

Ten things to know early: Weekly routines, class planning, and Blaze Overblaze
Ten tips covering recruitment plans, weekly activities, raven interactions, requests, the field, classes, Blaze, action order, reloading, and shared experience bonuses.
Original video: Ten things I wish I knew earlier in Fortune’s Weave; English-language gaming channel Jay Dunna.
Check recruitment conditions on the map and certification requirements first, choosing your intended recruits and classes. Return weekly for training, Divine Service, and meals. In combat, buff before attacking, and stop using Blaze Arts when the Blaze Gauge approaches full.
1. Check map requirements before planning recruits
There is plenty to do on reaching the capital, but do not rush around visiting everyone. Open the map’s character list, check recruitment availability and requirements for the current protagonist, then decide whom to develop on this route.
If you need healing, identify healer candidates first. The same character’s Renown and Support requirements differ by protagonist. Do not copy the previous route’s thresholds. Once you choose, travel directly from the map, give gifts, and share meals to build Support.
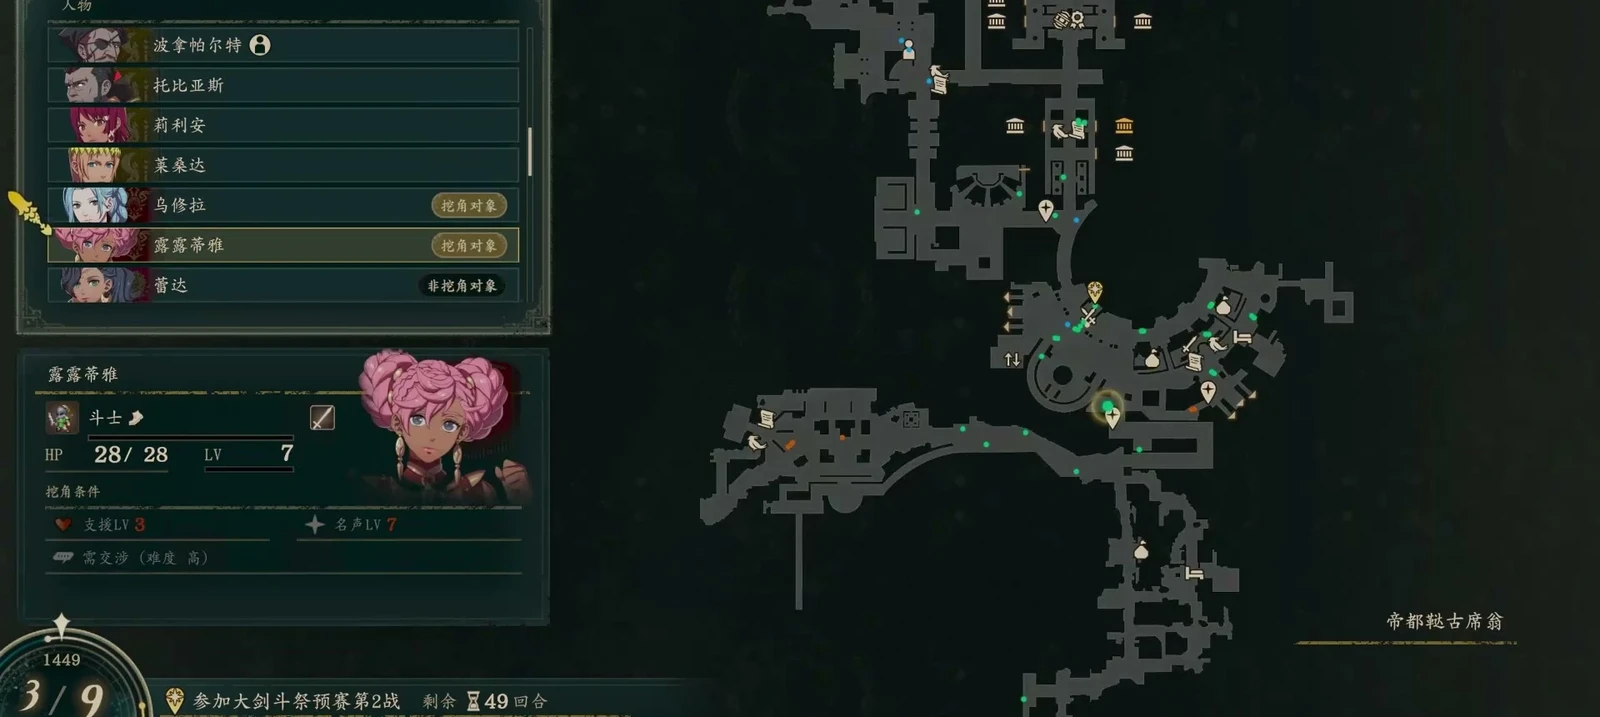
Image sources:
2. Make training, service, and meals a weekly routine
Visit the arena first. For 300 gold, train two characters in needed proficiencies such as swords or bows. Do not waste the week. Then arrange Temple Service at reception to keep improving Blessings.
Check the harbor merchants regularly, especially when their icons turn orange. An iron weapon worth 1500 gold may cost only a few vegetables, while recovery items may need just one material. What materials buy matters more than their sale price alone.
Then eat at the inn, view Support conversations, and assign automatic actions. I usually choose item searching. If someone is close to the next proficiency rank, switch to the relevant training to finish it.
3. Match raven responses to the conversation
Visit the Pale Raven’s Perch every week too. This interaction affects support at crucial battle moments and deserves a regular slot.
Respond to what the person says. For eyes, gaze intently. When  Cai asks whether he can surpass his father, nod affirmatively. If he wants to play, flap your wings. Threatening does not suit Cai here. One action sequence does not work for everyone.
4. Request deadlines and teleporting to turn them in
Check the request list in the adventure guide regularly. Accept available requests and note their clear deadlines. Once completed, you can travel directly to turn them in without remembering every requester’s city location.
Some pay 3000 gold just for talking to someone; others require dungeon items. After accepting, check the destination hint at the map’s upper right and link the stops into a route. Avoid reaching the field only to discover a missed collection.
5. Leave again to refresh the field, then plan your route
If no nearby enemies or gathering targets suit you, return to base and depart for the world map again through the menu. Leaving again costs one time unit and rearranges nearby enemies and activity points, sometimes putting a useful target close by.
For distant journeys, still check the route first. More exploration reveals items, shops, and new creatures for Cai. With a clear goal, find a suitable path on the map before setting out.
6. Prepare exams around target classes early
Visit the Certification Exam official in the upper temple district early to review intermediate and Advanced requirements. I originally wanted Cai to use swords and spears, but preparing for  Ornius Rider revealed missing Axe proficiency. Not training it earlier delayed the change.
Write down each character’s target, then arrange training. Start with one or two melee units and one ranged unit, add mages and two healers as needed, then adjust for recruits. Once certified, you can switch classes. The early priority is avoiding an available exam whose required subject you never trained.
7. Filling the Blaze Gauge triggers Burst
Blaze Arts are your main Burst option. Using them builds the gauge beside the portrait, and upgrades add effects such as Cai leaving flames on the ground.
After entering Overblaze, continued use that fills the gauge triggers Burst, injuring the user and halving maximum HP. Watch the gauge when planning.
8. Apply buffs before spending durability on Combat Arts
Show enemy attack ranges first and identify who your main units will face, then plan action order. If  Tialla can strengthen allies, buff first and let the main attacker act afterward. Combat arts cost durability, but repairs become available after Blacksmith unlocks; use them on crucial turns. Rewind mistakes: main-story battles restore uses, making that better than letting one error ruin the fight.
9. Reload gifts, but level rigging in one battle is difficult
Reloading within the same battle may give the same level-up result, so do not spend all your time repeating one growth roll. Saving before gifts is useful: reload an expensive mistaken gift, try another, and check the reaction. Saves can also reduce losses from failed exams.
10. Finish Part 1 first to buy experience bonuses
Notable Deeds provide Karma Shards to unlock experience bonuses shared across every route. I recommend focusing on one protagonist’s Part 1 first. That completion rewards 5000 shards, enough to speed growth on later routes.
Choose the story that interests you most. Without a preference, start with Cai. His story is personal, with a weaker early team that grows later. Claiming this shared benefit before playing the others makes them easier.