Early-game planning: check recruits, train weekly, and prepare secondary proficiencies
Choose your recruits and next classes first. Restore Motivation through meals, train proficiencies, and fit quests and exploration into the remaining schedule.
Original video: Early-game guide: more than twenty practical tips | English gaming channel Jay Dunna
Choose recruitment targets on the map first, then check secondary proficiencies for the next class. Use weekly meals for Motivation and training for proficiency, with spare turns for requests and exploration. Clear one protagonist's Part 1 before investing shards in later routes.
Check facilities and recruitment requirements on the city map
The city has plenty to do. Use the map to locate regular stops: skill training at the arena plaza, bird interactions at the perch, support meals at the inn, and weekly Divine Service with two characters at temples. Check the harbor too for trades that turn your items into useful equipment.
To the map’s right is the facility list; switch again for characters. Their positions change, so this is the easiest way to find them and check recruitment eligibility, support, and Renown requirements. Choose targets before giving gifts to avoid spending resources on someone your current protagonist cannot recruit.
Restore Motivation with meals before weekly training
Return to train once each week. Activities rotate. Pair mages, or characters with overlapping sword and bow needs, so one session helps both.
Training requires Motivation. If someone lacks it, dine at the inn first for both Motivation and support. Money goes quickly, so plan meals and training together. Automated Activities can search for supplies. Alternatively, check who is close to a proficiency rank and temporarily choose training to close the gap.
Match bird responses to the conversation
Do not skip bird interactions; start with the protagonist. Their words contain hints. If they praise the bird’s speed, choose an agile response. If they wonder about the world through its eyes, gaze intently. Following the topic works better than random selections.
Plan expeditions around quest markers
Accept notice-board and map quests first. Relevant enemies and targets are marked outside town. Follow the quests together to earn money and supplies along the way.
Press ZR for the full map and search towns, temples, and dungeons, with dungeons also sorted by level.  Cai can gather ground resources at some locations. If you dislike an enemy formation, return to town and head out again to check the refreshed result.
In town, press X for the adventure journal: Renown rewards, quests, the calendar, and foresight are here. The quest page helps find delivery locations, the calendar shows training and discounts, and foresight helps prepare for the next battle.
Equipment roles, Build, and weight
Press X in character information for detailed stats such as Movement and Build. Build offsets Attack Speed penalties from heavy weapons and equipment. Early  Tialla has only 1 Build, which can prevent spell follow-ups. Mounts and other tools can improve this later, so do not judge by Speed alone.
Choose equipment for the job.  Healing Staff adds 10 healing, useful even early. For mobile units who leave healers behind, I carry a melee weapon, a ranged option, and recovery items, adding a shield when needed. Decide what the character must do before choosing what they carry.
Train secondary proficiencies for team roles early
Look beyond a class’s main weapon. Prepare Sword for 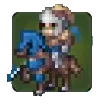 Light Cavalry and axes for
 Ornius Rider. Checking requirements early lets you train them alongside other needs instead of getting stuck just before a class change.
I usually keep two healers, two to three frontliners, and one ranged unit. Cover those jobs first, then try new classes suited to each character.
Clear Part 1 first for shards
Collect Notable Deeds rewards at the perch, then spend Karma Shards on Boons of Salvation for more EXP or lower item costs. Small objectives often give 10, 30, or 50, while completing a route gives 5000: a major difference.
I therefore recommend finishing one protagonist’s Part 1, around twenty to thirty hours, then investing that reward in later development. Subsequent protagonists will have a much smoother start.