

Chapter 2: True StrengthMajor spoilers
Keep training candidates and healers available in the capital, restore transport, then clear world-map miasma. At the gate, use Theodora’s elephant against physical enemies, protect the rear from fliers, and clear miasma before engaging Breza.
Recruit your allies again before setting out, and leave anyone needing training or class changes in the capital. Recheck healing roles after changing your mages' classes. Do not put them all in classes that use only Black Magic. The gate battle allows 9 units. Bring Sofia and archers who can handle fliers. Have Theodora on a War Elephant tank physical attacks while Eshmel uses combat arts from behind and clears miasma. Protect healers first as reinforcements approach. Stop relying on the elephant to tank when mages appear. Physical enemies may fail to hurt it, but magic can still kill it. Clear miasma before Breza and move Eshmel near enemies to nullify Underworld Boon. One approach uses a front-line tank with Aurora as an emergency option; another kites the 60-Speed boss with fliers. Check critical risk before taking a counter. After the gatekeeper falls, spend your remaining actions and break the gate on the final turn. Destroying it manually early skips the remaining turns.
Recruit allies again and compare merge benefits
Talk to allies in the capital to recruit them first, compare merge previews at the obelisk next, then organize classes and equipment. For Loretta, you can select the level-51 record and merge to raise Speed from 37 to 43. Skip records that add proficiency without stats for now, saving shards for units who gain key stats.
Keep units who need training, class changes, or mount feeding in the capital until finished, then dispatch them. Deployed parties cannot receive city training or change class directly. Check whether you have used all of today's training before leaving. More is available the next day, so do not rush units who still need it far away.
If Sirocco needs to provide both damage and healing, retain a class with both Black and White Magic. Druid cannot use White Magic, and Wiseman cannot use Black Magic. Making every mage a Druid removes your healers. If a split party lacks healing, restore a White Magic user before adding more damage.
Choose weapons around follow-ups and materials
Keep iron weapons for damage: If an Iron Sword still allows follow-ups, preserve its damage instead of switching just for a wooden weapon's Speed. Prioritize iron upgrades, and give sword users a Cleansing Blade as another option.
Use a Wooden Bow for Speed: Switch to a Wooden Bow +9 if Speed is lacking. Although an Iron Bow +5 adds 6 Dexterity, the unit compared here only increases from 34 to 36 Critical, a small increase for the investment. If Battle Soul Stones are scarce, upgrade silver weapons that do not consume them first. Prioritize the Cleansing Blade and Levin Sword, and delay Longbows and other weapons that need Battle Soul Stones.
Restore transport before splitting up to clear miasma
Check restoration materials at the start of free time and prioritize waystations and temples. Without transport points in the south, every round trip is long. Buy Building Materials after restoring towns. On the same visit, buy supplies before performing, and enter restored temples to accept side requests. Avoid having to backtrack after completing a circuit.
Split your two parties between the right and left routes to clear world-map miasma. Send one up the right from below and the other along the left from above. Give each party at least 2 healers and include a Dancer wherever available. Form parties before leaving; changing members on the fly also costs 1 turn.
To widen your gate-battle roster, move both parties near the gate. Adjacent parties can also participate. The tradeoff is that nobody can travel far away for requests during that time. Choose your gate-battle main units before arranging the meeting instead of repeatedly swapping members while traveling.
Leave a route for the rear before positioning the elephant
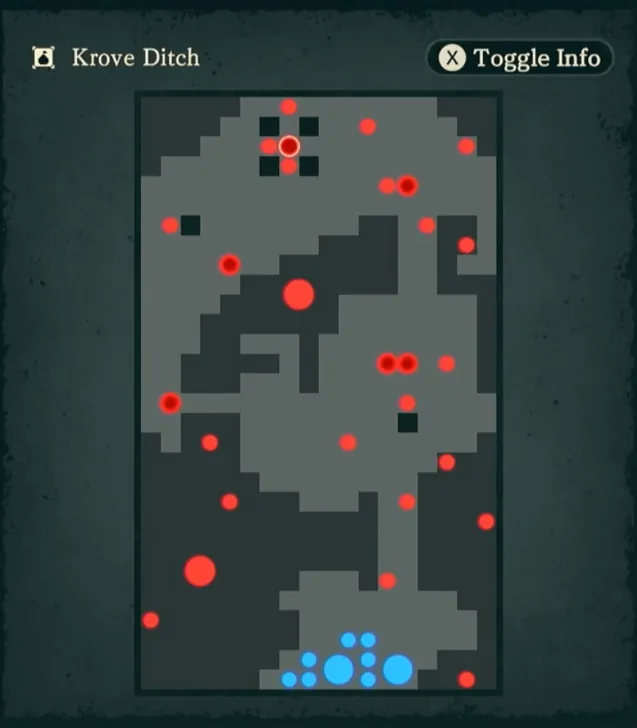
Have Eshmel clear miasma with a Blaze Art first, then use Theodora's War Elephant to hold physical enemies while he uses Combat Arts from behind. The elephant blocks allies in narrow spaces, so leave room for following units before positioning it. Fliers approach from the left. Do not discover too late that Leda is your only bow user and you lack enough attackers to clear them.
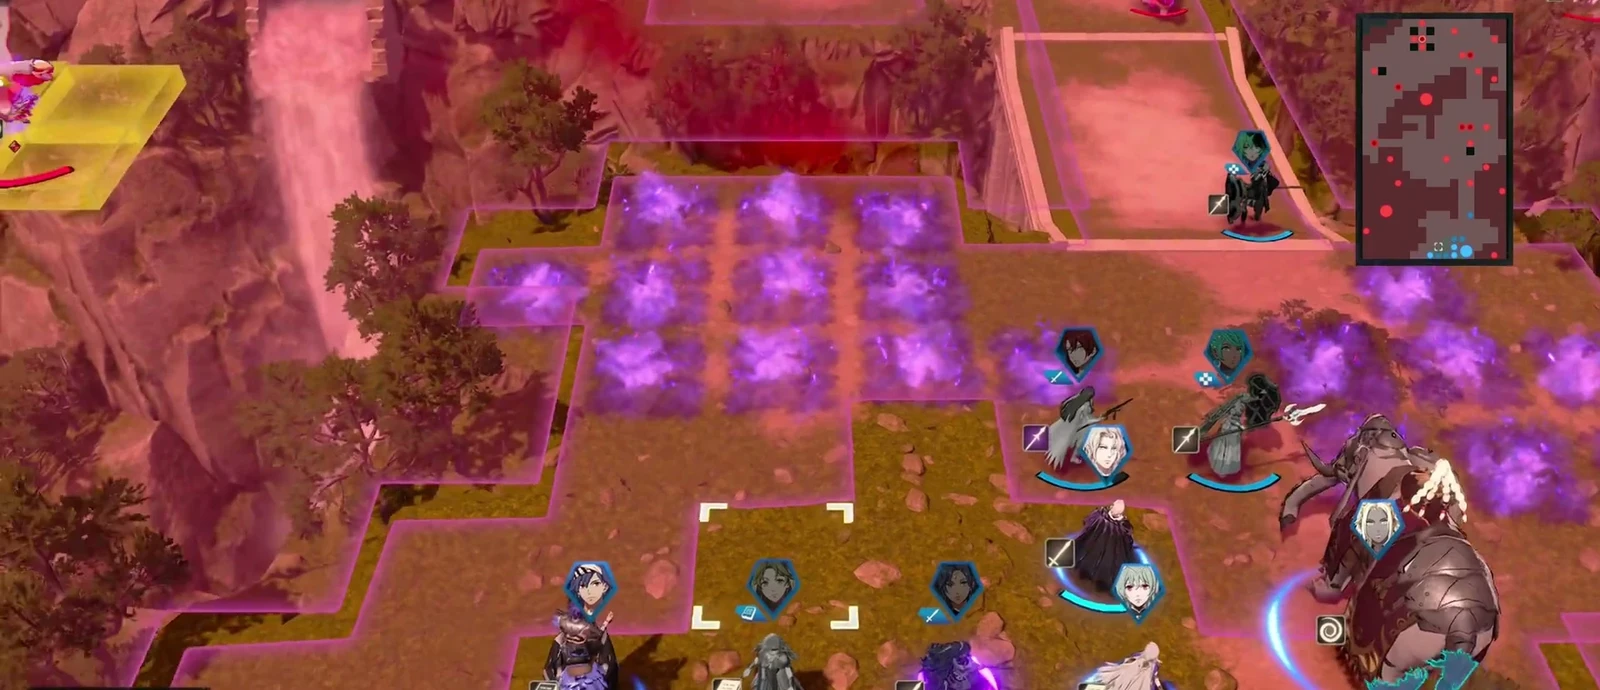
Change your tanking plan when mages enter range. Theodora loses Resistance on the War Elephant and may fall in two hits; Dietrich cannot take over against mages either. If the front line struggles, draw enemies back inside instead of continuing into magic attacks. Rush also stops working once its use limit is reached, so do not rely on it for every later engagement.
Protect healers from flying reinforcements
When flying reinforcements approach, clear enemies who can reach your healers first and save Leda's bow attack for bird enemies. If a healer has nowhere to escape and allies cannot surround them, use a Blessing to recover. Blocking a ground passage with tanks does not stop fliers.
Recheck recovery options after Silence
Check for Silence before assigning spells. Do not plan both healing and damage around someone who cannot cast. If Silence interrupts the plan, look for available area healing to keep the party healthy before advancing.
Stop and wait for Eshmel if miasma clearing falls behind. He can use a Blaze Art only once per turn, so do not plan to clear several routes with repeated uses in the same turn. Reinforcements also spawn behind you. Handle threats requiring rear support first instead of focusing the whole party forward.
Clear miasma before engaging Breza
Clear miasma, then tank: Keep clearing the fog before approaching Breza. Remove any miasma on your engagement tile, then check the damage forecast again. Even Cai with 34 Defense, enough for the earlier soldiers, may die outright against the boss. Clear miasma before blocking the boss, and pull Cai out of the front if the forecast still shows he cannot survive.
Keep clearing lesser enemies during the encirclement, as they circle around to your rear. Move Eshmel near enemies to nullify Underworld Boon within 2 tiles. Confirm their Boon is inactive before attacking. If your tank still cannot survive, activate Aurora's Blessing before trading further blows.
Kite the boss with fliers: Breza charges out on his own. Check follow-ups against his 60 Speed first. If only your Dancer avoids being doubled and ground units have less Movement than him, do not try to escape by endlessly backing away. Use flier mobility to kite him and confirm he cannot reach you before ending actions. Check critical risk before taking a counter: surviving a normal hit does not mean surviving a critical. Finishing attacks with 45, 55, or 65 Hit can all miss, so reserve backup attacks.
Spend remaining turns before destroying the gate
After defeating the gatekeeper, use the remaining actions for anything you need to do and break the gate on the final turn. Selecting Destroy Gate manually early skips all remaining actions. Selecting it by mistake can skip all 7 remaining turns and overwrite the autosave, so do not count on returning to the previous autosave.
If you need more equipment, make two Cleansing Blades +3 first, then check your remaining Lunar Stones. Do not run out of materials halfway through upgrading everyone's gear at once.
Free-time reference
| Category | Details |
|---|---|
| Free time | 36 turns |
| Returning allies | Speak to characters recruited in Part 1 in the capital to have them join |
| Class unlocks | Temple requests for Master classes |