

Chapter 3: The InheritorsMajor spoilers
Assign your three squads to city defense and miasma clearing, then regroup your strongest units for the gate. Use Pilums to stay clear of miasma, finish enemies before they retreat to heal, and leave melee units room beside the boss.
Concentrate your strongest units in the gate assault squad and keep Sofia as its healer. Anatolia and Fabio no longer count as healers once they become Druids. On the world map, leave enough units to defend the city, then clear the miasma along your route before regrouping. Do not wait until the final turn to head for the gate assault. Use Pilums in the gate battle to avoid the miasma. Finish enemies you can kill instead of leaving them wounded and free to retreat to a Priest for healing. Before approaching the boss, leave Dietrich a tile where he can attack in melee. Keep summoned units out of his attack positions.
Assign healers before leaving the city
When reorganizing your three squads, disband them first, then form them again. This costs no turns. Check each squad for healing afterward: once Anatolia and Fabio become Druids, Sofia is the only healer left in the original first squad. Leave healers in the other squads too instead of moving them all into your main force.
Give Sofia the staff that increases healing Range by one to extend her coverage. Leave characters who need training or horse feeding in the city: Catania can stay to feed horses, while Sirocco and Hong Hua can train magic. Sending every mage out leaves no suitable character for magic training in the city.
Clear the miasma before regrouping
Approach 1: defend with two squads and clear miasma with one. Leave two squads on city defense and send the third to clear the miasma along the route. Once it is clear, bring the protagonists together near the boss so the miasma squad does not have to handle the gate battle alone.
Approach 2: send two squads left and one right. Split up to handle the objectives on both sides. Sending one squad right and then doubling back left can leave it too late to arrive. When you are ready to attack the gate, transfer the strongest units from Cai’s squad into the assault squad while Cai keeps catching horses. Build the gate assault around your reinforced first squad; you do not need to recall every squad running errands.
Complete each world-map dispelling objective three times. Simply visiting the location is not enough. While the upper and lower routes still need attention, check where new enemies are actually heading. If both targets take the upper route, send more units there to avoid a last-minute detour around the desert.
Leave time to reach the gate battle
If you still need to unlock Swordmaster this chapter, allow time to return to the main temple and turn in the quest. With 12 turns remaining, the round trip alone can take an estimated 8 turns, and monsters on the road may delay you further. When returning to the city takes 4 turns, stop exploring caves and head back to turn in the quest.
Allow travel time before the gate assault too. Starting to move with three turns remaining is safer than leaving the battle until the final turn.
Before starting the gate battle, switch characters training as Charioteers back to their prepared combat classes. Have Dietrich change class before deployment, then check his current HP again: he may have less HP than before the change.
If Dietrich becomes a Swordmaster, stop counting him as an archer. Swordmasters cannot use bows, so assign ranged attacks to someone else.
If you temporarily put Theodora in an armored class to train mastery, consider her movement first. She will be slow without Armored Move; Ninae already has this ability and can advance more easily. Switch temporary armored trainees out as soon as they finish mastery instead of dragging a slow class through the entire expedition.
When you want to preserve Eshmel’s chance to use Overblaze, heal him with the Victory Gem; it restored 7 HP in testing. Do not try to sustain Overblaze by using a Curse Orb to bring his Blaze Gauge back to the middle. Fighting with a Curse Orb equipped lowers his gauge, but he still leaves the state when it drops.
Use Pilums and fliers to avoid miasma
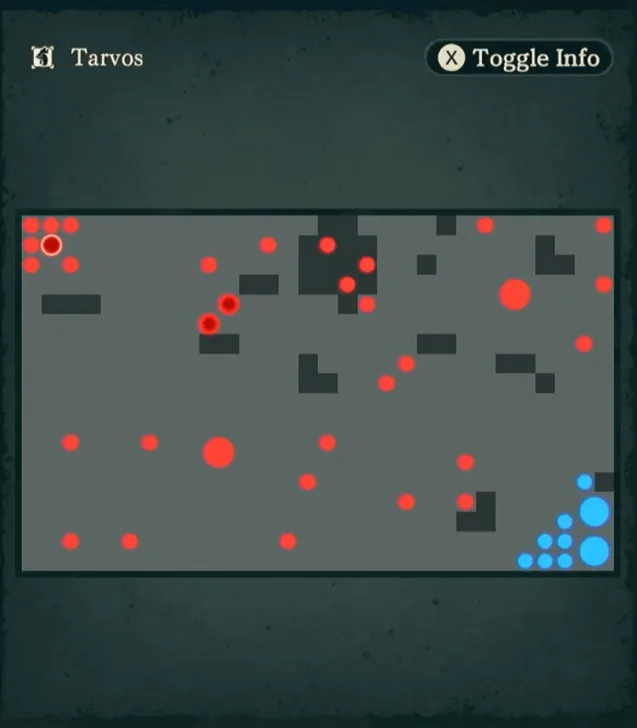
Approach 1: keep ground units outside and throw Pilums. Miasma reduces weapon durability and spell uses. If you can hit an enemy from outside with a Pilum, stay there and throw it instead of stepping into the miasma for a melee attack. Healing spells also lose uses, so keep track of more than weapon durability.
If an enemy carrying an item escapes and you only want to clear the map, let it go. You do not need to split off another group to chase it.
Approach 2: fly over the miasma. Fliers are unaffected by the miasma on this map. Give them engagement positions that require crossing it.
When chasing item-carrying enemies, do not plan on using Onslaught after Warp. You cannot use Onslaught after being warped, so you cannot catch a target if securing the kill depends on it.
Finish wounded enemies before they retreat
Wounded enemies retreat to Priests, heal, and force you to fight them again. When you see them withdrawing, prioritize targets you can finish. Avoid leaving several enemies at low HP and letting them all escape.
Leave melee space or test the boss with stones
Approach 1: leave a tile for melee attackers. Before entering the boss’s vicinity, reserve attack tiles for melee units such as Dietrich, then place your summons. Summons blocking the front can leave him stuck on the outside, unable to attack even after he arrives.
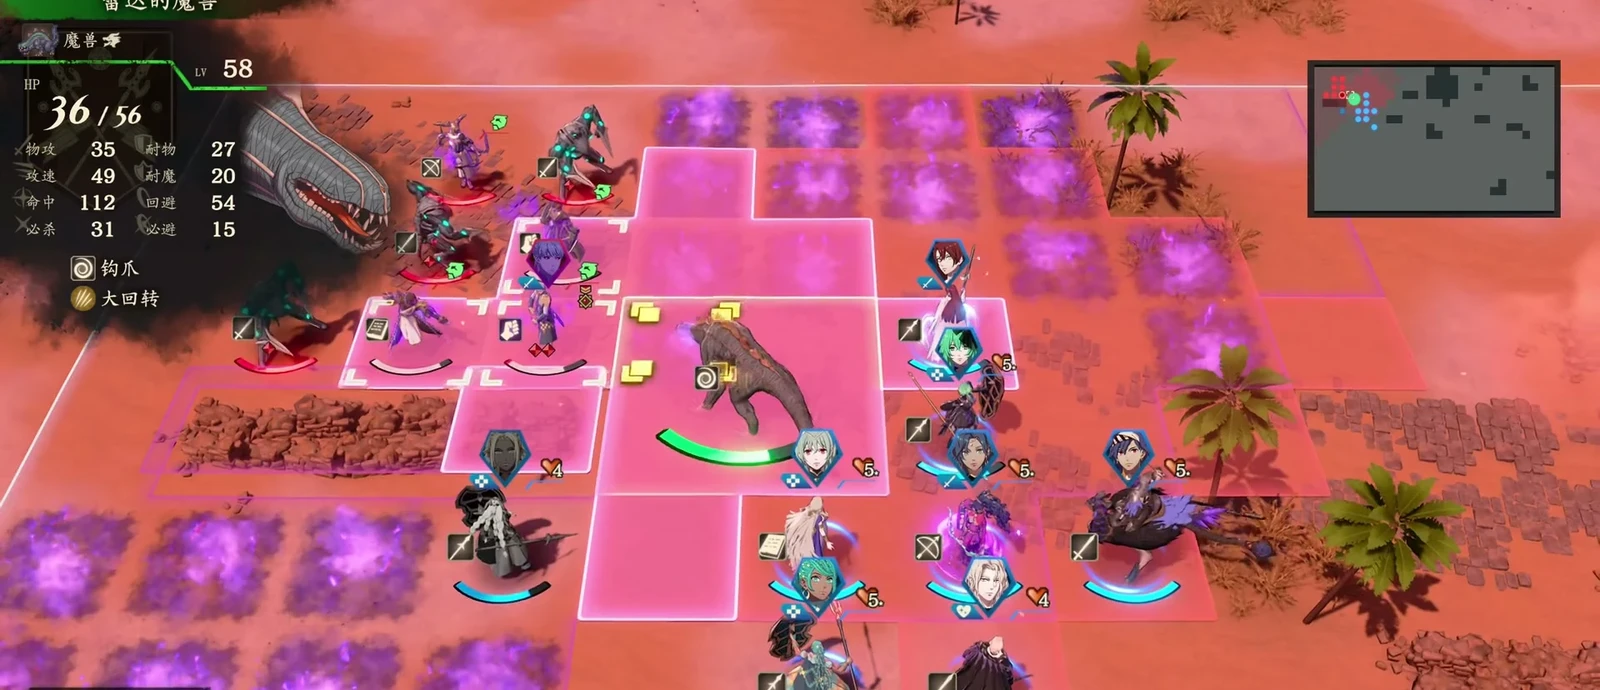
Approach 2: throw stones if the boss stays put. If the boss does not advance, you can try attacking from a distance with thrown stones, though they may miss. Check the boss’s attack range before moving into position: it reaches far enough that a stationary boss may still hit the attacker.
To have Eshmel intercept attacks for allies, raise his affinity with them before deployment; higher affinity makes it trigger more often. Still plan engagements as though each ally must take the hit themselves. Even after he intercepts two attacks in a row, he may fail to intercept the next one.
Use your remaining turns before destroying the gate
After defeating the boss, finish your other business and destroy the Underworld Gate last. Do not break it immediately after winning if you want to preserve your remaining activity time.
If you have seven turns left after the gate battle, you can send troops to defend the checkpoint. Check your troop reserves first and recruit more if needed. If there is no longer time to reach the far-left restoration project or catch a Black Horse, leave those tasks to Cai next chapter instead of spending your remaining turns on the long trip.
Chapter unlocks and new recruits
| Category | Details |
|---|---|
| Free actions | 36 turns |
| Squads | 3 controllable squads |
| New recruits this chapter |  Centurio |