

Chapter 4: The Hopes of Monarchs and the PeopleMajor spoilers
Protect both rear lines against Hanno and attack from outside the high ground. Against Baozi, clear the Hit-reducing miasma first; break all four golem shields to get a Battle Soul Stone.
For Hanno’s battle, divide strong frontline units and healers between both sides, keep your Dancer, and protect the rear lines before bringing the two groups together. Use fliers to deal with the artillery at the start. Expand your vision when you can clear miasma, then use Blaze Arts against Hanno from outside the high ground. Baozi’s battle has only nine deployment slots, so bring more mages. Miasma halves your high-level main units’ Hit against lower-level golems; clear it first. To get Battle Soul Stones, have Eshmel break all four golem shields while healers support him and allies take the kills. Leave Baozi alone until that is done.
Prepare proficiencies and weapons before changing class
If you plan to reclass Loretta into The Godhand, check that her White Magic is at C first. Do not wait until you obtain the exam item to train it. If Cai becomes The Cavalier, use a Levin Sword for magical damage instead of keeping his old spellcasting setup.
Update weapons and skills together after changing class. If you bring the wrong weapon to Baozi’s battle, return to preparations and change it before trying again. Check your Cullet supply before upgrading Qiankun Circles too: having enough money does not help if you lack materials.
If you have not finished feeding your mount, Cai can stay a Caladrius to save the time spent returning to feed or catch another mount. Avoid spending extra time preparing a mount just to change class.
Regroup all four squads or attack along two routes
Approach 1: regroup, then attack the gates in succession. Keep Dietrich waiting near home, then bring him over from Kalla’s temple when you are ready to deploy. After Hanno’s battle, send Cai back to defend while the others head for the other gate. This concentrates your assembled force while leaving someone to handle enemies near the city.
Approach 2: split into two groups. Send your strongest force along the upper route. Mix first- and second-string units in the group heading toward Baozi, with Eshmel fighting and breaking shields. Dietrich and Leda can handle combat themselves, so keep two healers in each squad and prioritize sustain when assigning the other slots.
Before calculating the journey to regroup, check whether the destination has a Divine Gate. A temple without one still cannot receive your squad by teleportation. Splitting a squad also costs a turn, so allow time to organize before marching.
Give each side frontline units and healers
Do not put all your capable fighters on the lower side when deploying against Hanno. If the upper side is weak, move Mu up and transfer a mage down. Give both sides frontline units and healers so each can protect its own rear line. Keep Sofia and your Dancer; an extra action can provide another heal when healing is short.
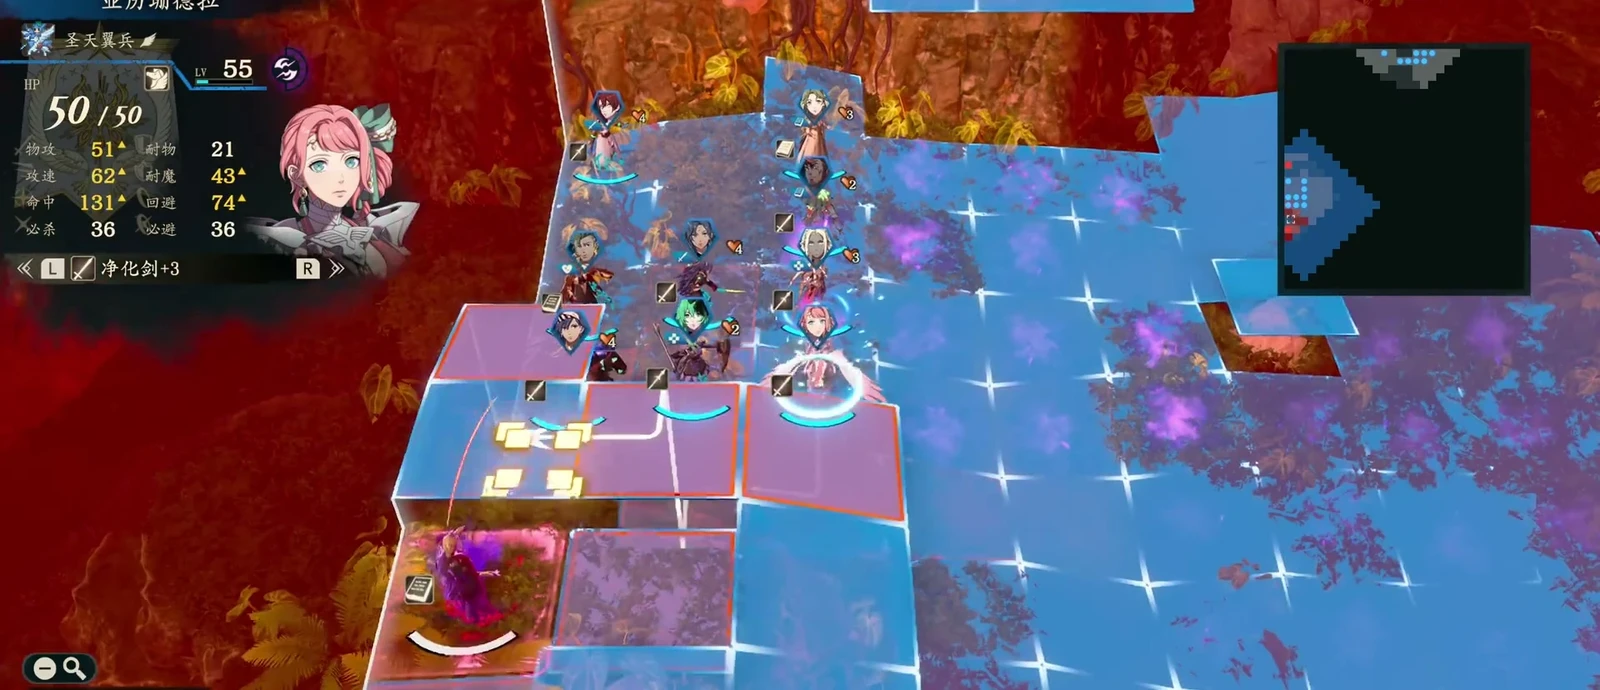
Clear the artillery and protect the rear line
Use fliers to deal with the artillery at the start, then protect the upper rear line. Enemies approach from the right, and there is little room to hide on the upper side. Deception Miasma limits your vision but does not affect enemies. After revealing airborne enemies, check whether your current unit can reach them.
Clearing miasma requires a Blaze Art during Overblaze, so you cannot clear your vision with it immediately at the start. Once it is available, clear nearby miasma and move both sides toward each other. While enemies remain hidden in the fog, prioritize relieving pressure on the rear line.
Before Catania takes on Archers, check that she is carrying the shield that protects against bow effectiveness. Even after activating Aurora’s Blessing, do not assume enemies will keep attacking the same frontline target. They may abandon that target and shoot your rear line instead.
Send help upward when fliers emerge from the fog
Fliers keep appearing from the fog. After killing one in front of you, do not spread weaker units into unexplored ground. Pegasi will still appear below. Let a few durable units lead while everyone else stays behind to heal and support, instead of sending each unit off to scout alone.
When Archers, Swordmasters, and fliers pressure the upper route together, stop advancing separately below and send help upward. Wait until the two groups connect before pushing on. Mountains slow movement, and some units lack ranged healing. Keep healers close to the units taking hits rather than waiting until the front line is nearly dead to start moving up.
Before battle, make sure someone in the deployed squad can cast Torch. A caster in another squad cannot reveal the Thoron mage in the fog. Find the caster before bringing the squad closer. If you are already surrounded and the forecast shows 53 damage, exactly enough to kill, change your destination or use reliable protection first. Do not stake survival on Scorching Sun triggering.
Attack Hanno from outside the high ground
Approach 1: deal damage from outside the high ground. Once you approach Hanno, if ground units cannot climb directly onto the high ground in front of them, use Blaze Arts from outside instead. Loretta can face enemies from the grass, but check the forecast and confirm their Hit is zero before leaving her there. The whole squad does not need to circle up.
You can use a Blaze Art only once per turn. After Goliath gives Eshmel another action, or Leda grants extra actions to the group, switch to attacks such as the Levin Sword. Leave someone to protect the rear line during the assault: mages behind you can still attack your healers.
Approach 2: use a high-Avoid unit to take attacks. If you cannot damage the boss, pull the other units back instead of crowding the entire squad around Hanno. Let a unit with stacked Avoid and just 3% forecast enemy Hit take the attacks. Do not count an unequipped terrain Avoid skill when judging current incoming damage. Theodora has low Hit, so check her forecast before attempting a finishing blow too.
Clear the Hit-reducing miasma against Baozi
Use more of the nine deployment slots for mages instead of bringing only physical attackers. Compare levels before fighting: Arrogance Miasma halves the higher-level side’s Hit against lower-level targets, so level 45 golems can put your heavily trained main units at a disadvantage. Clear the miasma affecting Hit as you advance.
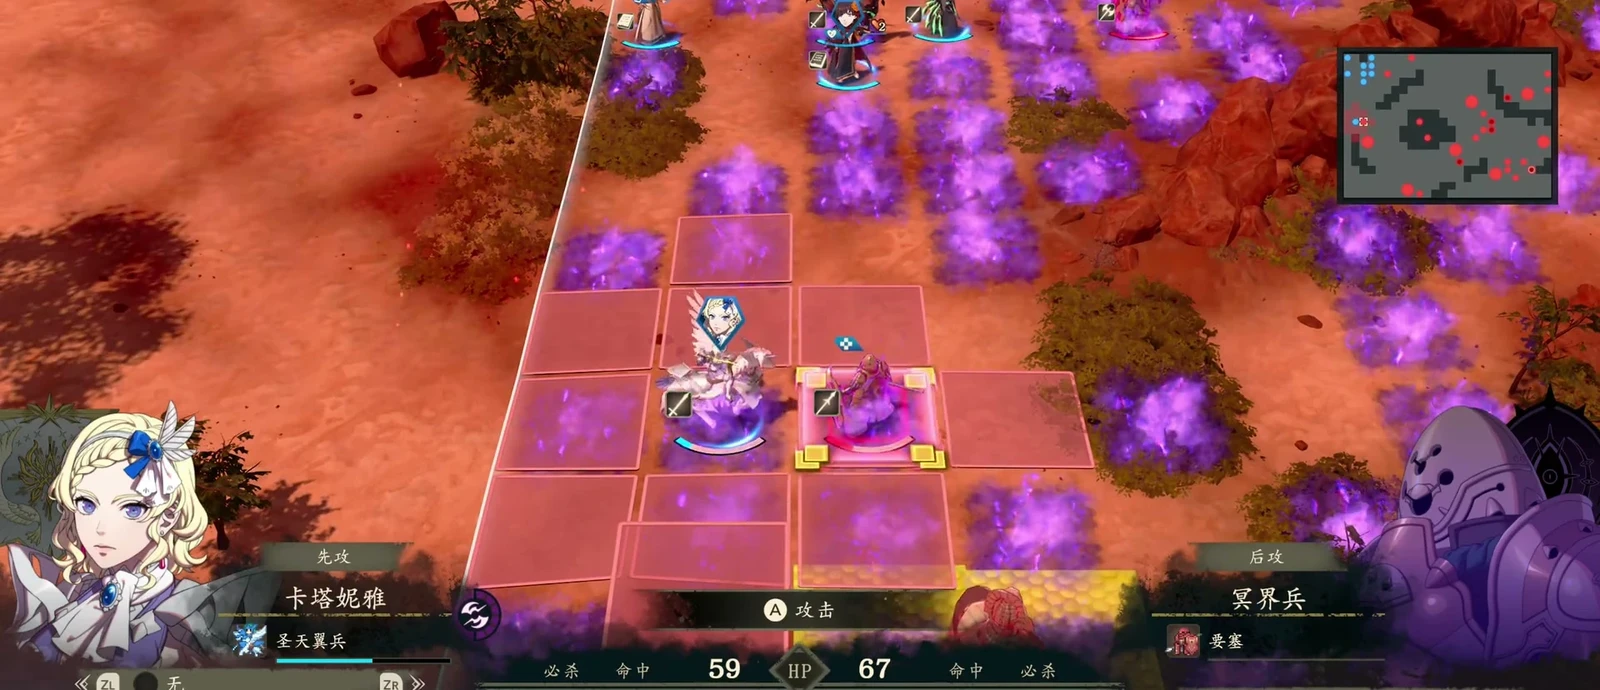
When Catania lures a golem, she can hold a Whirlwind Blade to maintain Attack Speed. Switching to a Levin Sword slows her down, so check the incoming-attack forecast again. If the golem receives buffs and her counterattacks stop dealing useful damage, bring your main units over instead of relying on her to wear it down alone.
As the squad advances downward, leave units to handle enemies approaching from above too. If Cai handles them alone, neither his damage nor his Hit may be enough. Bring Eshmel closer before fighting.
Decide whether to break the golems’ shields
Approach 1: kill them quickly. If you do not want golem materials, find an opening and attack straight through. You do not need to break every shield; save those actions for advancing.
Approach 2: break all four shields for materials. To get a Battle Soul Stone, break all four golem shields before an ally takes the kill. Killing it outright does not award this material. Eshmel’s cross-shaped attack makes shield breaking easier, but the shields need repeated breaks. Do not rush to finish the golem after one attack. Bring ranged healing to cover the damage taken while breaking shields.
While clearing the last few golems, avoid provoking Baozi behind them. Finish your current targets and the next wave of wyverns before fighting the boss, so your shield-breaking group does not have to handle another engagement at the same time.
Bring Eshmel when approaching Baozi
Against enemies with Underworld Boon, bring Eshmel close enough to provide support before having allies attack. Check his effective range again before attacking: it changed from three tiles back to two later, so units standing too far away still suffer Underworld Boon’s effects. Do not leave him waiting at the back, and do not let Hong Hua follow the front line into an exposed position; enemies will switch to attacking her.
Baozi has high Avoid. If the forecast gives only 40 Hit, save actions to recover from a miss. You can switch to a Wooden Sword and keep attacking; choose weapons based on the Hit forecast.
Leave a squad to intercept enemies before breaking the gate
Keep someone defending home while you use free actions after the gate battle. Until you break the gate, enemies on the map still head toward the city; Dietrich can return to defend it. If class changes and equipment have drained your funds, send Theodora’s squad mining to cover the expense before continuing preparations.
Turns and unlocks in this segment
| Category | Details |
|---|---|
| Free actions | 56 turns |
| Newly available | Heaven’s Crown Temple, Divine classes |