
Aurora's Blessing
Lv. 1 halves physical damage and Lv. 2 also halves magical damage. Lv. 3 is one army-wide answer to Underworld Boons on crucial turns. Cleansing Blades, Leda's buff, and Eshmel's aura can share the burden; do not budget Divine Sand as though you can invoke Aurora every turn.

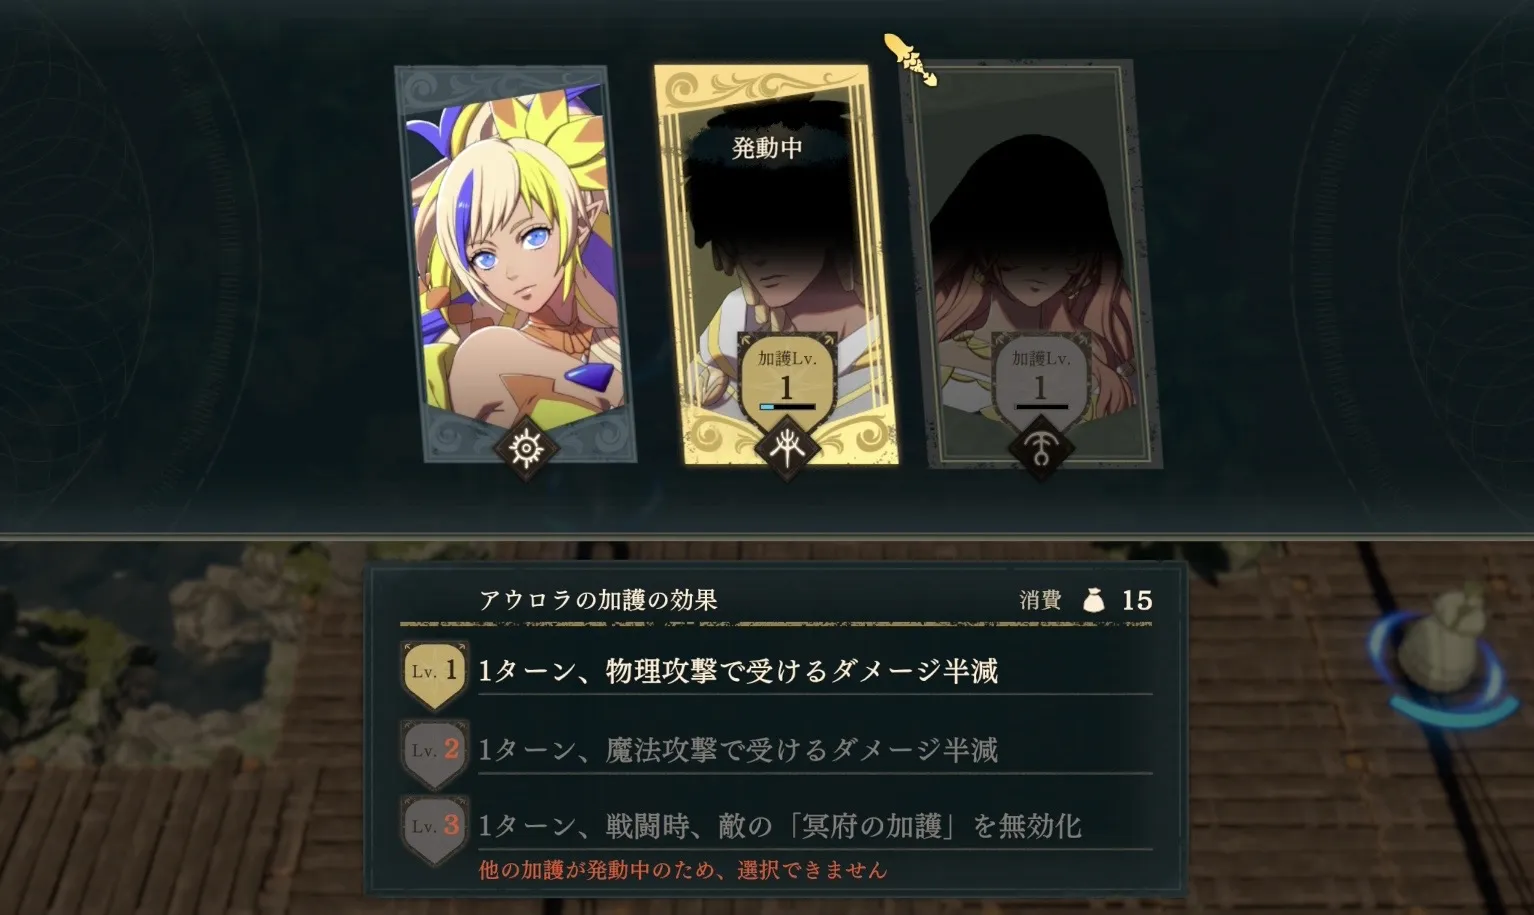
Aurora halves physical damage at level 1, also halves magical damage at level 2, and lets the whole army counter Underworld Boon on a key turn at level 3.
Aurora's three levels and costs
| Level | Effect |
|---|---|
| Lv. 1 | Halves incoming physical attack damage for 1 turn |
| Lv. 2 | Halves incoming magical attack damage for 1 turn |
| Lv. 3 | Nullifies the enemy's Underworld Boon during combat for 1 turn |
- Area and duration: Entire army, 1 turn.
- When to prioritize it: Direct reduction suits high-Hit attacks better than gambling on Avoid. Level 3 helps key turns when several groups must handle Underworld Boon. Normally, Cleansing Blade holders or units near Eshmel can share that work to save Sand. One training order is Kalla level 1, then Aurora level 3.
- Favorable days: Monday and Sunday.
From 100 Sand, with no reduction, only Aurora, and nothing reserved for rewind, the maximum is 6 uses on Normal or 5 on Hard.
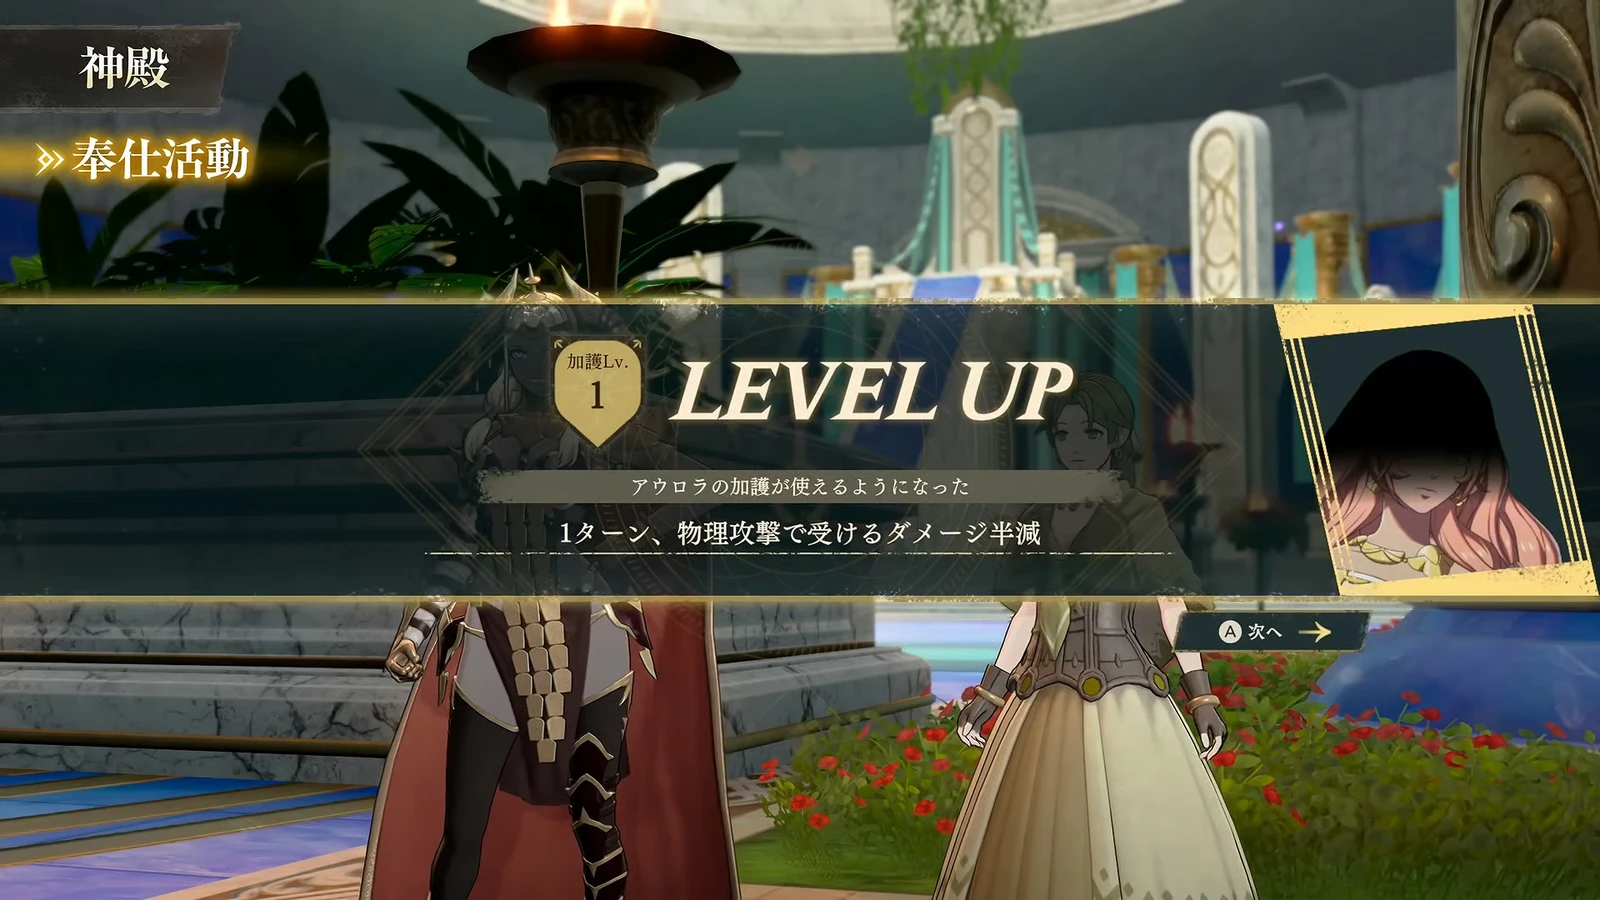
Image source:
Reliable damage reduction against accurate enemies
Halving damage does not rely on chance. Kalla relies on Avoid, but “when enemy Hit is high, Avoid alone will not save you.” Aurora directly cuts damage in half, making her more reliable against accurate enemies.
It is useful from Part 1. Most enemies are physical, and level 1 helps low-HP, low-Defense units survive another two or three rounds. Level 2 covers physical and magical damage on both player and enemy phases. Raise it to 2 first, use Aurora normally, and switch for special maps.
Prepare anti-Underworld Boon options for Part 3; Aurora level 3 is one. It sees frequent use even on a first run. Lacking counters noticeably reduces damage on Hard Classic.
Plan sustained offense separately from key turns. Options include Eshmel opening routes, Leda’s buffs, Aurora level 3, Cleansing Blade, and appropriate magic. Check who has an independent counter and who can stay near Eshmel before activating Aurora. See the advanced counter comparison for coverage requirements.
Plan for when Aurora’s uses run out. It can activate only a few times per battle. Units without Cleansing Blade or another counter need Eshmel’s nullification aura nearby to maintain damage, making him a Part 3 tactical core. Normally attack near the protagonist and save army-wide coverage for split forces or simultaneous attacks on several fronts.
There is not enough Sand to activate every turn. Reserve uses in advance.
Activate reduction when the first wave reaches your line
- When a large wave will reach you on enemy phase. “Wait until the first wave actually meets your line; do not waste it on scattered early damage.”
- Maps with many mages, once Lv. 2 is active.
- Crucial Part III turns when several fronts need damage and lack local counters. Lv. 3 nullifies enemies' Underworld Boons during combat. On other turns, first check coverage from Cleansing Blades, Leda's buff, or Eshmel's aura.
- On Classic, where fallen units are lost, you can prioritize upgrading Aurora.
When you need her less: There are few enemies and you can finish them in one turn, or you need to rush forward this turn or land your attacks.
Aurora's temple trial and portals
- Divine Gate: Chapter 6 of Cai's story unlocks a portal between Aurora's branch temple in Dagsion and her main temple on the world map. During free time, travel costs neither turns nor money.
- Trial: Opens in Part III after you restore Aurora's temple and complete “Aurora's Request.” Two consecutive battles; all enemies take half physical and magical damage. It is not especially difficult, but takes time. Advance steadily with a balanced, defensively capable team and a healer. Reward: Cloth of Aurora. Defeat does not cause a game over, and you can retry indefinitely.
- Additional content: Expansion Pass Wave 2 lets Aurora herself join during the Salvation story.
Aurora’s Part 1 audience restriction
SpoilersWhy you cannot meet Aurora in Part I
In Part I, Aurora is confined deep inside her temple and sees no one: Solel forbids her from contacting outsiders. Cai's paralogue reveals why, and Part II's War story explains much more. That is why you can perform Divine Service at her temple in Part I but cannot request an audience.