
Advanced blessing tacticsMinor spoilers
On Hard, rewinding refunds Divine Sand spent testing a blessing, but the rewind still costs 5. Buy cost reductions for the gods you use most, then choose for accuracy, durability, enemy phase, or Underworld Boons.

On Hard, rewind to before a blessing's activation to refund its Divine Sand cost. The rewind still costs 5, so leave enough sand before testing.
- You can test blessings on Hard, but it is not free. Rewind to before you activated a blessing to recover the Divine Sand spent on it. Fortuna still charges 5 for each rewind. Do not spend so much that you cannot afford to rewind.
- Buy cost reductions for gods you actually use. If you are stuck, one approach is to reduce Aurora's or Kalla's cost first; another is to choose Jurah and Kalla. Base the purchase on how often you invoke each god per battle instead of spreading upgrades evenly across all six.
- Choose only one regular blessing each turn. Plan blessings around your units, weapons, combat arts, and positioning. You can invoke only one god's regular blessing per turn. See Using blessings for base costs and equipment slots.
Rewind before activation to refund Divine Sand
Rewinding to before another blessing was used reverses its Divine Sand cost. Activate Kalla and check whether the extra Movement lets you reach your target; if your position is still poor, rewind to before activation and try a different plan.
Calculated example (Hard, no cost reductions, one rewind):
- 1Activate Kalla:Starting with 100 Divine Sand, invoking Kalla leaves 60.
- 2Rewind before activation:Kalla's 40 is refunded and Fortuna deducts 5, which should leave 95.
- 3Repeat undone actions:Any actions undone by the rewind must also be repeated. You cannot keep the buff and recover its cost.
In this Hard example with no cost reductions and one rewind, you pay a net 5 to choose a different plan. This cannot generate Divine Sand. Rewinding is free on Normal; on Hard, reserve enough for at least one rewind. You cannot undo actions after the victory results. For controls, see Fortuna's Blessing.
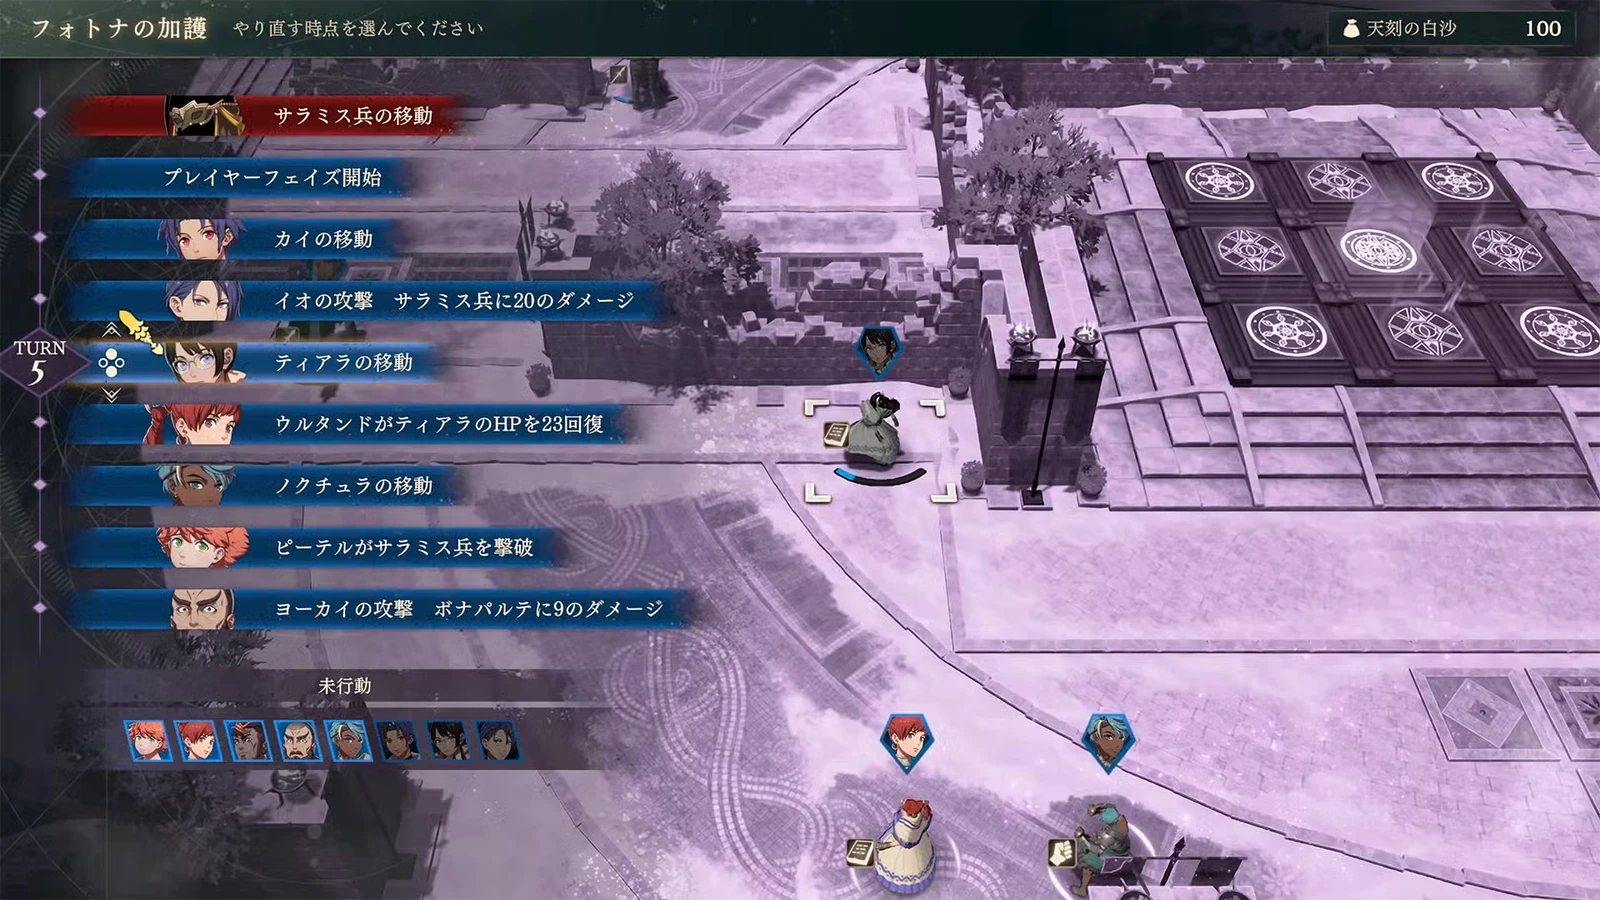
Reduce the costs of your most-used blessings first
Decide whether you need survival or faster progress, then buy cost reductions for frequently used blessings. If battles are difficult, reduce Aurora's and Kalla's costs so you can invoke them more often for survival. You can also choose the more offensive Kalla alongside the cheaper Jurah. Prioritize discounts for the blessings you use most. On Hard, cost reductions are especially worth considering because Fortuna's rewinds also consume Divine Sand, making the two uses compete for resources.
| God | Base cost on Hard | Reduced cost shown in play | Uses from 100 Divine Sand |
|---|---|---|---|
| Aurora | 20 | 10 | 5 → 10 |
| Kalla | 40 | 20 | 2 → 5 |
| Jurah | 15 | 7 | 6 → 14 |
These are maximums, calculated by dividing 100 Divine Sand by the cost and rounding down. Subtract whatever you intend to reserve for rewinds and other blessings.
Boons of Salvation are unlocked with Karma Shards and can be toggled on or off. Each god's reduction is purchased separately. See New Game+ for how to prioritize experience bonuses against blessing discounts.
Consider your training goals before buying Boons of Salvation. One first-playthrough approach prioritizes class and weapon/magic proficiency, followed by discounts for Kalla, Aurora, and Mars; choose character experience bonuses as needed. Fast leveling can outpace preparations for the next class. A player willing to delay leveling to gain growths in a target class has a different budget from someone who wants a build ready quickly.
Plan your training milestones first, then buy discounts for frequently used blessings. Keep experience bonuses if you want builds ready quickly.
Combat arts cost durability; Blaze Arts cost HP
| Problem to solve | Supported approach | Reason and limits |
|---|---|---|
| Low accuracy causes multihit physical combat arts to miss | Mars Lv. 1 | Improves combat art Hit so four-hit attacks are more likely to land in full; still check the forecast |
| Expensive combat arts wear out weapons too quickly | Credna Lv. 2 | Removes weapon durability consumption |
| A mage cannot reach, or must enter counterattack range | Smyrnos Lv. 2 | Adds 1 Range so you can attack from outside the enemy's reach; does not add Movement |
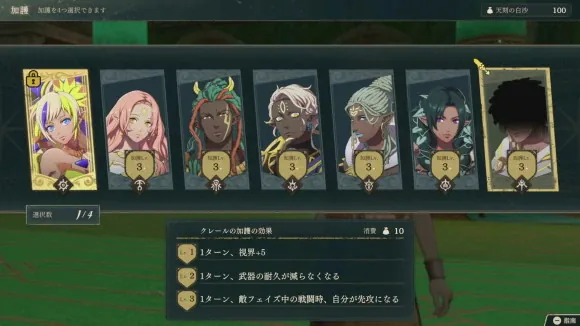
Blaze Arts still cost HP. They consume HP and build the Blaze Gauge. Credna only removes weapon durability costs; HP costs and the Blaze Gauge work as usual.
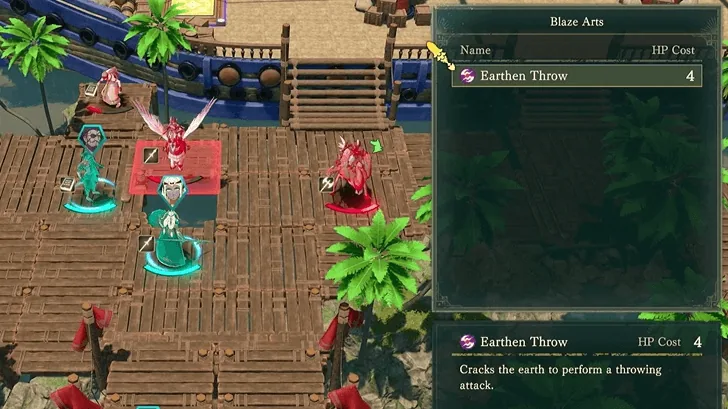
Give durability-based combat arts and HP-based bombardment separate jobs. One practical setup on Theodora's route uses Tobias's three-hit axe and four-hit bow attacks with Mars to strip boss HP bars. Meanwhile, Sofia heals Theodora from range to replace Earthen Throw's HP cost, enabling repeated attacks on a fixed target.
Tobias relies on Mars for Hit, while Theodora relies on Sofia's healing to maintain HP. Assign damage, accuracy support, and healing separately, then check whether the sequence can continue next turn.
Choose blessings for your enemy-phase goals
Pair dodge tanks with Kalla. Avoid +50, Speed +5, and Movement +2 form a package for pushing forward. Your unit needs to kill on retaliation as well as dodge. See Dodge tanks for units and equipment. Kalla does not guarantee that attacks with guaranteed accuracy will miss. Change your plan if the forecast is still dangerous.
Use Credna Lv. 3 to strike approaching enemies first. Army-wide Vantage can reduce incoming damage only when your opening attack kills the target. If it does not, account for damage from subsequent attacks.
Use Jurah Lv. 2 when slow units fear follow-up attacks. Push into dangerous areas while avoiding a heavy second hit. It blocks follow-ups, not the initial normal attack. :::
Choose these three options on separate turns. A blessing's Lv. 1–3 effects stack, and its cost does not increase with level.
For low-turn clears, consider Kalla Lv. 3. You can level other gods first on a relaxed first run; army-wide Movement +2 is useful when minimizing turns. Inference: calculate the distance, plan how to clear obstacles, and choose your finisher before activating the blessing and advancing. Whether 2 extra Movement saves a turn depends on finishing the objective this round.
Gambits receive no direct bonus. None of the seven blessings lists a Gambit or Charm bonus. Do not treat physical or magical Hit blessings as a guarantee for Gambits on Theodora's route.
SpoilersPart III enemy buffs and how to handle them
Most enemies in Part III have Underworld Boons. Deal with those before pursuing more damage. Choose your counter based on positioning, remaining Divine Sand, and the area you need to cover.
| Method | Best situation | Cost or limitation |
|---|---|---|
| Aurora Lv. 3 | Several groups need to attack this turn | Covers the army for one turn, costs Divine Sand, and uses that turn's regular blessing |
| Cleansing Blade | A sword user can handle the target alone | Requires someone who can equip it; does not remove the effect for the whole army |
 Leda's Blaze Art buff | Leda is present and you plan attacks around her buff | Depends on the relevant art, its activation, and coverage; not a permanent map-wide effect |
 Eshmel's aura | Enemies are clustered near the Promised One | Affects enemies within 2 spaces; requires positioning and cannot cover distant fronts |
Prepare several counters around your roster in advance. Eshmel, Leda's buff, Aurora Lv. 3, and the Cleansing Blade can all be part of your plan, as can the relevant spells. You do not need to invoke Aurora every turn.
Arrange ongoing coverage before spending Divine Sand on the whole army. Aurora has limited uses per battle, so units without a Cleansing Blade or another answer should stay close to Eshmel. Check which attackers can reach the protagonist's aura this round and which distant groups still lack a counter. Compare Aurora when several fronts need to deal damage at once. This positioning advice does not enlarge the aura: the nearby effect only covers units within its range.
“Four answers” does not mean these are the only four available. Spells effective against netherfiends, effectiveness bonuses against particular enemies, and the relevant white magic are also options. See Blaze Art bombardment for detailed Blaze Arts and Part III damage planning. :::