

Eshmel
SSイシュマール · EshmelIn Part 3, staying in Guardian before moving to Sentinel minimizes training. Invest in Heavy Armor and Riding if you want to bring his two-tile aura to the front line.
 Guardian Lv40
 Spear
 Authority


 Fan art →
Nine stats
| HP | Str | Mag | Spd | Dex | Def | Res | Lck | Cha | Total | |
|---|---|---|---|---|---|---|---|---|---|---|
| Growth rates | 50% | 45% | 45% | 45% | 45% | 35% | 35% | 40% | 50% | 390% |
| Overall rank63 characters total | Rank 9 | Rank 18 | Rank 5 | Rank 18 | Rank 22 | Rank 25 | Rank 18 | Rank 13 | Rank 4 | Rank 3 |
| Base statsGuardian Lv40 | 53 | 35 | 24 | 27 | 38 | 27 | 24 | 23 | 29 | 280 |
| Base stat ranking63 characters total | Rank 3 | Rank 3 | Rank 5 | Rank 4 | Rank 2 | Rank 5 | Rank 3 | Rank 3 | Rank 1 | Rank 1 |
| Lv60 expected statsSpears and white magic into The Trident | 71 | 51 | 33 | 39 | 52 | 40 | 39 | 32 | 40 | 397 |
| Expected rank62 characters total | Rank 11 | Rank 9 | Rank 16 | Rank 30 | Rank 7 | Rank 11 | Rank 13 | Rank 18 | Rank 5 | Rank 2 |
Proficiency
SpearAuthorityWeakness—Budding talent—Starting skills
| Category | Skills | Effect |
|---|---|---|
| Personal skill |  Light of Salvation | Negates Netherworld Blessing on foes within 2 spaces |
| Level skillsLv45 |  Scorching Sun | 5% chance to reduce damage taken to 0 when attacked by an Underworld foe |
| Level skillsLv60 |  Scorching Sun+ | 10% chance to reduce damage taken to 0 when attacked by an Underworld foe |
| Bloodmark |  Diadem of the Auger | 5% chance of Hit +100 when attacking |
| Blaze Arts |  Purifying Flash | Pierces the enemy with a sacred lance of light. |
| Blaze Arts | Purifying Flash · Improved | Pierces the enemy with a sacred lance of light.Always hits |
| Blaze Arts | Nine Heavens Strike | Pierces the enemy with a sacred lance of light. |
| Blaze Arts | Nine-Sky Strike+ | Pierces the enemy with a sacred lance of light. Super-effective against netherkin; always hits |
| Blaze Arts | Cleave Heaven | Pierces the enemy with a sacred lance of light. Super-effective against netherkin; always hits |
QiongyuanDestiny’s “The Promised One’s Story” 01:05–03:19, a low-investment main-story route: follow the starting Spear proficiency into Sentinel and The Trident. Train White Magic first, then combine damage, tanking, and healing.
Qiongyuan Destiny’s “Promised One’s Story” 03:24–05:42: master Castle Knight for Intercept first, then use Great Knight to retain armored mobility and Healing Armor. An additional detour into The Godhand for Divine Adornment is optional.

QiongyuanDestiny’s “The Promised One’s Story” 05:48–07:55: Rogue for In Shadow, with The Blade and The Eternal masteries to boost SpdandStr, then switch to Celestial Trooper, freeing the divine-class slot; ranged healing is required.

Eshmel’s spear-and-White-Magic, armored, and flying builds
For low training investment, take  Eshmel from Guardian into
 Sentinel and
 The Trident, retaining spears, White Magic, and frontline durability. With concentrated resources,
 Great Knight better exploits armored abilities and mount healing.
 Celestial Trooper instead trades investment for flight and Avoid, requiring teammates to keep up with ranged healing.
His aura determines support positioning
Eshmel has well-rounded offensive and defensive stats, allowing many training directions. Even without dedicated stat training, Blaze Arts and Light of Salvation give him important jobs. Part 3 enemies commonly have Netherworld Blessing, reducing damage from many mages who were effective in the first two parts. Eshmel disables Blessings on enemies within two spaces, preserving his own damage and opening targets for nearby allies.
Alongside Strength training, reach the front in time to cover the next ally’s target with his aura. At maximum level, Scorching Sun+ has a 10% chance to nullify netherfiend damage. It can occasionally save a unit, but cannot underpin tanking plans. Position using damage without activation.
Spear and White Magic save training slots
He formally joins as a Guardian with high Spear and Authority, making Sentinel into The Trident the smoothest path. Guardian can attack, tank, and provide healing support. Following this route lets him draw enemies at the front or switch to healing when the team is hurt, without insisting on a training-ground slot every time.
However, his starting White Magic is low, without a full ready-made spell set. Spend a turn or two training White Magic first. He gains that secondary role only after learning recovery spells. Keep  The Nameless and upgrade it through quests.
 Vendetta offers high Might and Range 1–2 as a cursed weapon. Eshmel’s Blaze type avoids the usual curse cost and lets him use it to control the Blaze Gauge during Burst, fitting this strategy.
 Halberd adds an option against armor; omit it if
 Frozen Spear already covers that role. Silver Spear has good overall performance but limited availability, so give it to another unit if they need a strong spear more. Use
 Victory Gem and
 Healing Staff for recovery: the former heals on kills, while the latter improves group healing and similar spells. With enough Speed and Build, carrying more practical items expands each turn’s options. Swap to a shield according to incoming pressure.
Build equipped abilities around  Spearfaire,
 Resolute Stance,
 Divine Wall, and Scorching Sun. Half-HP Avoid is easier to activate after Blaze deliberately drains HP and helps survival, but must first be learned. Choose the Dagda Qilin Battalion. This build’s clearest weakness is slow movement. Prioritize the Renown-reward movement item for him; otherwise allies may already be fighting before his aura reaches the needed position.
Great Knight links his healing sources
Eshmel can only be formally trained in Part 3, without pretraining through merges across earlier routes. For intensive development, concentrate on his distinctive armored abilities. The upgraded Armored Move grants two Movement, while  Healing Armor activates at a chance based on Magic and heals half the damage dealt. Movement helps him reach emergencies; the latter turns high Magic into sustain, covering repeated Blaze HP costs.
Both require an armored class, making mounted Great Knight a suitable endpoint. Train Heavy Armor and Riding immediately, first becoming a  Castle Knight to master
 Intercept, then Great Knight. Great Knight has excellent HP and Strength growth and better Resistance than conventional heavy armor. For more Resistance, optionally train Gauntlet and master
 Divine Adornment through
 The Godhand for Resistance +10. This additional training costs resources; skip it for a lighter investment.
Keep the spear weapons and replace Healing Staff with  Silver Shield for physical durability. Once learned, fill the five ability slots with Spearfaire, Intercept, upgraded Armored Move, and Healing Armor, with Divine Adornment as the final option. Use Monoceros with upgraded Paired Healing. Post-combat mount healing, Healing Armor, and Victory Gem’s kill healing together replenish Blaze costs. Each has its own trigger; kills and accuracy must keep pace too.
This investment provides high movement and much more reliable healing, especially for late maps requiring travel across the battlefield. Continuing to give him movement items serves the same purpose: reaching places where he can clear enemies or rescue allies every turn, rather than building thick stats in one corner.
Flying trades sustain for support reach and Avoid
For flight, first master  In Shadow in
 Rogue, then focus Sword and Flying training on him, taking Sword to at least S. Borrow
 The Blade and
 The Eternal for Speed and Strength respectively. After mastering them, return the Divine qualifications and go back to Celestial Trooper. Finish mastery before returning to the battle class.
Flight ignores terrain, letting him deliver Blaze everywhere and place Light of Salvation on the frontline. High Speed and Avoid combine with Eshmel’s sturdy foundation to leave more room for occasional hits than fragile dodge units. However, it lacks Great Knight’s strong self-healing. Bring a healer with  Physic to restore Blaze HP costs promptly.
Keep The Nameless and Vendetta, adding  Levin Sword +3 for broader coverage. Choose either Guandao or Whirlwind Blade for innate weapon Avoid. Kalla's Needle improves follow-up value, while
 Charm Mask uses high Charm to lower enemy Hit. Equip Spearfaire, In Shadow, and Lightning Reflexes, plus Strength and Speed boosts from Divine masteries. When mainly using swords, replace the spear ability with its sword counterpart.
Mounts offer two directions. Canto lets him reposition after a single-target kill and move the aura beside the next enemy an ally will attack, adding support value. Black Pegasus with Linked Avoid improves personal survival further. Either way, plan the post-kill landing tile together with allied attack order.
More guides
Site guides

Stay in Guardian to learn healing when Part 3 begins, then move to Sentinel. You can field Eshmel without waiting for a demanding armored or flying route.
Suppress Underworld Boons within two spaces and clear a path with Blaze Arts. Eshmel's proper training starts in Part 3. For faster frontline aura delivery, add Heavy Armor and Riding for Great Knight.
Class progression by stage
Part 1: No sustained training window
The prologue only gives brief control. None of the four protagonists can recruit him normally in Part 1; train him in Part 3.
Part 2: develop your existing team
Playable training conditions in Part 2 are unconfirmed. Check his level, proficiencies, and equipment when taking control in Part 3. Simulator checkpoints are only for route comparison.
Part 3: learn healing first
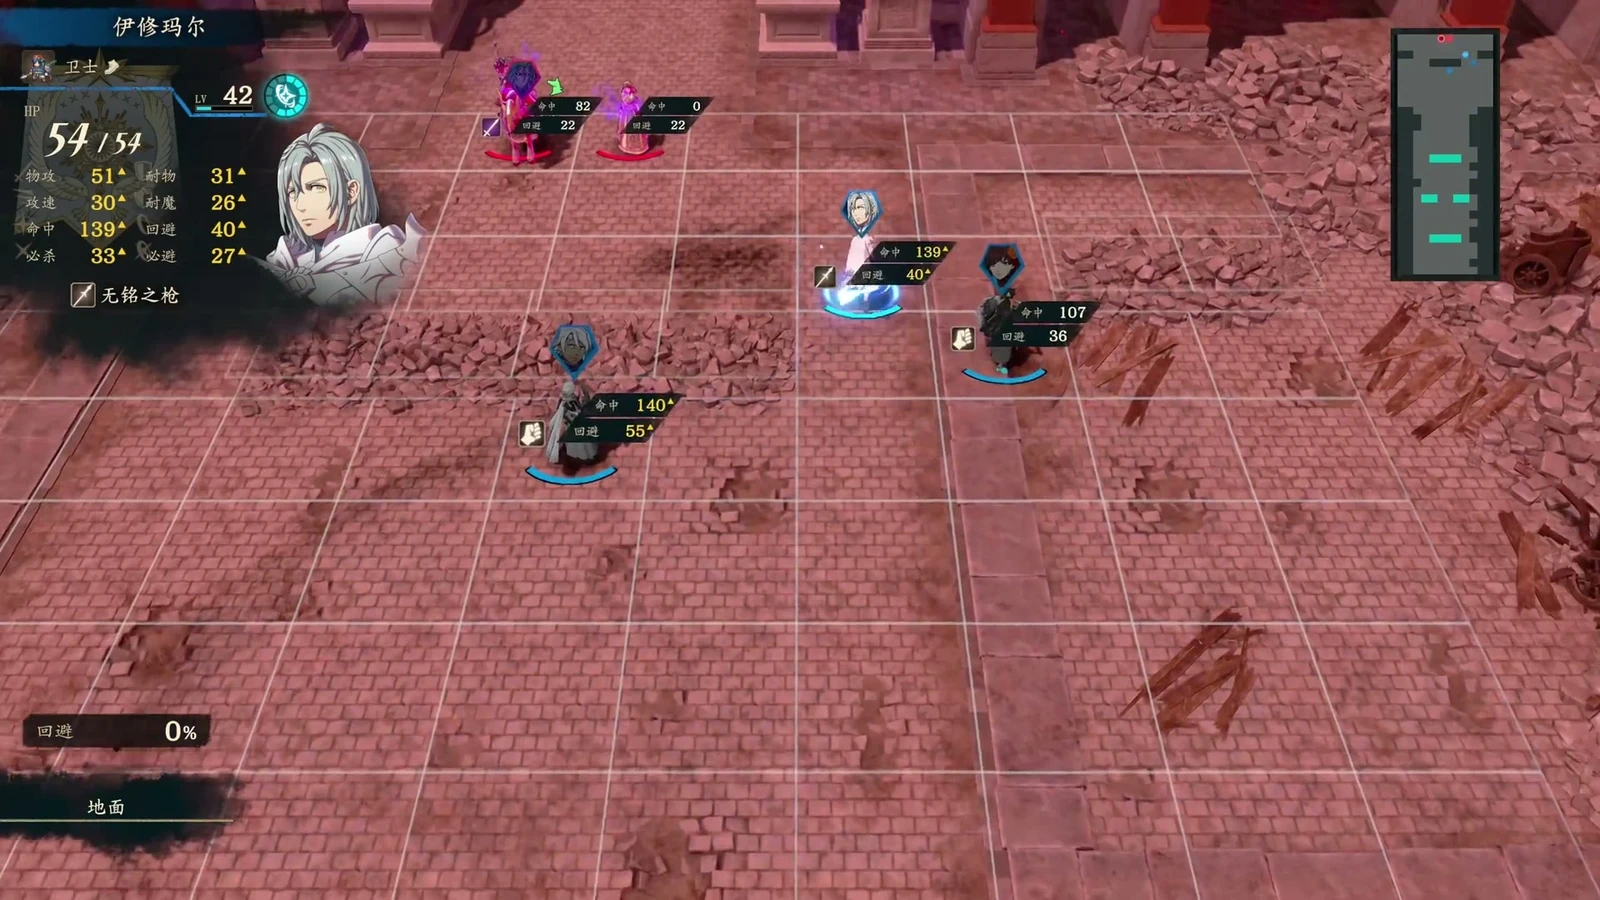
- 1Stay inGuardian on joining and train White Magic.Check whether he can already heal, then train it if not. The class permits white magic, but each spell must still be learned. Recovery offsets the HP cost of Blaze Arts.
- 2Set up sustain before considering divine classes.Use existing spears for regular attacks and Blaze Arts for purification and area damage. Victory Gem supports kill-based recovery; Healing Staff suits healing, while a shield helps under pressure. This foot route has no mount. The old page's optional equipment need not all be carried.
- 3After Segment 1, takeSentinel at level 45 and Spear A.
Keep the same weapon focus, attacks, and healing rather than training a new weapon set. Aim for Resolute Stance as a later mastery, not an ability available immediately on switching. These are exam requirements; the actual turn you qualify depends on your save. :::
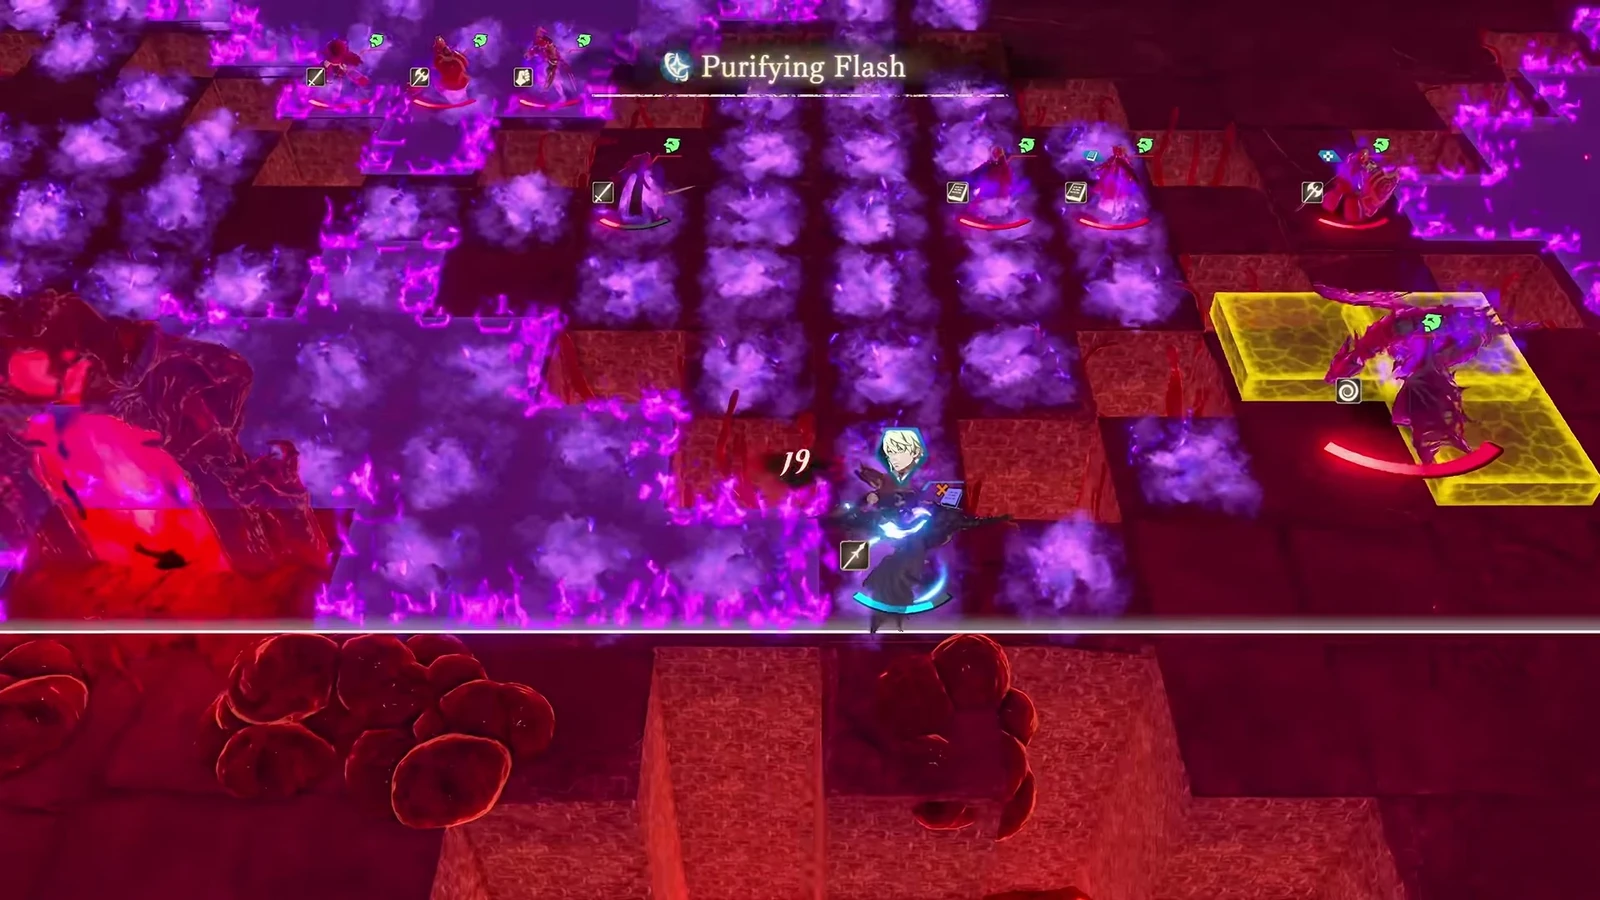
Eshmel uses Purifying Flash in the original game frame. Yellow tiles mark the target, with purple miasma and enemy positions visible for choosing where to clear it. Great Knight brings the aura to the front faster. Start Heavy Armor and Riding training on joining. From level 45, qualify for
Castle Knight with Spear or Axe A and Heavy Armor C, then master Intercept. After Credna's temple side quest in Segment 3, take Great Knight, requiring Heavy Armor D, Riding D, and Spear or Axe A. Armored skills and a mount help deliver the aura ahead of the team.Heavy Armor target What you learn and why D Armored Move gives armored classes +1 Movement. C Armored Move+ gives +2 Movement; do not mistake the “+1” in its name for the actual effect. B Healing Armor has a Magic-based chance when attacking to restore HP equal to half the damage dealt. Healing Armor activates by chance. Calculate survival without its healing. A mount with Paired Healing is an option, but use the mounts you already have rather than stopping story progress to complete the setup.
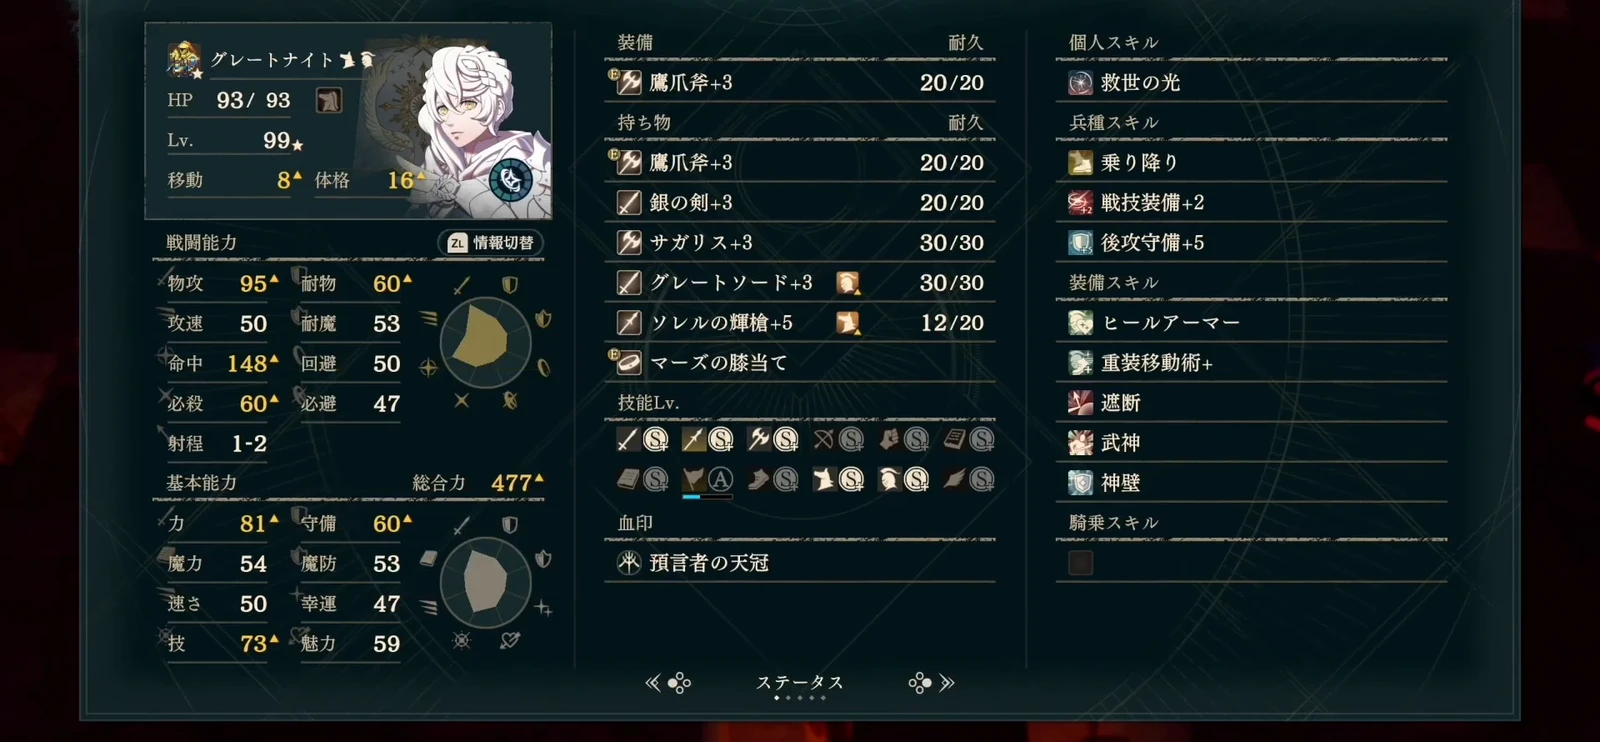
The original Japanese Great Knight setup shows Movement 8 at the upper left. Healing Armor, Armored Move+, and Intercept are actually equipped on the right. Confirm equipped skills before calculating armored mobility and sustain. A female custom character can also use flying support. Master Rogue for In Shadow, then prepare Flying C and Spear or Sword A. After Segment 1, take
Celestial Trooper at level 45. This trades extra training for terrain access and Canto positioning, with allies providing ranged healing. Celestial Trooper is female-only; a male custom character cannot copy it. With spare resources, master The Blade and The Eternal for Speed +10 and Strength +10 respectively; do not reverse them. A flying setup can use Levin Sword for magic damage while keeping the original spear. A Canto mount helps reposition the aura after attacking; a Linked Avoid setup instead suits more independent engagement. Flight needs substantial training, so focus on it rather than also pursuing the spear/white magic main route.Cover enemies with the two-space aura, then focus fire
First bring the enemy your allies will focus on within two tiles, then arrange the team's attacks. Eshmel's own kills are only part of the benefit. Once he is in position, letting allies penetrate underworld blessings often matters more. Purifying Blaze Arts both remove miasma and open a path. Arrange healing afterward so he does not face another concentrated attack with depleted HP.
Recruitment details
He is briefly usable in the prologue and appears as the protagonist of the Salvation Arc in Part 3. There is no normal Part 1 recruitment option. See the Eshmel recruitment page for the full requirements.
The flying branch is female-only
- 4Learn healing to enter combat sooner.Add armor or flight training when needed.
- 5Leave healing actions after Blaze Art HP costs.Healing Armor is chance-based; a kill-recovery gem first requires a kill.
- 6Cover the enemies with the aura.Its two-space range is centered on Eshmel; standing near allies is insufficient.
- 7Males cannot become Celestial Troopers
, even with maxed proficiencies.
Comments
Guardian→Lv45Sentinel→The TridentThe Nameless Mt 13 Hit 90 Wt 7VendettaMt 27 Hit 60 Wt 20Halberd
 Mt 12 Hit 70 Wt 12Victory GemWt 3Healing StaffWt 3
 VulnerarySpearfaireHit and Avo +10, attack +3 when wielding a lance
 Defensive Formation+Adjacent allies gain protection +2.
 BraceProtection +3 after defeating an enemy (until the next player phase)Frozen SpearCost 5 Mt 7 Hit 0Tempest SpearCost 2 Mt 4 Hit 10Brilliant StrikeCost 5 Mt 5 Hit 0Supreme SerpentCost 10 Mt 7 Hit 0Shining SpearMt 18 Hit 90 Wt 7VendettaMt 27 Hit 60 Wt 20HalberdMt 12 Hit 70 Wt 12Victory GemWt 3Healing StaffWt 3VulneraryScorching Sun5% chance to reduce damage taken to 0 when attacked by an Underworld foeSpearfaireHit and Avo +10, attack +3 when wielding a lanceResolute StanceIn combat, if the unit'sHPis full, Protection +5Defensive Formation+Adjacent allies gain protection +2.BraceProtection +3 after defeating an enemy (until the next player phase)Frozen SpearCost 5 Mt 7 Hit 0Tempest SpearCost 2 Mt 4 Hit 10Brilliant StrikeCost 5 Mt 5 Hit 0Purifying FlashCost HP 12 Mt Str+20Purifying Flash · ImprovedCost HP 18 Mt Str+25Nine Heavens StrikeCost HP 24 Mt Str+25Nine-Sky Strike+Cost HP 29 Mt Str+30Cleave HeavenCost HP 35 Mt Str+30
 Dagda Qilin BattalionAuthority AShining SpearMt 18 Hit 90 Wt 7VendettaMt 27 Hit 60 Wt 20HalberdMt 12 Hit 70 Wt 12Victory GemWt 3Healing StaffWt 3VulneraryScorching Sun5% chance to reduce damage taken to 0 when attacked by an Underworld foeSpearfaireHit and Avo +10, attack +3 when wielding a lanceResolute StanceIn combat, if the unit'sHPis full, Protection +5Divine WallDef+10BraceProtection +3 after defeating an enemy (until the next player phase)Frozen SpearCost 5 Mt 7 Hit 0Tempest SpearCost 2 Mt 4 Hit 10Brilliant StrikeCost 5 Mt 5 Hit 0Purifying FlashCost HP 12 Mt Str+20Purifying Flash · ImprovedCost HP 18 Mt Str+25Nine Heavens StrikeCost HP 24 Mt Str+25Nine-Sky Strike+Cost HP 29 Mt Str+30Cleave HeavenCost HP 35 Mt Str+30Dagda Qilin BattalionAuthority AShining SpearMt 18 Hit 90 Wt 7VendettaMt 27 Hit 60 Wt 20HalberdMt 12 Hit 70 Wt 12Victory GemWt 3Healing StaffWt 3VulneraryScorching Sun+10% chance to reduce damage taken to 0 when attacked by an Underworld foeSpearfaireHit and Avo +10, attack +3 when wielding a lanceResolute StanceIn combat, if the unit'sHPis full, Protection +5Divine WallDef+10BraceProtection +3 after defeating an enemy (until the next player phase)Frozen SpearCost 5 Mt 7 Hit 0Tempest SpearCost 2 Mt 4 Hit 10Brilliant StrikeCost 5 Mt 5 Hit 0Purifying FlashCost HP 12 Mt Str+20Purifying Flash · ImprovedCost HP 18 Mt Str+25Nine Heavens StrikeCost HP 24 Mt Str+25Nine-Sky Strike+Cost HP 29 Mt Str+30Cleave HeavenCost HP 35 Mt Str+30Dagda Qilin BattalionAuthority AGuardian→Lv45Castle Knight→Great KnightThe NamelessMt 13 Hit 90 Wt 7VendettaMt 27 Hit 60 Wt 20HalberdMt 12 Hit 70 Wt 12Victory GemWt 3Healing StaffWt 3VulnerarySpearfaireHit and Avo +10, attack +3 when wielding a lanceDefensive Formation+Adjacent allies gain protection +2.In ShadowAvoid +10 after defeating an enemy (resets after 1 battles)BraceProtection +3 after defeating an enemy (until the next player phase)Frozen SpearCost 5 Mt 7 Hit 0Tempest SpearCost 2 Mt 4 Hit 10Brilliant StrikeCost 5 Mt 5 Hit 0Supreme SerpentCost 10 Mt 7 Hit 0Shining SpearMt 18 Hit 90 Wt 7VendettaMt 27 Hit 60 Wt 20HalberdMt 12 Hit 70 Wt 12Victory GemWt 3Silver ShieldWt 4VulneraryDivine AdornmentRes+10SpearfaireHit and Avo +10, attack +3 when wielding a lanceInterceptReduces damage taken by 5 when attacked
 Armored Move+[Armored] Movement +2Healing Armor[Armored] When attacking, has a (Mag)% chance to activate, restoring half the damage dealt asHPFrozen SpearCost 5 Mt 7 Hit 0Tempest SpearCost 2 Mt 4 Hit 10Brilliant StrikeCost 5 Mt 5 Hit 0
 Shining SpearMt 18 Hit 90 Wt 7VendettaMt 27 Hit 60 Wt 20HalberdMt 12 Hit 70 Wt 12Victory GemWt 3Silver ShieldWt 4VulneraryDivine AdornmentRes+10SpearfaireHit and Avo +10, attack +3 when wielding a lanceInterceptReduces damage taken by 5 when attackedArmored Move+[Armored] Movement +2Healing Armor[Armored] When attacking, has a (Mag)% chance to activate, restoring half the damage dealt asHPFrozen SpearCost 5 Mt 7 Hit 0Tempest SpearCost 2 Mt 4 Hit 10Brilliant StrikeCost 5 Mt 5 Hit 0Purifying FlashCost HP 12 Mt Str+20Purifying Flash · ImprovedCost HP 18 Mt Str+25Nine Heavens StrikeCost HP 24 Mt Str+25Nine-Sky Strike+Cost HP 29 Mt Str+30Cleave HeavenCost HP 35 Mt Str+30
 MonocerosSpd+1 Dex+1 Lck+3Shining SpearMt 18 Hit 90 Wt 7VendettaMt 27 Hit 60 Wt 20HalberdMt 12 Hit 70 Wt 12Victory GemWt 3Silver ShieldWt 4VulneraryDivine AdornmentRes+10SpearfaireHit and Avo +10, attack +3 when wielding a lanceInterceptReduces damage taken by 5 when attackedArmored Move+[Armored] Movement +2Healing Armor[Armored] When attacking, has a (Mag)% chance to activate, restoring half the damage dealt asHPFrozen SpearCost 5 Mt 7 Hit 0Tempest SpearCost 2 Mt 4 Hit 10Brilliant StrikeCost 5 Mt 5 Hit 0Purifying FlashCost HP 12 Mt Str+20Purifying Flash · ImprovedCost HP 18 Mt Str+25Nine Heavens StrikeCost HP 24 Mt Str+25Nine-Sky Strike+Cost HP 29 Mt Str+30Cleave HeavenCost HP 35 Mt Str+30MonocerosSpd+1 Dex+1 Lck+3Guardian→Lv40Rogue→The Blade→The Eternal→Lv45Celestial TrooperThe NamelessMt 13 Hit 90 Wt 7VendettaMt 27 Hit 60 Wt 20HalberdMt 12 Hit 70 Wt 12Victory GemWt 3Healing StaffWt 3VulnerarySpearfaireHit and Avo +10, attack +3 when wielding a lanceDefensive Formation+Adjacent allies gain protection +2.In ShadowAvoid +10 after defeating an enemy (resets after 1 battles)BraceProtection +3 after defeating an enemy (until the next player phase)Frozen SpearCost 5 Mt 7 Hit 0Tempest SpearCost 2 Mt 4 Hit 10Brilliant StrikeCost 5 Mt 5 Hit 0Supreme SerpentCost 10 Mt 7 Hit 0Levin Sword +3Mt 20 Hit 70 Wt 8In ShadowAvoid +10 after defeating an enemy (resets after 1 battles)Defensive Formation+Adjacent allies gain protection +2.BraceProtection +3 after defeating an enemy (until the next player phase)
 Wrath StrikeCost 2 Mt 4 Hit 10Flash BlowCost 5 Mt 7 Hit 0WindsweepCost 10 Mt 5 Hit 0SolCost 10 Mt 5 Hit 0Supreme SerpentCost 10 Mt 7 Hit 0Lightning StrikeCost 5 Mt 8 Hit 20Shining SpearMt 18 Hit 90 Wt 7VendettaMt 27 Hit 60 Wt 20Levin Sword +3Mt 20 Hit 70 Wt 8Whirlwind BladeMt 8 Hit 90 Wt 2Kalla's NeedleWt 4Charm MaskWt 5SpearfaireHit and Avo +10, attack +3 when wielding a lanceIn ShadowAvoid +10 after defeating an enemy (resets after 1 battles)
 Lightning ReflexesWhen initiating combat, if attack speed exceeds the foe's by at least 10, make a follow-up attack before the foe can counterattack
 Divine InsightSpd+10Frozen SpearCost 5 Mt 7 Hit 0Tempest SpearCost 2 Mt 4 Hit 10Brilliant StrikeCost 5 Mt 5 Hit 0SolCost 10 Mt 5 Hit 0Supreme SerpentCost 10 Mt 7 Hit 0Lightning StrikeCost 5 Mt 8 Hit 20Purifying FlashCost HP 12 Mt Str+20Purifying Flash · ImprovedCost HP 18 Mt Str+25Nine Heavens StrikeCost HP 24 Mt Str+25Nine-Sky Strike+Cost HP 29 Mt Str+30Cleave HeavenCost HP 35 Mt Str+30Elite HuntersGambit: Disrupting ShotLevin Sword +3Mt 20 Hit 70 Wt 8In ShadowAvoid +10 after defeating an enemy (resets after 1 battles)Divine InsightSpd+10
 Divine MightStr+10Defensive Formation+Adjacent allies gain protection +2.BraceProtection +3 after defeating an enemy (until the next player phase)Wrath StrikeCost 2 Mt 4 Hit 10Flash BlowCost 5 Mt 7 Hit 0WindsweepCost 10 Mt 5 Hit 0SolCost 10 Mt 5 Hit 0Supreme SerpentCost 10 Mt 7 Hit 0Lightning StrikeCost 5 Mt 8 Hit 20Purifying FlashCost HP 12 Mt Str+20Purifying Flash · ImprovedCost HP 18 Mt Str+25Nine Heavens StrikeCost HP 24 Mt Str+25Nine-Sky Strike+Cost HP 29 Mt Str+30Cleave HeavenCost HP 35 Mt Str+30Elite HuntersGambit: Disrupting ShotShining SpearMt 18 Hit 90 Wt 7VendettaMt 27 Hit 60 Wt 20Levin Sword +3Mt 20 Hit 70 Wt 8Whirlwind BladeMt 8 Hit 90 Wt 2Kalla's NeedleWt 4Charm MaskWt 5SpearfaireHit and Avo +10, attack +3 when wielding a lanceIn ShadowAvoid +10 after defeating an enemy (resets after 1 battles)Lightning ReflexesWhen initiating combat, if attack speed exceeds the foe's by at least 10, make a follow-up attack before the foe can counterattackDivine InsightSpd+10Divine MightStr+10Frozen SpearCost 5 Mt 7 Hit 0Tempest SpearCost 2 Mt 4 Hit 10Brilliant StrikeCost 5 Mt 5 Hit 0SolCost 10 Mt 5 Hit 0Supreme SerpentCost 10 Mt 7 Hit 0Lightning StrikeCost 5 Mt 8 Hit 20Purifying FlashCost HP 12 Mt Str+20Purifying Flash · ImprovedCost HP 18 Mt Str+25Nine Heavens StrikeCost HP 24 Mt Str+25Nine-Sky Strike+Cost HP 29 Mt Str+30Cleave HeavenCost HP 35 Mt Str+30
 FalicornStr+1 Spd+3 Dex+1Shining SpearMt 18 Hit 90 Wt 7VendettaMt 27 Hit 60 Wt 20Levin Sword +3Mt 20 Hit 70 Wt 8Whirlwind BladeMt 8 Hit 90 Wt 2Kalla's NeedleWt 4Charm MaskWt 5SpearfaireHit and Avo +10, attack +3 when wielding a lanceIn ShadowAvoid +10 after defeating an enemy (resets after 1 battles)Lightning ReflexesWhen initiating combat, if attack speed exceeds the foe's by at least 10, make a follow-up attack before the foe can counterattackDivine InsightSpd+10Divine MightStr+10Frozen SpearCost 5 Mt 7 Hit 0Tempest SpearCost 2 Mt 4 Hit 10Brilliant StrikeCost 5 Mt 5 Hit 0SolCost 10 Mt 5 Hit 0Supreme SerpentCost 10 Mt 7 Hit 0Lightning StrikeCost 5 Mt 8 Hit 20Purifying FlashCost HP 12 Mt Str+20Purifying Flash · ImprovedCost HP 18 Mt Str+25Nine Heavens StrikeCost HP 24 Mt Str+25Nine-Sky Strike+Cost HP 29 Mt Str+30Cleave HeavenCost HP 35 Mt Str+30FalicornStr+1 Spd+3 Dex+1
Build approach and suitable stages
Spears and white magic into The Trident: Sentinel Lv45; Spears and white magic into The Trident: The Trident Lv45, Lv60
— low-investment main route: build on his starting Spear proficiency into Sentinel and The Trident, adding white magic first, then combining damage, tanking, and healing.
Armored Great Knight with recovery: Castle Knight Lv45; Armored Great Knight with recovery: Great Knight Lv46, Lv60
: master Castle Knight for Intercept first, then use Great Knight to carry over armored movement and Healing Armor; an extra detour into The Godhand for Divine Adornment is optional.
Divine-class masteries into Celestial Trooper: Rogue Lv40; Divine-class masteries into Celestial Trooper: The Blade Lv40; Divine-class masteries into Celestial Trooper: The Eternal Lv40; Divine-class masteries into Celestial Trooper: Celestial Trooper Lv45, Lv60
: Rogue for In Shadow, with The Blade and The Eternal masteries to boost SpdandStr, then switch to Celestial Trooper, freeing the divine-class slot; ranged healing is required.
DexWidely recommendedDexVery strongDexUseful for specific strategies
 Spears Lv. 1
 Spears Lv. 2
 Spears Lv. 3
 Spears Lv. 4
 Spears Lv. 5
 Attack Formation
 Defensive Formation
 Attack Formation+
 Lend Defense++
 Gambit Master
 Sword
 Swords Lv. 1
 Swords Lv. 2
 Swords Lv. 3
 Swords Lv. 4
 Swords Lv. 5
 Swordfaire
 Axe
 Spike
 Axes Lv. 1
 Axes Lv. 2
 Axes Lv. 3

 Axes Lv. 4
 Axes Lv. 5
 Axefaire
 Bow
 Curved Shot
 Bows Lv. 1
 Bows Lv. 2
 Bows Lv. 3
 Bows Lv. 4
 Bows Lv. 5
 Bowfaire
 Gauntlet
 Mighty Fist
 Fists Lv. 1
 Fists Lv. 2
 Fists Lv. 3
 Fists Lv. 4
 Fists Lv. 5
 Fistfaire
 Black Magic
 Fire
 Black Magic Lv. 1
 Black Magic Lv. 2
 Black Magic Lv. 3
 Black Magic Lv. 4
 Black Magic Lv. 5
 Black-Magic Mastery
 White Magic
 White Magic Lv. 1
 White Magic Lv. 2
 White Magic Lv. 3
 White Magic Lv. 4
 White Magic Lv. 5
 White-Magic Mastery
 Infantry
 Avoid Fatality
 Emergency Avoidance
 Sniper Evasion
 Infantry Move
 Avoid Fatality+
 Infantry Move+
 Knightly Senses
 Knight’s Vanguard
 Cavalry Move
 Read the Winds
 Flitting Flier
 Heavy Armor
 Armored Move
 Build +
Eshmel: unavailable on all four routes in Part I; joins in Part III.
 Cai's storyCannot recruit
Playable in the prologue and Part III; cannot be recruited on any of the four Part I routes
 Dietrich's storyCannot recruit
Playable in the prologue and Part III; cannot be recruited on any of the four Part I routes
 Theodora's storyCannot recruit
Playable in the prologue and Part III; cannot be recruited on any of the four Part I routes
 Leda's storyCannot recruit
Playable in the prologue and Part III; cannot be recruited on any of the four Part I routes
 Renown level
 Bond Level with this route's protagonist. For all characters across the four routes, see Recruitment; see recruitment steps at How to recruit。
Bond partners48 characters · 48 can reach A · 48 have confirmed paired endings
 AAlexandra
 ABenditz
 ABonaventure
 ABuccar
 ACai
 ACatania
 ADadao
 ADante
 ADiego
 ADietrich
 AEsmeralda
 AFabio
 AFianna
 AGaitz
 AGoliath
 AGuzran
 AHalvin
 AHong Hua
 AInyoni
 AIo
 AJasmine
 AJester
 ALeda
 ALilian
 ALoretta
 ALudia
 ALysander
 AMajide
 AMikaela
 AMu
 ANezha
 ANinae
 ANoctula
 ANydine
 AOlympia
 APeppe
 APeter
 ASha Lan
 ASimon
 ASirocco
 ASofia
 ATheodora
 ATialla
 ATobias
 AUltand
 AUrsula
 AYang Jie
 AZarcone
Letters indicate the highest available support conversation (C = support Lv2, B = support Lv3, A = support Lv4); A paired ending is confirmed,For the rules, seeBonds。
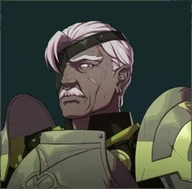
A being created in the place called the “Forbidden Land” to bring light back to the world. Possesses an unusual body unlike that of ordinary humans and greatStr. Returns to the past with Fortuna, goddess of fate, to gather companions to defeat Balor.
Details
| Title | Promised One |
|---|---|
| Affiliation | Promised One’s army |
| Age | Listed as age 3 in the character roster |
| Likes | Ambitious people, talented people, nameless wildflowers |
| Interests | Board games |
Relationships





In the story
Part I: back five years
After Barol's resurrection, an army of risen dead sweeps the world. Although Eshmel StrPowerful, but still unable to face an entire army alone, so relies on Fortuna'sStrReturn five years into the past to find four warriors who can change fate.
Part I: Intervening as a white birdLight spoilers
Eshmel’s past body can influence causality only to a limited degree, preventing him from directly resolving every crisis for the four warriors. Fortuna therefore turns him into a white bird, shaping their journeys through small suggestions and actions.
Part III: After the UnderworldSpoilers
The Underworld does not disappear immediately after Barol is defeated. To prevent the disaster from recurring, Eshmel and Fortuna go deeper to find the core sustaining it. After the Underworld collapses, they fall into a void where time and space vanish, and Fortuna uses her remaining StrShe sends Eshmel away and stays behind to sleep. Before parting, she asks him to imagine the person he most wants to see again, separating the historical record of the “Promised One's disappearance” from the private reunion that follows.
Trivia
- Eshmel was added midway through development to provide a view across the four protagonists and connect their stories.