

Diego
Cディエゴ · Diego Cai route· Recruitable
 Dietrich route· Recruitable
 Theodora route· Recruitable
 Leda route· Recruitable
Check Strength and follow-ups after his late recruitment. Use Warrior if Strength is lacking, then choose swords or sword-and-bow exploration according to remaining training time.
 Hunter Lv7
 Sword
 Bow
 Infantry
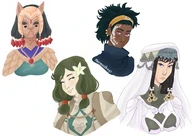
 Fan art →
Nine stats
| HP | Str | Mag | Spd | Dex | Def | Res | Lck | Cha | Total | |
|---|---|---|---|---|---|---|---|---|---|---|
| Growth rates | 45% | 40% | 20% | 45% | 60% | 35% | 20% | 35% | 30% | 330% |
| Overall rank63 characters total | Rank 23 | Rank 29 | Rank 38 | Rank 18 | Rank 1 | Rank 25 | Rank 48 | Rank 26 | Rank 40 | Rank 34 |
| Base statsHunter Lv7 | 28 | 11 | 4 | 10 | 12 | 6 | 3 | 8 | 6 | 88 |
| Base stat ranking63 characters total | Rank 30 | Rank 30 | Rank 46 | Rank 29 | Rank 20 | Rank 39 | Rank 55 | Rank 30 | Rank 40 | Rank 38 |
| Lv60 expected statsCleansing Blade critical-hit route | 63 | 36 | 15 | 49 | 57 | 25 | 13 | 29 | 24 | 311 |
| Expected rank62 characters total | Rank 30 | Rank 33 | Rank 37 | Rank 12 | Rank 4 | Rank 40 | Rank 53 | Rank 29 | Rank 45 | Rank 37 |
Proficiency
SwordBowInfantryWeakness Black MagicBudding talent—
Starting skills
 Cleansing Blade-based critical-hit route
Reach Sword S, then move into The Calamity.
Master Hunter’s Eye first, then use No Mercy+ to strengthen bow follow-ups.
Uses swords and bows while improving Str、Def, keeping a mount in the final class. The intermediate Myrmidon stage follows the main Sword route’s early progression.

Diego’s training, class routes, and recruitment
Original: Diego’s training, recommended classes, and recruitment requirements; Game8
 Diego starts as a Hunter, trains through
 Myrmidon and
 Shido, then becomes a
 Swordmaster before advancing to
 The Calamity, using high Dexterity for accuracy and criticals. The sword route focuses on criticals, while bows can follow
 Rogue,
 Forest Knight, and
 Bow Adept for ranged follow-ups.
 Cai’s route also offers Forest Knight with an animal mount. All three use his strengths. Orchel’s paralogue is the real limit on training time; he may not be recruitable when you first meet him.
Confirm the paralogue before planning training time
Every route must complete Orchel’s paralogue to recruit Diego permanently. Cai requires Support 3 and Renown 10;  Dietrich Support 3 and Renown 9;
 Theodora Support 2 and Renown 8; and
 Leda Support 3 and Renown 8. When you meet him in early Part 1 chapters, the paralogue is not yet available, so he cannot formally join.
Orchel’s paralogue becomes available from October 18. The acceptance windows are Chapter 11, October 18–19 for Cai; Chapter 11, October 18–27 for Dietrich and Leda; and Chapter 12, October 18–27 for Theodora. Plan around the 19th on Cai’s route and the 27th on the others.
The paralogue battle has two catapults. Activating both in the same phase damages the enemy army. The acceptance chapter varies by protagonist, so follow your current route’s quest window. Guest appearances before joining are separate from permanent recruitment. If he formally joins after the Beginner stage, continue from his current class instead of repeating Hunter.
High Dexterity is more reliable than personal support
His growths are HP 45%, Strength 40%, Magic 20%, Speed 45%, Dexterity 60%, Defense 35%, Resistance 20%, Luck 35%, and Charm 30%, totaling 330. Exceptional Dexterity and a reasonable Speed foundation support accuracy and criticals in physical combat. Strength and Resistance are clear limitations: high Hit may still deal little damage against high Defense, and Resistance matters against magic.
His strengths are Sword, Bow, and Infantry, with Black Magic as a weakness. Both swords and bows follow his strengths: swords use accuracy and criticals, while bows use ranged follow-ups. Neither physical route relies on low-growth Black Magic for routine damage. Physical attacks remain the focus even after he learns spells.
His overall value is mainly limited by late recruitment and little Part 1 availability, resulting in an A rating.
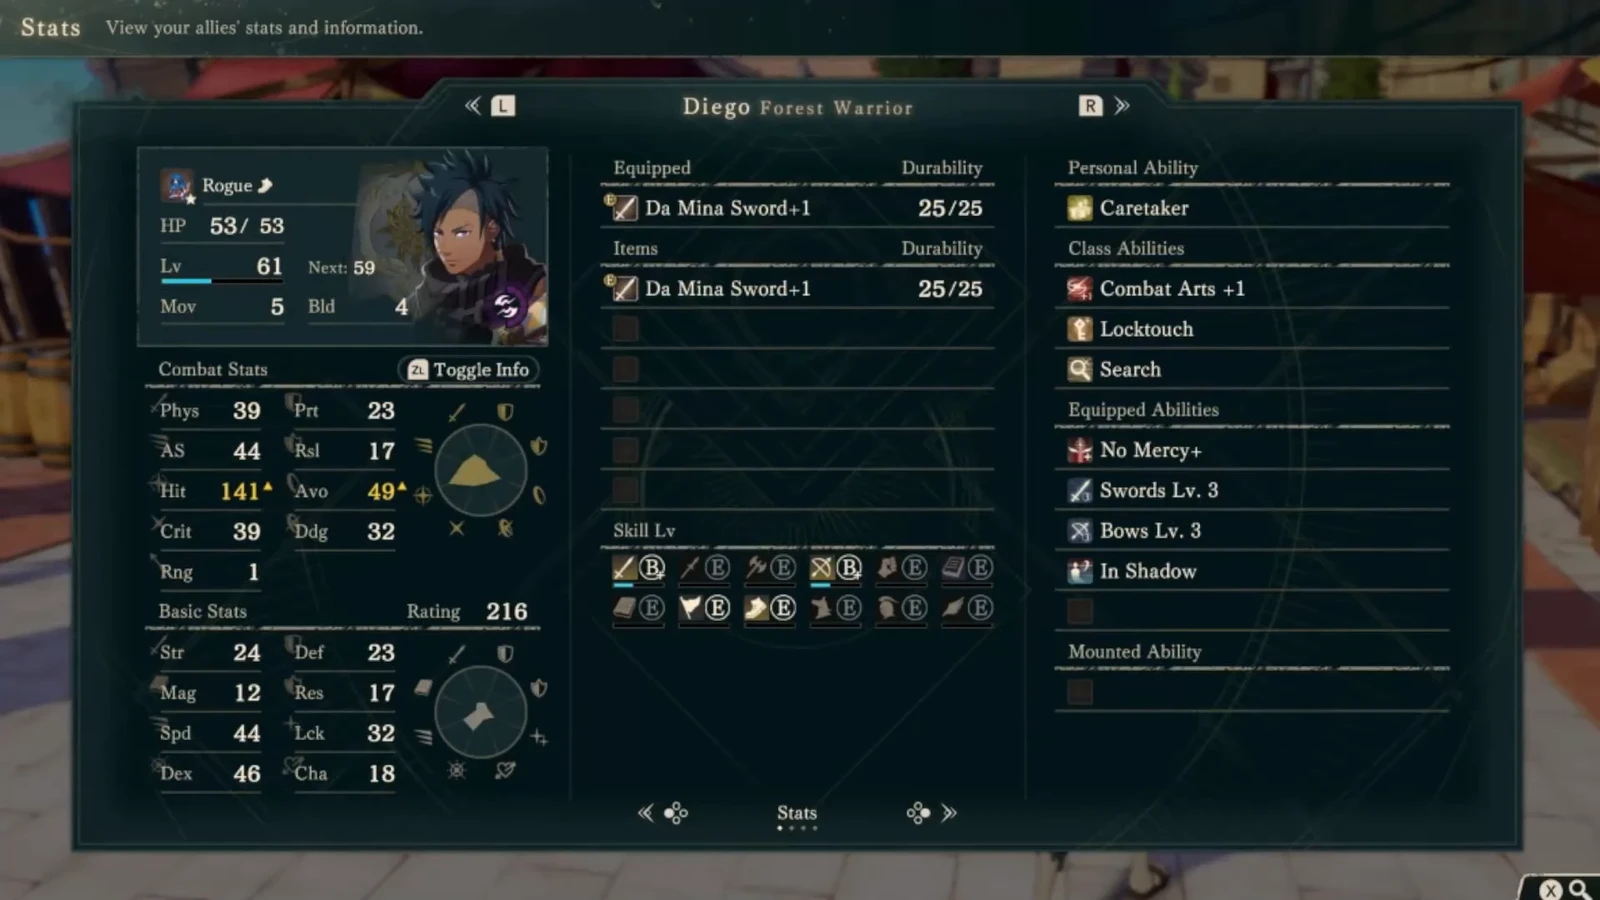
When an adjacent ally fights,  Caretaker has only a 5% chance to prevent enemy follow-ups against that ally. Do not risk an ally being doubled to gamble on that 5%. Diego’s own Hit, follow-ups, and Range are more reliable. At level 35,
 No Mercy+ grants Hit +10 and Critical +10 on follow-ups, connecting directly with Speed and follow-up builds.
Sword criticals and Cleansing Blade carry into Part 3
The sword recommendation is Hunter, Myrmidon, Shido, and Swordmaster. Main requirements are Sword C for Myrmidon, B for Shido, and A for Swordmaster. Sword classes progressively raise Sword Crit, with Swordmaster’s +7 combining with Dexterity growth to improve finishing power. Before Swordmaster unlocks, use Shido. Proficiency alone does not bypass the class unlock.
Myrmidon mastery  DexRavaging Arts increases critical damage. Shido mastery
 Ever Vigilant restores HP after defeating an enemy with a critical. Swordmaster mastery
 Astra strikes five times at half damage per hit. These support critical damage, post-kill sustain, and multihit attacks respectively, and each requires the corresponding mastery. Any mastery unfinished before becoming a Swordmaster still needs separate training.
Cleansing Blade bypasses Underworld protection, letting sword classes keep attacking in Part 3. This is a major reason to choose swords. Add other everyday swords, recovery items, and accessories as needed.
Normal sword stages also have different class modifiers: Myrmidon adds one equipped Combat Art slot and Sword Crit +3; Shido adds two slots and Sword Crit +5; Swordmaster adds three slots and Sword Crit +7. Expanded slots still require manually selecting arts already learned. Obtaining a class does not automatically equip every recommended skill.
Prepare Calamity certification after Sword S
After Swordmaster, advance to The Calamity. It requires Sword or Bow S and  Crystal of Darkness after Part 3 unlocks. There is no fixed recommended reclass level. Prepare proficiency and Divine certification first. Sword and Bow are both strengths, so you can continue investing in your current route while preparing.
The class grants Combat Arts +3, Locktouch, and Ultimate Search, while mastering  Divine Will gives Luck +10. The earlier sword stages rely on Swordmaster’s Sword Crit +7. That class skill disappears on changing to Divine, while earned mastery rewards remain. The final class permits swords and bows but no longer lances, so check each stage’s loadout.
Bow follow-ups need Forest Knight mastery first
The follow-up bow route is Hunter, Rogue, Forest Knight, and Bow Adept. Bow Adept improves Speed growth to trigger No Mercy+ through follow-ups. Forest Knight mastery  Hunter's Eye adds Attack +3 on bow follow-ups. Both apply only to the follow-up strike and offer nothing when you lack the Speed to double.
Although the middle stage is cavalry, this route ends as an infantry archer. Train Riding for Forest Knight, then recheck cavalry-only skills and the mount slot on returning to Bow Adept. Bow Adept mainly requires Bow A. To improve follow-up damage, first complete Forest Knight mastery for Hunter's Eye.
This route puts high Dexterity and Speed potential into ranged offense. Unlike swords using Cleansing Blade for Part 3, its sword, bow, and cavalry benefits depend on the current class. Check which weapons that class permits at each stage before choosing arts.
Cai can stop at Forest Knight
Another option is Advanced Forest Knight with a Ferghanan Horse. He can use his favored swords and bows while mounted. At bond level 5, the mount improves Strength and Defense and provides corresponding growth modifiers. This branch can stop at Advanced to keep sword-and-bow flexibility and mount benefits.
Animal capture opens in Chapter 5 on Cai’s route. Other protagonists cannot copy that timing. If you have not found a rare animal, an ordinary animal of the same species provides the same total growth bonus. Choose a rare individual mainly for its bonus distribution and intended role.
The Forest Knight and Bow Adept branches share intermediate stages but have different final roles. The former keeps cavalry Movement and two weapon options; the latter focuses on infantry bows and follow-ups. All three start from the same joining class. You do not need to wait for a fixed level: take exams once Renown and weapon proficiency suffice, with licenses and unlocks ready. Displayed levels are not hard requirements.
Choose sword and bow arts for the target’s state
For swords, Sunder adds Critical, while Destreza adds Attack +5 and Critical +10 when enemy HP is at most half. Attack Speed arts such as Skysplit should be judged by whether they enable a follow-up. Choose arts for their trigger conditions rather than ranking them only by Might.
Bow arts include  Warning Shot, granting combat Avoid +10; Surprise Shot, with a 30% chance to increase Attack against a full-HP target; and Twin-Shot Flow, striking twice at 70% damage per hit. Consecutive strikes and Attack Speed follow-ups have different triggers. No Mercy+ applies only to follow-ups.
Infantry dodge skills improve Avoid against bows and magic, while Authority skills such as  Rein lower adjacent enemies’ Avoid. Each requires the corresponding proficiency. Check what he already knows after recruitment, then equip arts permitted by his current class.
Check Strength, Speed, Dexterity, and HP
Near the end of Part 1, around level 40, watch Strength, Speed, Dexterity, and HP. Dexterity improves accuracy and criticals, but 40% Strength still makes damage growth-dependent. Speed at 45% determines whether follow-ups and Avoid pay off, while HP provides an engagement buffer. Magic and Charm are not central to either physical role. Slightly low Luck does not mean failed training. Resistance at 20% is a clear weakness, best handled by avoiding unfavorable magical fights.
If Strength falls well behind, use Diego trained on another route for Merge Causality, taking the higher stats. Since permanent recruitment depends on the paralogue window, complete the other route’s recruitment prerequisites before retraining.
He likes forest walks, herb gathering, and Orchel. Gift options include Arrowhead Gem and Wing Fletching, as well as Bow Repair Kit, Decorative Arrows, Decorative Bow, Joint-Relief Gloves, Protection Figurine, and History of a Master. Gifts raise Support but do not replace Orchel’s paralogue.
Gifts and Support partners
His favorites are  Wing Fletching and
 Arrowhead Gem. He likes Herbal Recipe Guide, Rare Spices, Crimson Ghosh, Joint-Relief Gloves, Protection Figurine, Training Pillar, and Training Weights. Simple Pastries, Common Coffee, and Mature Ghosh are neutral.
His Support conversation partners include the Promised One, Theodora,  Esmeralda,
 Lilian,
 Ninae,
 Sha Lan,
 Io,
 Seteth,
 Halvin, and
 Nuzzuo. His birthday is November 4, and his Japanese voice actor is Kengo Takanashi.
More guides
- Diego's recommended classes and recruitment requirementsGameWith Fortune's Weave guide team
- Diego class and stat analysisAltema guide team
Site guides

Take Diego through Shido → Swordmaster, using high Dexterity for Hit and Critical. Add Warrior only if his late-recruit Strength is lacking.
Diego has high Dexterity but joins late. Check whether he can follow up and damage enemies, then choose swords or sword/bow exploration based on remaining training time. His post-level-35 Hit and Critical bonuses apply only to follow-ups, not the first strike.
Training route by stage
Part 1: continue after the paralogue
After Orchel's paralogue, continue from his actual recruitment state. Level 7 Hunter is a base template. Check current level, Strength, Sword, and Bow when he joins. Use existing higher-class qualifications instead of retraining lower tiers.
- If Strength is low, consider Warrior. Improve Strength to catch the team up. It requires level 35, Renown 8, and any B in Sword, Axe, or Gauntlet. Sword is a strength, so continue it rather than adding a new Axe route.
- If Strength is sufficient, focus Sword or Bow. Swords use high Dexterity for Hit and Critical; sword/bow exploration requires preparing Ranger and Shadow Seeker access. Both still need actual follow-ups. Dexterity growth of 60% alone does not guarantee kills.
- Below level 35, use existing qualifications. Myrmidon requires level 20, Renown 4, and Sword C as a sword-route bridge; skip it if higher qualifications are already available.
Part 2: focus swords or sword/bow
Continue the direction chosen when he joined. Stay in Warrior while added Strength remains useful. Once he handles his targets, return to swords or sword-and-bow rather than changing class just for a route table.
Sword B permits the Shido exam, still requiring level 35 and Renown 8. Equip Ravaging Arts only after Myrmidon mastery and Ever Vigilant only after Shido mastery. The former needs criticals; the latter needs a critical kill, not unconditional self-healing.
Another option is Warrior into Ranger. Ranger requires level 35, Renown 8, Sword or Bow B, and its route prerequisite. Continue Sword A for Shadow Seeker. You can skip an intermediate class and change directly in Part 3. This is one sword/bow approach; improving Strength does not force everyone into the same endpoint.
Use a main weapon that preserves follow-ups and finish enemies from the second line. Both routes are infantry and need no mount. Equip consecutive-shot moves only if already learned.
Part 3: Swordmaster or Shadow Seeker
For sword damage, change to Swordmaster at level 45 with Sword A after unlocking it. For sword/bow exploration, use Shadow Seeker at level 45 with Sword or Bow A after Segment 1 of the Promised One's story. Late recruitment means class timing should reflect the training time remaining.
Another option trains Axe S to master The Eternal for Strength, then returns to the target class. It costs extra proficiency, an unlock item, and mastery time; skip it if little of the game remains.
If the current setup already kills targets reliably, deploy it. With limited training time, do not delay participation just to add more Strength.
Finish targets he can follow up against
Follow the front line and attack targets he can double. After level 35, No Mercy+ gives +10 Hit and +10 Crit only on follow-ups. The first strike does not receive them. Without a follow-up, that advantage disappears. Check for an actual second strike in the forecast before damage and enemy counters.
Caretaker gives adjacent allies only a 5% chance to avoid a follow-up, making it occasional insurance. Standing beside Diego is no reason for Orchel or another ally to take an otherwise lethal double. His own low Resistance also calls for avoiding concentrated mage attacks.
Recruitment
All four routes require Orchel's paralogue first, with acceptance and completion deadlines varying by protagonist. Theodora's route also needs Renown 8 and Support 2 with the protagonist; other routes differ. Check Diego recruitment rather than treating his first appearance as recruitability.
Dexterity does not replace Strength or buff the first strike
- Continue from the current level after late recruitment. Automatic growth has already happened; do not return to the level 7 template.
- Check Strength, Attack Speed, and weapon damage despite high Dexterity. Plan kills without criticals first.
- No Mercy boosts only follow-ups. The first strike does not get its 10 Hit and 10 Critical.
- Train enough for the current task first. Add Strength and mastery if time remains.
Comments
Hunter→Lv20Myrmidon→Lv35Shido→Lv45Swordmaster→The CalamityHunter Iron Bow
 Mt 9 Hit 75 Wt 6
 Hunting BasicsDex、Spd+1
 Swords Lv. 1Hit +3 when wielding a sword
 Bows Lv. 1Hit +3 when a bow is equippedReinAdjacent enemies suffer Avo -3
 Dodge[Infantry] Avo +5 in combat against enemies using bows or magic
 Victory GemEquippedWt 3
Reach Sword S, then move into The Calamity. This setup follows Hunter’s weapon access, mount, and battalion rules.
MyrmidonIron SwordMt 9 Hit 90 Wt 4 No MercyHit and Crit +5 on follow-up attacksDexRavaging ArtsDamage dealt +6 on a critical hitHunting BasicsDex、Spd+1
 Swords Lv. 3Hit and Avo +5 when a sword is equippedDodge[Infantry] Avo +5 in combat against enemies using bows or magic
 Deadly BladeCost 2 Mt 0 Hit 0Victory GemEquippedWt 3
Move into The Calamity after reaching Sword S. This setup follows Myrmidon’s weapon access, mount, and battalion rules.
ShidoIron SwordMt 9 Hit 90 Wt 4No Mercy+Hit and Crit +10 on follow-up attacksDexRavaging ArtsDamage dealt +6 on a critical hitEver VigilantRestores a small amount of HP after defeating a foe with a critical hitHPSwords Lv. 3Hit and Avo +5 when a sword is equippedDodge[Infantry] Avo +5 in combat against enemies using bows or magic
 Deadly BladeCost 2 Mt 0 Hit 0Victory GemEquippedWt 3
Move into The Calamity after reaching Sword S. This setup follows Shido’s weapon access, mount, and battalion rules.
SwordmasterCleansing BladeMt 8 Hit 90 Wt 3 Killing EdgeMt 11 Hit 90 Wt 6Iron SwordMt 9 Hit 90 Wt 4Bronze SwordMt 4 Hit 90 Wt 3
 VulneraryVictory GemWt 3No Mercy+Hit and Crit +10 on follow-up attacksDexRavaging ArtsDamage dealt +6 on a critical hitEver VigilantRestores a small amount of HP after defeating a foe with a critical hitHP
 Swords Lv. 4Hit and Avo +7 when a sword is equipped
 Infantry Move[Infantry] Terrain movement cost -1 (minimum 1)
 Deadly BladeCost 2 Mt 0 Hit 0Victory GemEquippedWt 3
Reach Sword S, then move into The Calamity. This setup follows Swordmaster’s weapon access, mount, and battalion rules.
The CalamityCleansing BladeMt 8 Hit 90 Wt 3Killing EdgeMt 11 Hit 90 Wt 6Iron SwordMt 9 Hit 90 Wt 4Bronze SwordMt 4 Hit 90 Wt 3VulneraryVictory GemWt 3No Mercy+Hit and Crit +10 on follow-up attacksDexRavaging ArtsDamage dealt +6 on a critical hitEver VigilantRestores a small amount of HP after defeating a foe with a critical hitHPSwords Lv. 4Hit and Avo +7 when a sword is equippedInfantry Move[Infantry] Terrain movement cost -1 (minimum 1) Combat Arts +3Equippable combat arts +3
 LocktouchCan open chests without a key
 Ultimate SearchMakes perfect exploration results extremely likely when deployedDeadly BladeCost 2 Mt 0 Hit 0Victory GemEquippedWt 3The CalamityCleansing BladeMt 8 Hit 90 Wt 3Killing EdgeMt 11 Hit 90 Wt 6Iron SwordMt 9 Hit 90 Wt 4Bronze SwordMt 4 Hit 90 Wt 3VulneraryVictory GemWt 3No Mercy+Hit and Crit +10 on follow-up attacksDexRavaging ArtsDamage dealt +6 on a critical hitEver VigilantRestores a small amount of HP after defeating a foe with a critical hitHPSwords Lv. 4Hit and Avo +7 when a sword is equippedDivine WillLck+10Combat Arts +3Equippable combat arts +3LocktouchCan open chests without a keyUltimate SearchMakes perfect exploration results extremely likely when deployedDeadly BladeCost 2 Mt 0 Hit 0Victory GemEquippedWt 3Hunter→Lv20Rogue→Lv35Forest Knight→Lv45Bow AdeptHunterIron BowMt 9 Hit 75 Wt 6Hunting BasicsDex、Spd+1Swords Lv. 1Hit +3 when wielding a swordBows Lv. 1Hit +3 when a bow is equippedReinAdjacent enemies suffer Avo -3Dodge[Infantry] Avo +5 in combat against enemies using bows or magicVictory GemEquippedWt 3
Master Hunter’s Eye first, then strengthen bow follow-ups with No Mercy+. This setup follows Hunter’s weapon access, mount, and battalion rules.
RogueIron BowMt 9 Hit 75 Wt 6No MercyHit and Crit +5 on follow-up attacks In ShadowAvoid +10 after defeating an enemy (resets after 1 battles)
 Bows Lv. 3Hit and Avoid +5 when wielding a bowHunting BasicsDex、Spd+1Dodge[Infantry] Avo +5 in combat against enemies using bows or magic
 Combat Arts +1Equippable combat arts +1LocktouchCan open chests without a key
 SearchSlightly increases the chance of a perfect exploration result when deployedWarning ShotCost 2 Mt 3 Hit 0Surprise ShotCost 2 Mt 3 Hit 0Twin-Shot FlowCost 10 Mt 0 Hit 0Victory GemEquippedWt 3
Master Hunter’s Eye first, then strengthen bow follow-ups with No Mercy+. This setup follows Rogue’s weapon access, mount, and battalion rules.
Forest KnightIron BowMt 9 Hit 75 Wt 6No Mercy+Hit and Crit +10 on follow-up attacksIn ShadowAvoid +10 after defeating an enemy (resets after 1 battles)Bows Lv. 3Hit and Avoid +5 when wielding a bowHunter's EyeAttack +3 on follow-up attacks when a bow is equippedHunting BasicsDex、Spd+1 Mount/DismountCan use “Mount” and “Dismount”Combat Arts +1Equippable combat arts +1
 Bow Hit +5Hit +5 when a bow is equippedWarning ShotCost 2 Mt 3 Hit 0Surprise ShotCost 2 Mt 3 Hit 0Twin-Shot FlowCost 10 Mt 0 Hit 0Victory GemEquippedWt 3
 Ferghanan HorseStr+2 Dex+1 Def+2

Master Hunter’s Eye first, then use No Mercy+ to strengthen bow follow-ups. This setup follows Forest Knight’s weapon access, mount, and battalion rules.
Bow AdeptSilver BowMt 18 Hit 75 Wt 5No Mercy+Hit and Crit +10 on follow-up attacksIn ShadowAvoid +10 after defeating an enemy (resets after 1 battles) Bows Lv. 4Hit and Avoid +7 when wielding a bowHunter's EyeAttack +3 on follow-up attacks when a bow is equippedInfantry Move[Infantry] Terrain movement cost -1 (minimum 1)
 Twin-Shot FlowCost 10 Mt 0 Hit 0Warning ShotCost 2 Mt 3 Hit 0Sky HunterMt 7 Hit 0Victory GemEquippedWt 3
 Adept ArchersGambit: Disrupting Shot
Master Hunter’s Eye first, then strengthen bow follow-ups with No Mercy+. This setup follows Bow Adept’s weapon access, mount, and battalion rules.
Bow AdeptSilver BowMt 18 Hit 75 Wt 5No Mercy+Hit and Crit +10 on follow-up attacksIn ShadowAvoid +10 after defeating an enemy (resets after 1 battles) Bows Lv. 5Hit and Avoid +10 when wielding a bowHunter's EyeAttack +3 on follow-up attacks when a bow is equippedInfantry Move[Infantry] Terrain movement cost -1 (minimum 1)Twin-Shot FlowCost 10 Mt 0 Hit 0Warning ShotCost 2 Mt 3 Hit 0Sky HunterMt 7 Hit 0Victory GemEquippedWt 3Elite HuntersGambit: Disrupting Shot
Master Hunter’s Eye first, then strengthen bow follow-ups with No Mercy+. This setup follows Bow Adept’s weapon access, mount, and battalion rules.
Hunter→Lv20Myrmidon→Lv35Forest KnightHunterIron BowMt 9 Hit 75 Wt 6Hunting BasicsDex、Spd+1Swords Lv. 1Hit +3 when wielding a swordBows Lv. 1Hit +3 when a bow is equippedReinAdjacent enemies suffer Avo -3Dodge[Infantry] Avo +5 in combat against enemies using bows or magicVictory GemEquippedWt 3Uses swords and bows while improving Str、Def, keeping a mount at the endpoint. Intermediate Myrmidon follows the earlier stages of the main sword route. This setup follows Hunter’s weapon access, mount, and battalion rules.
MyrmidonIron SwordMt 9 Hit 90 Wt 4No MercyHit and Crit +5 on follow-up attacksDexRavaging ArtsDamage dealt +6 on a critical hitHunting BasicsDex、Spd+1Swords Lv. 3Hit and Avo +5 when a sword is equippedDodge[Infantry] Avo +5 in combat against enemies using bows or magicDeadly BladeCost 2 Mt 0 Hit 0Victory GemEquippedWt 3Uses swords and bows while improving Str、Def, keeping a mount at the endpoint. Intermediate Myrmidon follows the earlier stages of the main sword route. This setup follows Myrmidon’s weapon access, mount, and battalion rules.
Forest KnightIron BowMt 9 Hit 75 Wt 6No Mercy+Hit and Crit +10 on follow-up attacksIn ShadowAvoid +10 after defeating an enemy (resets after 1 battles)Bows Lv. 3Hit and Avoid +5 when wielding a bowHunter's EyeAttack +3 on follow-up attacks when a bow is equippedHunting BasicsDex、Spd+1Mount/DismountCan use “Mount” and “Dismount”Combat Arts +1Equippable combat arts +1Bow Hit +5Hit +5 when a bow is equippedWarning ShotCost 2 Mt 3 Hit 0Surprise ShotCost 2 Mt 3 Hit 0Twin-Shot FlowCost 10 Mt 0 Hit 0Victory GemEquippedWt 3Ferghanan HorseStr+2 Dex+1 Def+2Forest KnightIron BowMt 9 Hit 75 Wt 6No Mercy+Hit and Crit +10 on follow-up attacksIn ShadowAvoid +10 after defeating an enemy (resets after 1 battles)Bows Lv. 3Hit and Avoid +5 when wielding a bowHunter's EyeAttack +3 on follow-up attacks when a bow is equippedHunting BasicsDex、Spd+1Mount/DismountCan use “Mount” and “Dismount”Combat Arts +1Equippable combat arts +1Bow Hit +5Hit +5 when a bow is equippedWarning ShotCost 2 Mt 3 Hit 0Surprise ShotCost 2 Mt 3 Hit 0Twin-Shot FlowCost 10 Mt 0 Hit 0Victory GemEquippedWt 3Ferghanan HorseStr+2 Dex+1 Def+2Build approach and suitable stages
Cleansing Blade-based critical build: The Calamity Lv60
Move into The Calamity after reaching Sword S. This setup follows The Calamity’s weapon access, mount, and battalion rules.
Stay mounted with swords and bows: Forest Knight Lv35, Lv60
Uses swords and bows while improving Str、Def, keeping a mount in the final class. The intermediate Myrmidon stage follows the main Sword route’s early progression. This setup follows Forest Knight’s weapon access, mount, and battalion rules.
DexWidely recommendedDexVery strongDexUseful for specific strategies
 Swords Lv. 2
 Swords Lv. 5
 Swordfaire
 Bows Lv. 2
 Bowfaire
 Positioning
 Surprise Attack
 Spear
 Tempest Spear
 Spears Lv. 1
 Spears Lv. 2
 Spears Lv. 3
 Ambush Charge
 Spears Lv. 4
 Spears Lv. 5
 Spearfaire
 Axe
 Smash
 Axes Lv. 1
 Axes Lv. 2
 Axes Lv. 3
 Axes Lv. 4
 Axes Lv. 5
 Axefaire
 Gauntlet
 Deal Death
 Fists Lv. 1
 Fists Lv. 2
 Retreating Assault
 Fists Lv. 3
 Fists Lv. 4
 Fists Lv. 5
 Fistfaire
 White Magic
 Laia
 White Magic Lv. 1
 White Magic Lv. 2
 White Magic Lv. 3
 White Magic Lv. 4
 White Magic Lv. 5
 White-Magic Mastery
 Heavy Armor
 Timely Guard
 Armored Combat
 Bld
 Authority
 Rein+
 Anti-flier tactics
 Gambit Master
 Wind
 Black Magic Lv. 1
 Black Magic Lv. 2
 Black Magic Lv. 3
 Black Magic Lv. 4
 Black Magic Lv. 5
 Black-Magic Mastery
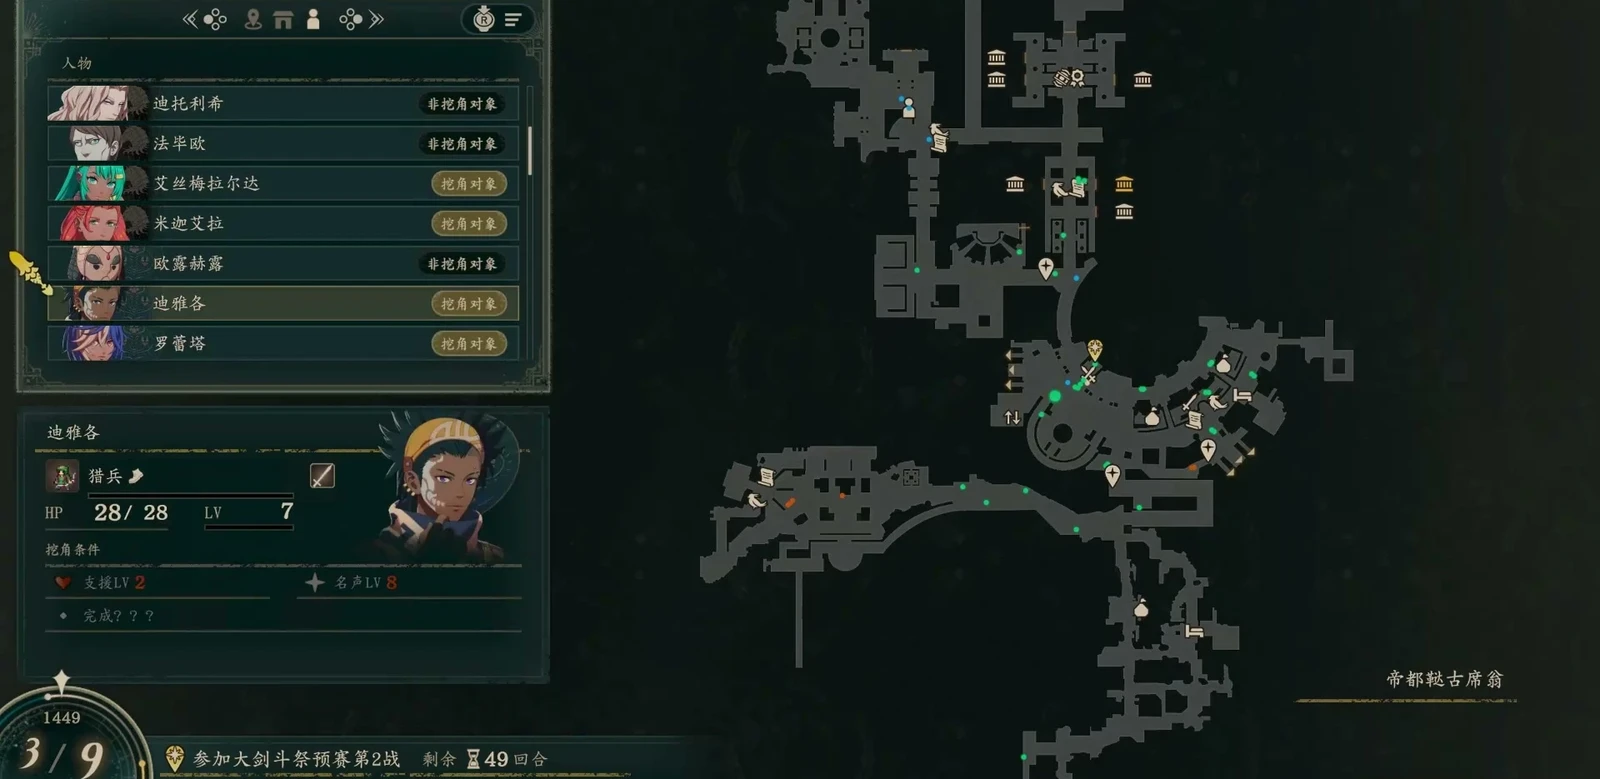
Diego: Recruitable on Cai's, Dietrich's, Theodora's, and Leda's routes (Renown 8–10).
Cai's storyRecruitable 10
 3From Chapter 3Orchel's Paralogue: Orchel's Regret
Steps
Recruitable. Available to meet early, but joining requires the prerequisite paralogue. Give a gift in Dagsion to unlock recruitment, then reach renown Lv10 and support Lv3 with Cai. Complete Orchel's Paralogue: Orchel's Regret first, allow travel time, then return to negotiate. Finish before this route's Chapter 12 main battle; normal recruitment cannot be completed after entering the War Arc. Gift options includeDecorative Arrows, recorded for sale at 600G in the gift shop at Imperial Capital Dagsion's open-air market.
- PrerequisiteFirst clear Orchel's Paralogue: Orchel's Regret
Dietrich's storyRecruitable93From Chapter 4Orchel's Paralogue: Orchel's RegretSteps
Recruitable. Can be met early, but joins only after the prerequisite paralogue. In Dagsion, give one gift to unlock recruitment, then reach Renown Lv9 and support Lv3 with Dietrich. Clear Orchel's Paralogue: Orchel's Regret first, allow time for the round trip, then return to negotiate with the character. Finish before this route's Chapter 12 main battle; ordinary recruitment is unavailable once the War Arc begins. Gift options: Decorative Arrows, recorded for sale at 600G in the gift shop at Imperial Capital Dagsion's open-air market.
- PrerequisiteFirst clear Orchel's Paralogue: Orchel's Regret
Theodora's storyRecruitableEasiest option82From Chapter 5Orchel's Paralogue: Orchel's RegretSteps
Recruitable. Can be encountered early, but joining requires the prerequisite paralogue. Give one gift in Dagsion to unlock recruitment, then reach renown Lv8 and support Lv2 with Theodora. Complete Orchel’s Paralogue: Orchel’s Regret, allow time for the round trip, then return to town to negotiate in person. Finish before leaving town on 10/24 and before the main battle of Chapter 12 on this route. Gift options:Decorative Arrows, recorded for sale at 600G in the gift shop at Imperial Capital Dagsion's open-air market.
- PrerequisiteFirst clear Orchel's Paralogue: Orchel's Regret
Leda's storyRecruitable83From Chapter 4Orchel's Paralogue: Orchel's RegretSteps
Recruitable. Can be encountered early, but joining requires the prerequisite paralogue. Give a gift in Dagsion to unlock recruitment, then reach Renown Lv8 and bond Lv3 with Leda. Complete Orchel's Paralogue: Orchel's Regret first, allow time for the round trip, then return to negotiate. Complete before this route's Chapter 12 main battle; regular recruitment closes in the War Arc. Gift options:Decorative Arrows, recorded for sale at 600G in the gift shop at Imperial Capital Dagsion's open-air market.
- PrerequisiteFirst clear Orchel's Paralogue: Orchel's Regret
Renown level Bond Level with this route's protagonist. For all characters across the four routes, see Recruitment; see recruitment steps at How to recruit。
 Most effective gifts
All are favorites and sold in shops. Diego mainly favors bow-related gifts. Favorites display double arrows in-game and grant the most affinity.
Find where to buy these on the map→ Where to buy all 8 favorite gifts→
Favorite9 items

Likes9 items
LikesWalking in the forest, gathering medicinal herbs, OrchelInterestsPlaying the flute, devoted service to Orchel
Bond partners10 characters · 3 can reach A · 1 have confirmed paired endings
 A
 A
 A
 B
 B
 B
 C
 C
 C
 C
Letters indicate the highest available support conversation (C = support Lv2, B = support Lv3, A = support Lv4); A paired ending is confirmed,For the rules, seeBonds。
A young man of the battle-skilled Har-Hari tribe, with its distinctive patterns engraved on his arms and upper body. Taciturn and unsociable, he has nevertheless sworn lifelong loyalty to Orchel and follows her faithfully.
Details
| Title | A warrior from a forest tribe |
|---|---|
| Affiliation | Dew on Linaria |
| Birthday | 11/4 |
| Likes | Walking in the forest, gathering medicinal herbs, Orchel |
| Interests | Playing the flute, devoted service to Orchel |
| Japanese voice | Kengo TakanashiWikipedia (Japanese) |
| English voice actor | Nazeeh TarshaVoice actor database |
Relationships


In the story
Swears loyalty to a lifesaver
Orchel saved Diego in 1446. He then swore lifelong loyalty and served as her guard during the Heroic Games. Though not good with words, he always stays by her side.
The branch that reunites a scattered peopleSpoilers
In his paired epilogue with Eshmel, after years at Credna Temple he decides to reunite his scattered people. Years of effort make him a powerful leader, with even other forest tribes joining his group; Eshmel always receives a warm welcome on later visits.
Trivia
- His surname means “gold” in Spanish.