
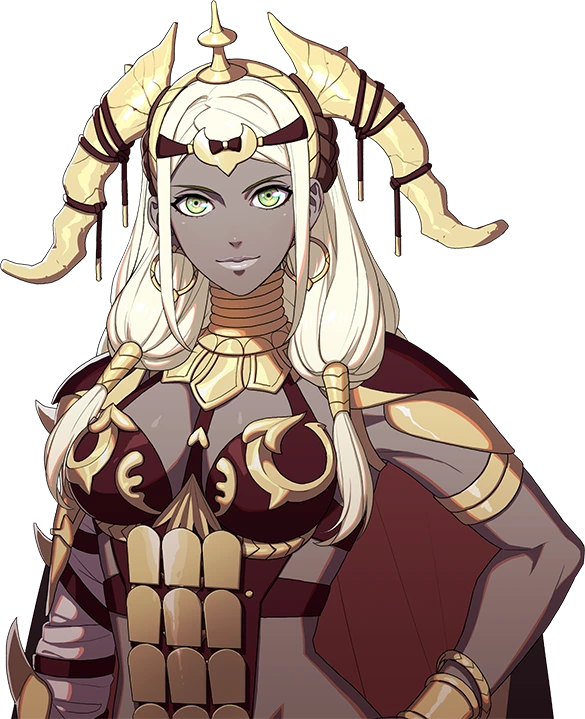
Theodora
Sセオドラ · Theodora Theodora route· Available from the startProtagonist
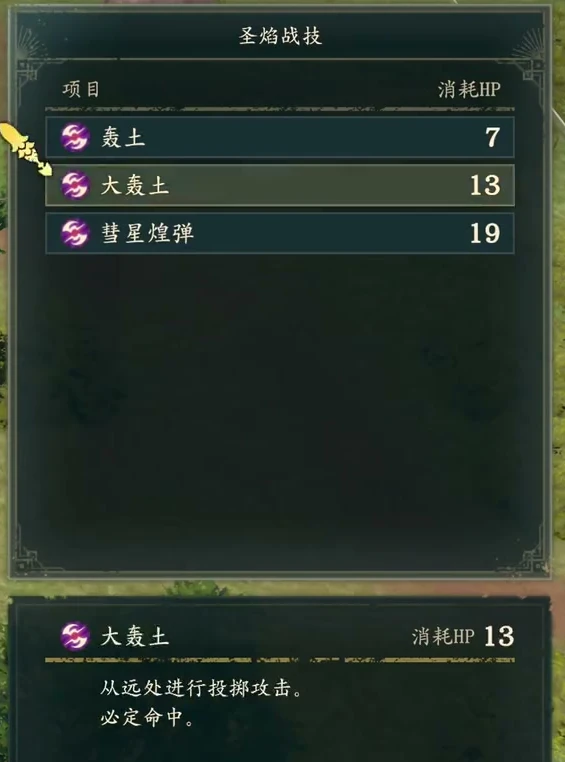
The spear-and-white-magic route holds the front line and heals. With another armored mainstay already available, choose riding or flying to extend her Blaze boulder attacks.
 Noble Lv1
 Spear
 White Magic
 Authority


 Fan art →
Nine stats
| HP | Str | Mag | Spd | Dex | Def | Res | Lck | Cha | Total | |
|---|---|---|---|---|---|---|---|---|---|---|
| Growth rates | 70% | 50% | 30% | 40% | 40% | 40% | 30% | 30% | 50% | 380% |
| Overall rank63 characters total | Rank 1 | Rank 8 | Rank 25 | Rank 29 | Rank 39 | Rank 14 | Rank 26 | Rank 36 | Rank 4 | Rank 6 |
| Base statsNoble Lv1 | 30 | 6 | 6 | 6 | 6 | 7 | 5 | 6 | 8 | 80 |
| Base stat ranking63 characters total | Rank 23 | Rank 56 | Rank 31 | Rank 51 | Rank 55 | Rank 32 | Rank 40 | Rank 50 | Rank 30 | Rank 56 |
| Lv60 expected statsArcher for Hit, then Spear and White Magic into The Trident | 88 | 46 | 23 | 22 | 38 | 51 | 21 | 25 | 40 | 354 |
| Expected rank62 characters total | Rank 2 | Rank 13 | Rank 27 | Rank 54 | Rank 36 | Rank 3 | Rank 30 | Rank 46 | Rank 5 | Rank 6 |
Proficiency
SpearWhite MagicAuthorityWeakness Black MagicBudding talent—
Starting skills
| Category | Skills | Effect |
|---|---|---|
| Personal skill |  Royal Resolve | 30% chance to halve damage taken when attacked |
| Level skills |  Unstoppable Force | Multiplies damage dealt to obstacles by 3 |
| Level skills |  Direct Hit | 30% chance to deal +10 damage when attacking with a Blaze Art |
| Bloodmark |  Diadem of Duality | 25% chance of Attack +3 when attacking |
| Blaze Arts |  Earthen Throw | Split the ground with a throwing attack |
Master Archer for Crescendo to improve accuracy and raise SpdDex; start training White Magic toward B as a Guardian for  Physic. In Part 3, briefly master Castle Knight for Intercept, then return to Sentinel to avoid Castle Knight reducing SpdRes; finish in The Trident to retain triple white magic uses. Castle Knight is inserted to obtain its mastery skill; leave after mastering it.
 Mage Instructors(C)

Follow mounted classes: begin as an Ornius Rider, use Armored Ornius Rider for mobility and Protection, then become a Dragoon to cross terrain and find angles for throwing Blaze Arts; take Bau Lord at Master tier. Reach Flying C and Spear B before becoming a Dragoon.
then Guardian and Sentinel into The Trident. The new video at 01:14–02:55 also offers the armored route without extra Bow or Sword training as an alternative.
Fix Theodora’s accuracy before building a lance-and-white-magic frontliner
Original video: Theodora’s classes and development plan · English video creator Jay Dunna
 Theodora suits a lance frontliner who can heal, but accuracy and Speed are worth addressing along the way. Start in
 Soldier, use intermediate
 Archer mastery for
 Crescendo, spend most advanced-class time in
 Guardian training White Magic, switch to
 Sentinel in Part 3, and finish in
 The Trident. Her HP and Strength are already high. Focus on landing attacks, reducing enemy follow-ups, and actually developing her white magic.

High HP still needs Speed and Dexterity
Her HP growth is among the highest in the roster. She has 50% Strength, 50% Charm, and 380% total personal growths. Her 30% Magic does not favor a dark-magic damage role, but her white magic list deserves investment: healing, Physic at White Magic B, Seraphim against late-game netherfiends, and Aura at S. A durable character who can also heal allies is the key value of this path.
Even 40% Speed and 40% Dexterity can fall behind in Part 3 on Hard. Her 40% Defense and 30% Resistance provide a foundation for taking hits, but cannot replace accuracy and Attack Speed. Stacking HP, Strength, and Defense works early. If you ignore Speed and Dexterity throughout, reliable follow-ups and Blaze Art accuracy become harder later.
Pick up Crescendo in an intermediate class
Armored Knight offers good HP, Strength, and Defense growths, and its mastery,  Great Counter, adds 3 Attack when the enemy initiates. I mostly used armor in this playthrough, but recommend an Archer detour instead. Crescendo grants 3 Hit per kill, up to 30 on the current map, improving normal attacks and Blaze Arts. Archer also improves Speed and Dexterity growths, so the short stay offers more than mastery alone.
The cost is that Archer only uses bows. You cannot train in the class while continuing to use lances as usual. To improve Speed while keeping lances, choose  Myrmidon. For a stronger Speed focus, you can switch to
 Rogue after Archer mastery and at least retain swords. Her base Speed is not beyond help; this detour creates more follow-up opportunities later.
If you do not want extra bow or sword training, stay in Armored Knight. That branch still improves frontline strength, but does not also solve accuracy and Speed. Crescendo needs kills to stack, too: you do not begin each map with 30 Hit.
Start training White Magic as a Guardian
Advanced  Ranger helps Speed and Dexterity. A short stay can further adjust growths, but the goal here is leveling benefits; its bow-counter mastery is not central to the lance-and-white-magic build.
 Shido also uses lances, and Ever Vigilant restores a little HP after a critical kill. Theodora does not crit often, so do not build her main sustain around it.
Spend most advanced-class time in Guardian. It combines lances, Combat Arts, and white magic, with Magic Heal +10 improving recovery. Mastery grants  Brace, giving Protection +3 after a kill until your next player phase. She gains fuller action choices: defeat an enemy and keep holding the line, or turn to healing when free.
Invest in White Magic actively instead of remembering it only in Part 3. You can buy 10 White-Magic Manuals across three towns each chapter. Check their shop stock on the world map and collect them. Cast spells in spare moments to train proficiency while continuing to use lances in major battles. Aim first for Physic at B. A frontline body with ranged healing is far more convenient than one who must stand beside an ally to heal.
Prepare a light lance and cavalry coverage in Part 1
Use  Mahadu's Spear as the main Part 1 weapon and carry a Javelin upgraded as far as possible for ranged exchanges.
 Da Mina Spear adds accuracy to Combat Arts while Dexterity is still lacking, and Ridersbane handles cavalry. Carry several Vulneraries to leave room for recovery after pushing forward.
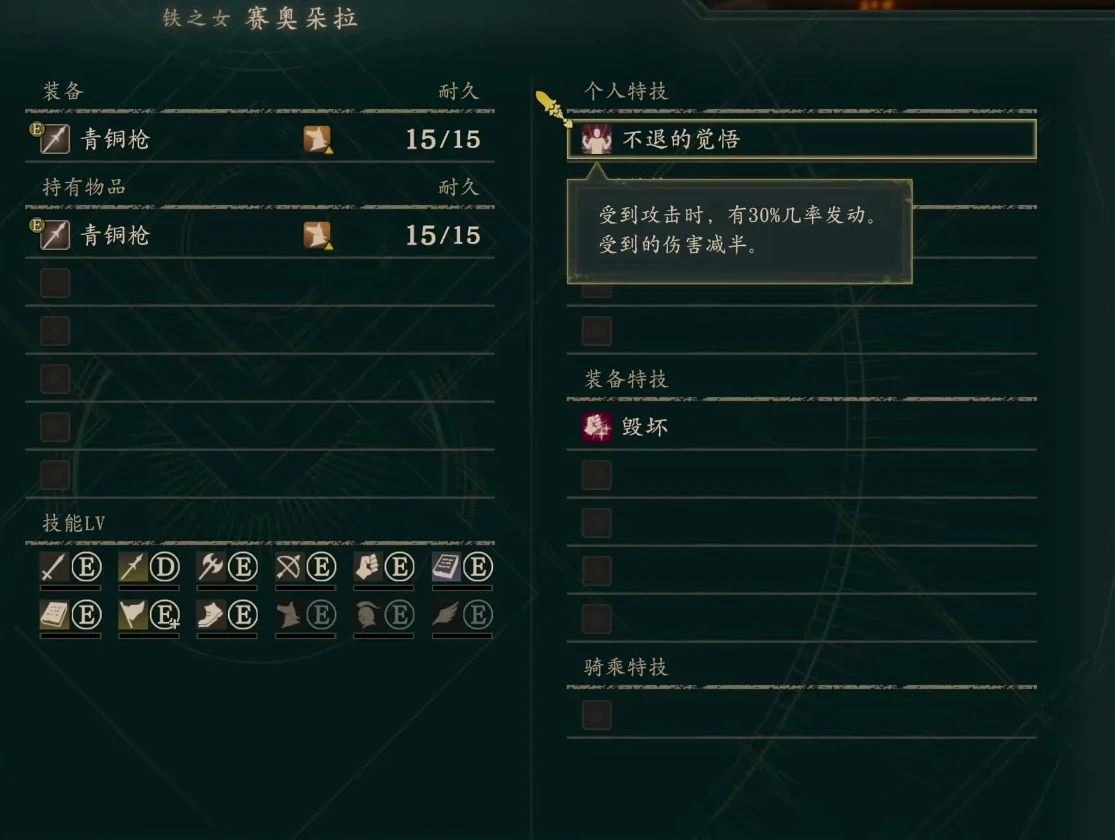
Royal Resolve has a 30% chance to halve damage when attacked, offering extra survivability. Overblaze strengthens her personal ability. Still keep enough HP to survive without the damage reduction. A random activation cannot be treated as guaranteed.
Stay in Sentinel and borrow Castle Knight's Intercept
When master exams unlock in Part 3, Sentinel directly extends Guardian: an extra Combat Art slot, continued Magic Heal +10, and doubled white magic uses. Seraphim is effective against netherfiends, especially armored ones late in the game. Mastery grants  Resolute Stance, adding 5 Protection and 5 Resilience at full HP. Once injured, you cannot keep counting those 5 points.
For more durability, briefly enter  Castle Knight to learn
 Intercept, reducing damage taken by 5 when attacked. It has excellent HP, Strength, and Defense growths but lowers Speed and Resistance growths. Mainly borrow its mastery rather than staying long and becoming more vulnerable to follow-ups.
Another useful mastery comes from  Orichaldia:
 Fierce Spear prevents enemy follow-ups in the combat where you use that lance Combat Art. It is not a permanent passive; you must select the art. If you still need Speed,
 Swordmaster can continue using lances. Celestial Trooper’s Lightning Reflexes requires at least 10 more Attack Speed than the enemy when initiating. Unless Speed has grown exceptionally well in your save, do not make that branch the main plan. Keep Sentinel for most of Part 3 and insert other masteries as needed.
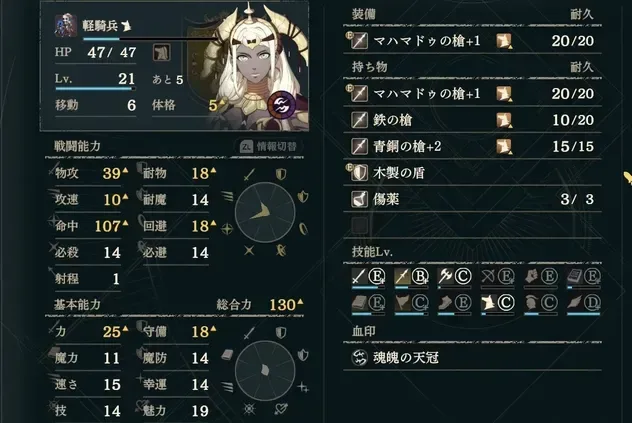
The Trident keeps white magic useful through the end
Choose The Trident as the divine class. It retains an extra Combat Art slot and Magic Heal +10, and triples white magic uses, giving Seraphim and Aura more room to work. Mastery grants  Divine Wall for Defense +10, turning her already high HP into more frontline durability.
The endgame Theodora shown here has 60 Strength, 42 Speed, 47 Dexterity, 47 Defense, 37 Resistance, and 58 Charm. Strength is excellent, but Speed is still not high enough to ignore follow-ups. Charm can support Battalions. This setup emphasizes reliable attacks and durability without specifying one Battalion.
Endgame weapons have clear jobs: Da Mina Spear for Combat Art accuracy, Pilum for long throws, Halberd against armor, Mahadu’s Spear for Full Moon, and Ridersbane for cavalry. Full Moon is upgraded to +4 here, gaining 6 might. The inventory also includes a Concoction. Armored enemies and cavalry are separate effectiveness targets. Change lances for the enemy you are fighting.
Replace Direct Hit with Divine Wall first
The five equipped skills shown are:
| Skill | Reason to keep it |
|---|---|
| Crescendo | She can secure kills and turn them into Hit for more reliable later attacks. |
| Direct Hit | Blaze attacks can deal 10 extra damage, but activation is inconsistent. |
| Resolute Stance | Improves durability at full HP, so healing matters. |
| Infantry Move | Reduces infantry movement costs through difficult terrain so the frontliner can reach combat. |
 Spearfaire | Improves Hit, Avoid, and damage with her main weapon type. |
After learning Divine Wall, replace Direct Hit first. On Hard, thrown stones often cannot finish enemies directly, and Direct Hit's bonus damage needs a chance trigger. Crescendo matters for later accuracy, Resolute Stance for survival, and Infantry Move for reaching the position in time, so these deserve their slots more. Learn Divine Wall first, then replace Direct Hit in the original five-slot setup.
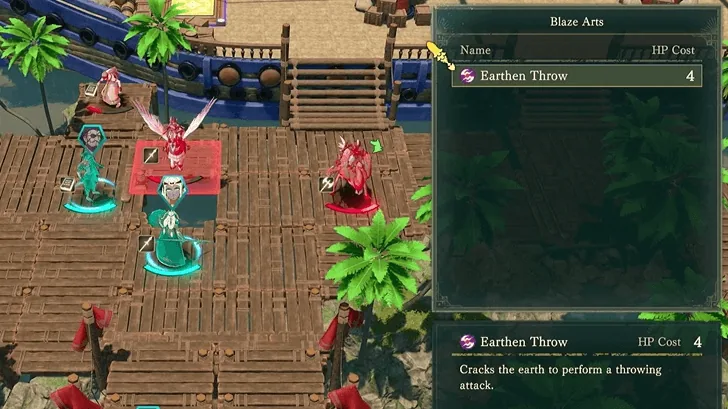
Use Combat Arts to prepare for the next hit
Choose spear arts for the next battle's enemies: upgraded Tempest Spear adds Hit; Armored Blow improves Protection after a kill but cannot follow up; Protective Storm adds Protection during the current combat; Brilliant Strike adds Resistance after a kill, useful before facing mages. Distinguish immediate effects from on-kill effects rather than counting a later defensive bonus on the opening attack.
After completing Dietrich’s Parts 1 and 2, Combat Art upgrades can improve these moves further. Keep training White Magic too. The displayed build already has 9 Seraphim uses, and manuals can keep pushing toward Aura at S. She remains most comfortable near the front: throw at distant targets, use lances against enemies ahead, and cast when allies need healing. A healer who can hold her ground gives your front line more freedom.
More guides
Site guides

Use Armored Knight before Guardian, relying on Theodora's HP to hold the front and adding healing. Train White Magic in advance.
The spear/White Magic route is Soldier → Armored Knight → Guardian → Sentinel. Healing duties become complete only after Guardian unlocks and White Magic is trained. Blaze throwing is already useful in Part 1. Mounted or flying alternatives extend its coverage but require separate training from spear/White Magic.
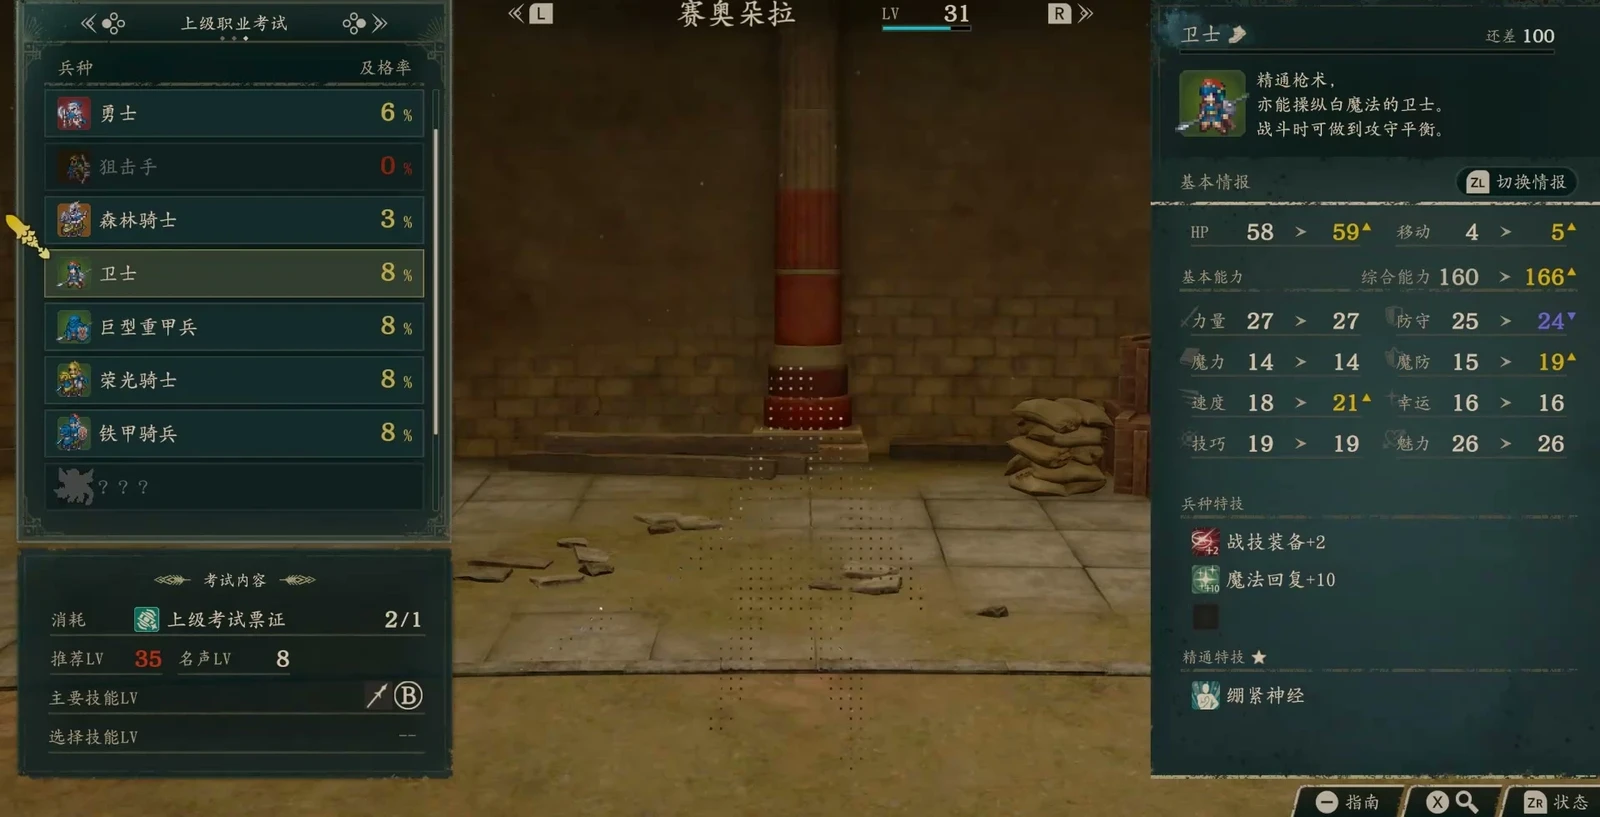
Class progression by stage
Part 1: train Spear alongside White Magic
- At level 5, Renown 1, and Spear D, qualify for Soldier. Continue her existing Spear training rather than splitting investment. Defense Basics mastery gives 1 Defense. Use accurate spears and combat arts to finish weakened enemies, leaving distant threats to Blaze boulders.
- At level 20, Renown 4, Spear C, and Heavy Armor E+, qualify for
 Armored Knight. Build HP, Strength, and durability while retaining spears. Mastery grants Great Counter, adding 3 Attack when attacking second.
- Train White Magic to B alongside this, aiming for Physic. Seraphim at White Magic C handles fiends. Learn the spells before moving into a white-magic class. Changing to Guardian does not automatically fill the spell list.
- If Hit is a problem, visit Archer for Crescendo: level 20, Renown 4, Bow C. Master it, then return to the main route. Each kill adds 3 Hit for that map, up to 30. You can use the inn to accumulate class experience. Borrow the skill rather than spending this entire leveling stage in a bow class on a spear-and-shield route.
Use level 35, Renown 8, and Spear B as the reference for Guardian, and unlock the class first. Theodora needs military preparation requests; required counts and chapters differ across records. Check whether the class menu is unlocked rather than copying another route's challenge quests. If locked, remain Armored Knight and keep training Spear and White Magic.

Part 2: engage and heal
Guardian uses spears and White Magic. Stand at the front of the main force, survive a round, then heal or attack. Calculate survival first, including total follow-up damage. For dedicated physical defense, continuing armored classes is also an option.
Prioritize accuracy in frequently used spear arts, then Protection or recovery. Bring an accurate spear and a long-range throwing spear to cover close and ranged targets. Choose from forecasts instead of sacrificing Hit for single-hit Might. On foot, diagonally covering gambits can fill the blind spots of straight-line throws. Exact spear and battalion names, including the diagonal gambit's battalion, remain incompletely verified.
Find a healer after Blaze attacks rather than facing the next enemy round wounded. There is no fixed chapter for reaching level 35 or mastering Guardian; follow your training progress.

Part 3: Sentinel or mobile throwing
On the main route, take the Sentinel exam at level 45 and Spear A after clearing the first section, continuing spears and white magic. Resolute Stance mastery gives +5 Protection only at full HP. Healing therefore also supports tanking; do not apply the bonus to a low-HP stat sheet.
If  Tobias already tanks in armor, make her mounted or flying to extend throwing coverage. The mounted path is Ornius Rider → Bardinger → Orichaldia. A complete level-by-level flying path is not established; train the two routes separately.
- Bardinger: level 35, Renown 8, Riding C, and Spear or Sword B. Orichaldia: level 45, Riding B, Spear or Sword A, and Segment 1 cleared.
- Keep mobility and hand White Magic healing to another unit.
- Dragoon: level 35, Renown 8, Flying C, Spear or Axe B, and its unlock. Bau Lord: level 45, Flying C, Spear or Axe A, and Segment 1 cleared.
- Cross terrain to find throwing angles, watching bows and actual incoming damage.
Ornius Rider is mounted; switching to flying requires separate Flying training. Specific mount individuals and fixed Boons for these plans remain unconfirmed. Mounted and flying units cannot take battalions; recheck magic access after changing too. See battalion restrictions. For tanking alone, prepare Castle Knight at level 45 with Spear A and Heavy Armor C, sacrificing spear/White Magic duties and requiring a solution for low movement.

Compare the existing routes in the simulator.
Line up targets before throwing
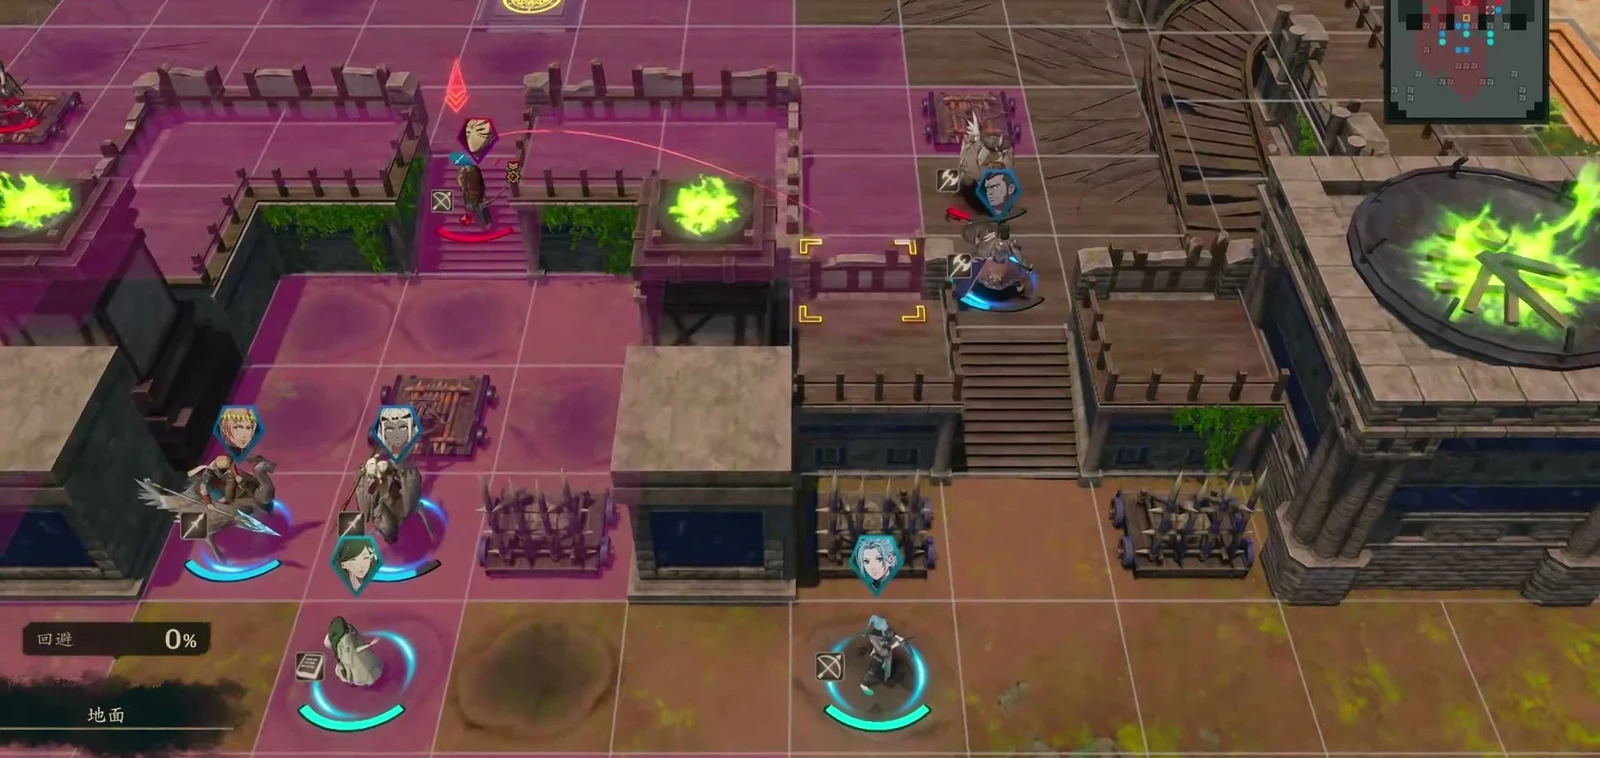
Another enemy in front of the target may block the throw. Piercing attacks work against several enemies in a straight line; check preview coverage first. Large enemies occupy multiple tiles, making multi-tile attacks valuable. Compare them with ordinary single-target damage.
The spear/White Magic route tanks and heals near the front; mobile routes find throwing angles and reach objectives. Part 3 enemies are tougher, and throws may not kill outright. Check damage, HP costs, and allied finishing attacks rather than relying on random extra damage.
Recruitment details
She is the protagonist of Theodora's route and cannot be recruited normally on other protagonists' Part 1 routes. Later availability follows protagonist progression requirements. See Theodora recruitment details.
Calculate incoming damage without the reduction proc
- Treating a 30% damage-reduction trigger as permanent halved damage. Royal Resolve is chance-based. Check survival without it, and do not include random extra Blaze damage in a guaranteed kill threshold.
- Treating the Archer exam as completed mastery. Crescendo needs full class experience, then equipping and kills to build stacks. You do not start with +30 Hit.
- Expecting ranged healing immediately after changing to Guardian. She needs White Magic B. Armor, riding, and flying routes cannot retain another class's spell permissions.
- Assuming high HP makes doubles harmless. At low Speed, count both hits and concentrated attacks. Recheck bow threats after taking flight.
Comments
Noble→Lv5 Ornius Rider→Lv20
 Armored Ornius Rider→Lv35
 Dragoon→Lv45
 Bau LordMahadu's Spear
 Mt 10 Hit 85 Wt 8
 Unstoppable ForceMultiplies damage dealt to obstacles by 3
 Spears Lv. 1Hit +3 with a spear equipped
 ReinAdjacent enemies suffer Avo -3
 Combat BasicsHit, Avoid +3Full MoonCost 3 Mt 5 Hit 0Earthen ThrowCost HP 6 Mt Str+18

 Victory GemWt 3
First use the story-obtained Mahadu's Spear; prepare Spear and Riding for an ornius mount, filling each unlearned equipment slot according to its need field.
Mahadu's SpearMt 10 Hit 85 Wt 8Direct Hit30% chance to deal +10 damage when attacking with a Blaze ArtSpears Lv. 1Hit +3 with a spear equipped Knightly SensesAvoid +10 in combat against spear usersReinAdjacent enemies suffer Avo -3
 Offense BasicsStr、Mag+1
 Mount/DismountCan use “Mount” and “Dismount”Full MoonCost 3 Mt 5 Hit 0Earthen ThrowCost HP 6 Mt Str+18Victory GemWt 3
 Ornius
 Rider first provides mobility and Spd growth while continuing to use spears; equip Knightly Senses after Riding D and Offense Basics after mastery.
Mahadu's SpearMt 10 Hit 85 Wt 8Direct Hit30% chance to deal +10 damage when attacking with a Blaze Art Spears Lv. 3Hit and Avo +5 when a spear is equippedKnightly SensesAvoid +10 in combat against spear users
 Sense ThreatAvo +20 in combat if the enemy's attack is effective or super-effective against youOffense BasicsStr、Mag+1Mount/DismountCan use “Mount” and “Dismount”Full MoonCost 3 Mt 5 Hit 0Earthen ThrowCost HP 6 Mt Str+18Victory GemWt 3Ornius
Continue riding an ornius as an Armored Ornius Rider and obtain Sense Threat; train Flying C and Spear B and unlock Dragoon to prepare for switching to a dragon at level 35.
Mahadu's SpearMt 10 Hit 85 Wt 8Direct Hit30% chance to deal +10 damage when attacking with a Blaze ArtSpears Lv. 3Hit and Avo +5 when a spear is equipped Read the WindsAvo +10 in combat against bow usersSense ThreatAvo +20 in combat if the enemy's attack is effective or super-effective against you
 BesiegerHit +20 in combat if the enemy occupies advantageous terrain
 Tempest SpearCost 2 Mt 4 Hit 10Armored BlowCost 4 Mt 3 Hit 0Protective StormCost 6 Mt 5 Hit 0Full MoonCost 3 Mt 5 Hit 0Earthen ThrowCost HP 6 Mt Str+18Victory GemWt 3Wyvern
Dragoon switches to a flying dragon to cross terrain and find angles for throwing Blaze Arts stones; replace the ornius-stage setup, retain this route's Sense Threat, and equip Besieger after mastering Dragoon.
Mahadu's SpearMt 10 Hit 85 Wt 8PilumMt 11 Hit 70 Wt 12Halberd Mt 12 Hit 70 Wt 12Ridersbane
 Mt 12 Hit 70 Wt 10
 ConcoctionVictory GemWt 3Direct Hit30% chance to deal +10 damage when attacking with a Blaze ArtSpearfaireHit and Avo +10, attack +3 when wielding a lanceRead the WindsAvo +10 in combat against bow usersSense ThreatAvo +20 in combat if the enemy's attack is effective or super-effective against youBesiegerHit +20 in combat if the enemy occupies advantageous terrain
 Tempest SpearCost 2 Mt 4 Hit 10Protective StormCost 6 Mt 5 Hit 0Brilliant StrikeCost 5 Mt 5 Hit 0Full MoonCost 3 Mt 5 Hit 0Earthen ThrowCost HP 6 Mt Str+18Victory GemWt 3Wyvern
After clearing Part 3 section 1 and reaching Spear A and Flying C, move into Bau Lord. At Spear S+, replace Spears Lv. 3 with Spearfaire and continue mobile stone throwing and spear combat arts.
DexWidely recommendedDexVery strongDexUseful for specific strategies
 Spears Lv. 2
 Spears Lv. 4
 Spears Lv. 5
 White Magic Lv. 1
 White Magic Lv. 2
 White Magic Lv. 3
 White Magic Lv. 4
 White Magic Lv. 5
 White-Magic Mastery
 Attack Formation
 Rein+
 Attack Formation+
 Frontline Gambit
 Gambit Master
 Sword
 Wrath Strike
 Swords Lv. 1
 Swords Lv. 2
 Swords Lv. 3
 Heavy Sword Smash
 Swords Lv. 4
 Swords Lv. 5
 Swordfaire
 Axe
 Spike
 Axes Lv. 1
 Axes Lv. 2
 Axes Lv. 3
 Axes Lv. 4
 Axes Lv. 5
 Axefaire
 Bow
 Curved Shot
 Bows Lv. 1
 Heavy Lead Arrow
 Bows Lv. 2
 Bows Lv. 3
 Bows Lv. 4
 Bows Lv. 5
 Bowfaire
 Gauntlet
 Mighty Fist
 Fists Lv. 1
 Fists Lv. 2
 Fists Lv. 3
 Fists Lv. 4
 Fists Lv. 5
 Fistfaire
 Infantry
 Close Quarters
 Avoid Fatality
 Avoid Fatality+
 Close Quarters+
 Infantry Move+
 Knight’s Vanguard
 Flying
 Flitting Flier
 Heavy Armor
 Armored Combat
 Heavy Break
 Heavy Break+
 Bld
 Counter Flurry
 Build +
 Fire
 Black Magic Lv. 1
 Black Magic Lv. 2
 Black Magic Lv. 3
 Black Magic Lv. 4
 Black Magic Lv. 5
 Black-Magic Mastery
Theodora: joins through the story in Theodora's story.
 Cai's storyCannot recruit
The four protagonists cannot be recruited in another protagonist’s Part I; guest or enemy appearances do not count as recruitment
 Dietrich's storyCannot recruit
The four protagonists cannot be recruited in another protagonist’s Part I; guest or enemy appearances do not count as recruitment
Theodora's storyCurrent route's protagonistPart I, Chapter 1, current route's protagonist
 Leda's storyCannot recruit
The four protagonists cannot be recruited in another protagonist’s Part I; guest or enemy appearances do not count as recruitment
 Renown level
 Bond Level with this route's protagonist. For all characters across the four routes, see Recruitment; see recruitment steps at How to recruit。
 Most effective gifts
All are favorite gifts and available in shops. Favorites display double arrows in-game and grant the most affinity.
Favorite3 items
Likes18 items
 Joint-Relief Gloves300G · BowWing Fletching300G · BowDecorative Arrows600G · Bow
 Decorative BowBow
 Eastern Black Silk3000G · FashionGaudy Bangle450G · FashionEastern Earrings800G · FashionExquisite Ring1500G · FashionStrong Seasonings200G · CookingDual Fish Knives700G · CookingDagda Beard Grass200G · HorsesHorse-Grooming Kit400G · HorsesSharp Dagger800G · WeaponOrgus Coffee150G · CoffeeShield Portrait1000G · PaintingRare Spices500G · Spicy foodTraining Bracelet450G · TrainingEastern Tea Leaves2000G · Drinks
LikesBattle, seeing the people of Saramis prosperInterestsHunting, gauntlet training
Bond partners16 characters · 8 can reach A · 2 have confirmed paired endings
 AEshmel
 ATobias
 ACai
 ADietrich
 ALeda
 ALilian
 ALysander
 ANezha
 BBertrand
 BBonaventure
 BSimon
 BTalimun
 BTialla
 CAlexandra
 CDiego
 CTroy
Letters indicate the highest available support conversation (C = support Lv2, B = support Lv3, A = support Lv4); A paired ending is confirmed,For the rules, seeBonds。
The young queen of the Kingdom of Saramis, with an unyielding will and the talent of a ruler. Her right arm can shatter stone barehanded. She enters the Heroic Games to fulfill her homeland's centuries-old wish.
Details
| Title | Queen of the Kingdom of Saramis |
|---|---|
| Affiliation | Megaira's Flame |
| Origin | Kingdom of Saramis |
| Height | 177 cm |
| Birthday | 2/12 |
| Likes | Battle, seeing the people of Saramis prosper |
| Interests | Hunting, gauntlet training |
| Japanese voice | Minami TakayamaWikipedia (Japanese) |
| English voice actor | Shara KirbyVoice actor database |
Relationships





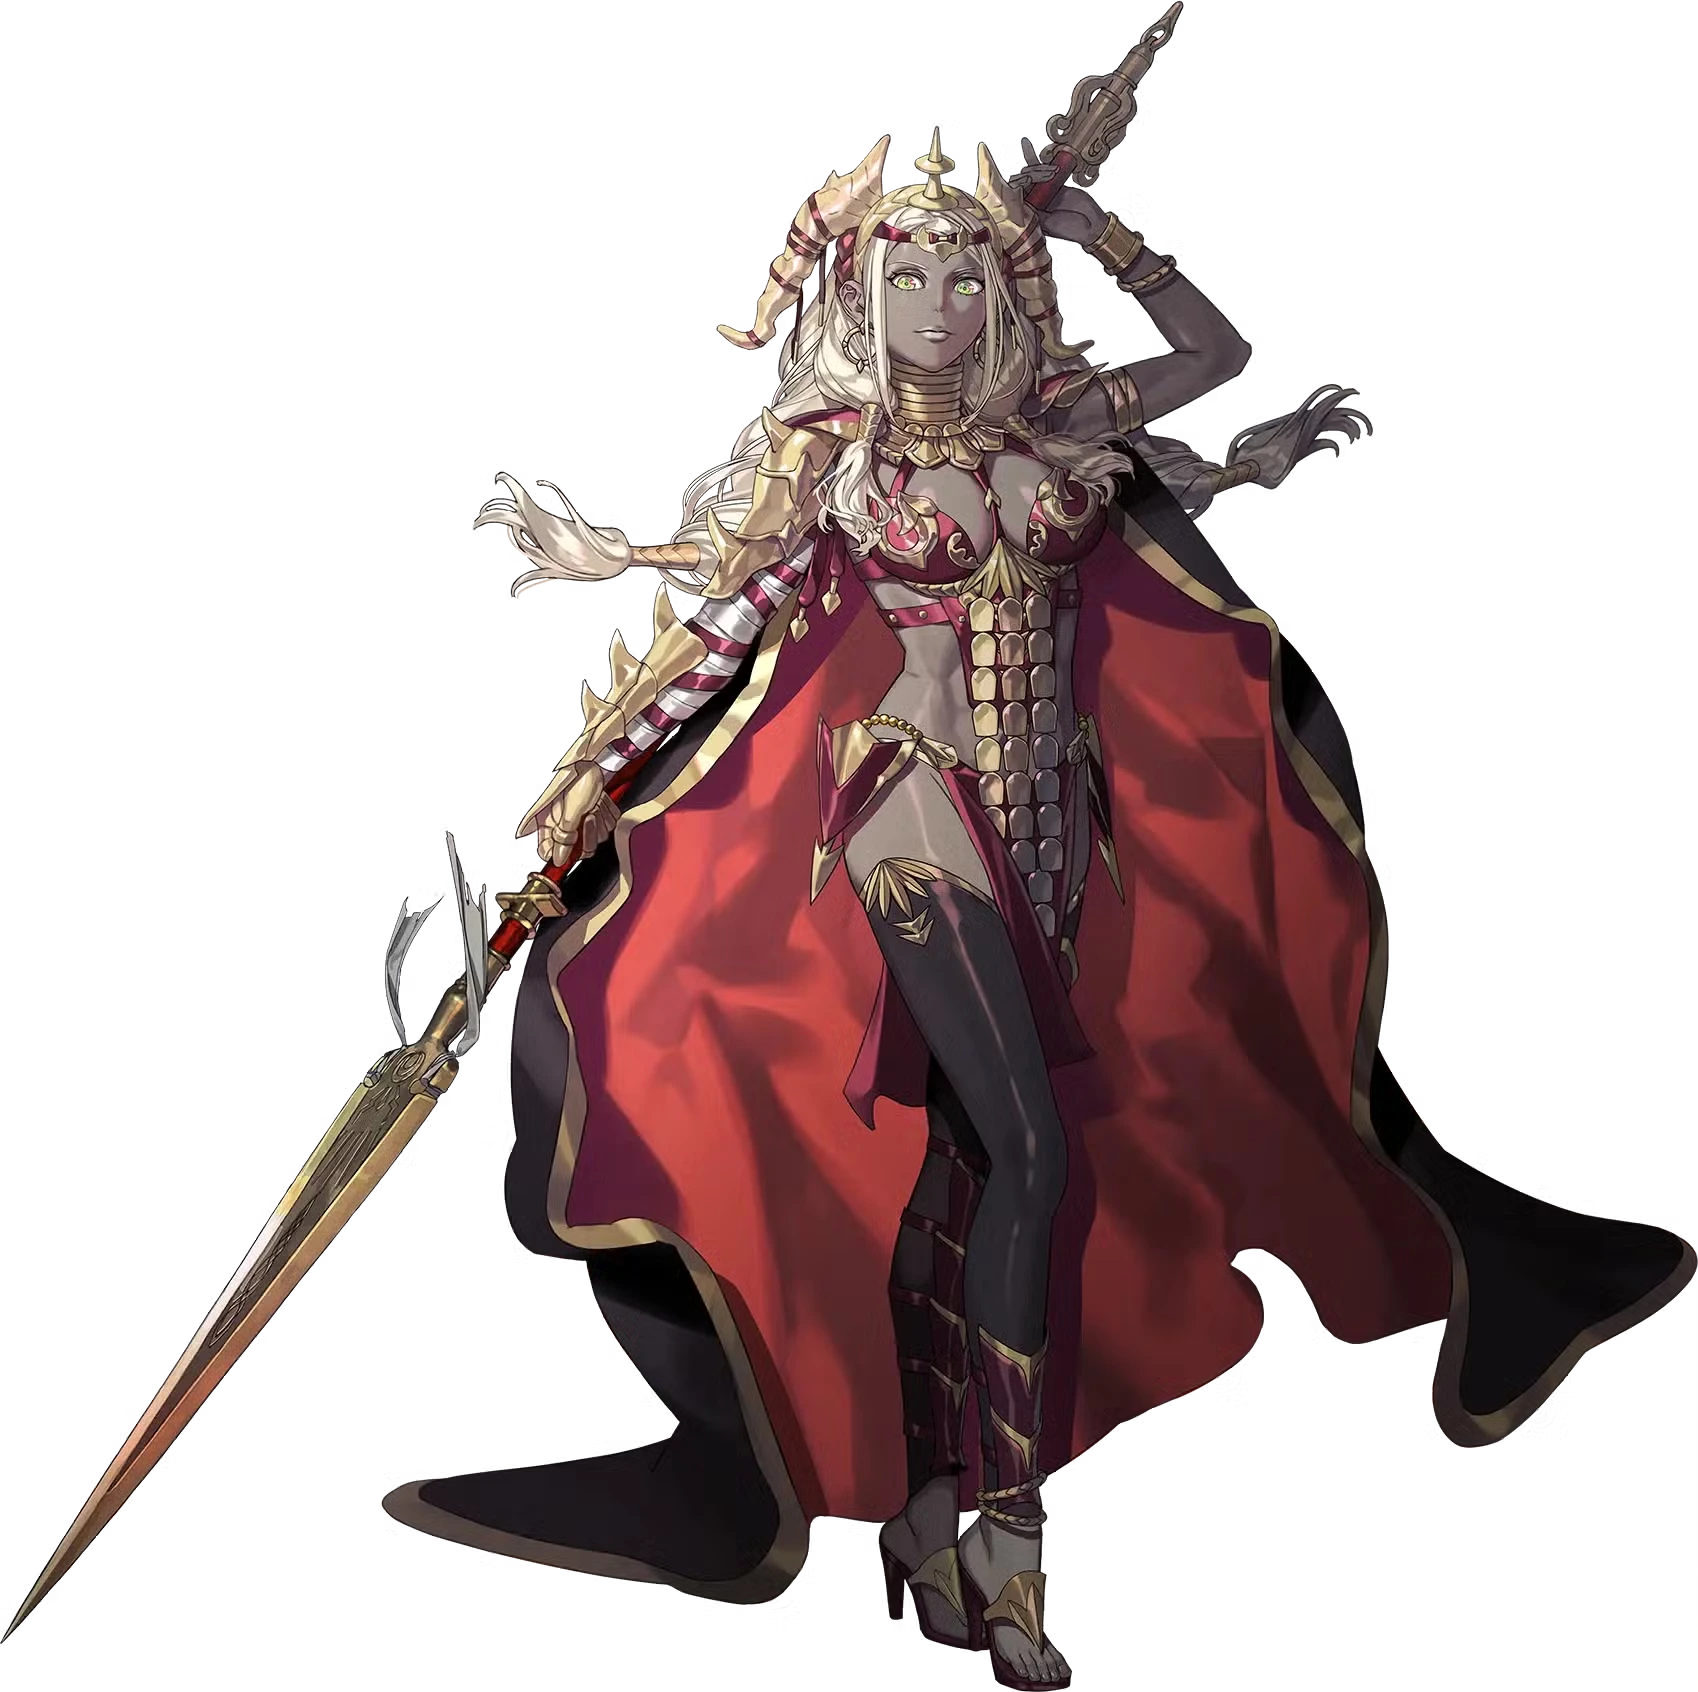
In the story
Competing for country and faith
Theodora brings her retainers to the Heroic Games to fulfill her homeland’s longstanding wish. She cares about her country and people, and enters partly to secure standing for her nation’s faith.
The choice before the finalSpoilers
She lost her right arm when her father was assassinated, later gaining a powerful replacement arm but suffering fromStrcorrosion. Troy's protective chain suppresses the effect only temporarily, and the remade chain also breaks in the semifinal. Before the final, she learns her homeland has been invaded and its fortress has fallen. She gives up the title to return and save her country.
Former acquaintances bring helpSpoilers
She builds connections with people from different factions during the tournament, and Talimun agrees to trade with Saramis. In Part II, Bertrand becomes an important reinforcement, turning those earlier relationships into tangible wartime support.
Solo ending: prosperity and retirementSpoilers
In her solo ending, she fulfills her wish to secure new territory for her homeland and begins rebuilding a sacred site, leading Saramis toward prosperity. Her right arm later causes her health to decline; she passes the throne to her chosen successor and withdraws from public life.
Trivia
- Japanese voice: Minami Takayama.