
Recruiting characters from other teamsMinor spoilers
A first gift unlocks recruitment, then you need the target’s bond with your current protagonist, Renown, and negotiation prerequisites. Recruit mainstays early and check recruitment windows for collection-only characters. Restarting after building bonds resets chapter time and money, so train seriously afterward.

Give one gift to unlock the Recruit option, then meet the target's Support requirement with your current protagonist, Renown requirement, and negotiation prerequisites.
- 1Find the character in Dagsion.
- 2Give one gift. The Recruit option will not appear before this.
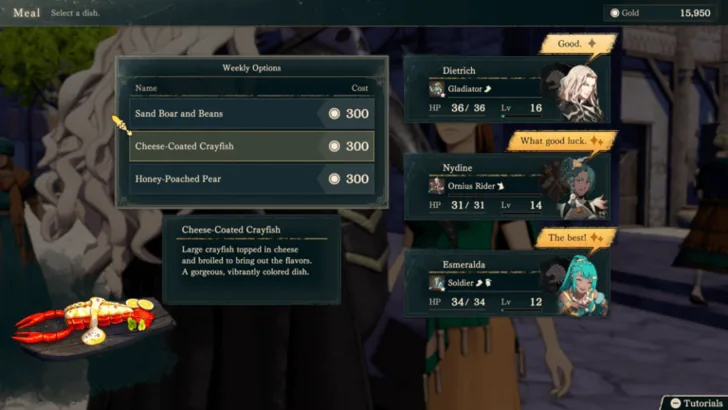
- 3Use meals, gifts, and theater visits to reach the required Support with your current protagonist.
- 4Once your Renown is high enough, negotiate. Some characters also require money, items, or completion of their quest.
Support belongs to a specific pair: raising Cai's Support with a target does not raise Leda's. Repeat “eat → wait for the weekly reset → eat again → restart the chapter.” Support remains, while money and chapter progress revert. See raising Support for recruitment for the full method.
Recruit future core units early; check the window first for collection or equipment. Early recruits give you more chapters to control their classes and growth. Late recruits can sometimes save training or bring better gear.
Use the character table below for individual conditions, recruitment priorities by route for your current protagonist, all-character route allocation to cover all four routes, and recruiting difficult characters for demanding conditions.
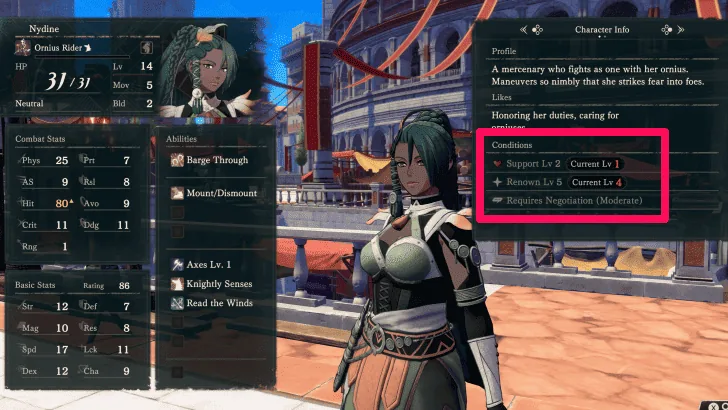
Image source:
First gifts, Support, Renown, and negotiation
Recruitment unlocks when free actions begin in Part I Chapter 3–4: Chapter 3 for Cai and Chapter 4 for the other three protagonists. Timing differs by route.
1. Find the character and give one gift
An orange name label marks someone you have not spoken to. Talk to everyone once. Afterward, the map's “Characters” tab lets you travel directly to them and check their requirements at any time. Open the map and use the directional buttons to switch to the character tab for each person's requirements on this route.
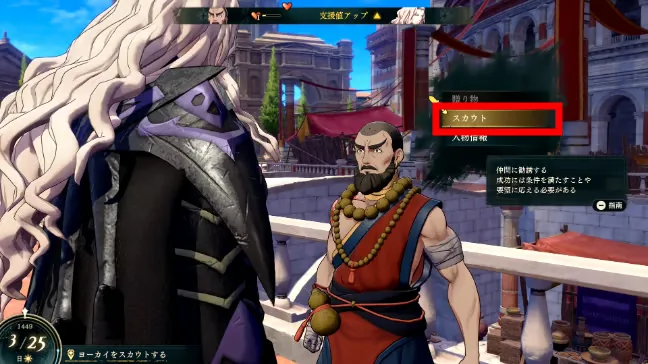
Give at least one gift: The “Recruit” option only appears after a gift. This also applies to characters who require only bond level 1: no further bond building is needed, but you still need the gift. You can give each person one gift per week.
Cheap all-purpose gifts include “Saraminian Sweets” at the market in Theodora's capital, Megaira, with unlimited stock at about 90–100G. They only need to unlock recruitment and dining, so save your good gifts. Common Coffee and Select Coffee are other options; about 70% of characters gain affinity from them.
2. Raise Support with your current protagonist
For characters who have not joined, only three activities work:
| Activity | Details |
|---|---|
| Meals at the inn | Up to 3 people; the target must dine with the protagonist. Requires a prior gift. Food preferences are visible before selecting the dish. Half price on Sundays |
| Gifts | Once per person per week; liked gifts give more, and birthdays give an extra increase |
| Watching theater | Unlocks at Renown 7; also restores Motivation |
Training, Temple Service, hot springs, and feasts only work for characters who have already joined.
One way to divide your resources is to use gifts alone for characters who need bond level 2: suitable gifts take around 4–5 weeks to go from 1→2. Reserve meals for those who need level 3. Level 2 comes quickly, while level 3 costs noticeably more time and money, so start level 3 targets early, even while you are far from their Renown requirement.
3. Reach this route's Renown requirement
Renown comes from this route's main story, side quests, paralogues, and exclusive activities. You must build it again after switching protagonists. Check the current route's requirement first, and keep raising the target–protagonist bond while waiting for Renown. For example,  Peter requires Renown 8 in Dietrich's story, 7 in Theodora's, and 10 in Leda's. All three require bond 3 and his request completed. For ways to close the gap and unlocks at each level, see Renown levels and unlocks.
4. Complete negotiations to add them to your party
Once requirements are met, speak to the character again and choose “Recruit.” Some agree immediately; others require negotiation through money, items, questions, or requests. You can retry failed negotiations without losing the recruitment opportunity. See the negotiation table at the end for each character's needs.
“???” requirements: Some requirements temporarily display only “???” because you must first reach a certain chapter or complete a paralogue.
Image source:
Restarting a chapter keeps meal Support
Restart Chapter returns time, items, and levels to the chapter's starting state, but keeps Support.
A demonstration uses Chapter 8 of Cai's story:
- Go straight to the inn at the chapter opening and eat 3 meals with your targets, using that week's allowance.
- Use “Work for Money” at the inn to pass 28 turns, exactly one week, with 1 turn equal to 6 hours. Weekly activities reset.
- Eat another 3 meals and repeat until the chapter is nearly over.
- Menu → System → Restart Chapter. You return to the chapter opening with bonds intact.
The demonstration raises bonds from level 1 to nearly level 3 using meals alone. Key points:
- Pick a chapter with a long free-action period. Cai's Chapter 8 has 172 turns, while Leda's Chapter 9 has 204, the longest in the game. Cai's Chapters 7 and 10 are alternatives, with immediate free actions and 120 turns each.
- Build another protagonist's bonds along the way. Bonds are shared across the save. Dining with Theodora and a future Theodora-route recruit during Leda's story raises “Theodora × that character” in advance. You can give gifts to and dine with people who are “not recruitable” on the current route.
- Gift allowances also reset with the chapter, letting you test preferences.
- Build bonds first, then begin serious training: Restarting resets chapter progress, so level characters, acquire equipment, and complete requests after the bond loop.
For a normal playthrough with around twenty recruits, you can manage without farming: one documented route recruited about twenty without it. Farming is worthwhile if you want every possible recruit on one route, or want to recruit and train someone as soon as possible.
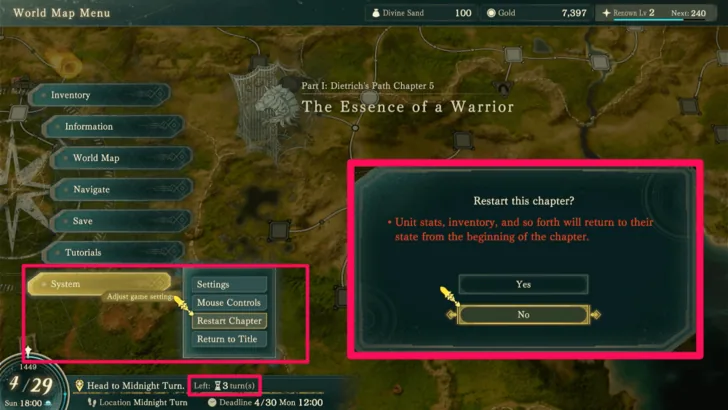
Image source:
Leda's Chapter 7 has a recorded “eat → restart → Support remains” example; another approach replays chapters after finishing Part 1 to raise relationships. Temple Service resets within the chapter. Other weekly activities, mount affinity, and training gains need separate checks. Finish raising relationships before restarting.
In one meal-and-restart comparison, gold returned to just over 4,000 while Support kept accumulating. Further meals then raised it to level 3.
Use this method to raise relationships before advancing normally. Do not assume that levels, equipment, or completed quests from the chapter will remain too.
Recruit core units early and weigh collection costs
Recruiting core units early lets you choose their training direction. The existing comparison covers only 5 characters: Jester, Diego, Ursula, Catania, and Sirocco. Left unrecruited, they automatically level and change classes as the story advances, but almost every stat falls below its growth-rate expectation, by up to 4 points.
Training them yourself also gives you Certification Exam base stat floors: passing a class raises any stat below that class's floor to the floor. Recruit characters you want to train on the earliest available route, then develop them there. Another recruitment account also favors early recruitment for more training freedom; late recruits have higher levels but weaker stats.
You can leave unused characters until later to collect equipment. A level 25 Catania example also supports waiting until the next month for automatic skill upgrades if you will not field her yet. These choices depend on the character and timing; late recruitment does not guarantee fixed equipment for everyone.
Other reasons to wait:
- Recruiting characters you will not train later can save high-tier equipment and certification seals.
- For characters requiring items or a chain of three quests—Olympia, Jester, Halvin, Mu, Nezha, Dadao, Goliath, Loretta, Nuzzuo, and others—skip recruitment on your first playthrough unless they are favorites. Spend that time gathering materials and catching mounts. Part 3 only uses the inventory from your first clear (see the missable checklist), while characters can be recruited later. For example, Mu is easier to train on Cai's route, where she can ride, and Leda's, where she starts in the party. Other routes need not spend time recruiting her specifically.
:::
The tutorial recruit has a low level: The character used to teach recruitment—Guzran for Cai, Yang Jie for Dietrich, Sofia for Theodora, or Catania for Leda—joins behind your current level and needs training. Later self-selected recruits have higher levels. The War Arc's “Troop Leveling Training” can immediately bring underleveled characters up to the average level.
To see every conversation, check event requirements too. Consult the support lock checklist before collecting, keep saves in key chapters, then choose your recruitment order. Numeric bonds, formal recruitment, and C/B/A conversations are three separate forms of progress.
- Each route is separate: Recruiting Ninae in Cai's story does not recruit her in Dietrich's, where requirements may be completely different.
- Ordinary companions available in Part I need formal recruitment on any one route: From Division 2 of Part III, speak to them in Dagsion to reassemble the party. If you never recruited one of these companions, gifts in Part III cannot recruit them for the first time. The four paralogue characters, two War Arc recruits, and new Part III companions have separate requirements; see special recruitment conditions. Part II uses the current protagonist's Part I party, rather than combining all four rosters.
- If you recruited and trained a character on several routes, choose one version as the base when they join in Part III. To combine growth across routes, use “Merge Causality”: 300 Karma Shards per character, taking the highest value for each stat. See building characters with Merge Causality.
Negotiation costs and items for 46 characters
Alexandra's note that “Renown reaches level 6 exactly after the main story” applies only to Theodora's route. See the recruitment tables by route for other routes' Renown, Support, and appearance chapters.
| Character | Negotiation requirements |
|---|---|
 Tialla | Pay 3000G |
 Fabio | After  Dietrich loses in Chapter 11, give Fabio a weapon he likes |
 Mikaela | Pay 3000G |
 Lilian | Pay 5000G |
 Lysander | Give Iron Spear ×5 |
 Mu | Give Glirmosa ×3 |
 Ursula | Answer “Yes” to every question |
 Simon | Pay 500G and choose “Tails” for the coin toss |
 Fianna | Pay 3000G |
 Sha Lan | Choose “Understood,” “Kingdom of Saramis,” “Da Mina,” and “The stranded giant ship,” in that order |
 Nezha | Give Sandworm Meat ×3 |
 Halvin | Give Dates ×10 |
 Dadao | Give Kothar Gar ×2 |
 Dante | Pay 8000G |
 Goliath | Give Giants' Meat ×3 |
 Ninae | Give Paradise Fish ×1 |
 Loretta | Give Iron Sword ×3 |
 Nydine |  Cai/Dietrich: give Bronze Axe ×2;  Theodora/  Leda: give Iron Axe ×3 |
 Io | Cai/Theodora: pay 4000G; Dietrich: pay 800G; Leda: pay 1500G |
 Yang Jie | Answer “Cheese” and “Full moon night”; any answer for the third question |
 Zarcone | Reject the first three offers of 10000G, 1000G, and 100G, then pay 10G |
 Nuzzuo | Cai/Theodora/Leda: give Iron Bow ×3; Dietrich: give Iron Bow ×2 |
 Jasmine | Cai: pay 2000G; Dietrich/Theodora: pay 5000G; Leda: pay 500G |
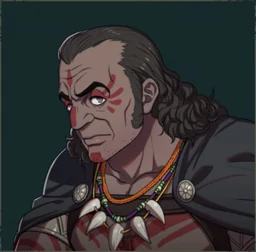 Kiroc | Cai/Theodora: give Pure Water ×8; Dietrich/Leda: give Pure Water ×3 |
 Inyoni | Cai/Dietrich: pay 6000G; Theodora: pay 4000G; Leda: pay 3000G |
 Majide | Answer “Required” to every question |
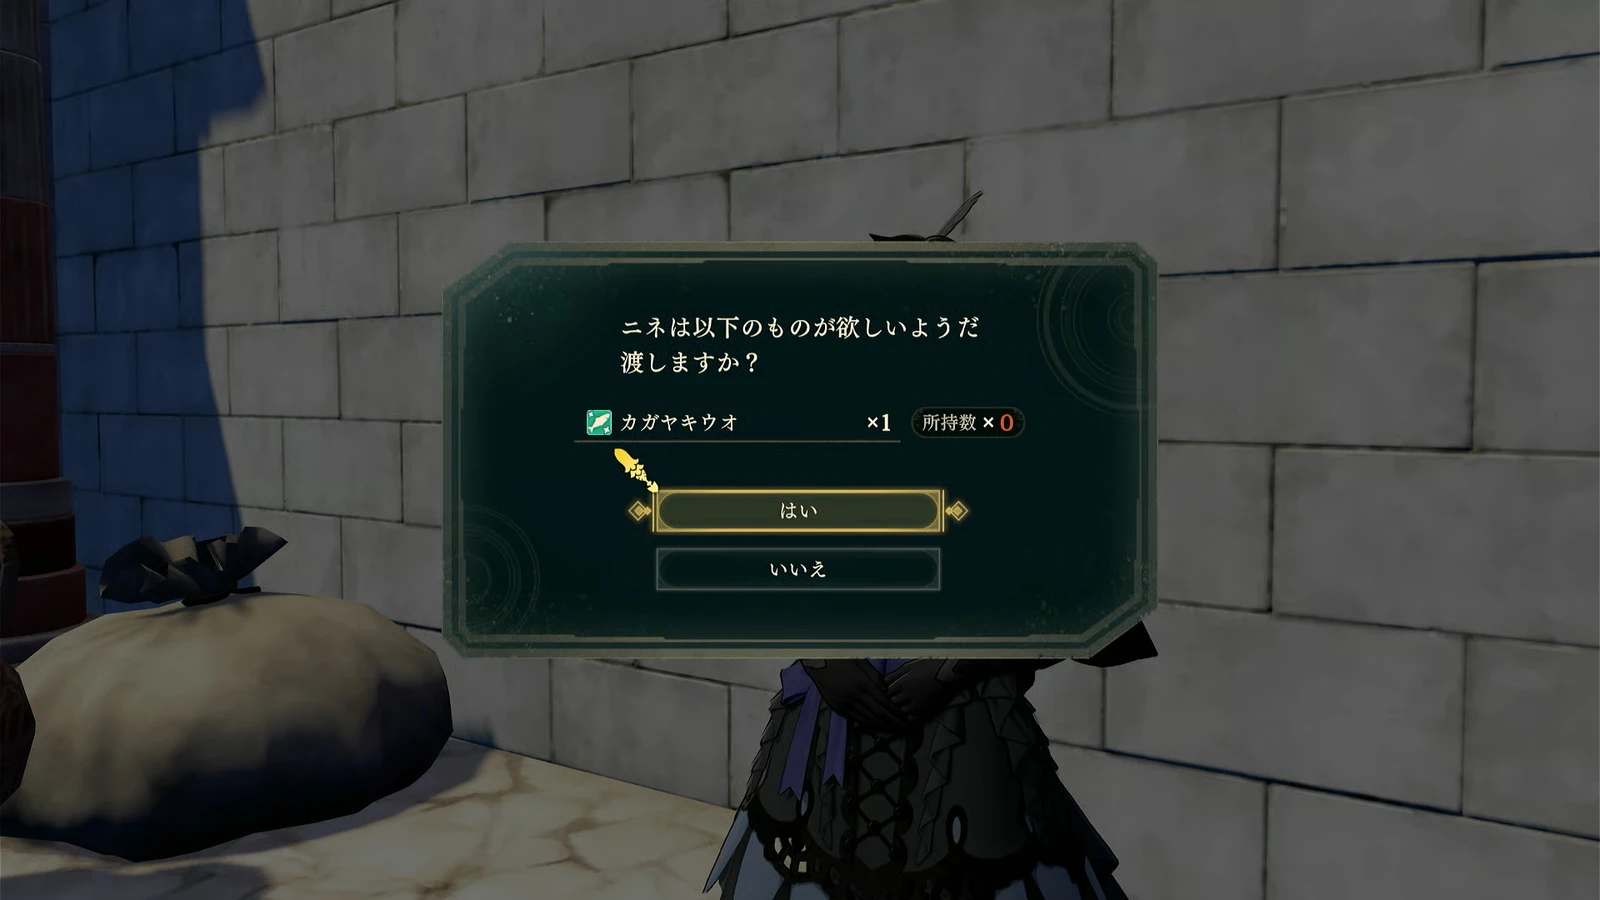
Item locations are in each character's requirement notes in the character-by-character table below.
Check each character's joining conditions across all four routes, the cost of missing them, and recruitment in Parts 2 and 3.