
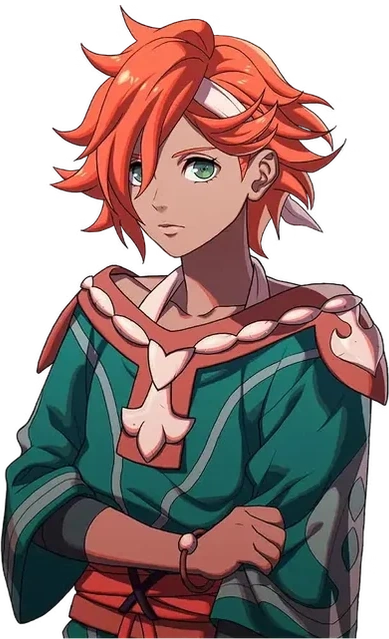
Mu
Aムウ · Mu Leda route· Available from the start
 Cai route· Recruitable
 Theodora route· Recruitable
 Dietrich route· Recruitable
Train fists early on Leda’s route. Once Speed is sufficient, borrow Warrior for Strength. Only branch into post-attack Warp after preparing White Magic A and War Monk mastery.
 Commoner Lv1
 Sword
 Axe
 Gauntlet
 White Magic

 Fan art →
Nine stats
| HP | Str | Mag | Spd | Dex | Def | Res | Lck | Cha | Total | |
|---|---|---|---|---|---|---|---|---|---|---|
| Growth rates | 50% | 50% | 25% | 50% | 50% | 40% | 30% | 30% | 40% | 365% |
| Overall rank63 characters total | Rank 9 | Rank 8 | Rank 32 | Rank 11 | Rank 8 | Rank 14 | Rank 26 | Rank 36 | Rank 18 | Rank 12 |
| Base statsCommoner Lv1 | 23 | 7 | 3 | 7 | 8 | 5 | 5 | 4 | 4 | 66 |
| Base stat ranking63 characters total | Rank 61 | Rank 52 | Rank 56 | Rank 43 | Rank 38 | Rank 55 | Rank 40 | Rank 63 | Rank 59 | Rank 63 |
| Lv60 expected statsGauntlet-focused Battlemaster route | 75 | 51 | 16 | 41 | 38 | 36 | 21 | 21 | 30 | 329 |
| Expected rank62 characters total | Rank 8 | Rank 9 | Rank 35 | Rank 28 | Rank 36 | Rank 18 | Rank 30 | Rank 56 | Rank 27 | Rank 21 |
Proficiency
SwordAxeGauntletWhite MagicWeakness—Budding talent—Starting skills
| Category | Skills | Effect |
|---|---|---|
| Personal skill |  Signs of Growth | Base stats are more likely to increase on level-up |
| Level skillsLv20 |  Warrior’s Blood | Increases base stats according to the equipped weapon type. |
| Level skillsLv35 |  Warrior's Blood+ | Greatly boosts base stats according to the equipped weapon type |
Raise HPStr and obtain War Master's Strike; the source explicitly prioritizes it over The Godhand.
to combine brawling and white magic; Warp has a fixed range of five spaces, not unlimited range.

Commoner, Gladiator, and Brigand fill out this site's earlier axe stages for the same character.

but explicitly rates staying in Battlemaster as stronger. This is an extra comparison option, not a replacement for the first three; Divine Adornment favors Res, requiring extra investment for Divine certification.
Mu’s Gauntlet offense, Warp, and mounted training
 Mu works well as a primary physical attacker with gauntlets: start as Commoner, then progress through
 Gladiator,
 Pugilist, and
 Warrior into
 Battlemaster. Strength, Speed, Dexterity, and HP all grow easily, and her master class adds more Strength. Choose War Monk when you need White Magic for Warp. Cai’s route also offers a separate Dragoon and animal-based training path.
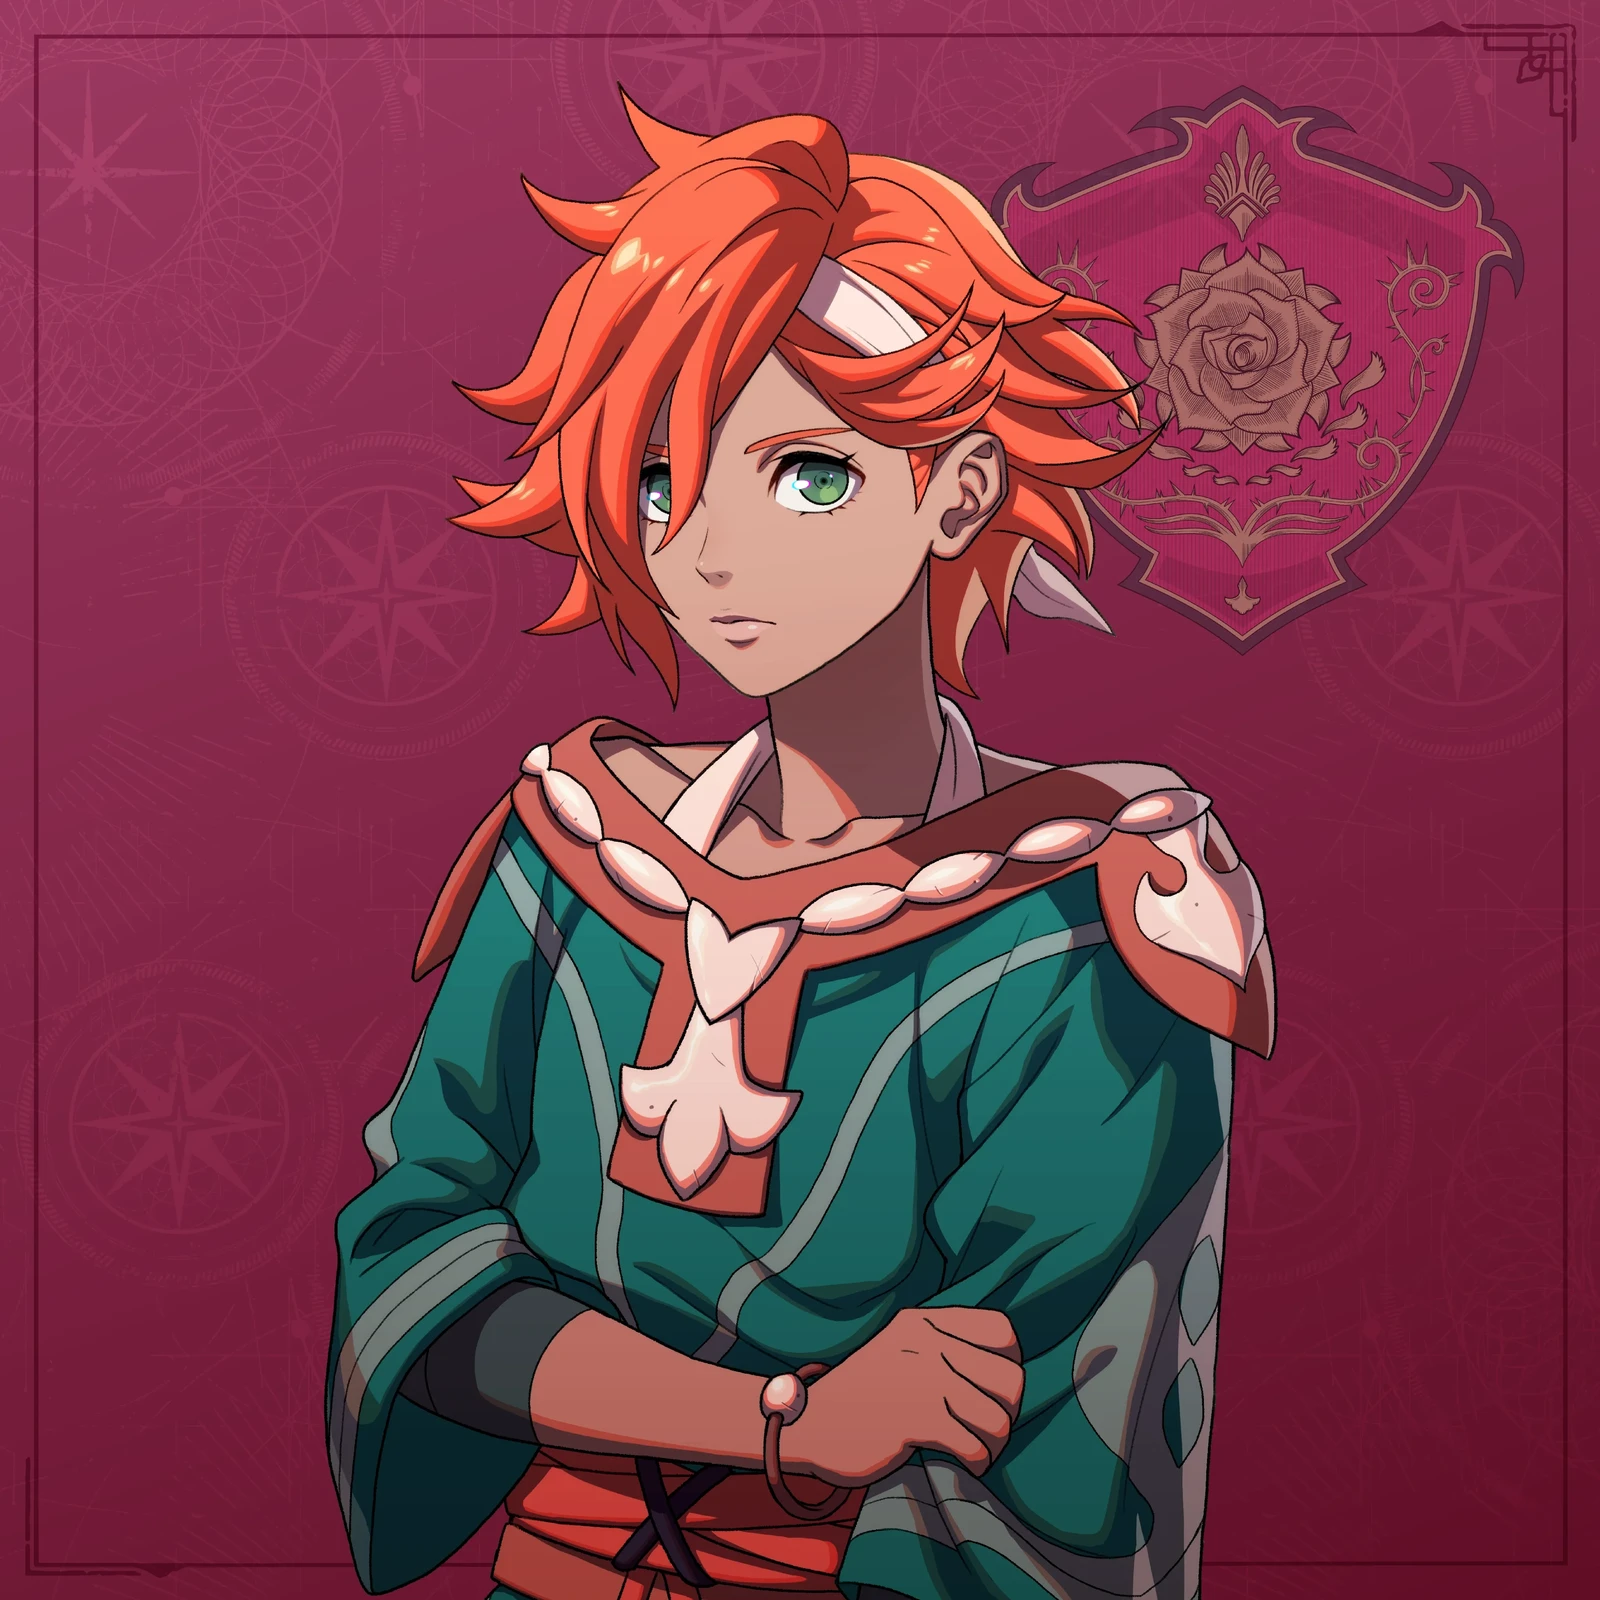
Four physical growths reach fifty percent
Her personal growths are 50% each in HP, Strength, Speed, and Dexterity, with Defense 40%, Magic 25%, Resistance 30%, Luck 30%, and Charm 40%, totaling 365. Signs of Growth also makes basic stats more likely to rise on level-up. All four main physical-offense stats are strengths. The additional increase is unknown; do not add an invented growth rate.
Sword, Axe, Gauntlet, and White Magic are strengths, with no listed proficiency weaknesses. Choose swords, axes, or gauntlets to match the team, and prepare White Magic support if needed. You do not need to max every strength. Decide her main weapon and endpoint first, then train secondary exam requirements to keep investment focused.
Resistance and Luck at 30% remain weaknesses, and she has no separate innate Bloodmark or Blaze Art mechanic. Her overall assessment is S, but damage can still fall short in the second half of Part 1 on Hard, and a Divine class does not automatically fix this. Broad growths make her worth training; current weapons, Attack Speed, and forecasts determine whether she can secure kills.
From Pugilist to Battlemaster
Prepare for Gladiator at level 5 and Renown 1. Sword, Axe, or Gauntlet D is enough, and mastery grants  Attack Basics. At level 20 and Renown 4, switch to Pugilist with Gauntlet C and keep using gauntlets. The class provides Gauntlet Avoid +3 and a Combat Art slot. Its mastery ability is
 Attack, Get Back.
Warrior is recommended at level 35 and Renown 8, with Sword, Axe, or Gauntlet B meeting its selection requirement. Keep using gauntlets on the main path. The class adds 5 each to Axe and Gauntlet Hit, while its mastery ability  Practiced Art adds 10 Hit when attacking with Combat Arts. At level 45, prepare for Battlemaster with the relevant weapon at A. It can use swords, axes, and gauntlets, grants Axe and Gauntlet Hit modifiers of 7 each, and adds 25 each to HP and Strength growths, further developing her physical foundation.
Battlemaster mastery  War Master's Strike deals 1.5× damage and is the main draw of this endpoint. You must fill class experience after entering Battlemaster to earn the mastery art. Plan early progression around recommended levels while also preparing Renown, seals, proficiencies, and unlocks.
The Godhand is not the first-choice upgrade
 The Godhand requires Gauntlet S and White Magic C, both covered by Mu’s strengths. However, stopping at Battlemaster is more strongly recommended because its physical offense exceeds The Godhand’s.
For comparison, follow the same Commoner, Gladiator, Pugilist, Warrior, and Battlemaster opening, then switch to The Godhand after obtaining the Emperor’s Sash and Divine certification. This requires extra training to Gauntlet S and White Magic C. The new class mainly uses gauntlets and White Magic; Battlemaster’s swords and axes do not remain usable. Divine mastery  Divine Adornment grants Resistance +10, a different benefit from the original path’s Strength growth and War Master’s Strike. Stay with the recommended Battlemaster endpoint when physical damage matters more.
Prepare White Magic A for Warp
To use  Warp, train White Magic A and enter
 War Monk. In this game, Warp moves an adjacent ally to a destination within five spaces. Its range is fixed, not unlimited. With only 1 base use, save it for repositioning that changes the battle.
Start with Commoner, Gladiator,  Brigand, and Warrior, then War Monk. War Monk requires Gauntlet B and White Magic D; Warp itself needs further training to White Magic A. The class uses gauntlets and White Magic, so attacks learned through swords and axes cannot all carry over unchanged. Gauntlets retain physical offense while White Magic provides healing, regeneration, and limited Warp. Prepare each learning rank separately.
Take the separate Dragoon path on Cai’s route
After unlocking  Dragoon on Cai’s route, Mu can ride Wild Bau. At bond level 5, it grants Strength and Dexterity +2 each and adds +10% to each of those growths, improving damage with her favored axes. Animal capture starts in Part 1 Chapter 5. Total growth modifiers at bond level 5 equal 25%. If you have not found a rare animal, use a wild individual of the same species first.
Start Commoner, Gladiator, and Brigand to train Axe, then prepare for Dragoon at level 35 with either Axe B or Lance B, plus Flying C. This path can stop at Dragoon and keep riding Wild Bau. After mounting, recheck infantry-only abilities, gauntlets, White Magic, and Battalions against the current class’s rules.
Check Strength, Speed, Dexterity, and HP at forty
Around level 40 at the end of Part 1, ideally Strength, Speed, Dexterity, and HP should exceed the expected values for the recommended path. Strength determines gauntlet and War Master’s Strike damage. Speed takes advantage of light gauntlets for follow-up attacks. Dexterity supports Hit and Critical, while HP leaves room to take damage.
You do not need to push Magic and Charm specifically for a primary physical attacker. Resistance and Luck each have 30% growth, and falling a little behind does not require abandoning the path. If growth goes poorly, use Merge Causality with the same character trained on another route, taking the higher value for each stat. Merging does not automatically fill in class mastery, weapon proficiency, or casting permissions.
Check the attack order of Gauntlet Combat Arts
For swords,  Wrath Strike grants Might +4 and Hit +10;
 Shadow Gambit ignores the enemy’s beneficial terrain effects;
 Gale Blow grants Might +7 and has a chance equal to half Speed to add another 5 Attack when attacking;
 Twin Blades costs 10 durability and makes two consecutive attacks, each dealing 80% damage.
For axes,  Spike grants Might +4 and Hit +10;
 Enrage adds Strength +1 after combat, up to +5 on the current map;
 Riot grants Attack +5 on follow-up attacks; and
 StrSpike costs 8 durability for Might +12 and Hit +10. Chance-based damage increases, map-long Strength stacking, and follow-up bonuses each have conditions. Do not count them all as fixed effects on every attack.
For gauntlets,  Deal Death grants Might +4 and Critical +5.
 Feint inflicts Avoid -20 on the enemy after combat, which wears off after one combat, but the art has a Hit modifier of -50. Check whether it can connect first.
 Battle Rush costs 7 durability and has Might -2, but lets you make a follow-up attack before the enemy counters.
 Saving Fist leaves enemies with at least 2 HP at 1 HP and cannot make follow-up attacks. It suits controlling when kills happen, rather than ordinary finishing blows.
At level 35, Warrior's Blood+ greatly improves different stats according to the equipped weapon type. In multiweapon classes, assess the weapon currently held.  Fistfaire raises Hit, Avoid, and Attack with gauntlets equipped. She can also learn adjacent-enemy Hit reduction, infantry Avoid against bows or magic, a small chance of greatly increased Avoid when attacked, and Hit bonuses on favorable terrain. Do not carry all these effects into the flying branch without checking class conditions.
Physical classes cannot cast spells
| Spell | Base uses | Main use |
|---|---|---|
 Wind | 10 | Basic wind magic, effective against flying units |
 Fire | 10 | Basic fire magic |
 Cutting Gale | 8 | Advanced wind magic, effective against flying units |
 Bolganone | 5 | Advanced fire magic |
 Excalibur | 3 | Might 15, Hit 100, effective against flying units |
 Nosferatu | 8 | Restores HP equal to half the damage dealt |
 Aura | 3 | Might 22, Hit 70, Weight 18 |
 Heal | 10 | Range 1, heals an ally |
 Regenera | 5 | Restores a little HP at the start of the phase; ends after five turns |
| Warp | 1 | Moves an ally to a tile within five spaces |
Every spell is restricted by the magic types the current class can use. Battlemaster and Dragoon cannot cast spells simply because the character has learned them, and War Monk only permits White Magic. Aura has high Might but clear Weight and Hit costs. Do not change a physical build into a mage based on Might alone.
Prepare three  Glirmosa before recruitment
She joins through the story at the start of the battle at Barsk Post Town in Chapter 1 of Leda’s route, without recruitment. The other three routes all require Support 3: from Part 1 Chapter 4 on Cai’s route with Renown 9; from Chapter 5 on Dietrich’s route with Renown 7; and from Chapter 5 on Theodora’s route with Renown 9. Then hand over three Glirmosa.
The plant-goods merchant in Messilina sells the negotiation material. Merchants appear as green icons on the world map and move over time. Hover over their tile and press ZL to check stock before traveling. Each costs 4000G; reserve 12000G for three.
Sweets and medicine-making are conversation topics
She likes developing new medicine, her parents, and sweets. She loves  Saraminian Sweets,
 Morfis Tea,
 Garum,
 Common Coffee,
 Portrait of Yu Phas,
 Kitten Figurine, and
 Weak Cervi. Liked gifts include
 Arrowhead Gem,
 Honey Pastries,
 Jamel Milk,
 Outdoor Cooking Set,
 Pickled Vegetables,
 Pure-White Cervi, and
 Yarc Milk. Specific gifts in the “somewhat likes” category are unknown.
More guides
- Mu's development, class routes, and recruitment requirements (Game8 Japanese)ゲームエイト
- Mu's recommended classes and recruitment requirementsGameWith
- Mu's recommended classes and recruitment guide (Game8 English)Game8
- Leda route character usage log: Musagaryuuju
- Character reviews after a first clearHiiro
- All three parts of the Leda route: Mu’s staged training records_runoa
- Mu class design and practical training discussionTenPointsforListenin and commenters (credited on each claim card)
Site guides

Take Mu through Gladiator → Pugilist → Battlemaster early on Leda’s route. Give her safe kills and let her high growths develop her into a main fighter.
Her early stats are ordinary. Give her kills and use her high growths to build a physical mainstay. For Warp after attacking, start White Magic A training early and obtain War Monk mastery. Effective fist combat and a complete Warp setup are two separate milestones.
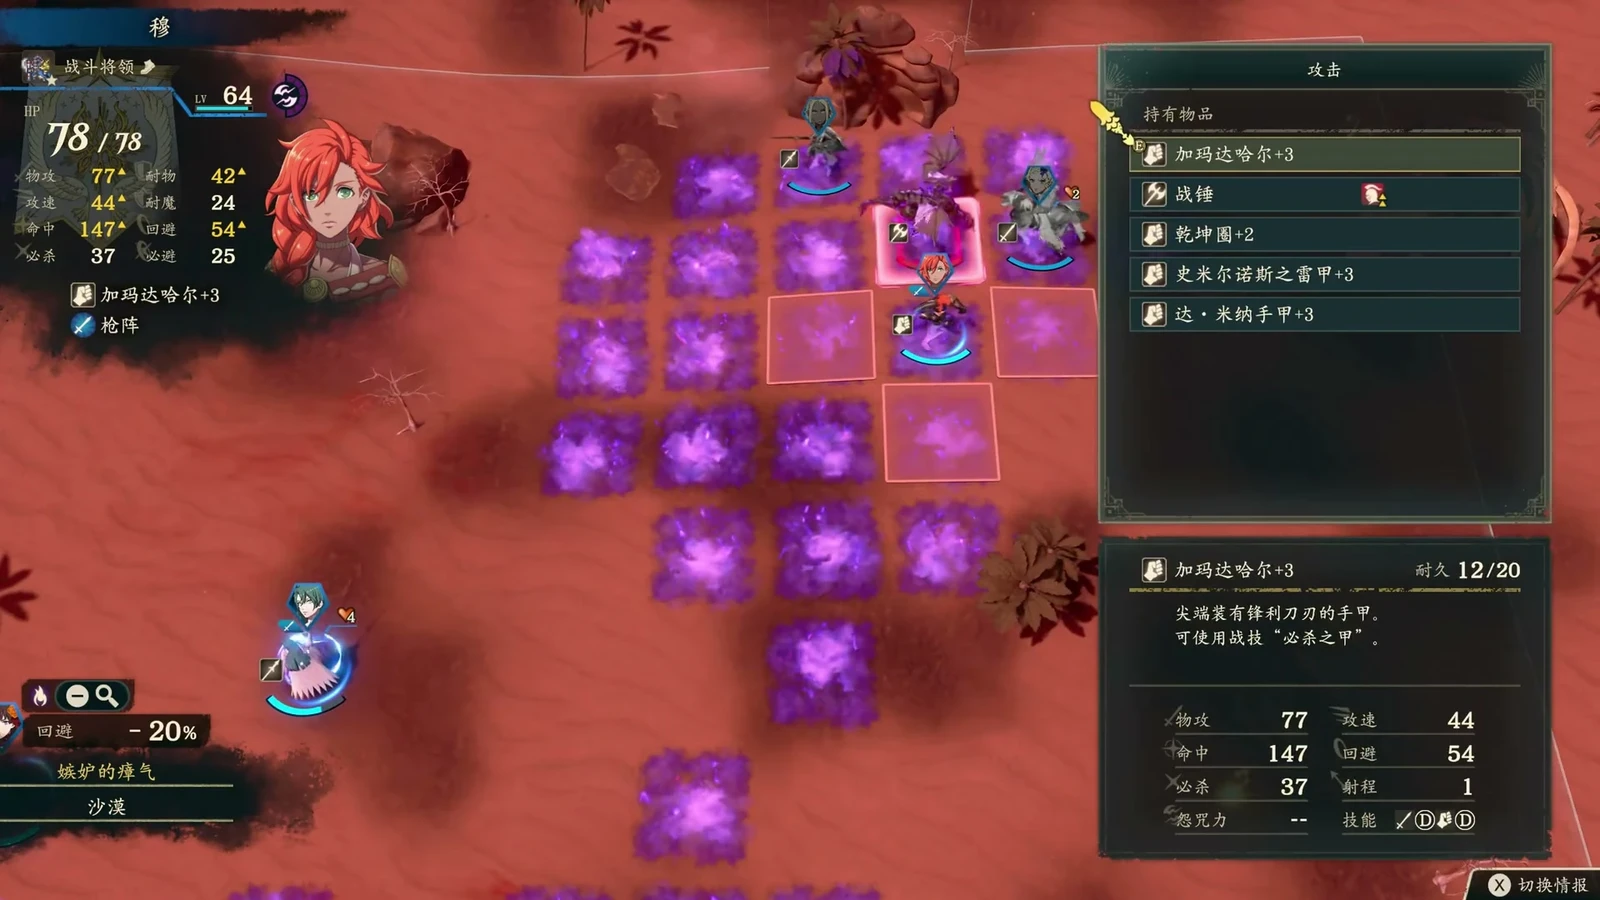
Class progression by stage
The table lists recommended exam levels; proficiency, Renown, items, and unlocks still apply. If recruited late on another route, continue from her joining stats. She has less training time than at Leda’s opening.
Part 1: Give her safe kills to develop fist combat
Start Gladiator → Pugilist. Focus on Gauntlet and assign kills she can safely secure to improve her low starting stats. Gladiator → Brigand is another option for more Strength, keeping training focused on the main weapon.
| Target | Recommended exam milestone | Training and purpose |
|---|---|---|
| Gladiator | Level 5, Renown 1; Sword, Axe, or Gauntlet D | Use gauntlets on the main route. Equip Attack Basics after mastery for Strength. |
| Pugilist | Level 20, Renown 4; Gauntlet C | Continue fist damage and build the foundation for Strength, Speed, and Avoid. |
| Optional Brigand | Level 20, Renown 4; Sword or Axe C | Another physical transition when Strength lags; not a mandatory change after completing Pugilist. |
Strength, Speed, and Dexterity each have 50% growth, already including the personal growth bonus. Adding another 20 percentage points counts it twice. At level 35, Warrior’s Blood+ also raises stats according to the equipped weapon. Calculate immediate weapon bonuses, personal growths, and class growths separately.
If you plan to use Warp in Part 3, schedule White Magic training in Part 1. You can also train physical stats on Leda’s route, recruit her on another route specifically for White Magic A, and merge in Part 3. Dividing work across two routes is enough; you do not need to retrain her on every route.
Part 2: Switch to Warrior when Strength is lacking
Keep using gauntlets for physical damage and choose a transition class based on her current stats.
Use Warrior for extra Strength only when Speed and Dexterity are already sufficient and follow-ups are common.
If Speed and Dexterity are still lacking, stay in Pugilist or consider Ranger once unlocked.
Warrior recommends level 35 and Renown 8, with any of Sword, Axe, or Gauntlet B. Ranger also recommends level 35 and Renown 8, with Sword B or Bow B, plus a separate unlock.
Another approach is to stay Pugilist until Master classes, then switch to Battlemaster. There is also a gauntlet/White Magic path that uses Shido for Speed before War Monk. Choose the branch matching missing Strength, Speed, or White Magic needs; you do not need to pass through ten classes.
Prepare Battle Rush at Gauntlet B and Feint at C, confirming she has learned them first. Battle Rush moves an otherwise available follow-up ahead of the enemy counter at a high cost. Feint sacrifices accuracy in the current attack to aid later combat. Battle Rush still requires meeting follow-up conditions.
If she already removes one boss HP bar in one hit, Leda can Dance for another action to attack the next bar. Confirm the damage reaches a full-bar threshold before scheduling the refresh.
Part 3: Physical damage or Warp after attacking
Main path: Battlemaster. Recommended level 45, any of Sword, Axe, or Gauntlet A, and unlocked after clearing segment 1 of the Promised One’s story. Keep gauntlets as the main attack and prepare Qiankun Circles at range 1–2 for separated targets. War Master’s Strike requires mastery; it is not granted on reclassing day.
The other core is War Monk → The Godhand. Train Gauntlet and White Magic, then master War Monk for Strike and Heal to chain combat into support magic. Warp itself still needs White Magic A.
| Requirement | What it actually provides | What is still missing |
|---|---|---|
| War Monk: around level 45, Gauntlet B, White Magic D, corresponding side-quest unlock | Gauntlets and white magic | White Magic D prepares the exam; it does not grant Warp. |
| Master War Monk and equip Strike and Heal | Support magic after combat | Without Warp learned, only existing support spells are available. |
| White Magic A and Warp actually in the skill menu | Warp as the post-attack support spell | Check remaining uses, destination, and personal safety. |
| The Godhand: Gauntlet S, White Magic C, special qualification and unlock | Stronger fist/white-magic role and more white-magic uses | Divine Adornment is a separate mastery reward, not automatic on finishing War Monk. |
The Godhand mastery Divine Adornment improves Resistance. Warp uses come from the class’s White Magic use bonus; do not combine the two effects. The Godhand cannot use swords, so give Cleansing Blade and sword combos to allies. Appropriate Blessings can also cover the gap against Underworld enemies. If you are not training White Magic, stay physical or choose The Eternal.
Sword and chariot merging, or flight
For swords, use Gladiator → Myrmidon → Shido, adding Warrior if Strength is lacking, then Swordmaster. On a secondary route, use Soldier → Armored Knight → Charioteer or Dreadnought for Strength and Defense. Cover different weaknesses on the two routes, then merge in Part 3. Charioteer additionally needs Bow, Riding, and mount bonds.
Flight is another approach: Ornius Rider → Armored Ornius Rider. If Dragoon is not unlocked, do not force the switch; consider Bau Lord or Celestial Trooper in Part 3. Train Spear A and Flying C for the endpoint.
Plan Warp destinations for the gauntlet/White Magic path
For physical fists, find a safe follow-up position, check Hit and counters, then use Battle Rush to try to finish before retaliation. Dodge Gauntlets can improve Avoid, but still calculate enemy Hit. Carry ranged gauntlets too. When preparing to take magic, check the Resistance effect of the weapon held at the end of the action.
For the gauntlet/White Magic path, decide whom to Warp and where before choosing a safe attack target this turn. Do not leave Mu unable to protect herself after casting just to attack once first. Let an ally cover Cleansing Blade access.
Recruitment details
She joins through the story at the start of Leda’s route. Other routes require a gift first, Support 3, that route’s Renown requirement, and three Glirmosa. Account separately for the shorter training time of late recruitment. See Mu’s recruitment requirements for Renown, material acquisition, and deadlines.
White Magic A and War Monk mastery are both required
- The 50% figure already includes her personal bonus. Treating it as 70% double-counts it; growth rates are not guaranteed stat gains every level.
- If Speed still falls short of follow-ups, preserve Speed growth first. Switching to Warrior for Strength can lose follow-ups.
- White Magic D meets the War Monk exam requirement; Warp still needs A.
- Master War Monk before using Warp after an attack. Divine Adornment improves Resistance; spell uses depend on class bonuses.
- The Godhand only uses gauntlets and White Magic. Give Cleansing Blade to an ally after reclassing.
Comments
Commoner→Lv5Gladiator→Lv20Pugilist→Lv35Warrior→Lv45BattlemasterCommoner Wooden GauntletsMt 2 Hit 90 Wt 1

 Wooden GauntletsMt 2 Hit 90 Wt 1
 Qiankun CirclesMt 10 Hit 70 Wt 4
 Resistant GauntletsMt 12 Hit 80 Wt 5
 Dodge GauntletsMt 11 Hit 80 Wt 3
 Counter GauntletsMt 11 Hit 70 Wt 4
 Concoction
 Fists Lv. 2Hit +5 with gauntlets equippedAttack BasicsStr+1
 Dodge[Infantry] Avo +5 in combat against enemies using bows or magicDeal DeathCost 2 Mt 4 Hit 0Battle RushCost 7 Mt -2 Hit 0FeintCost 2 Mt 0 Hit -50
 Da Mina GauntletsMt 11 Hit 90 Wt 4Qiankun CirclesMt 10 Hit 70 Wt 4Resistant GauntletsMt 12 Hit 80 Wt 5Dodge GauntletsMt 11 Hit 80 Wt 3Counter GauntletsMt 11 Hit 70 Wt 4ConcoctionWarrior’s BloodIncreases base stats according to the equipped weapon type.
 Fists Lv. 3Hit and Avo +5 with gauntlets equippedAttack BasicsStr+1Attack, Get BackAvoid +10 during combat using a combat artDodge[Infantry] Avo +5 in combat against enemies using bows or magic

 Deal DeathCost 2 Mt 4 Hit 0Battle RushCost 7 Mt -2 Hit 0FeintCost 2 Mt 0 Hit -50Da Mina GauntletsMt 11 Hit 90 Wt 4Qiankun CirclesMt 10 Hit 70 Wt 4Resistant GauntletsMt 12 Hit 80 Wt 5
 Cleansing BladeMt 8 Hit 90 Wt 3Counter GauntletsMt 11 Hit 70 Wt 4ConcoctionWarrior's Blood+Greatly boosts base stats according to the equipped weapon typeFists Lv. 3Hit and Avo +5 with gauntlets equippedAttack BasicsStr+1Attack, Get BackAvoid +10 during combat using a combat artDodge[Infantry] Avo +5 in combat against enemies using bows or magic
 Combat Arts +2Equippable combat arts +2
 Axe Hit +5Hit +5 when wielding an axe
 Brawl Hit +5Hit +5 with gauntlets equippedDeal DeathCost 2 Mt 4 Hit 0Battle RushCost 7 Mt -2 Hit 0FeintCost 2 Mt 0 Hit -50
 Windfire RingsMt 17 Hit 65 Wt 6
 Silver GauntletsMt 18 Hit 90 Wt 5
 Smyrnos's ChannelsMt 7 Hit 85 Wt 1Cleansing BladeMt 8 Hit 90 Wt 3
 Victory GemWt 3ConcoctionWarrior's Blood+Greatly boosts base stats according to the equipped weapon type
 Fists Lv. 5Hit and Avo +10 with gauntlets equippedAttack, Get BackAvoid +10 during combat using a combat artPracticed ArtHit +10 when attacking with a combat artDodge[Infantry] Avo +5 in combat against enemies using bows or magic
 Combat Arts +3Equippable combat arts +3
 Axe Hit +7Hit +7 when wielding an axe
 Brawl Hit +7Hit +7 with gauntlets equippedDeal DeathCost 2 Mt 4 Hit 0Battle RushCost 7 Mt -2 Hit 0FeintCost 2 Mt 0 Hit -50

 Victory GemWt 3
 Advanced Warriors计策「枪阵」Windfire RingsMt 17 Hit 65 Wt 6Silver GauntletsMt 18 Hit 90 Wt 5Smyrnos's ChannelsMt 7 Hit 85 Wt 1Cleansing BladeMt 8 Hit 90 Wt 3Victory GemWt 3ConcoctionWarrior's Blood+Greatly boosts base stats according to the equipped weapon typeFists Lv. 5Hit and Avo +10 with gauntlets equippedAttack, Get BackAvoid +10 during combat using a combat artPracticed ArtHit +10 when attacking with a combat artDodge[Infantry] Avo +5 in combat against enemies using bows or magicCombat Arts +3Equippable combat arts +3Axe Hit +7Hit +7 when wielding an axeBrawl Hit +7Hit +7 with gauntlets equippedDeal DeathCost 2 Mt 4 Hit 0Battle RushCost 7 Mt -2 Hit 0FeintCost 2 Mt 0 Hit -50Victory GemWt 3
 Elite HuntersGambit: Disrupting ShotCommoner→Lv5Gladiator→Lv20Brigand→Lv35Warrior→Lv45War MonkCommonerWooden GauntletsMt 2 Hit 90 Wt 1Wooden GauntletsMt 2 Hit 90 Wt 1Qiankun CirclesMt 10 Hit 70 Wt 4Resistant GauntletsMt 12 Hit 80 Wt 5Dodge GauntletsMt 11 Hit 80 Wt 3Counter GauntletsMt 11 Hit 70 Wt 4ConcoctionFists Lv. 2Hit +5 with gauntlets equippedAttack BasicsStr+1Dodge[Infantry] Avo +5 in combat against enemies using bows or magicDeal DeathCost 2 Mt 4 Hit 0Battle RushCost 7 Mt -2 Hit 0FeintCost 2 Mt 0 Hit -50
 Da Mina AxeMt 16 Hit 65 Wt 10
 Iron AxeMt 13 Hit 65 Wt 10
 Hand AxeMt 5 Hit 65 Wt 10Cleansing BladeMt 8 Hit 90 Wt 3Qiankun CirclesMt 10 Hit 70 Wt 4ConcoctionWarrior’s BloodIncreases base stats according to the equipped weapon type.
 Axes Lv. 3Hit and Avo +5 with an axe equippedAttack BasicsStr+1
 RegroupAvoid +20 during combat in which the unit's attack is dodgedDodge[Infantry] Avo +5 in combat against enemies using bows or magic
 Da Mina GauntletsMt 11 Hit 90 Wt 4Qiankun CirclesMt 10 Hit 70 Wt 4Resistant GauntletsMt 12 Hit 80 Wt 5Cleansing BladeMt 8 Hit 90 Wt 3Counter GauntletsMt 11 Hit 70 Wt 4ConcoctionWarrior's Blood+Greatly boosts base stats according to the equipped weapon typeFists Lv. 3Hit and Avo +5 with gauntlets equippedAttack BasicsStr+1Dodge[Infantry] Avo +5 in combat against enemies using bows or magicCombat Arts +2Equippable combat arts +2Axe Hit +5Hit +5 when wielding an axeBrawl Hit +5Hit +5 with gauntlets equippedDeal DeathCost 2 Mt 4 Hit 0Battle RushCost 7 Mt -2 Hit 0FeintCost 2 Mt 0 Hit -50Windfire RingsMt 17 Hit 65 Wt 6Silver GauntletsMt 18 Hit 90 Wt 5Smyrnos's ChannelsMt 7 Hit 85 Wt 1Dodge GauntletsMt 11 Hit 80 Wt 3Victory GemWt 3ConcoctionRegroupAvoid +20 during combat in which the unit's attack is dodgedWarrior's Blood+Greatly boosts base stats according to the equipped weapon typeFists Lv. 5Hit and Avo +10 with gauntlets equippedCombat Arts +3Equippable combat arts +3
 White-Magic SeekerWhite magic uses ×2
 Brawl Avo +7Avo +7 when wielding gauntletsVictory GemWt 3
 Pure PriestsGambit: “Area Heal”Windfire RingsMt 17 Hit 65 Wt 6Silver GauntletsMt 18 Hit 90 Wt 5Smyrnos's ChannelsMt 7 Hit 85 Wt 1Dodge GauntletsMt 11 Hit 80 Wt 3Victory GemWt 3ConcoctionRegroupAvoid +20 during combat in which the unit's attack is dodgedWarrior's Blood+Greatly boosts base stats according to the equipped weapon typeFists Lv. 5Hit and Avo +10 with gauntlets equippedCombat Arts +3Equippable combat arts +3White-Magic SeekerWhite magic uses ×2Brawl Avo +7Avo +7 when wielding gauntletsVictory GemWt 3
 Elevated PriestsGambit: “Area Heal”Commoner→Lv5Gladiator→Lv20Brigand→Lv35DragoonCommoner
 Wooden AxeMt 5 Hit 70 Wt 7Iron AxeMt 13 Hit 65 Wt 10Hand AxeMt 5 Hit 65 Wt 10Cleansing BladeMt 8 Hit 90 Wt 3Qiankun CirclesMt 10 Hit 70 Wt 4Concoction
 Axes Lv. 2Hit +5 when wielding an axeAttack BasicsStr+1Dodge[Infantry] Avo +5 in combat against enemies using bows or magicDa Mina AxeMt 16 Hit 65 Wt 10Iron AxeMt 13 Hit 65 Wt 10Hand AxeMt 5 Hit 65 Wt 10Cleansing BladeMt 8 Hit 90 Wt 3Qiankun CirclesMt 10 Hit 70 Wt 4ConcoctionWarrior’s BloodIncreases base stats according to the equipped weapon type.Axes Lv. 3Hit and Avo +5 with an axe equippedAttack BasicsStr+1RegroupAvoid +20 during combat in which the unit's attack is dodgedDodge[Infantry] Avo +5 in combat against enemies using bows or magicDa Mina AxeMt 16 Hit 65 Wt 10Iron AxeMt 13 Hit 65 Wt 10Hand AxeMt 5 Hit 65 Wt 10Cleansing BladeMt 8 Hit 90 Wt 3ConcoctionWarrior's Blood+Greatly boosts base stats according to the equipped weapon typeAxes Lv. 3Hit and Avo +5 with an axe equipped

 Wild BauStr+2 Spd+1 Dex+2Da Mina AxeMt 16 Hit 65 Wt 10Iron AxeMt 13 Hit 65 Wt 10Hand AxeMt 5 Hit 65 Wt 10Cleansing BladeMt 8 Hit 90 Wt 3ConcoctionWarrior's Blood+Greatly boosts base stats according to the equipped weapon typeAxes Lv. 3Hit and Avo +5 with an axe equippedWild BauStr+2 Spd+1 Dex+2Commoner→Lv5Gladiator→Lv20Pugilist→Lv35Warrior→Lv45Battlemaster→The GodhandCommonerWooden GauntletsMt 2 Hit 90 Wt 1Wooden GauntletsMt 2 Hit 90 Wt 1Qiankun CirclesMt 10 Hit 70 Wt 4Resistant GauntletsMt 12 Hit 80 Wt 5Dodge GauntletsMt 11 Hit 80 Wt 3Counter GauntletsMt 11 Hit 70 Wt 4ConcoctionFists Lv. 2Hit +5 with gauntlets equippedAttack BasicsStr+1Dodge[Infantry] Avo +5 in combat against enemies using bows or magicDeal DeathCost 2 Mt 4 Hit 0Battle RushCost 7 Mt -2 Hit 0FeintCost 2 Mt 0 Hit -50Da Mina GauntletsMt 11 Hit 90 Wt 4Qiankun CirclesMt 10 Hit 70 Wt 4Resistant GauntletsMt 12 Hit 80 Wt 5Dodge GauntletsMt 11 Hit 80 Wt 3Counter GauntletsMt 11 Hit 70 Wt 4ConcoctionWarrior’s BloodIncreases base stats according to the equipped weapon type.Fists Lv. 3Hit and Avo +5 with gauntlets equippedAttack BasicsStr+1Attack, Get BackAvoid +10 during combat using a combat artDodge[Infantry] Avo +5 in combat against enemies using bows or magicDeal DeathCost 2 Mt 4 Hit 0Battle RushCost 7 Mt -2 Hit 0FeintCost 2 Mt 0 Hit -50Da Mina GauntletsMt 11 Hit 90 Wt 4Qiankun CirclesMt 10 Hit 70 Wt 4Resistant GauntletsMt 12 Hit 80 Wt 5Cleansing BladeMt 8 Hit 90 Wt 3Counter GauntletsMt 11 Hit 70 Wt 4ConcoctionWarrior's Blood+Greatly boosts base stats according to the equipped weapon typeFists Lv. 3Hit and Avo +5 with gauntlets equippedAttack BasicsStr+1Attack, Get BackAvoid +10 during combat using a combat artDodge[Infantry] Avo +5 in combat against enemies using bows or magicCombat Arts +2Equippable combat arts +2Axe Hit +5Hit +5 when wielding an axeBrawl Hit +5Hit +5 with gauntlets equippedDeal DeathCost 2 Mt 4 Hit 0Battle RushCost 7 Mt -2 Hit 0FeintCost 2 Mt 0 Hit -50Windfire RingsMt 17 Hit 65 Wt 6Silver GauntletsMt 18 Hit 90 Wt 5Smyrnos's ChannelsMt 7 Hit 85 Wt 1Cleansing BladeMt 8 Hit 90 Wt 3Victory GemWt 3ConcoctionWarrior's Blood+Greatly boosts base stats according to the equipped weapon typeFists Lv. 5Hit and Avo +10 with gauntlets equippedAttack, Get BackAvoid +10 during combat using a combat artPracticed ArtHit +10 when attacking with a combat artDodge[Infantry] Avo +5 in combat against enemies using bows or magicCombat Arts +3Equippable combat arts +3Axe Hit +7Hit +7 when wielding an axeBrawl Hit +7Hit +7 with gauntlets equippedDeal DeathCost 2 Mt 4 Hit 0Battle RushCost 7 Mt -2 Hit 0FeintCost 2 Mt 0 Hit -50Victory GemWt 3Advanced Warriors计策「枪阵」Windfire RingsMt 17 Hit 65 Wt 6Silver GauntletsMt 18 Hit 90 Wt 5Smyrnos's ChannelsMt 7 Hit 85 Wt 1Dodge GauntletsMt 11 Hit 80 Wt 3Victory GemWt 3ConcoctionWarrior's Blood+Greatly boosts base stats according to the equipped weapon typeFists Lv. 5Hit and Avo +10 with gauntlets equippedAttack, Get BackAvoid +10 during combat using a combat artPracticed ArtHit +10 when attacking with a combat artDodge[Infantry] Avo +5 in combat against enemies using bows or magicCombat Arts +3Equippable combat arts +3
 White-Magic ZenithWhite magic uses ×3
 Brawl Avo +10Avo +10 when wielding gauntletsDeal DeathCost 2 Mt 4 Hit 0Battle RushCost 7 Mt -2 Hit 0FeintCost 2 Mt 0 Hit -50Victory GemWt 3Elite HuntersGambit: Disrupting Shot
Build approach and suitable stages
Gauntlet-focused Battlemaster route: Gladiator Lv 5; Gauntlet-focused Battlemaster route: Pugilist Lv 20; Gauntlet-focused Battlemaster route: Warrior Lv 35; Gauntlet-focused Battlemaster route: Battlemaster Lv 45, Lv 60; The Godhand comparison route: Commoner Lv 1; The Godhand comparison route: Gladiator Lv 5; The Godhand comparison route: Pugilist Lv 20; The Godhand comparison route: Warrior Lv 35; The Godhand comparison route: Battlemaster Lv 45
Raise HPStr and obtain War Master's Strike; the source explicitly prioritizes it over The Godhand.
White magic/Warp War Monk route: Commoner Lv 1; White magic/Warp War Monk route: Gladiator Lv 5; White magic/Warp War Monk route: Brigand Lv 20; White magic/Warp War Monk route: Warrior Lv 35; White magic/Warp War Monk route: War Monk Lv 45, Lv 60; The Godhand comparison route: The Godhand Lv 60
to combine brawling and white magic; Warp has a fixed range of five spaces, not unlimited range.
Cai-route Dragoon for Strength: Gladiator Lv 5; Cai-route Dragoon for Strength: Brigand Lv 20; Cai-route Dragoon for Strength: Dragoon Lv 35, Lv 60
Commoner, Gladiator, and Brigand fill out this site's earlier axe stages for the same character.
DexWidely recommendedDexVery strongDexUseful for specific strategies
 Swords Lv. 1
 Swords Lv. 2
 Swords Lv. 3
 Swords Lv. 4
 Swords Lv. 5
 Swordfaire
 Axes Lv. 4
 Axes Lv. 5
 Axefaire
 Fists Lv. 4
 White Magic Lv. 1
 White Magic Lv. 2
 White Magic Lv. 3
 White Magic Lv. 4
 White Magic Lv. 5
 White-Magic Mastery
 Spear
 Tempest Spear
 Spears Lv. 1
 Quick Thrust
 Spears Lv. 2
 Graceful Blow
 Spears Lv. 3
 Flying Spear
 Spears Lv. 4
 Spears Lv. 5
 Spearfaire
 Bow
 Curved Shot
 Bows Lv. 1
 Leg Shot
 Bows Lv. 2
 Bows Lv. 3
 Twin-Shot Flow
 Bows Lv. 4
 Bows Lv. 5
 Bowfaire
 Black Magic
 Black Magic Lv. 1
 Black Magic Lv. 2
 Black Magic Lv. 3
 Black Magic Lv. 4
 Black Magic Lv. 5
 Black-Magic Mastery
 Infantry
 Evasion
 Surprise Attack
 Infantry Move
 Dodge+
 Infantry Move+
 Riding
 Knightly Senses
 Read the Winds
 Heavy Armor
 Timely Guard
 Armored Move
 Heavy Break
 Bld
 Counter Flurry
 Build +
 Authority
 Distraction
 Draw Back
 Distraction+
Mu: Joins through the story on Leda's route; recruitable on Cai's, Dietrich's and Theodora's routes (Renown 7–9).
 Cai's storyRecruitable
Steps
Available from Part I, Chapter 4. Give a gift to unlock recruitment, then reach renown 9 and support 3 with Cai. Hand over Glirmosa×3。
- NegotiateGlirmosa×3
- Tip
 Mellow PastriesBuy from the gift merchant at the lower tavern in the imperial capital, Dagsion, for 30G each. Gifts and meals raise bonds with your route's protagonist; include the protagonist in the meal. GlirmosaRequires 3. A rare find is recorded on Breeze Hill near the capital; cultivate more after obtaining the first.
 Dietrich's storyRecruitable
Steps
Available from Part I, Chapter 4. Give one gift to unlock recruitment, then reach Renown 7 and Bond Level 3 with Dietrich. Hand over Glirmosa×3。
- NegotiateGlirmosa×3
- TipMellow PastriesBuy from the gift merchant at the lower tavern in the imperial capital, Dagsion, for 30G each. Gifts and meals raise bonds with your route's protagonist; include the protagonist in the meal. GlirmosaRequires 3; gather through exploration at western Giant's Hill, Augas Pass, the Back Mountain Path, or Forest of No Return.
 Theodora's storyRecruitable
Steps
Encounter from Part I, Chapter 5. Give a gift to unlock recruitment, then reach Renown 9 and bond 3 with Theodora. Hand over Glirmosa×3。
- NegotiateGlirmosa×3
- TipMellow PastriesBuy from the gift merchant at the lower tavern in the imperial capital, Dagsion, for 30G each. Gifts and meals raise bonds with your route's protagonist; include the protagonist in the meal. GlirmosaRequires 3; gather through exploration at western Giant's Hill, Augas Pass, the Back Mountain Path, or Forest of No Return.
 Leda's storyJoins through the storyEasiest option
Joins through the story in Part I, Chapter 1
 Renown level
 Bond Level with this route's protagonist. For all characters across the four routes, see Recruitment; see recruitment steps at How to recruit。
 Most effective gifts


All are favorite gifts and sold in shops. Mu mostly favors sweets and coffee-related gifts. Favorites show double arrows in game and grant the most affinity.
Find where to buy these on the map→ Where to buy all 9 favorite gifts→
Favorite9 items




Likes9 items

LikesDeveloping medicines, father, mother, sweetsInterestsMaking medicine, exercise
Bond partners11 characters · 6 can reach A · 2 have confirmed paired endings
 A
 A
 A
 A
 A
 A
 B
 B
 B
 B
 C
Letters indicate the highest available support conversation (C = support Lv2, B = support Lv3, A = support Lv4); A paired ending is confirmed,For the rules, seeBonds。
A still-childlike girl who ran away from home to find her mother, who had stopped sending word. She meets Leda while searching for her mother's whereabouts. She deliberately dresses and speaks like a boy.
Details
| Title | A girl searching for her mother |
|---|---|
| Affiliation | Rose Storm |
| Height | 145 cm |
| Birthday | 6/25 |
| Likes | Developing medicines, father, mother, sweets |
| Interests | Making medicine, exercise |
| Japanese voice | Akane YamaguchiWikipedia (Japanese) |
| English voice actor | Asante MangoVoice actor database |
Relationships


In the story
Part I: Leaving home to find her mother
After being left in her aunt's care, Mu lost contact with her mother, who worked away from home. To protect herself while traveling alone, she dressed as a boy and left to search for her mother. She later traveled with Leda after receiving her help.
Part I: reunited with motherSpoilers
In an optional meeting with Mikaela, Mu learns her mother earns money abroad so Mu can study magic under a teacher and enter a temple. Mu refuses to let her mother choose her life and continues traveling with Leda; Mikaela recalls resisting her own parents' plans when young.
After Part III: Individual endingSpoilers
Mu enters a temple and immerses herself in its books. She later develops many medicines, uses her knowledge to help others and leaves her mark on Dagdan pharmacology.
Trivia
- Mu likes his father, mother, and sweets.