
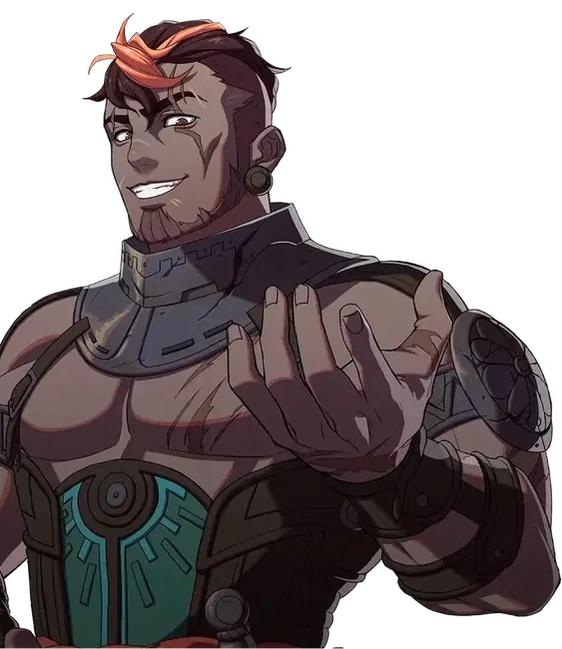
Guzran
Sグザラン · Guzran Cai route· Available from the start
 Dietrich route· Recruitable
 Theodora route· Recruitable
 Leda route· Recruitable
Recruit early for a straightforward sword route, adding Brigand or Warrior if Strength lags. His random bonus affects only one stat; even the level 35 upgrade cannot guarantee Hit and Critical together.
 Gladiator Lv5
 Sword
 Gauntlet
 Infantry
 Fan art →
Nine stats
| HP | Str | Mag | Spd | Dex | Def | Res | Lck | Cha | Total | |
|---|---|---|---|---|---|---|---|---|---|---|
| Growth rates | 45% | 45% | 20% | 50% | 45% | 35% | 20% | 45% | 30% | 335% |
| Overall rank63 characters total | Rank 23 | Rank 18 | Rank 38 | Rank 11 | Rank 22 | Rank 25 | Rank 48 | Rank 10 | Rank 40 | Rank 28 |
| Base statsGladiator Lv5 | 28 | 12 | 4 | 11 | 8 | 7 | 3 | 10 | 6 | 89 |
| Base stat ranking63 characters total | Rank 30 | Rank 24 | Rank 46 | Rank 24 | Rank 38 | Rank 32 | Rank 55 | Rank 19 | Rank 40 | Rank 35 |
| Lv60 expected statsSword path through to The Blade | 64 | 42 | 15 | 52 | 45 | 26 | 14 | 37 | 24 | 319 |
| Expected rank62 characters total | Rank 28 | Rank 23 | Rank 37 | Rank 10 | Rank 21 | Rank 38 | Rank 49 | Rank 13 | Rank 45 | Rank 30 |
Proficiency
SwordGauntletInfantryWeakness White Magic
 Black MagicBudding talent—
Starting skills
| Category | Skills | Effect |
|---|---|---|
| Personal skill |  Hot-Headed | One of hit, avoid or critical +10 during combat |
| Level skillsLv20 |  Top Form | 「Hot-Headed” stat bonus becomes +15. |
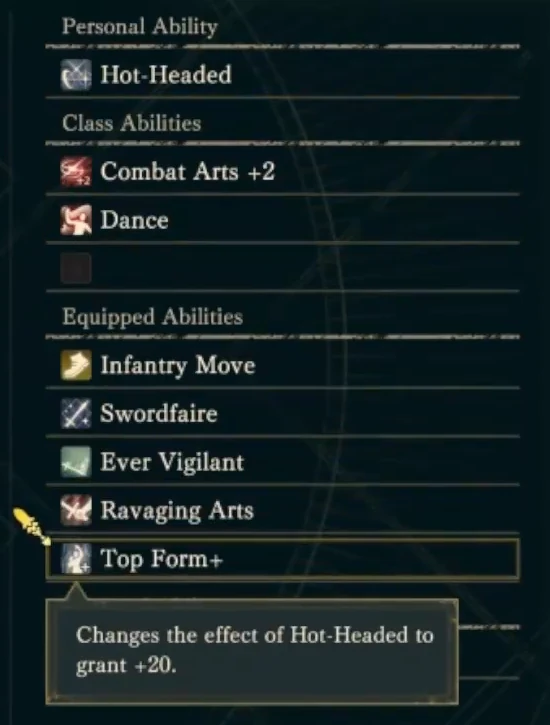
| Level skillsLv35 |  Top Form+ | 「Hot-Headed” effect increases the stat bonus to +20 |
Swordmaster improves SpdDex, continuing into The Blade through Sword S; retain the original page's recommendations at every tier.
Strength, Dexterity, and Speed grow together, while Top Form+ randomly provides 20 Hit, Avoid, or Critical. Stop here when reserving Divine certification for another character.
Bond 5 adds StrDef and Def growth. The starting Gladiator class comes from the character database; no later Master-tier endpoint is added because the source specifies none.

Guzran’s sword progression and Ferghanan Horse branch
Sword is the smoothest training route for 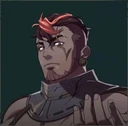 Guzran. Continue Sword from his joining Gladiator, then follow
 Myrmidon,
 Shido,
 Swordmaster, and
 The Blade. Balanced Speed, Strength, and Dexterity suit follow-ups, dodging, and counters. In
 Cai’s story, he can instead follow
 Light Cavalry into
 Bardinger, using a Ferghanan Horse to improve Defense.
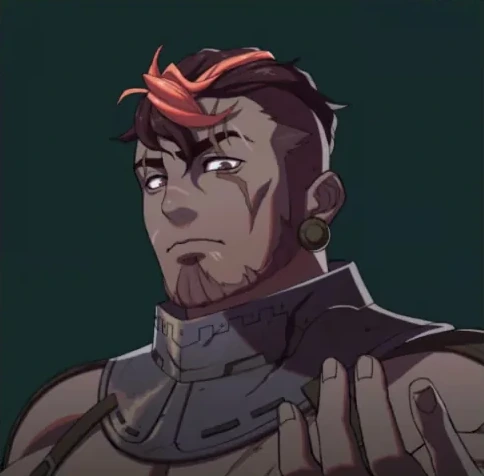
Keep training Sword through The Blade
Beginner Gladiator recommends level 5 and Renown 1, accepting Sword, Axe, or Gauntlet D as its weapon qualification. Since he already joins as a Gladiator, train Sword in the current class rather than changing training direction for each later exam. Mastering  Attack Basics also provides Strength +1.
Specialty Myrmidon requires Sword C, recommended level 20 and Renown 4. It provides Sword Crit +3 and one extra Combat Art slot. Master  DexRavaging Arts to increase critical damage. Advanced Shido requires Sword B, recommended level 35 and Renown 8. Sword Crit rises to +5 and extra Combat Art slots to two. After mastering
 Ever Vigilant, critical kills restore a little HP, aiding sustained sword combat.
Master Swordmaster requires Sword A, with recommended level 45. Speed growth +20 and Dexterity growth +15 amplify his existing speed, accuracy, and critical foundation. The class grants Sword Crit +7 and three extra Combat Art slots. Mastery  Astra strikes five times at 50% damage each. It opens in Section 3 of the Promised One’s story. Continue using Shido beforehand rather than pausing training while waiting for the final class.
At the divine stage, The Blade requires Sword S, continuing the existing sword training. Sword Critical rises to +10, and it keeps three extra Combat Art slots. Mastery  Divine Insight gives Speed +10. The Blade also needs Heaven's Crown Temple's qualification item and divine-class unlock conditions; reaching a character level does not replace them.
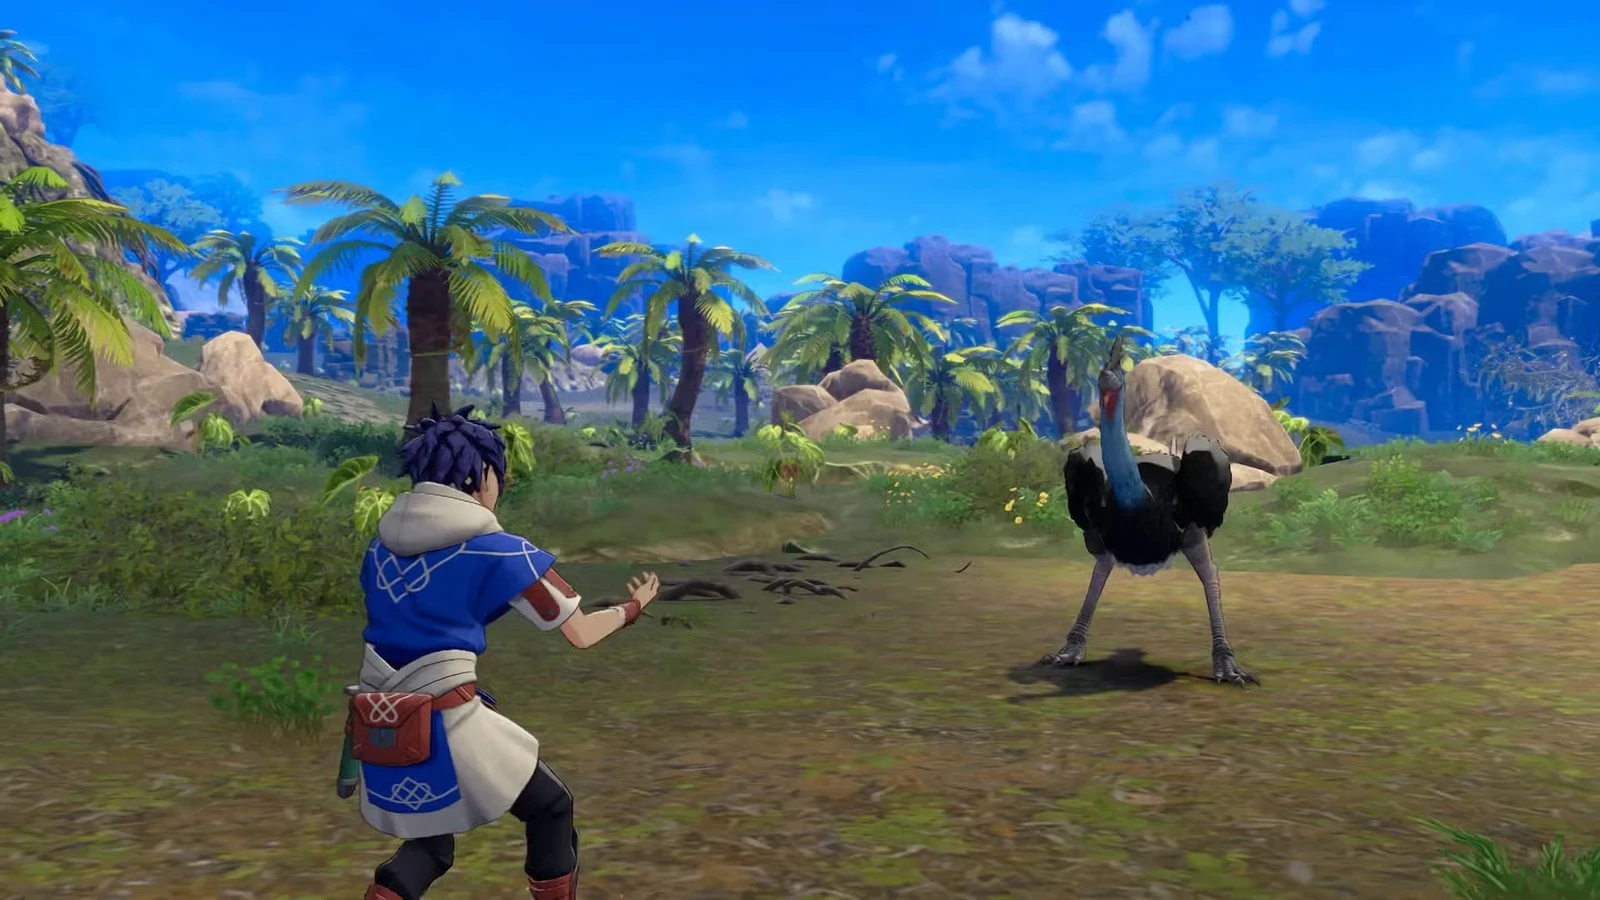
Ferghanan Horse adds Defense to the cavalry branch
In Cai’s story, choose Specialty Light Cavalry with a Ferghanan Horse, then Advanced Bardinger to stay mounted. At bond level 5, a Ferghanan Horse grants Strength and Defense +2 each, plus Defense growth +10 percentage points. This improves physical foundations and mounted utility, differing from the pure sword route’s focus on Speed and criticals.
Animal capture opens from Chapter 5 of Cai’s story. Bond-level-5 animals provide total growth bonuses of 25 percentage points. If no rare has appeared, a wild animal of the same species has the same total bonus and can be trained first. Light Cavalry requires Riding D, and Bardinger needs Riding C, while Sword progresses from C to B. Do not train only Sword and overlook Riding exam requirements.
Check follow-up and counterattack foundations around level 40
Around level 40 near Part 1's end, an ideal result has Strength, Speed, Dexterity, and HP above expectations for the same route. Speed's 50% growth supports follow-ups and Avoid, aided by Swordmaster's growth modifier. Strength 45% governs damage, Dexterity 45% supports Hit and Critical, and HP lets him survive enemy-phase attacks and keep countering. Check sword damage, follow-ups, and counters first.
Low Magic, Resistance, or Charm does not justify retraining the sword route. Magic and Charm are not its main uses. Resistance at 20% is a real weakness, handled by avoiding magical engagements. Luck at 45% supports criticals and Dodge; normal expected growth is sufficient. If Strength grows poorly, use Merge Causality with Guzran trained in another story, taking higher individual stats from the other record.
Hot-Headed grants one benefit each battle
Personal ability Hot-Headed randomly grants Hit, Avoid, or Crit +10 in combat. You cannot select which. Level enhancement Top Form+ raises the corresponding bonus to +20. Judge it through the forecast and actual effect rather than counting all three bonuses simultaneously.
His personal growths are HP 45%, Strength 45%, Magic 20%, Speed 50%, Dexterity 45%, Defense 35%, Resistance 20%, Luck 45%, and Charm 30%, totaling 335. He excels in Sword, Gauntlet, and Infantry, but struggles with White and Black Magic. Sword A and S follow the main route naturally, and early recruitment allows many Part 1 battles. Speed, Luck, Strength, and Dexterity make follow-ups, Avoid, and enemy-phase counters valuable. Low Resistance and uncontrollable random bonuses require careful enemy selection. His overall rating is S.
Cai and Leda can recruit him early more easily
Cai can recruit him in Chapter 3 with Support 1 and Renown 2.  Leda requires Support 1 and Renown 3 in Chapter 4.
 Dietrich can recruit him in Chapter 4 and
 Theodora in Chapter 5, but both require Support 3 and Renown 8. The first two stories have lower thresholds, letting earlier recruitment turn Part 1 combat experience toward the chosen build.
Strategy books join Ghosh and coffee as gifts
He likes alcohol, women, interesting people, and inexperienced young people. His favorite gifts are  Mature Ghosh,
 Crimson Ghosh, Common Coffee, Strategy Manuscript, History of a Master, and Volcano Ghosh.
He likes Blue-Rose Bouquet, Aromatic Shosh, Huge Fish Eyeball, Jade Ghosh, Blue Shosh, Mature Shosh, Orgus Coffee, Rustic Ghosh, Secret Ghosh, Select Coffee, Southern Coffee, Southern Ghosh, Strong Seasonings, Sun Ghosh, Wing Fletching, Young Ghosh, and Young Shosh. He somewhat likes Saraminian Sweets, Garum, and Kitten Figurine.
For Pale Raven conversations, choose Spread Wings when he asks whether you enjoy life, and Dance when he suspects the Pale Raven is human. Choose Nod when he boasts of being “Guzran the Undying,” reminds you to make your own decisions, discusses eating whatever you want, asks whether he has a veteran’s bearing, or offers help whenever needed. Choose Somersault when he says it is too peaceful here and asks you to wake him up.
Twin Blades and counters need durability to spare
Twin Blades attacks twice consecutively for 80% damage each, costing 10 durability. Astra comes from Swordmaster mastery and hits five times for 50% each. Their acquisition and per-hit damage differ. Other learnable arts and skills follow; check weapon, class type, and trigger conditions separately.
Abilities and weapon learning entries
| Ability, Combat Art, or spell | Effect listed in the original |
|---|---|
| Top Form+ | Hot-Headed’s stat bonus becomes +20. |
 Knightly Senses | Avoid +10 against spear enemies. |
 Read the Winds | Avoid +10 against bow enemies. |
 Infantry Move | Infantry: terrain movement cost −1, minimum 1. |
 Distraction | Adjacent enemies’ Hit −3. |
 Close Quarters+ | Infantry: adjacent enemies’ Movement −2. |
 Evasion | Infantry: 3% chance of Avoid +100 when attacked. |
 Timely Guard | 25% chance of Protection +3 when attacked. |
 Fire | Basic fire magic. |
 Laia | A little healing, occasionally healing +100. |
| Wrath Strike | Improves accuracy. |
| Grounder | Effective against flying units. |
| Blaze Blow | Strength /2% chance of Attack +5 when attacking. |
| Twin Blades | Strikes twice at 80% damage per hit. |
 Tempest Spear | Improves accuracy. |
| Bash | Improves Might. |
 Spike | Improves accuracy. |
| Hurl | Improves accuracy; requires a Range 1–2 axe. |
| Riot | Attack +5 on follow-ups. |
 Curved Shot | Improves accuracy. |
| Breakaway Shot | May move one space after combat. |
 Mighty Fist | Improves accuracy. |
| Beatdown | Speed +1 after combat, up to +10 for this battle. |
 Lend Strength | Ally Strength +2 until the next player phase. |
Supports and voice actor
His Support partners are the Promised One, Leda, 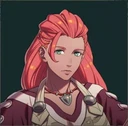 Mikaela, and
 Mu. His Japanese voice actor is Hayato Kaneko, whose notable roles include Lihito in Kengan Ashura, Gigante in Ranking of Kings, and Arajin Tomoshibi in BUCCHIGIRI?!.
More guides
Site guides

Take Guzran through Myrmidon → Shido → Swordmaster. Their mastery skills strengthen critical hits; use Brigand or Warrior if Strength is lacking.
Critical damage and healing on critical kills require mastering Myrmidon and Shido and equipping their skills. Consider sword classes or an unlocked Ranger when you need Speed and Dexterity rather than following fixed arrows. His personal bonus rises to +20 at level 35, but still randomly affects only one of Hit, Avoid, or Critical.
Class progression by stage
Prepare qualification items, proficiency, Renown, and class unlocks for exams. Schedule them around your current progress rather than a fixed chapter. If he is already a Gladiator or higher, keep training.
Part 1: Choose Myrmidon or Brigand at level 20
Recruit him early and build stats through swords and safe kills. Gladiator recommends level 5, Renown 1, and any one of Sword, Axe, or Gauntlet D. Train Sword to C for Myrmidon at level 20 and Renown 4. If Strength is clearly lacking, use Brigand at the intermediate tier for Strength, HP, and Defense, then return to swords once damage is sufficient.
- Sword C; use your best practical sword, then equip Ravaging Arts after mastery.
- Continue Speed development and increase critical damage.
- Sword or Axe C; use whichever is already trained to improve Strength.
- Fix attacks that connect and double but do too little damage.
Use your current swords, then switch when you obtain a rare weapon. If accuracy is poor, use learned accuracy arts such as Wrath Strike. Against fliers, switch to an effective sword art and check the forecast first.
Part 2: Switch to Warrior if Strength is low
The core continues into Shido at the recommended level 35, Renown 8, and Sword B. Myrmidon's Ravaging Arts increases critical damage; Shido's Ever Vigilant restores a little HP after a critical kill. Both require mastery and equipping. Changing classes in sequence does not automatically equip everything. A critical is not guaranteed, and attacking alone does not trigger the healing.
Look beyond equipment rarity. Upgrade Iron Swords or Bronze Swords in Part 2 and choose your main weapon by actual Might and Attack Speed. Shido can also use spears: carry ranged options such as a Javelin, Short Spear, or Pilum, and switch to Ridersbane against cavalry. Throwing a spear from a tile away avoids trading hits at melee range.
Another approach only visits Shido for mastery, then levels in Warrior or Ranger. Choose Warrior for Strength or an unlocked Ranger for Speed and Dexterity. Both recommend level 35 and Renown 8. Warrior requires Sword, Axe, or Gauntlet B; Ranger requires Sword or Bow B and its unlock. Change class to improve stats, or stay in Shido if you need its combat performance now.
Part 3: Pair Swordmaster with a Cleansing Blade
Swordmaster recommends level 45, Sword A, and the corresponding temple side-quest unlock. Continue switching swords and spears by target. Add Astra to your combat arts after mastering it. Keeping swords in Part 3 lets you use a Cleansing Blade against the risen dead.
Each activation still randomly increases only one of Hit, Avoid, or Critical. These are upgrades, not a stack of 10, 15, and 20 or a boost to all three stats together.
Whether finishing in Swordmaster or returning to Ranger, check kills without assuming the bonus selects the stat you need.
Infantry Move at Infantry A reduces terrain movement costs to a minimum of 1 without increasing displayed Movement. It only works when learned, equipped, and currently in an infantry class.
The regular infantry sword route needs no mount.
Change routes for mobility or a missing bow role
For mobility, Cai's route can take Ornius Rider and Armored Ornius Rider into Charioteer or Dragoon. Another approach switches directly to Light Cavalry to cover distant targets. The former borrows mount growth, while the latter reduces the pressure on a lone flier vulnerable to bows; choose one to develop. Dragoon also requires Flying and its unlock, and changing animals means rebuilding bonds.
For a missing bow role, Ranger develops Speed and Dexterity while adding utility through Breakaway Shot and Spiral Shot. The core sword route does not need this detour. Shadow Seeker or Bow Adept are also suggested further bow endpoints, but depend on actual Bow rank and remaining training time.
With investment across routes, use Brigand and Warrior for Strength on one and swords or Ranger for Speed on another. Armor on Leda's route can also improve Defense before merging in Part 3. Improving Defense takes extra training; Strength and Defense after merging depend on actual growth on each route.
Switch swords and spears without relying on random Avoid
On the core route, find ground-front-line targets he can safely double. Use swords up close, spears at range, and effective weapons against matching targets. Before taking attacks, check survival without the personal Avoid roll or Ever Vigilant healing. Retreat and thin dense enemies gradually; do not gamble on dodging through a solo charge. A Levin Sword is a backup, but low Magic does not support building him as a main magic-sword attacker.
Recruitment details
He is the recruitment tutorial character on Cai's route, but still needs a gift, Renown 2, and support 1. Leda's route needs Renown 3 and support 1 and also suits early recruitment. The other two routes have higher thresholds. See Guzran's recruitment requirements. Tutorial recruitment is not automatic joining on every route.
Ever Vigilant requires a critical kill
- Each random bonus affects only one stat. Calculate attacks without assuming it selects Critical.
- Master and equip Ever Vigilant, then trigger it with a critical kill.
- If follow-ups are reliable but damage is low, change class to improve Strength.
- Infantry Move changes terrain costs; displayed Movement stays the same.
Comments
Gladiator→Lv20Myrmidon→Lv35Shido→Lv45Swordmaster→The Blade Bronze SwordMt 4 Hit 90 Wt 3Iron SwordMt 9 Hit 90 Wt 4Flyssa
 Mt 10 Hit 90 Wt 4
 Levin SwordMt 12 Hit 70 Wt 8
 Vulnerary
 Bolt GemWt 5
 Swords Lv. 1Hit +3 when wielding a sword
 Close Quarters[Infantry] Adjacent enemies suffer Movement -1Timely Guard25% chance when attacked: protection +3DistractionAdjacent enemies suffer Hit -3Attack BasicsStr+1Wrath StrikeCost 2 Mt 4 Hit 10Grounder
 Cost 3 Mt 3 Hit 0Lend StrengthCost 0 Mt 0 Hit 0Lightning StrikeCost 5 Mt 8 Hit 20Bolt GemBackupWt 5
UseBronze Swordto start; obtainFlyssathen swap it in for stronger single hits. Wrath Strike adds hit, and Grounder handles flying foes. Learn the listed moves and meet each item's acquisition requirements before swapping them in. Obtain the battalion in Theodora's story first; in other stories, equip it only after the Part III reunion if already owned; Bolt GemEquip as needed; first check whether it affects follow-ups.
FlyssaMt 10 Hit 90 Wt 4 VeroquineMt 13 Hit 60 Wt 12Venin EdgeMt 3 Hit 90 Wt 3Levin SwordMt 12 Hit 70 Wt 8VulneraryBolt GemWt 5
 Swords Lv. 3Hit and Avo +5 when a sword is equippedTop FormThe stat boost from Hot-Headed becomes +15.Close Quarters[Infantry] Adjacent enemies suffer Movement -1Timely Guard25% chance when attacked: protection +3Attack BasicsStr+1

 Wrath StrikeCost 2 Mt 4 Hit 10GrounderCost 3 Mt 3 Hit 0Blaze BlowCost 5 Mt 7 Hit 0Bolt GemBackupWt 5
Myrmidon continues Sword training and aims for criticals. Wrath Strike adds hit, Grounder handles fliers, and Blaze Blow boosts single-hit damage; Levin SwordRanged backup only. Swap these in after learning the listed moves and meeting each item's acquisition conditions. Obtain the battalion in Theodora's story first; in other stories, equip it only after the Part III reunion if already owned; Bolt GemEquip as needed; first check whether it affects follow-ups.
Iron Sword +2Mt 13 Hit 90 Wt 4VeroquineMt 13 Hit 60 Wt 12 Short Spear
 Mt 5 Hit 75 Wt 10Ridersbane
 Mt 12 Hit 70 Wt 10VulneraryBolt GemWt 5Swords Lv. 3Hit and Avo +5 when a sword is equippedTop Form+Stat boosts from Hot-Headed become +20DexRavaging ArtsDamage dealt +6 on a critical hitClose Quarters+[Infantry] Adjacent enemies suffer Movement -2Timely Guard25% chance when attacked: protection +3
 Wrath StrikeCost 2 Mt 4 Hit 10GrounderCost 3 Mt 3 Hit 0Blaze BlowCost 5 Mt 7 Hit 0PruneCost 10 Mt 15 Hit 20Bolt GemBackupWt 5Iron Sword +3Mt 19 Hit 90 Wt 4Cleansing BladeMt 8 Hit 90 Wt 3Short SpearMt 5 Hit 75 Wt 10RidersbaneMt 12 Hit 70 Wt 10VulneraryBolt GemWt 5Swords Lv. 3Hit and Avo +5 when a sword is equippedTop Form+Stat boosts from Hot-Headed become +20DexRavaging ArtsDamage dealt +6 on a critical hitEver VigilantRestores a small amount of HP after defeating a foe with a critical hitHPInfantry Move[Infantry] Terrain movement cost -1 (minimum 1)

 Twin BladesCost 10 Mt 0 Hit 0GrounderCost 3 Mt 3 Hit 0Blaze BlowCost 5 Mt 7 Hit 0Bolt GemBackupWt 5
 Adept ArchersGambit: Disrupting ShotIron Sword +3Mt 19 Hit 90 Wt 4Cleansing Blade +3Mt 20 Hit 90 Wt 3Short Spear +3Mt 16 Hit 75 Wt 10Ridersbane +3Mt 22 Hit 70 Wt 10VulneraryBolt GemWt 5
 Swords Lv. 5Hit and Avo +10 when a sword is equippedTop Form+Stat boosts from Hot-Headed become +20DexRavaging ArtsDamage dealt +6 on a critical hitEver VigilantRestores a small amount of HP after defeating a foe with a critical hitHPDivine InsightSpd+10
 Bolt GemBackupWt 5
Sword S and Demonic Swordguard Reclass into The Blade once all requirements are met; retain Twin Blades and Astra, then use Divine Insight after Divine class mastery to add Spd。
Gladiator→Lv20Myrmidon→Lv35Shido→Lv45SwordmasterBronze SwordMt 4 Hit 90 Wt 3Iron SwordMt 9 Hit 90 Wt 4FlyssaMt 10 Hit 90 Wt 4Levin SwordMt 12 Hit 70 Wt 8VulneraryBolt GemWt 5Swords Lv. 1Hit +3 when wielding a swordClose Quarters[Infantry] Adjacent enemies suffer Movement -1Timely Guard25% chance when attacked: protection +3DistractionAdjacent enemies suffer Hit -3Attack BasicsStr+1Wrath StrikeCost 2 Mt 4 Hit 10GrounderCost 3 Mt 3 Hit 0Lend StrengthCost 0 Mt 0 Hit 0Lightning StrikeCost 5 Mt 8 Hit 20Bolt GemBackupWt 5UseBronze Swordto start; obtainFlyssathen swap it in for stronger single hits. Wrath Strike adds hit, and Grounder handles flying foes. Learn the listed moves and meet each item's acquisition requirements before swapping them in. Obtain the battalion in Theodora's story first; in other stories, equip it only after the Part III reunion if already owned; Bolt GemEquip as needed; first check whether it affects follow-ups.
FlyssaMt 10 Hit 90 Wt 4VeroquineMt 13 Hit 60 Wt 12Venin EdgeMt 3 Hit 90 Wt 3Levin SwordMt 12 Hit 70 Wt 8VulneraryBolt GemWt 5Swords Lv. 3Hit and Avo +5 when a sword is equippedTop FormThe stat boost from Hot-Headed becomes +15.Close Quarters[Infantry] Adjacent enemies suffer Movement -1Timely Guard25% chance when attacked: protection +3Attack BasicsStr+1Wrath StrikeCost 2 Mt 4 Hit 10GrounderCost 3 Mt 3 Hit 0Blaze BlowCost 5 Mt 7 Hit 0Bolt GemBackupWt 5Myrmidon continues Sword training and aims for criticals. Wrath Strike adds hit, Grounder handles fliers, and Blaze Blow boosts single-hit damage; Levin SwordRanged backup only. Swap these in after learning the listed moves and meeting each item's acquisition conditions. Obtain the battalion in Theodora's story first; in other stories, equip it only after the Part III reunion if already owned; Bolt GemEquip as needed; first check whether it affects follow-ups.
Iron Sword +2Mt 13 Hit 90 Wt 4VeroquineMt 13 Hit 60 Wt 12Short SpearMt 5 Hit 75 Wt 10RidersbaneMt 12 Hit 70 Wt 10VulneraryBolt GemWt 5Swords Lv. 3Hit and Avo +5 when a sword is equippedTop Form+Stat boosts from Hot-Headed become +20DexRavaging ArtsDamage dealt +6 on a critical hitClose Quarters+[Infantry] Adjacent enemies suffer Movement -2Timely Guard25% chance when attacked: protection +3Wrath StrikeCost 2 Mt 4 Hit 10GrounderCost 3 Mt 3 Hit 0Blaze BlowCost 5 Mt 7 Hit 0PruneCost 10 Mt 15 Hit 20Bolt GemBackupWt 5Iron Sword +3Mt 19 Hit 90 Wt 4Cleansing BladeMt 8 Hit 90 Wt 3Short SpearMt 5 Hit 75 Wt 10RidersbaneMt 12 Hit 70 Wt 10VulneraryBolt GemWt 5Swords Lv. 3Hit and Avo +5 when a sword is equippedTop Form+Stat boosts from Hot-Headed become +20DexRavaging ArtsDamage dealt +6 on a critical hitEver VigilantRestores a small amount of HP after defeating a foe with a critical hitHPInfantry Move[Infantry] Terrain movement cost -1 (minimum 1)Twin BladesCost 10 Mt 0 Hit 0GrounderCost 3 Mt 3 Hit 0Blaze BlowCost 5 Mt 7 Hit 0Bolt GemBackupWt 5Adept ArchersGambit: Disrupting ShotIron Sword +3Mt 19 Hit 90 Wt 4Cleansing Blade +3Mt 20 Hit 90 Wt 3Short Spear +3Mt 16 Hit 75 Wt 10Ridersbane +3Mt 22 Hit 70 Wt 10VulneraryBolt GemWt 5Swords Lv. 5Hit and Avo +10 when a sword is equippedTop Form+Stat boosts from Hot-Headed become +20DexRavaging ArtsDamage dealt +6 on a critical hitEver VigilantRestores a small amount of HP after defeating a foe with a critical hitHPInfantry Move[Infantry] Terrain movement cost -1 (minimum 1)Bolt GemBackupWt 5Use Twin Blades and Astra for repeated attacks, and Grounder against flying enemies. Ever Vigilant heals only on critical kills; judge whether to stay on the front line by the actual current bonuses. Switch in the listed arts after learning them and meeting each acquisition requirement. Obtain battalions on Theodora's route first; on other routes, equip them only after the Part III merger if already owned;Bolt GemEquip as needed; first check whether it affects follow-ups.
Gladiator→Lv20Light Cavalry→Lv35BardingerBronze SwordMt 4 Hit 90 Wt 3Iron SwordMt 9 Hit 90 Wt 4FlyssaMt 10 Hit 90 Wt 4Levin SwordMt 12 Hit 70 Wt 8VulneraryBolt GemWt 5Swords Lv. 1Hit +3 when wielding a swordClose Quarters[Infantry] Adjacent enemies suffer Movement -1Timely Guard25% chance when attacked: protection +3DistractionAdjacent enemies suffer Hit -3Attack BasicsStr+1Wrath StrikeCost 2 Mt 4 Hit 10GrounderCost 3 Mt 3 Hit 0Lend StrengthCost 0 Mt 0 Hit 0Lightning StrikeCost 5 Mt 8 Hit 20Bolt GemBackupWt 5Prepare for Light Cavalry through Sword first, training Riding D separately.
FlyssaMt 10 Hit 90 Wt 4VeroquineMt 13 Hit 60 Wt 12Venin EdgeMt 3 Hit 90 Wt 3Levin SwordMt 12 Hit 70 Wt 8VulneraryBolt GemWt 5Swords Lv. 3Hit and Avo +5 when a sword is equippedTop FormThe stat boost from Hot-Headed becomes +15.Timely Guard25% chance when attacked: protection +3Attack BasicsStr+1Knightly SensesAvoid +10 in combat against spear users Mount/DismountCan use “Mount” and “Dismount”Wrath StrikeCost 2 Mt 4 Hit 10GrounderCost 3 Mt 3 Hit 0Blaze BlowCost 5 Mt 7 Hit 0Bolt GemBackupWt 5
 Ferghanan HorseStr+2 Dex+1 Def+2
Switch to Light Cavalry at Intermediate tier; retain his previous sword-line inventory, prepare Sword C and Riding D, and raise the bond with a Ferghanan Horse.
Iron Sword +2Mt 13 Hit 90 Wt 4VeroquineMt 13 Hit 60 Wt 12Short SpearMt 5 Hit 75 Wt 10RidersbaneMt 12 Hit 70 Wt 10VulneraryBolt GemWt 5Swords Lv. 3Hit and Avo +5 when a sword is equippedTop Form+Stat boosts from Hot-Headed become +20Timely Guard25% chance when attacked: protection +3Knightly SensesAvoid +10 in combat against spear users Aegis20% chance to halve damage taken from a magic attackWrath StrikeCost 2 Mt 4 Hit 10GrounderCost 3 Mt 3 Hit 0Blaze BlowCost 5 Mt 7 Hit 0PruneCost 10 Mt 15 Hit 20Bolt GemBackupWt 5Ferghanan HorseStr+2 Dex+1 Def+2
Become a Bardinger after reaching Riding C and Sword B; Ferghanan Horse continues to add StrandDef。
Iron Sword +2Mt 13 Hit 90 Wt 4VeroquineMt 13 Hit 60 Wt 12Short SpearMt 5 Hit 75 Wt 10RidersbaneMt 12 Hit 70 Wt 10VulneraryBolt GemWt 5Swords Lv. 3Hit and Avo +5 when a sword is equippedTop Form+Stat boosts from Hot-Headed become +20Timely Guard25% chance when attacked: protection +3Knightly SensesAvoid +10 in combat against spear usersAegis20% chance to halve damage taken from a magic attackWrath StrikeCost 2 Mt 4 Hit 10GrounderCost 3 Mt 3 Hit 0Blaze BlowCost 5 Mt 7 Hit 0PruneCost 10 Mt 15 Hit 20Bolt GemBackupWt 5Ferghanan HorseStr+2 Dex+1 Def+2Stay in Bardinger for continued mounted training; keep a light sword and a spear alternative, and do not bring infantry-only skills into a mounted class.
Build approach and suitable stages
Sword path through to The Blade: Shido Lv35; SwordmasterSpdDex: Shido Lv35
Use enhancedIron Swordas the everyday main weapon, Short SpearProvides attacks at two spaces; RidersbaneAgainst cavalry; replace after learning Blaze Blow at Sword BLend Strength. Swap in after learning the listed moves and meeting each item's acquisition requirements. Obtain the battalion in Theodora's story first; on other stories, equip it only after the Part III reunion and once owned;Bolt GemEquip as needed; first check whether it affects follow-ups.
Sword path through to The Blade: Swordmaster Lv45; SwordmasterSpdDex: Swordmaster Lv45
Normally use an upgradedIron Sword, switch only against foes with Netherworld Blessing toCleansing Blade; Twin Blades at Sword A enables two consecutive attacks without waiting until level 60. Switch in the listed arts after learning them and meeting each acquisition requirement. Obtain battalions on Theodora's route first; on other routes, equip them only after the Part III merger if already owned;Bolt GemEquip as needed; first check whether it affects follow-ups.
DexWidely recommendedDexVery strongDexUseful for specific strategies
 Swords Lv. 2
 Swords Lv. 4
 Swordfaire
 Fists Lv. 1
 Fists Lv. 2
 Fists Lv. 3
 Spirit Smash
 Fists Lv. 4
 Fists Lv. 5
 Fistfaire
 Evasion +
 Infantry Move+
 Spear
 Spears Lv. 1
 Spears Lv. 2
 Spears Lv. 3
 Spears Lv. 4
 Spears Lv. 5
 Spearfaire
 Axe
 Axes Lv. 1
 Axes Lv. 2
 Axes Lv. 3

 Axes Lv. 4
 Axes Lv. 5
 Axefaire
 Bow
 Bows Lv. 1
 Bows Lv. 2
 Bows Lv. 3
 Bows Lv. 4
 Bows Lv. 5
 Bowfaire
 Knight’s Vanguard
 Cavalry Move
 Flying
 Flitting Flier
 Heavy Armor
 Armored Move
 Armored Move+
 Build +
 Authority
 Distraction+
 Gambit Master
 Black Magic Lv. 1
 Black Magic Lv. 2
 Black Magic Lv. 3
 Black Magic Lv. 4
 Black Magic Lv. 5
 Black-Magic Mastery
 White Magic Lv. 1
 White Magic Lv. 2
 White Magic Lv. 3
 White Magic Lv. 4
 White Magic Lv. 5
 White-Magic Mastery
Guzran: joins through the story on the Cai route; recruitable on the Dietrich, Theodora, and Leda routes (renown 3–8).
Cai's storyGiven in the tutorialEasiest option 2
 1
Steps
Follow the recruitment tutorial in Part I, Chapter 3. Give one gift to unlock recruitment, then reach renown 2 and support 1 with Cai.
- TipYoung GhoshBuy from the gift merchant in the lower tavern of the imperial capital, Dagsion, for 50G each. This route only requires support 1; check the requirements after the first gift.
Dietrich's storyRecruitable83From Chapter 4Steps
Available from Part I, Chapter 4. Give a gift to unlock recruitment, then reach Renown 8 and Bond 3 with Dietrich.
- TipYoung GhoshBuy from the gift merchant at the lower tavern in the imperial capital, Dagsion, for 50G each. Gifts and meals raise bonds with your route's protagonist; include the protagonist in the meal.
Theodora's storyRecruitable83From Chapter 5Steps
Available from Part I, Chapter 5. Give one gift to unlock recruitment, then reach Renown 8 and support 3 with Theodora.
- TipYoung GhoshBuy from the gift merchant at the lower tavern in the imperial capital, Dagsion, for 50G each. Gifts and meals raise bonds with your route's protagonist; include the protagonist in the meal.
Leda's storyRecruitable31From Chapter 4Steps
Available from Part I, Chapter 4. Give a gift to unlock recruitment, then reach Renown 3 and Bond 1 with Leda.
- TipYoung GhoshBuy from the gift merchant in the lower tavern of the imperial capital, Dagsion, for 50G each. This route only requires support 1; check the requirements after the first gift.
Renown level Bond Level with this route's protagonist. For all characters across the four routes, see Recruitment; see recruitment steps at How to recruit。
 Most effective gifts
All are most-loved gifts available at shops. Most of Guzran's favorites are fermented drinks. Most-loved gifts show double arrows in-game and give the largest affection increase.
Find where to buy these on the map→ Where to buy all 13 favorite gifts→
Favorite13 items
Young Ghosh50G · Fermented drinksMature Ghosh100G · Fermented drinksRustic Ghosh100G · Fermented drinksYoung Shosh100G · Fermented drinksJade Ghosh150G · Fermented drinksMature Shosh150G · Fermented drinksSouthern Ghosh150G · Fermented drinksSun Ghosh150G · Fermented drinksVolcano Ghosh150G · Fermented drinksAromatic Shosh500G · Fermented drinksEnergizing Ghosh150G · Fermented drinksTales of Adventure300G · BookStrategy Manuscript500G · TrainingLikes12 items
Select Coffee100G · CoffeeOrgus Coffee150G · CoffeeSouthern Coffee150G · CoffeeCommon Coffee100G · CoffeeSecret Ghosh500G · Fermented drinksLight Shosh100G · Fermented drinksBlue Shosh150G · Fermented drinksWing Fletching300G · BowStrong Seasonings200G · CookingBlue-Rose Bouquet500G · FlowersEastern Tea Leaves2000G · DrinksHuge Fish Eyeball400G · FishLikesAlcohol, women, interesting people, brash youngstersInterestsBoasting
Bond partners4 characters · 1 can reach A · 1 have confirmed paired endings
 A
 B
 B
 C
Letters indicate the highest available support conversation (C = support Lv2, B = support Lv3, A = support Lv4); A paired ending is confirmed,For the rules, seeBonds。
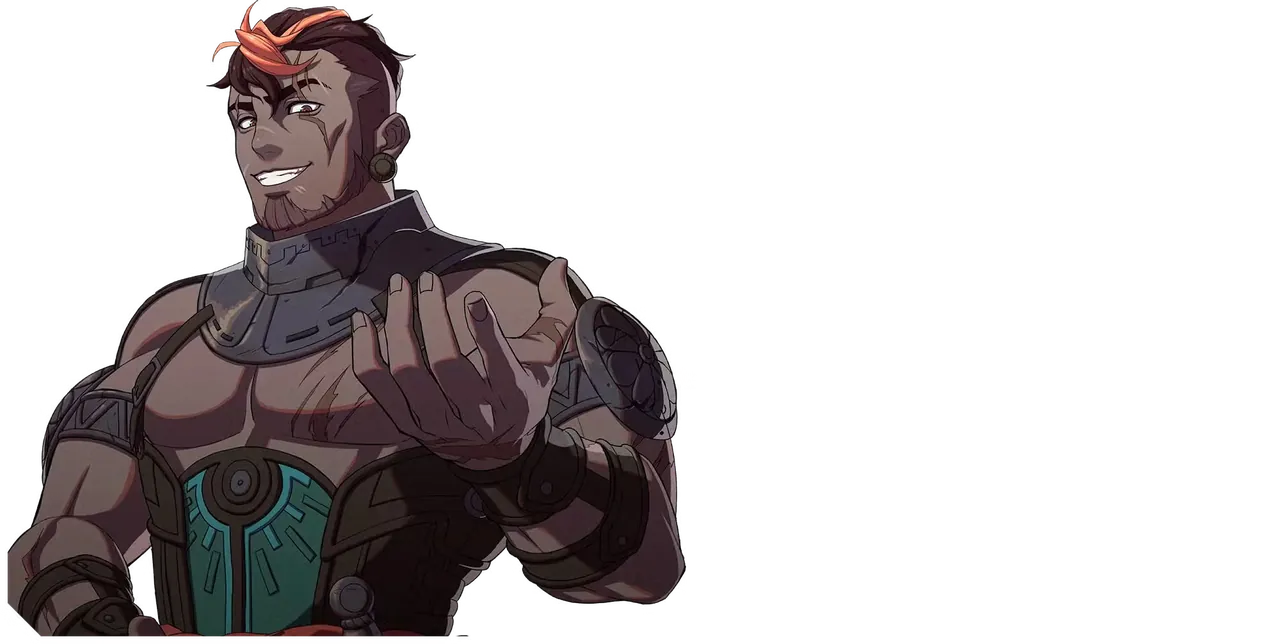
A bold, carefree mercenary who has survived many dangerous battles, known among companions as “Guzran the Undying”. He boasts so often that people may tune him out, but his abilities are real.
Details
| Title | Freelance mercenary |
|---|---|
| Affiliation | Unaffiliated |
| Age | Ages 36–37 (Parts I and II); 41 (Part III) |
| Height | 188 cm |
| Birthday | 9/17 |
| Likes | Alcohol, women, interesting people, brash youngsters |
| Interests | Boasting |
| Japanese voice | Hayato KanekoWikipedia (Japanese) |
| English voice actor | Matthew David RuddVoice actor database |
In the story
A mercenary with experience on many battlefields
Guzran earns his living as a mercenary and has survived many dangerous situations. He exaggerates his exploits, but his skills are more than empty talk.
Solo epilogue: Continues as an independent mercenarySpoilers
In his solo ending, he continues taking mercenary jobs after the war without serving any country. Despite becoming a war hero, he still enjoys drinking and boasting about the past, winning affection through his warmth and readiness to help.
Trivia
- Japanese voice actor: Hayato Kaneko.