
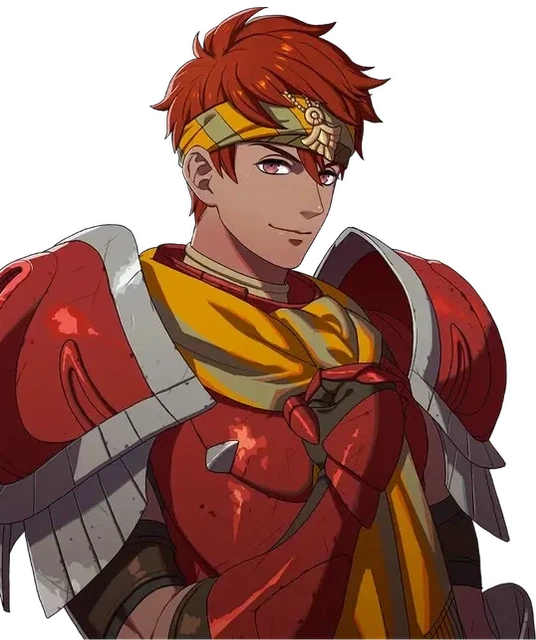
Nathan
Cネイサン · Nathan Dietrich route· Recruitable
 Leda route· Recruitable
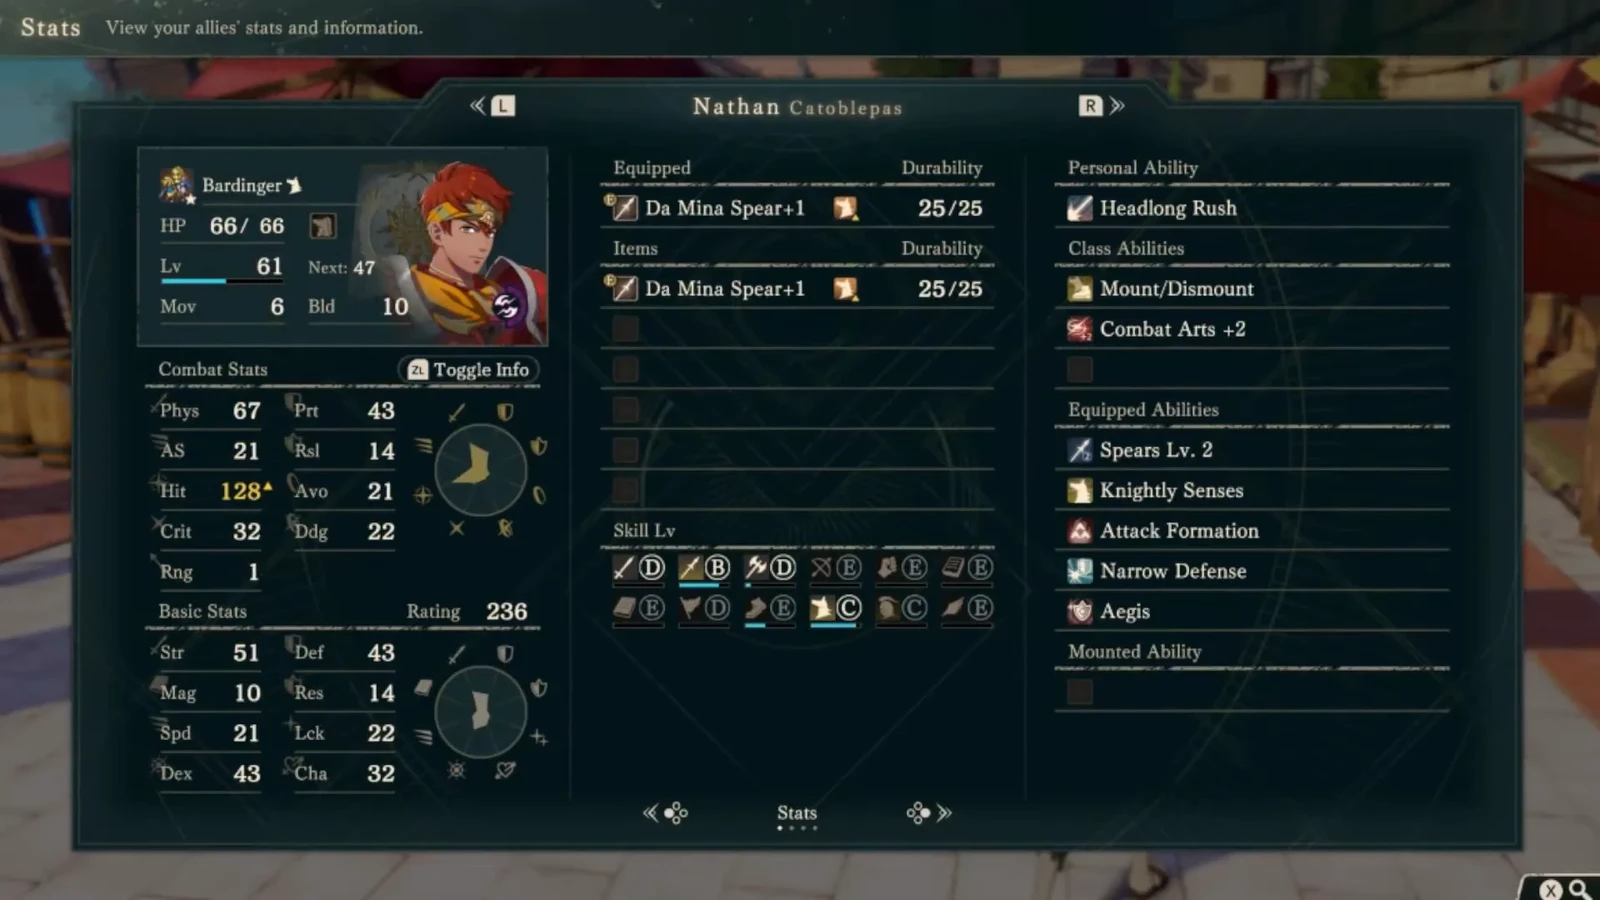
Use him as a physical spear unit as soon as he formally joins in Part 2, prioritizing powerful single hits. Standard cavalry, a short defensive detour, and Sentinel each have costs; do not restart in beginner classes.
 Bardinger Lv40
 Spear
 Riding
 Heavy Armor
 Fan art →
Nine stats
| HP | Str | Mag | Spd | Dex | Def | Res | Lck | Cha | Total | |
|---|---|---|---|---|---|---|---|---|---|---|
| Growth rates | 55% | 60% | 15% | 25% | 60% | 45% | 15% | 25% | 30% | 330% |
| Overall rank63 characters total | Rank 4 | Rank 1 | Rank 52 | Rank 56 | Rank 1 | Rank 5 | Rank 58 | Rank 55 | Rank 40 | Rank 34 |
| Base statsBardinger Lv40 | 50 | 35 | 8 | 15 | 34 | 28 | 10 | 16 | 18 | 214 |
| Base stat ranking63 characters total | Rank 5 | Rank 3 | Rank 19 | Rank 13 | Rank 4 | Rank 4 | Rank 16 | Rank 10 | Rank 11 | Rank 9 |
| Lv60 expected statsArmored lance cavalry into The Cavalier | 77 | 56 | 10 | 14 | 48 | 45 | 11 | 21 | 25 | 307 |
| Expected rank62 characters total | Rank 7 | Rank 4 | Rank 55 | Rank 58 | Rank 15 | Rank 6 | Rank 59 | Rank 56 | Rank 43 | Rank 41 |
Proficiency
SpearRidingHeavy ArmorWeakness—Budding talent—Starting skills
| Category | Skills | Effect |
|---|---|---|
| Personal skill |  Headlong Rush | Attack Speed +3 and Hit +10 when initiating combat |
Then prepare for The Cavalier with Riding A and Spear S. Cataphract certification first requires completing Theodora-route military preparation requests.

Reach Armor D through training or guidebooks, then become a Great Knight; this route does not have Pavise from Cataphract mastery.
Train Armor before moving into Great Knight. The infantry armor stage loses mounted movement.
Nathan’s armored Spear cavalry build and recruitment
 Nathan suits heavy single hits with a spear. Switch from his starting Bardinger to
 Cataphract to build Heavy Armor, then move into
 Great Knight and eventually
 The Cavalier. His Strength and Dexterity are very high, but his Speed and Resistance are low. Choose targets actively in combat. His armored appearance does not mean he can repeatedly take on fast enemies and mages.
A heavy spear hit is more realistic than follow-ups
His strengths are 60% Strength and 60% Dexterity growths. The former raises damage per hit, while the latter improves the consistency of Hit and Critical. HP 55% and Defense 45% also give him a foundation for taking physical damage. Spear, Riding, and Heavy Armor are all strengths. Great Knight’s proficiency requirements follow those three strengths, with no particular weakness to work around.
His limits are clear: 25% Speed rarely gives frequent natural follow-ups, and 15% Resistance makes magic dangerous. Magic is 15%, Luck 25%, and Charm 30%, for total growth of 330. Strong-looking Strength and Dexterity do not mean every stat grows equally. Overall rating: C. He joins only in Part 2, leaving a short training and deployment window, while low Speed exposes him to follow-ups.
His personal ability Headlong Rush grants Attack Speed +3 and Hit +10 when initiating, making it easier to use his strengths on offense. Attack Speed +3 only applies in the relevant combat. It does not change permanent Speed growth or guarantee that every enemy will fail to make a follow-up attack. Check the combat forecast before attacking, then decide whether he can remain near enemies.
Build Heavy Armor as Cataphract before Great Knight
| Stage | Class and preparation | Reason to use this stage |
|---|---|---|
| Recruitment | Bardinger; the character database starts him at level 40 | Check his current Spear, Riding, and learned abilities, then prepare to build Heavy Armor |
| Advanced-class adjustment | Cataphract; recommended level 35, Renown 8, Heavy Armor E+, Riding D, Spear or Axe B | Keeps mounted spear access while building the Heavy Armor needed for Great Knight; mastery grants  Pavise |
| Master class | Great Knight; recommended level 45, Heavy Armor D, Riding D, Spear or Axe A | Combat Arts +2, Strike-Last Def +5; mastery grants  Fierce Shield |
| Divine class | The Cavalier; Riding A, Spear, Axe, or Sword S, and the corresponding qualification | Combat Arts +3, Golden Ride; mastery grants  Divine Dexterity for Dexterity +10 |
Cataphract's recommended level is 35, below Nathan's late joining level. At level 40, switch at his current level once the class, proficiencies, and seal are ready. The route table starts at Bardinger and retains this advanced-class adjustment.
Cataphract unlocks by completing every military preparation upgrade before Chapter 8 on Theodora's route. Nathan's available protagonist route differs from the unlock route, so check account-wide eligibility first. Without it, use  Dreadnought: switch from Bardinger to train Heavy Armor, then return to a mounted class when Great Knight unlocks.
Great Knight unlocks after restoring the corresponding temple and completing its Part 3 side quest. Level 45 and Spear A alone are insufficient. Stay in Cataphract or Dreadnought until it opens. Divine classes also need  Divinium Saddle and the required proficiencies; there is no fixed recommended level, so switch when eligible.
Stay in Bardinger if Cataphract is locked
Another plan reduces class changes: stay in Bardinger, train Heavy Armor separately through training and guidebooks, then move directly to Great Knight. This keeps mounted spear combat familiar and avoids a foot-armor detour. The cost is separate Heavy Armor investment up to D.
Great Knight’s mastery ability Fierce Shield has a 50% chance when initiating to halve damage taken during that combat. Like Headlong Rush, it encourages active attacks: first improve Hit and Attack Speed, then seek to reduce counterattack damage. However, 50% is not guaranteed. Choose targets based on surviving even if it fails to activate. Waiting for enemies to attack also misses both initiation benefits.
The three routes serve different unlock states: use the full armored spear-cavalry route if Cataphract is available; use Dreadnought if it is not and you are willing to switch for Heavy Armor; or stay mounted as Bardinger and train Heavy Armor manually.
Check whether Strength, HP, and Defense keep up
Assess training results through Strength, HP, Defense, and Dexterity first. Strength and Dexterity make heavy spear hits more reliable. HP and Defense determine whether he can survive physical counterattacks after attacking or stay on the front line against a limited number of enemies. Exceeding expected values in these four stats is the most direct sign that this physical heavy cavalry build has succeeded.
If Magic, Luck, and Charm are a little lower, you do not need to spend extra resources bringing them up for this role. Normal Speed growth is enough. Headlong Rush improves Attack Speed when initiating, but the fundamental weakness of low Speed remains. Resistance is also difficult to force upward within his limited training window. Avoiding concentrated mage attacks when choosing his route is more effective than trying to use Defense in place of Resistance.
Train advanced armor after he joins; you need not return to beginner or intermediate classes.
Save the finishing blow for Creek
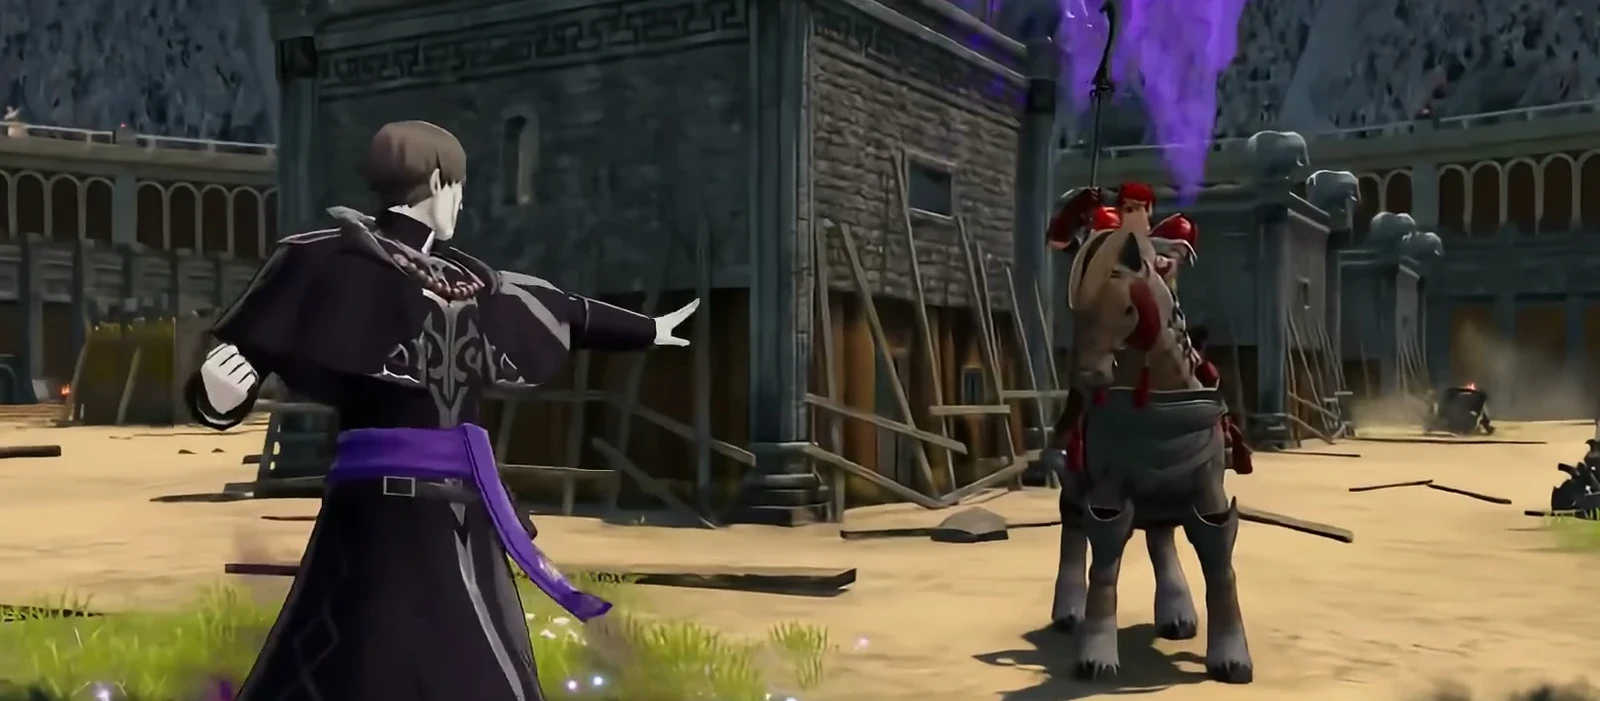
Nathan appears as a reinforcement in Chapter 3 of the Part 2 War story.  Kiroc must defeat him, and he joins after the battle. If anyone else defeats him, you cannot recruit him even if you win. Bring Creek before entering the map and leave him an action that can secure the kill. Do not casually clear Nathan like an ordinary reinforcement.
Creek has his own prerequisites: finish the late sister's accessory side quest in Part 1, then defeat him in the earlier related Part 2 battle to use him here. Missing his Part 1 quest prevents this required defeat later.
Separate accuracy and finishing roles for Spear Combat Arts
 Wrath Strike and
 Tempest Spear are both close-range Combat Arts with durability cost 2, Might +4, and Hit +10. The former needs the corresponding sword, while the latter uses a spear. Keep Tempest Spear first in a standard Spear build. Matching numbers do not remove weapon restrictions.
 Armored Blow costs 4 durability and grants Might +3. After defeating an enemy, it grants Protection +3 until the next player phase, but cannot make follow-up attacks. Its value is improved physical durability after a kill, rather than follow-up damage.
 Vanguard Spear costs 5 durability and grants Might +7. When attacking, it has a chance equal to half Strength, as a percentage, to add 5 Attack. High Strength improves the chance, but you still need to judge whether it can finish the target using damage without activation.
 Knightly Senses gives Avoid +10 against spears;
 Attack Formation gives adjacent allies Attack +1;
 Timely Guard has a 25% chance for Protection +3 when attacked;
 Spearblock requires armor and gives Protection +5 against spears. Enemy weapons, current class, and initiation conditions affect the benefit. Mount and innate class abilities are listed separately and must not be counted twice or treated as occupying the five equipped skill slots.
Choose weapons and training supplies as gifts
He values the red armor bestowed by his king and loyalty, and dislikes people who look down on loyalty. Prepare  Sharp Dagger,
 Ceremonial Spear,
 Strategy Manuscript,
 Training Weights,
 Training Bracelet, and
 Antique Medal. This group centers on weapons, training, and military achievements.
His Support conversation partner is Kiroc, and his Japanese voice actor is Makoto Kaneko. Creek matters for both recruitment and later Support, so arrange Creek’s related tasks early if you plan to train Nathan.
More guides
- The tradeoffs of using Nathan as heavy cavalry through a full playthroughHiiro
- Practical character training advicegaze Sakura
- Nathan’s offensive heavy cavalry routeGameWith
- Nathan's development routes and recruitment requirements (Japanese Game8)ゲームエイト
- Nathan class and training recommendations (English Game8)Game8
- Nathan's recommended classes and performanceAltema guide team
Site guides

Use his existing spear cavalry for high-damage single hits after recruitment. High Strength and Dexterity let him fill a gap immediately. Take a short detour only if Defense is lacking; do not retrain Beginner classes.
Initiating Attack Speed +3 and Hit +10 help, but cannot solve every low-Speed or low-Resistance problem.
Training route by stage
Part 1: Complete Creek’s request first
Complete the Creek-related timed request to prepare both characters’ Part 2 recruitment. Nathan cannot join in Part 1, so do not schedule Beginner reclassing, weapon training, or mount training for him yet. Confirm the prerequisite before skipping all the relevant war story chapters.
Part 2: Leave the finishing blow to Creek
Have the already recruited  Creek land the final blow. Defeating Nathan in Chapter 3 and his formal joining in Chapter 4 are separate events. Do not let another attacker finish him. After recruitment, check his own level, Spear, Riding, and equipment.
Check his current class on recruitment. Use suitable spear cavalry directly rather than retraining Beginner classes. For Bardinger, first check level, certification, and proficiencies.
Focus on Spear, then assess Riding and Heavy Armor. A short armored detour can improve Defense; stay spear cavalry for mobility. Compare his ability to reach the fight before switching to armor. Choose spears with sufficient damage and reliable single-hit arts from his learned menu.
| Possible advanced transition | Class-table milestone | Check first |
|---|---|---|
| Bardinger | Level 35, Riding C, Spear or Sword B | If his current class works, no switch is required just to match the table |
| Cataphract | Level 35, Riding D, Heavy Armor E+, Spear or Axe B | Requires a  Theodora-route unlock; check whether this save inherited eligibility |
| Dreadnought | Level 35, Heavy Armor D, Spear or Axe B | Whether losing mounted mobility still lets him reach fights |
Choose whichever of the three classes above fits the current job; there is no need to take every exam. Level alone is insufficient: unlocks and proficiencies still matter. Check whether the new class can do the job, then train the gaps.
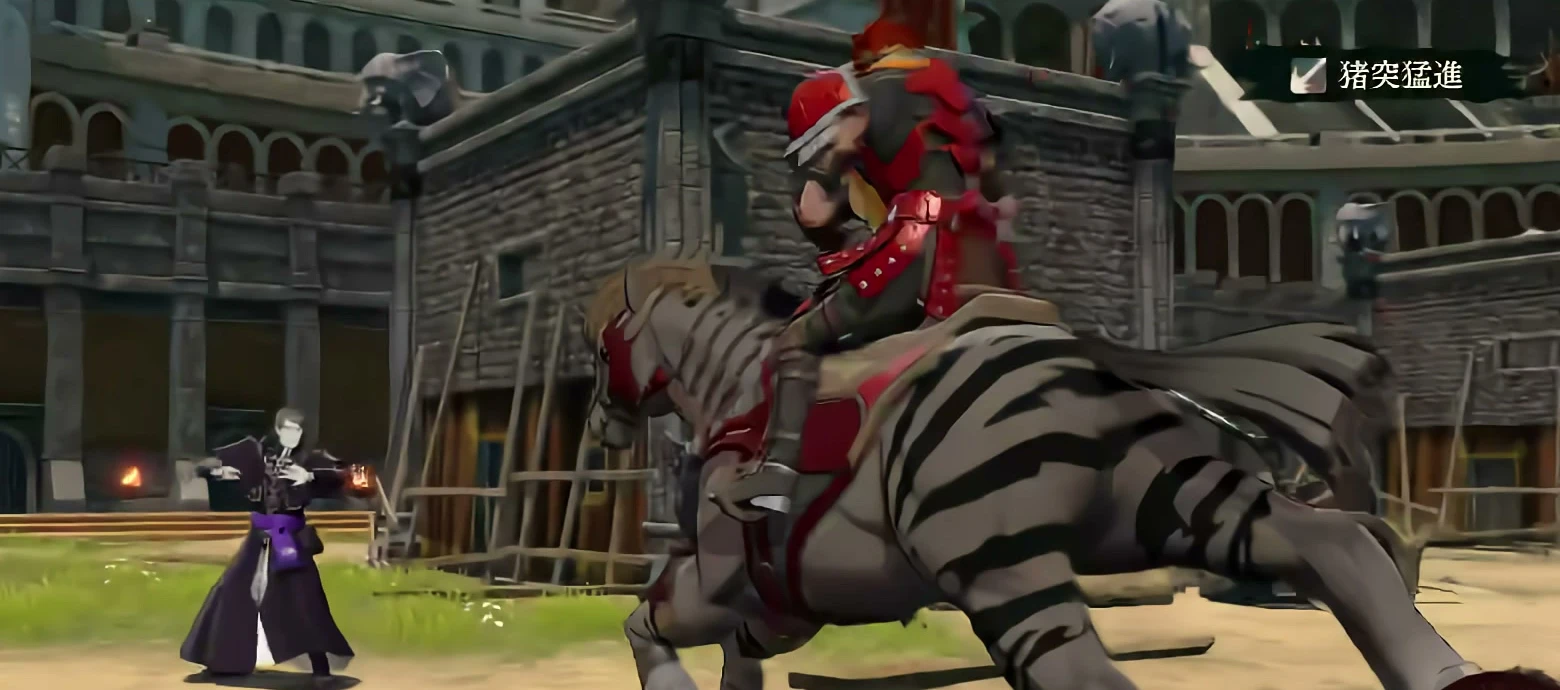

Part 3: Choose an endpoint for the spear role
- Preparation: Level 45, Riding B, either Spear A or Sword A; prepare after clearing segment 1
- Role and cost: Retain ordinary spear cavalry mobility for physical reinforcement that needs to arrive quickly
- Preparation: Level 45, Riding D, Heavy Armor D, either Spear A or Axe A; also complete the Credna temple quest
- Role and cost: Consider it for better physical durability. The unlock and Heavy Armor training cannot be skipped
- Preparation: Level 45, Spear A, and clearing segment 1; train White Magic separately
- Role and cost: Consider it for a spear user who also casts White Magic, requiring separate White Magic training
Fight a few battles before taking a short Defense detour. If spear cavalry works, keep using it; there is no need to pass through Cataphract before Great Knight. You can also return to spear cavalry after improving Defense.
Build around Headlong Rush’s initiating condition. Attack Speed +3 and Hit +10 apply only when initiating. Check whether they actually create a follow-up. Without one, a high-damage single hit can still do the job.
Arrange equipment, mounts, and Battalions for the current final class. Spears are his main weapon. Check total weight and the risk of being doubled before adding shields or other heavy gear.Mounted classes can use an appropriate mount you already own, but a new Part 2 recruit does not automatically arrive with a fully developed special horse. Switching to infantry Sentinel removes mounted benefits from calculations.
Choose physical enemies for high-damage single hits
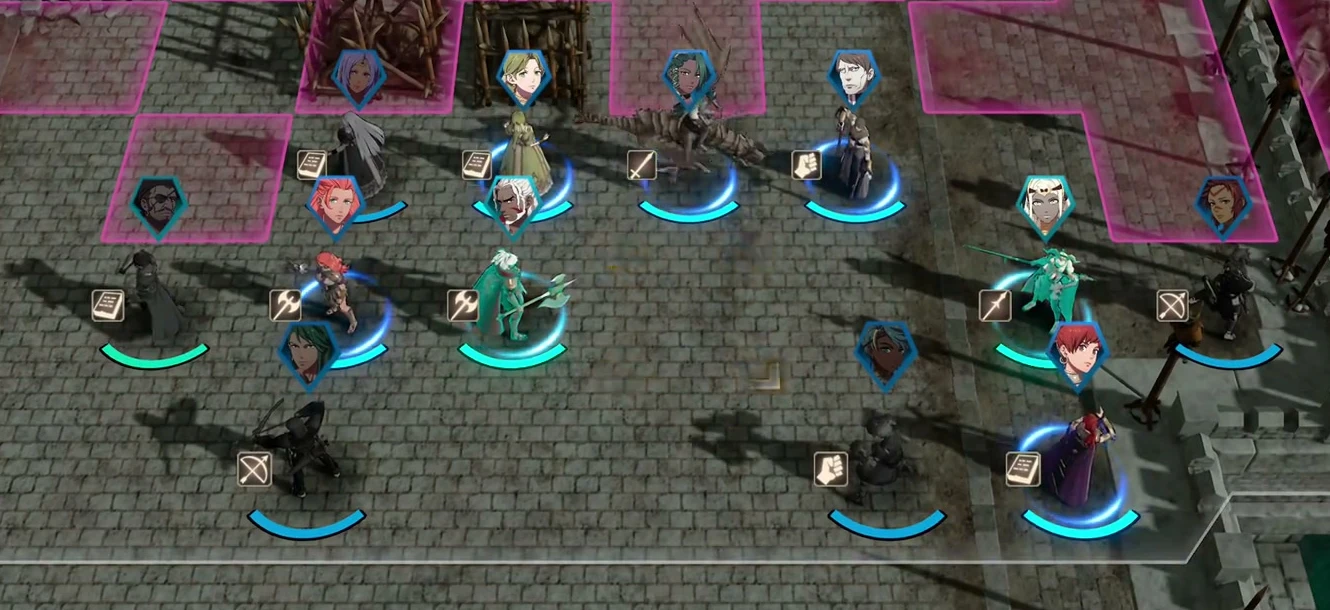
Assign him a physical enemy lane and choose targets he can defeat in one hit. He adds immediate combat power when the team lacks bodies, and high Dexterity helps consistency. Have teammates weaken or control targets, then finish with a spear art. This is easier to deliver than chasing a double every fight. For tanking, check current Defense and total enemy damage; growth rates are not his stats in this battle.
Stay outside ranges where mages can double him. Low Resistance and low Speed are a real danger, and initiation acceleration does not cover enemy phase. Have teammates remove mages or keep Nathan on a flank they cannot reach. Low physical damage forecasts after an armored switch do not make magic threats disappear.
Recruitment
Complete Creek's Part 1 prerequisites, recruit Creek under the conditions in Dietrich's or Leda's War arc, then have him defeat Nathan in Chapter 3. Nathan joins in Chapter 4. See the Nathan recruitment page for full quest names, windows, and Part 3 return requirements.
Creek’s finishing blow is a recruitment condition
- Assuming anyone can defeat him in Chapter 3 for recruitment. Creek must land the final blow, and formal recruitment comes in a later chapter.
- Returning to Beginner classes to start over. Use his actual joining level, weapons, and class. Late recruits continue from current progress.
- Treating initiating Attack Speed +3 as permanent Speed +3. It applies only in combat he initiates, not enemy phase. Check follow-ups in the forecast.
- Assuming Great Knight is automatically better than ordinary spear cavalry. Compare arrival time, unlocks, Heavy Armor training, and map length.
- Assuming high Strength and Dexterity can handle every enemy. Mage follow-ups are a clear weakness. Split routes and have allies remove threats.
Comments
Bardinger→Lv40Cataphract→Lv45Great Knight→The CavalierBardinger Guandao
 Mt 11 Hit 90 Wt 9
 JavelinMt 3 Hit 80 Wt 8
 Ridersbane +1
 Mt 16 Hit 70 Wt 10
 Concoction
 Pure Water
 Silver ShieldWt 4
 Spears Lv. 3Hit and Avo +5 when a spear is equippedKnightly SensesAvoid +10 in combat against spear usersTimely Guard25% chance when attacked: protection +3
 Aegis20% chance to halve damage taken from a magic attack
 Cavalry Move[Cavalry] Terrain movement cost -1 (minimum 1)Tempest SpearCost 2 Mt 4 Hit 10Armored BlowCost 4 Mt 3 Hit 0Vanguard SpearCost 5 Mt 7 Hit 0Silver ShieldEquippedWt 4Currently assigned horseCataphractGuandaoMt 11 Hit 90 Wt 9JavelinMt 3 Hit 80 Wt 8Ridersbane +1Mt 16 Hit 70 Wt 10ConcoctionPure WaterSilver ShieldWt 4Spears Lv. 3Hit and Avo +5 when a spear is equippedKnightly SensesAvoid +10 in combat against spear usersTimely Guard25% chance when attacked: protection +3Aegis20% chance to halve damage taken from a magic attackPavise20% chance to halve damage from a physical attack
 Mount/DismountCan use “Mount” and “Dismount”
 Combat Arts +1Equippable combat arts +1
 DefendingDef+3Protection +3 when the foe initiates combatTempest SpearCost 2 Mt 4 Hit 10Armored BlowCost 4 Mt 3 Hit 0Vanguard SpearCost 5 Mt 7 Hit 0Silver ShieldEquippedWt 4Wild HorseSpd+1 Dex+3 Def+1
 Paired RunBond 3[Cavalry] Movement +1GuandaoMt 11 Hit 90 Wt 9JavelinMt 3 Hit 80 Wt 8Ridersbane +1Mt 16 Hit 70 Wt 10ConcoctionPure WaterSilver ShieldWt 4
 Spears Lv. 4Hit and Avo +7 when a spear is equippedAegis20% chance to halve damage taken from a magic attackPavise20% chance to halve damage from a physical attackFierce Shield50% chance to halve damage taken during combat when initiatingCavalry Move[Cavalry] Terrain movement cost -1 (minimum 1)Mount/DismountCan use “Mount” and “Dismount”
 Combat Arts +2Equippable combat arts +2
 DefendingDef+5Protection +5 when the foe initiates combat
 Raging TempestCost 8 Mt 12 Hit 20Armored BlowCost 4 Mt 3 Hit 0Vanguard SpearCost 5 Mt 7 Hit 0Silver ShieldEquippedWt 4Wild HorseSpd+1 Dex+3 Def+1Paired RunBond 3[Cavalry] Movement +1GuandaoMt 11 Hit 90 Wt 9JavelinMt 3 Hit 80 Wt 8Ridersbane +1Mt 16 Hit 70 Wt 10ConcoctionPure WaterSilver ShieldWt 4Spears Lv. 4Hit and Avo +7 when a spear is equippedAegis20% chance to halve damage taken from a magic attackPavise20% chance to halve damage from a physical attackFierce Shield50% chance to halve damage taken during combat when initiatingCavalry Move[Cavalry] Terrain movement cost -1 (minimum 1)Mount/DismountCan use “Mount” and “Dismount”
 Combat Arts +3Equippable combat arts +3
 Golden RideNo longer vulnerable to cavalry-effective or cavalry-super-effective attacksRaging TempestCost 8 Mt 12 Hit 20Armored BlowCost 4 Mt 3 Hit 0Vanguard SpearCost 5 Mt 7 Hit 0Silver ShieldEquippedWt 4Wild HorseSpd+1 Dex+3 Def+1Paired RunBond 3[Cavalry] Movement +1GuandaoMt 11 Hit 90 Wt 9JavelinMt 3 Hit 80 Wt 8Ridersbane +1Mt 16 Hit 70 Wt 10ConcoctionPure WaterSilver ShieldWt 4Spears Lv. 4Hit and Avo +7 when a spear is equippedAegis20% chance to halve damage taken from a magic attackPavise20% chance to halve damage from a physical attackFierce Shield50% chance to halve damage taken during combat when initiatingDivine DexterityDex+10Mount/DismountCan use “Mount” and “Dismount”Combat Arts +3Equippable combat arts +3Golden RideNo longer vulnerable to cavalry-effective or cavalry-super-effective attacksRaging TempestCost 8 Mt 12 Hit 20Armored BlowCost 4 Mt 3 Hit 0Vanguard SpearCost 5 Mt 7 Hit 0Silver ShieldEquippedWt 4Wild HorseSpd+1 Dex+3 Def+1Paired RunBond 3[Cavalry] Movement +1Bardinger→Lv45Great KnightBardingerGuandaoMt 11 Hit 90 Wt 9JavelinMt 3 Hit 80 Wt 8Ridersbane +1Mt 16 Hit 70 Wt 10ConcoctionPure WaterSilver ShieldWt 4Spears Lv. 3Hit and Avo +5 when a spear is equippedKnightly SensesAvoid +10 in combat against spear usersTimely Guard25% chance when attacked: protection +3Aegis20% chance to halve damage taken from a magic attackCavalry Move[Cavalry] Terrain movement cost -1 (minimum 1)Tempest SpearCost 2 Mt 4 Hit 10Armored BlowCost 4 Mt 3 Hit 0Vanguard SpearCost 5 Mt 7 Hit 0Silver ShieldEquippedWt 4Currently assigned horseGuandaoMt 11 Hit 90 Wt 9JavelinMt 3 Hit 80 Wt 8Ridersbane +1Mt 16 Hit 70 Wt 10ConcoctionPure WaterSilver ShieldWt 4Spears Lv. 4Hit and Avo +7 when a spear is equippedAegis20% chance to halve damage taken from a magic attackTimely Guard25% chance when attacked: protection +3Fierce Shield50% chance to halve damage taken during combat when initiatingCavalry Move[Cavalry] Terrain movement cost -1 (minimum 1)Mount/DismountCan use “Mount” and “Dismount”Combat Arts +2Equippable combat arts +2DefendingDef+5Protection +5 when the foe initiates combatRaging TempestCost 8 Mt 12 Hit 20Armored BlowCost 4 Mt 3 Hit 0Vanguard SpearCost 5 Mt 7 Hit 0Silver ShieldEquippedWt 4Wild HorseSpd+1 Dex+3 Def+1Paired RunBond 3[Cavalry] Movement +1Great KnightGuandao +3Mt 23 Hit 90 Wt 9Javelin +3Mt 15 Hit 80 Wt 8Ridersbane +3Mt 22 Hit 70 Wt 10ConcoctionPure WaterSilver ShieldWt 4
 Spears Lv. 5Hit and Avo +10 when a spear is equippedAegis20% chance to halve damage taken from a magic attackFierce Shield50% chance to halve damage taken during combat when initiatingCavalry Move[Cavalry] Terrain movement cost -1 (minimum 1)Mount/DismountCan use “Mount” and “Dismount”Combat Arts +2Equippable combat arts +2DefendingDef+5Protection +5 when the foe initiates combatRaging TempestCost 8 Mt 12 Hit 20Armored BlowCost 4 Mt 3 Hit 0Vanguard SpearCost 5 Mt 7 Hit 0Silver ShieldEquippedWt 4Wild HorseSpd+1 Dex+3 Def+1Paired RunBond 3[Cavalry] Movement +1Bardinger→Lv40Dreadnought→Lv45Great KnightBardingerGuandaoMt 11 Hit 90 Wt 9JavelinMt 3 Hit 80 Wt 8Ridersbane +1Mt 16 Hit 70 Wt 10ConcoctionPure WaterSilver ShieldWt 4Spears Lv. 3Hit and Avo +5 when a spear is equippedKnightly SensesAvoid +10 in combat against spear usersTimely Guard25% chance when attacked: protection +3Aegis20% chance to halve damage taken from a magic attackCavalry Move[Cavalry] Terrain movement cost -1 (minimum 1)Tempest SpearCost 2 Mt 4 Hit 10Armored BlowCost 4 Mt 3 Hit 0Vanguard SpearCost 5 Mt 7 Hit 0Silver ShieldEquippedWt 4Currently assigned horseDreadnoughtGuandaoMt 11 Hit 90 Wt 9JavelinMt 3 Hit 80 Wt 8Ridersbane +1Mt 16 Hit 70 Wt 10ConcoctionPure WaterSilver ShieldWt 4Spears Lv. 3Hit and Avo +5 when a spear is equippedKnightly SensesAvoid +10 in combat against spear usersTimely Guard25% chance when attacked: protection +3Aegis20% chance to halve damage taken from a magic attackCombat Arts +2Equippable combat arts +2DefendingDef+5Protection +5 when the foe initiates combatTempest SpearCost 2 Mt 4 Hit 10Armored BlowCost 4 Mt 3 Hit 0Vanguard SpearCost 5 Mt 7 Hit 0Silver ShieldEquippedWt 4GuandaoMt 11 Hit 90 Wt 9JavelinMt 3 Hit 80 Wt 8Ridersbane +1Mt 16 Hit 70 Wt 10ConcoctionPure WaterSilver ShieldWt 4Spears Lv. 4Hit and Avo +7 when a spear is equippedAegis20% chance to halve damage taken from a magic attackTimely Guard25% chance when attacked: protection +3Fierce Shield50% chance to halve damage taken during combat when initiatingCavalry Move[Cavalry] Terrain movement cost -1 (minimum 1)Mount/DismountCan use “Mount” and “Dismount”Combat Arts +2Equippable combat arts +2DefendingDef+5Protection +5 when the foe initiates combatRaging TempestCost 8 Mt 12 Hit 20Armored BlowCost 4 Mt 3 Hit 0Vanguard SpearCost 5 Mt 7 Hit 0Silver ShieldEquippedWt 4Wild HorseSpd+1 Dex+3 Def+1Paired RunBond 3[Cavalry] Movement +1Great KnightGuandao +3Mt 23 Hit 90 Wt 9Javelin +3Mt 15 Hit 80 Wt 8Ridersbane +3Mt 22 Hit 70 Wt 10ConcoctionPure WaterSilver ShieldWt 4Spears Lv. 5Hit and Avo +10 when a spear is equippedAegis20% chance to halve damage taken from a magic attackFierce Shield50% chance to halve damage taken during combat when initiatingCavalry Move[Cavalry] Terrain movement cost -1 (minimum 1)Mount/DismountCan use “Mount” and “Dismount”Combat Arts +2Equippable combat arts +2DefendingDef+5Protection +5 when the foe initiates combatRaging TempestCost 8 Mt 12 Hit 20Armored BlowCost 4 Mt 3 Hit 0Vanguard SpearCost 5 Mt 7 Hit 0Silver ShieldEquippedWt 4Wild HorseSpd+1 Dex+3 Def+1Paired RunBond 3[Cavalry] Movement +1
Build approach and suitable stages
Armored lance cavalry into The Cavalier: Cataphract Lv40; Armored lance cavalry into The Cavalier: Great Knight Lv45; Armored lance cavalry into The Cavalier: The Cavalier Lv60
Then prepare for The Cavalier with Riding A and Spear S. Cataphract certification first requires completing Theodora-route military preparation requests.
Bardinger directly to Great Knight: Great Knight Lv 45, Lv 60
Reach Armor D through training or guidebooks, then become a Great Knight; this route does not have Pavise from Cataphract mastery.
Dreadnought for Armor, then mounted classes: Bardinger Lv 40; Dreadnought for Armor, then mounted classes: Dreadnought Lv 40; Dreadnought for Armor, then mounted classes: Great Knight Lv 45, Lv 60
Train Armor before moving into Great Knight. The infantry armor stage loses mounted movement.
DexWidely recommendedDexVery strongDexUseful for specific strategies
 Spears Lv. 1
 Spears Lv. 2
 Spearfaire
 Bld
 Counter Flurry
 Sword
 Swords Lv. 1
 Chop
 Swords Lv. 2
 Swords Lv. 3
 Swords Lv. 4
 Swords Lv. 5
 Swordfaire
 Axe
 Spike
 Axes Lv. 1
 Enrage
 Axes Lv. 2
 Axes Lv. 3
 Axes Lv. 4
 Axes Lv. 5
 Axefaire
 Bow
 Bows Lv. 1
 Bows Lv. 2
 Bows Lv. 3
 Bows Lv. 4
 Bows Lv. 5
 Bowfaire
 Gauntlet
 Mighty Fist
 Fists Lv. 1
 Fists Lv. 2
 Fists Lv. 3
 Fists Lv. 4
 Fists Lv. 5
 Fistfaire
 Black Magic
 Fire
 Black Magic Lv. 1
 Thunder
 Black Magic Lv. 2
 Bolganone
 Black Magic Lv. 3
 Thoron
 Black Magic Lv. 4
 Black Magic Lv. 5
 Black-Magic Mastery
 White Magic
 Laia
 White Magic Lv. 1
 Nosferatu
 White Magic Lv. 2
 Restore
 White Magic Lv. 3
 Warp
 White Magic Lv. 4
 White Magic Lv. 5
 White-Magic Mastery
 Infantry
 Evasion
 Emergency Avoidance
 Evasion +
 Infantry Move
 Infantry Canto
 Flying
 Read the Winds
 Flitting Flier
 Authority
 Lend Strength
 Lend Strength+
 Lend Strength++
 Gambit Master
Nathan: unavailable for recruitment on all four Part I routes; joins in Part II.
 Cai's storyCannot recruit
Characters who join conditionally in Part II; their requests can be prepared in Part I, but they cannot join then
 Dietrich's storyCannot recruit
Characters who join conditionally in Part II; their requests can be prepared in Part I, but they cannot join then
 Theodora's storyCannot recruit
Characters who join conditionally in Part II; their requests can be prepared in Part I, but they cannot join then
 Leda's storyCannot recruit
Characters who join conditionally in Part II; their requests can be prepared in Part I, but they cannot join then
 Renown level
 Bond Level with this route's protagonist. For all characters across the four routes, see Recruitment; see recruitment steps at How to recruit。
 Most effective gifts
All are favorites and sold in shops. Nathan mainly favors training items. Favorite gifts show double arrows in-game and give the largest bond gains.
Find where to buy these on the map→ Where to buy all 7 favorite gifts→
Favorite7 items

Likes2 items


LikesRed armor bestowed by the king, loyaltyInterestsVarious combat drills
Bond partners2 characters · 0 can reach A
 B
 B
Letters indicate the highest available support conversation (C = support Lv2, B = support Lv3, A = support Lv4); A paired ending is confirmed,For the rules, seeBonds。
A valiant general of the Kingdom of Arago with overwhelming offensive power. He and the green knight Creek are known as the “Twin Pillars of Arago.” Loyal and upright, he is almost painfully straightforward.
Details
| Title | A general of the Kingdom of Arago |
|---|---|
| Affiliation | Kingdom of Arago |
| Birthday | 5/20 |
| Likes | Red armor bestowed by the king, loyalty |
| Interests | Various combat drills |
| Japanese voice | Makoto KanekoWikipedia (Japanese) |
| English voice actor | Matt SilverVoice actor database |
Relationships


In the story
Red knight and green knight
Nathan is a general of the Kingdom of Arago, known alongside Creek as one of Arago's twin pillars. He treasures the red armor bestowed by his king and values loyalty and martial training.
Solo ending: return to AragoSpoilers
In his solo ending, he returns home, renews his oath to the royal family and quells the unrest remaining across Arago. He also trains a new generation of warriors; despite experiencing many great events, his honest, straightforward character remains unchanged.
Trivia
- His name comes from Hebrew and is related to a root meaning “to give.”