

Nezha
Bナジャ · Nezha Cai route· Recruitable
 Dietrich route· Recruitable
 Theodora route· Recruitable
 Leda route· Recruitable
A player-phase physical attacker. Default to Myrmidon into Shido for critical damage and sustain, adding Brigand if Strength lags. Choose fist and bow branches separately for team needs.
 Gladiator Lv7
 Sword
 Gauntlet
 Infantry


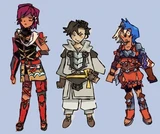 Fan art →
Nine stats
| HP | Str | Mag | Spd | Dex | Def | Res | Lck | Cha | Total | |
|---|---|---|---|---|---|---|---|---|---|---|
| Growth rates | 45% | 45% | 25% | 45% | 50% | 35% | 25% | 30% | 25% | 325% |
| Overall rank63 characters total | Rank 23 | Rank 18 | Rank 32 | Rank 18 | Rank 8 | Rank 25 | Rank 34 | Rank 36 | Rank 56 | Rank 40 |
| Base statsGladiator Lv7 | 28 | 10 | 6 | 14 | 9 | 8 | 6 | 8 | 6 | 95 |
| Base stat ranking63 characters total | Rank 30 | Rank 36 | Rank 31 | Rank 17 | Rank 33 | Rank 24 | Rank 33 | Rank 30 | Rank 40 | Rank 24 |
| Lv60 expected statsInitiating sword route into The Eternal | 63 | 39 | 19 | 52 | 47 | 27 | 19 | 26 | 21 | 313 |
| Expected rank62 characters total | Rank 30 | Rank 28 | Rank 33 | Rank 10 | Rank 18 | Rank 34 | Rank 43 | Rank 39 | Rank 57 | Rank 35 |
Proficiency
SwordGauntletInfantryWeakness SpearBudding talent—
Starting skills
| Category | Skills | Effect |
|---|---|---|
| Personal skill |  Quick Draw | 50% chance of Attack +3 when initiating combat |
| Level skillsLv20 |  Never Stop | 30% chance when attacking after Quick Draw activates to grant Attack +5. |
| Level skillsLv35 |  Never Stop+ | 「Quick Draw" activation gives attacks a 50% chance to grant attack +5 |
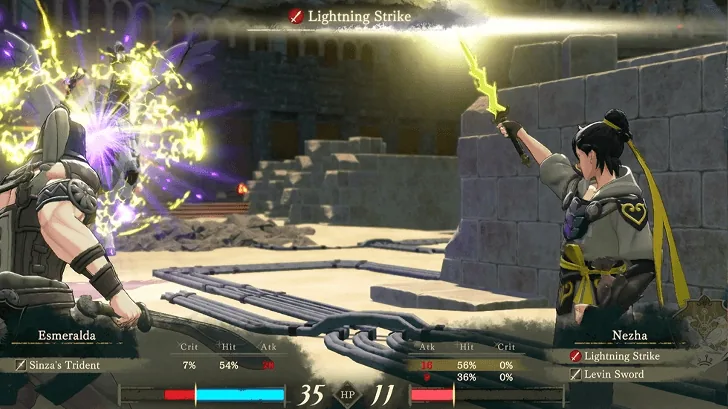
Use his Sword strength and Quick Draw to develop close-range physical offense. Cleansing Blade for the Promised One’s story.
Use StrandDef stats and growths for bulk
Pser_hanser's Nezha section likewise favors a personal offensive build with swords as the main focus, brawling secondary, and gauntlets at the end.
Nezha’s sword and gauntlet options for initiating combat
The main route for  Nezha goes from Gladiator through
 Myrmidon and
 Shido, ending in
 Swordmaster. He deals close-range physical damage through Strength, Dexterity, and bonus damage when initiating combat. Sword, Gauntlet, and Infantry are all strengths, and
 Battlemaster is another branch if your team wants him to use gauntlets. The sword route lets him use Cleansing Blade, giving him a way to attack enemies with Underworld Boon in the Promised One’s story.
Stay in Shido until the final class unlocks
| Stage | Certification preparation | Combat and mastery benefits |
|---|---|---|
| Gladiator | Recommended level 5, Renown 1; Sword D, Axe D, or Gauntlet D | Joins as a Gladiator; train Sword immediately; mastery grants Attack Basics |
| Myrmidon | Recommended level 20, Renown 4; Sword C | Sword Crit +3, Combat Arts +1; mastery grants  DexRavaging Arts |
| Shido | Recommended level 35, Renown 8; Sword B | Sword Crit +5, Combat Arts +2; mastery grants  Ever Vigilant |
| Swordmaster | Recommended level 45; Sword A; unlock the class first | Sword Crit +7, Combat Arts +3; mastery grants the Combat Art  Astra |
 The Eternal | Sword S, Axe S, or Gauntlet S; obtain Scales of Judgement | Divine alternative; Combat Arts +3, Axe and Gauntlet Hit +10; mastery grants  Divine Might |
Sword is a strength throughout, so there is no need to force training in his weak Spear subject for intermediate exams. Swordmaster unlocks through Salvation progress. After Shido at level 35, it may remain locked at level 45; finish story and class unlocks before switching.
Gauntlets are another route. Nezha is strong in Gauntlet too and can use them as the main weapon toward Battlemaster. This is a different weapon direction. The sword route’s Cleansing Blade prepares for Salvation’s Underworld Boon; gauntlets do not share that benefit.

The mounted branch improves Defense
On Cai’s route, you can instead make him a  Light Cavalry at the intermediate tier, riding a Ferghanan Horse, then keep him mounted as a
 Bardinger. At bond level 5, the Ferghanan Horse adds Strength +2, Defense +2, and Defense growth +10%, improving Nezha’s durability alongside his offense.
Animal capture unlocks in Chapter 5 of Cai’s route, and the total growth bonus at bond level 5 is 25%. Until you find a rare specimen, wild specimens of the same species provide the same total growth bonus, so you can start raising one right away. This branch requires Cai’s route and the corresponding mount. If you follow the main sword infantry route, continue using the sword mastery benefits from Myrmidon and Shido.
Prioritize Strength, Speed, and Dexterity over Magic
Around level 40, focus on Strength, Speed, Dexterity, and HP. Strength determines sword damage and forms the basis for extra Attack when initiating combat; Speed affects follow-up attacks and Avoid; Dexterity makes Hit and critical hits more reliable; HP gives him room to take hits in close combat. If Magic, Resistance, Luck, or Charm fall below expectations, you do not need to divert him from physical offense to fix those stats first.
| HP | Strength | Magic | Dexterity | Speed | Defense | Resistance | Luck | Charm |
|---|---|---|---|---|---|---|---|---|
| 45% | 45% | 25% | 50% | 45% | 35% | 25% | 30% | 25% |
His personal Resistance growth is only 25%, so you still need to adjust whom he engages when facing magic users. If his Strength grows particularly poorly on one route, train him again on another route. Merge Causality takes the higher value for each stat, covering weaknesses in the old save.
His physical offense and many opportunities to fight in Part 1 make him worth investing in: sword follow-up attacks and bonus damage when initiating let him finish enemies proactively, while his strength in Sword makes certification progression smooth. However, every route requires recruiting him through negotiation, and his protection against magic remains weak. You only get to develop these advantages after recruiting him.
Both damage bonuses have activation conditions
Quick Draw has a 50% chance to grant Attack +3 when attacking first. At level 35, Never Stop+ has another 50% chance to add Attack +5 on attacks after Quick Draw has activated. Without the first activation, there is no second bonus; after it, another 50% check is still required.
Distraction lowers adjacent enemy Hit by 3.  Close Quarters lowers adjacent enemy Movement by 1 while infantry. An infantry Avoid skill available at half HP or below grants Avoid +20, and
 Dodge gives infantry Avoid +5 against bows or magic. The last three require an infantry class and stop working while mounted.
| Combat Art | Uses and costs |
|---|---|
| Wrath Strike | Costs 2 durability; Might +4, Hit +10, Range 1. |
| Crosswise Cut | Costs 4 durability; Might +5; Dexterity +2 after combat, up to +10 on this map. |
| Gale Blow | Costs 5 durability; Might +7; when attacking, has a (Speed / 2)% chance to add a further Attack +5. |
 Gale Spear | Costs 2 durability; Might +4, Crit +5, Range 1. |
 Smash | Costs 2 durability; Might +4, Crit +5, Range 1. |
 Deal Death | Costs 2 durability; Might +4, Crit +5, Range 1. |
Ravaging Arts and Ever Vigilant along the sword route, plus Astra in the final class, are the rewards for continued training. The spear, axe, and gauntlet Combat Arts in the table show alternative weapon options; they do not mean a Swordmaster can equip every weapon at once.
Prepare three Sandworm Meat
| Protagonist route | Part 1 appearance | Support | Renown |
|---|---|---|---|
| Cai | Chapter 5 | 3 | 6 |
| Dietrich | Chapter 4 | 3 | 10 |
| Theodora | Chapter 5 | 2 | 6 |
| Leda | Chapter 4 | 3 | 9 |
He joins through negotiation on all four routes, requiring you to hand over three  Sandworm Meat. Insect enemies may drop Sandworm Meat. Another way to prepare is to repeatedly explore the Secret Altar in the south of the map for
 Luxury Meat Crate. Luxury Meat Crates are rare exploration finds with a low appearance rate, but opening them makes Sandworm Meat relatively easy to obtain. Gather three before negotiating.
Renown, Support, and the requested items are separate requirements to prepare. He appears in Chapter 5 on Cai’s and Theodora’s routes and Chapter 4 on the other two routes, but you still need to meet the corresponding Renown and Support requirements.
Food and martial arts gifts both work well
Nezha likes exercise, justice, fighting, and good food. His favorite gifts are  Pickled Bulbs, Strategy Manuscript, and History of a Master; he likes Rare Spices, Blue-Rose Bouquet, Sturdy Rucksack, Training Bracelet, and Wing Fletching.
Gifts that receive a neutral reaction include Simple Pastries, Alecto Garum, Garum, Common Coffee, Kitten Figurine, and Young Ghosh. In Pale Raven conversations, choose “Sing gently” when he is sleepy after putting so much into training; when he says a martial arts demonstration keeps the body and mind sharp and invites you to try, choose “Somersault.”
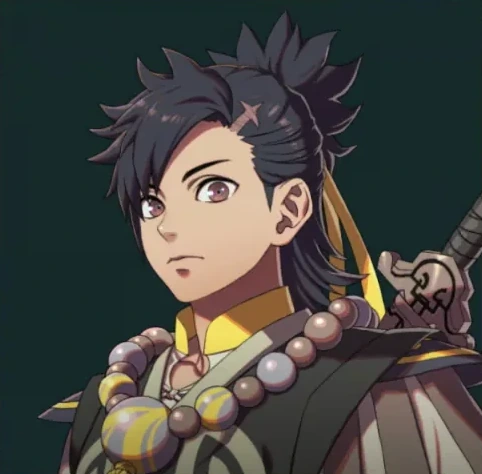
Support partners and voice actor
His support partners include the Promised One,  Theodora,
 Ultand,
 Fabio,
 Sha Lan,
 Dadao,
 Halvin, and
 Majide.
Nezha’s Japanese voice actor is Shota Hayama. Notable roles include Kuko Harai in Hypnosis Mic -Alternative Rap Battle-, Yu Hakase in Kawagoe Boys Sing, and Soji in REVENGER.
More guides
- Training Nezha for offensive sword combatGameWith Fortune’s Weave guide team
Site guides

Train Nezha in swords, take critical-damage mastery first, then master Shido to heal through critical kills. Switch to gauntlets if the team needs that role.
The default route is Myrmidon → Shido → Swordmaster for player-phase physical offense. Start Myrmidon from level 20, take Shido mastery after level 35, and reach the final class in Part 3. Gauntlets are an alternative if the team needs them.
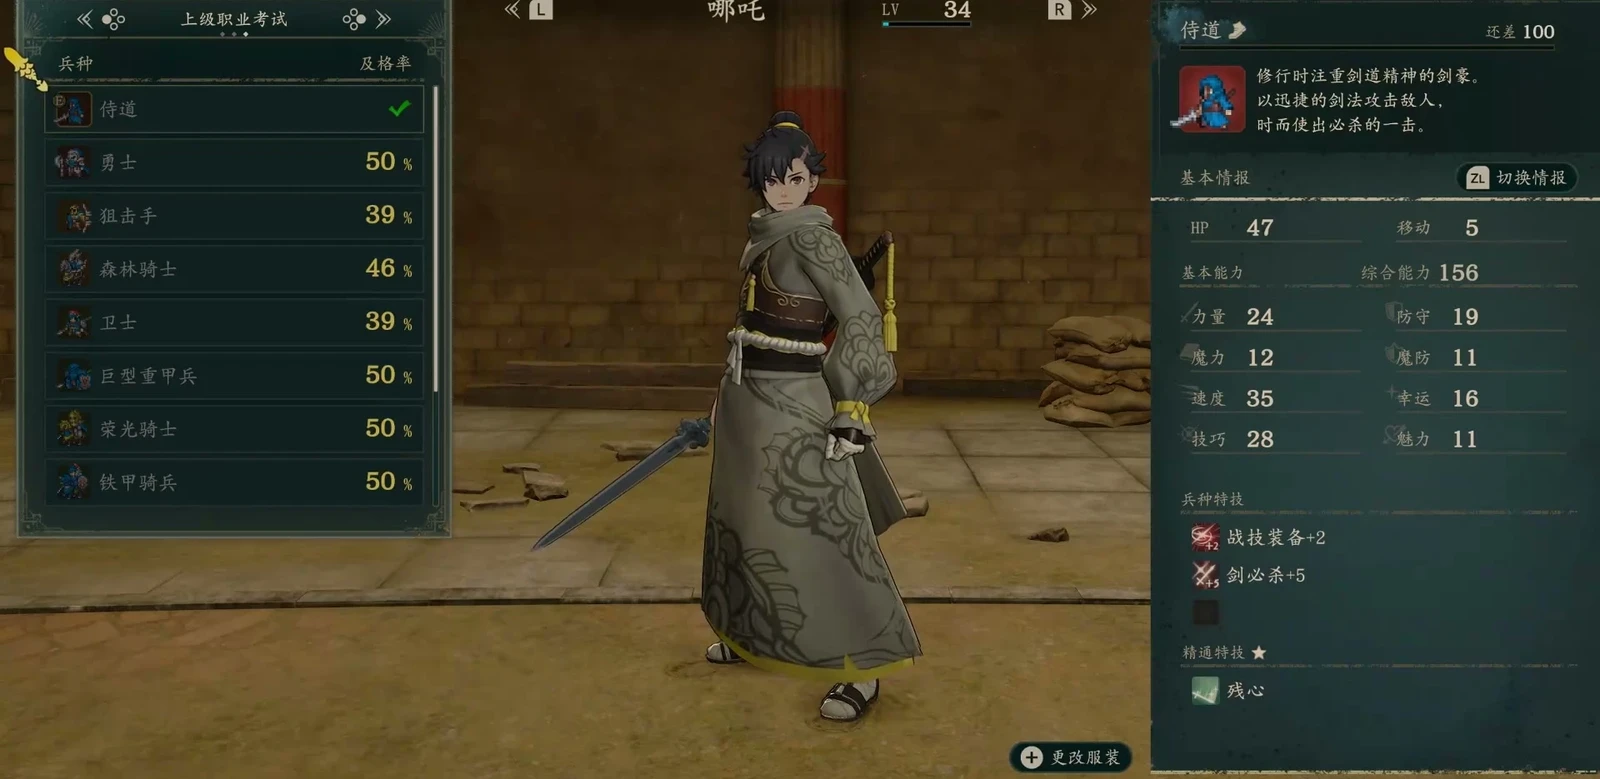
Class progression by stage
The levels below are exam levels. Reclassing dates depend on training progress; late recruits should continue from their current level and qualifications.
Part 1: Choose swords or gauntlets, then fix Strength
The sword core starts in Gladiator: level 5, Renown 1, and Sword, Axe, or Gauntlet D. Take Myrmidon at level 20, Renown 4, and Sword C. Ravaging Arts mastery increases damage on critical hits; it does not directly raise critical rate, which still needs weapons, support, and other conditions. Continue Sword B for Shido.
You do not need another swordsman if the role is filled. He can also focus on swords with secondary gauntlets, adding  Brigand for Strength: level 20, Renown 4, Sword or Axe C. For gauntlets,
 Pugilist needs level 20, Renown 4, Gauntlet C. After improving Strength, move from Brigand or Pugilist into Ranger, or stay with gauntlets. Choose the two routes separately.
Choose weapons he can handle and kill with rather than comparing Might alone. Replace a ranged spear with a light weapon if it is too heavy. The exact spear is unconfirmed, so none is mandatory. Use a Battalion to fill Dexterity, Defense, or Charm needs; specific Battalion names and Authority requirements remain unconfirmed.
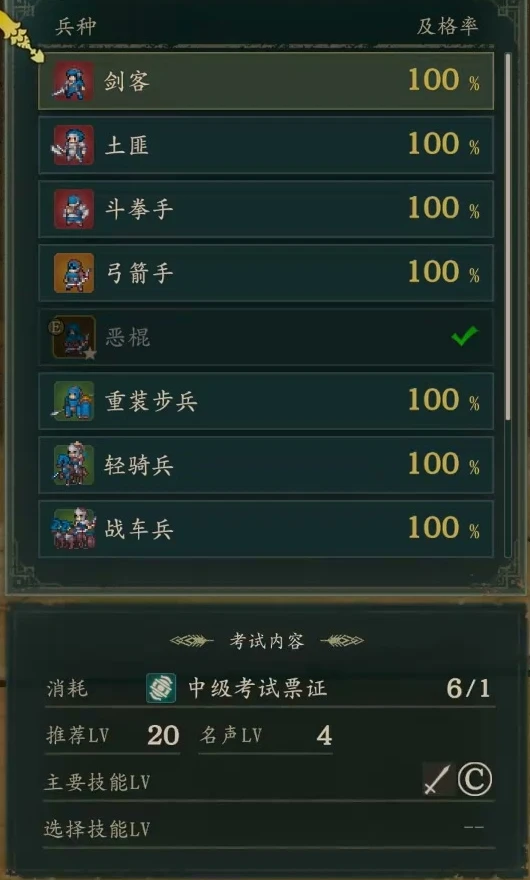
Part 2: Master Shido for Ever Vigilant
Level 35, Renown 8, and Sword B qualify for Shido. Once mastered, Ever Vigilant restores HP only when a critical kills an enemy. Without both the critical and kill, you cannot count on healing. Combined with Myrmidon mastery, this is the main reason for the sword route’s sustain. The exact reclassing chapter is unconfirmed; there is no need to rush it at Part 2’s start.
Train a Strength-fixing branch only until damage secures kills, then return to the main route. Continuing to  Ranger is another setup requiring level 35, Renown 8, Sword or Bow B, and this route’s unlock. It shifts to sword-and-bow offense; a gauntlet focus can choose another endpoint.
Calculate damage against key targets without the chance-based bonus. Do not rely on it for a one-turn kill.
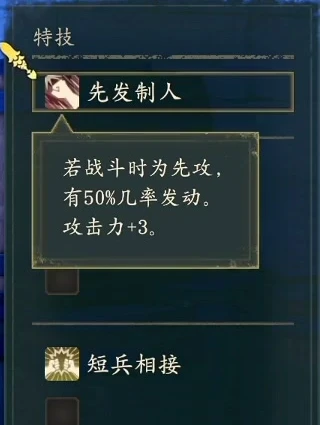

Part 3: Swordmaster is a sufficient endpoint
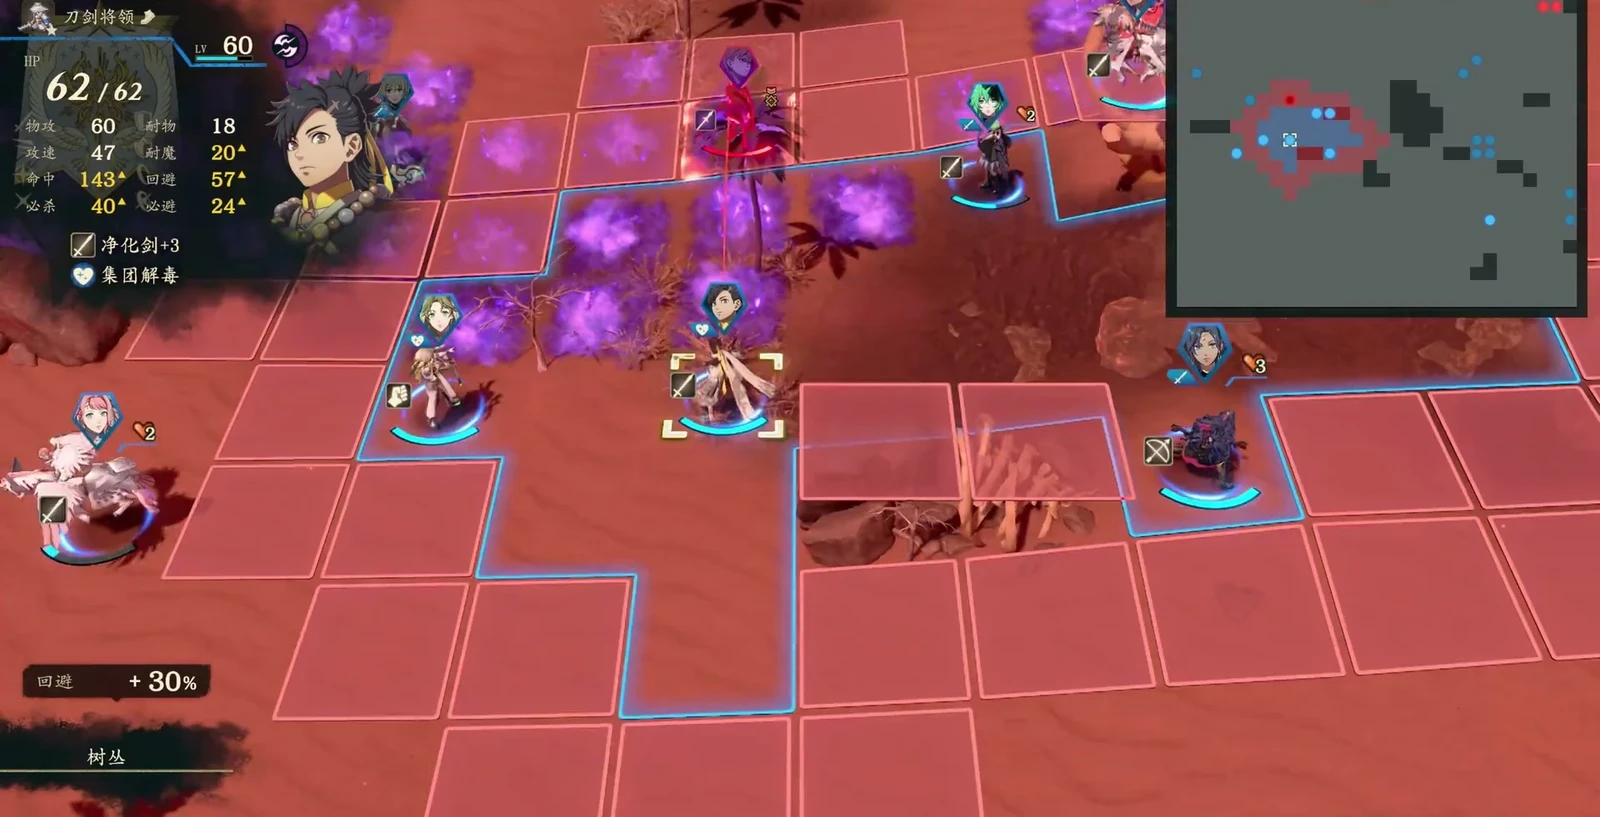
At level 45 with Sword A and the unlock, become Swordmaster. Keep earned Ravaging Arts and Ever Vigilant, then master Astra. Cleansing Blade handles risen dead, while a critical setup emphasizes post-kill sustain. Weapon acquisition timing, fixed Combat Arts, and complete equipment combinations remain unconfirmed. Use equipment already obtained.
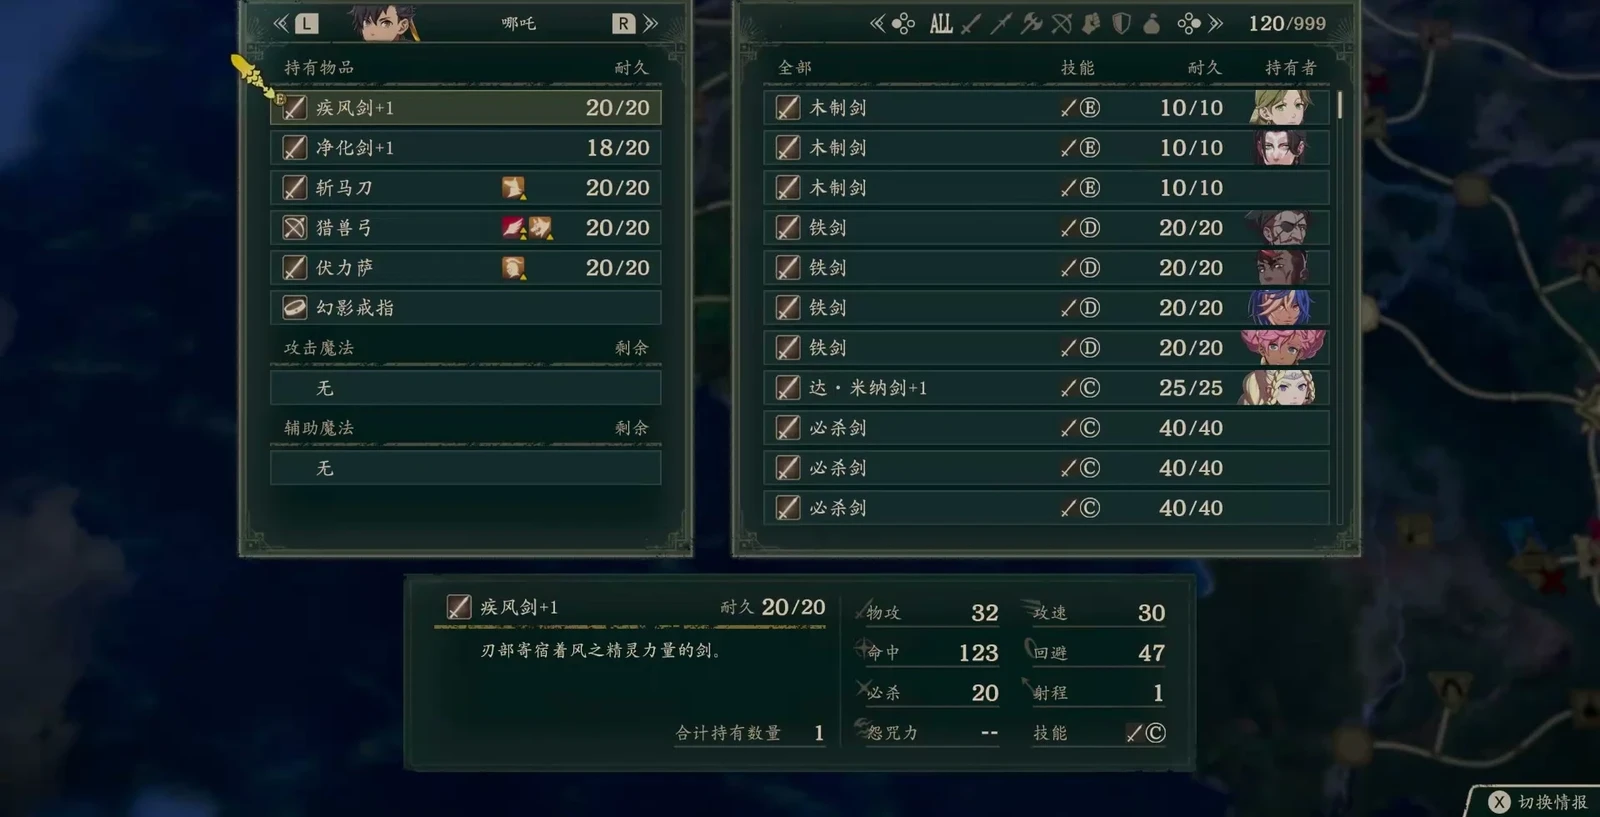
With Sword S and the Divine item, consider  The Blade mastery. Other swordsmen also need the slot. With tight resources, Swordmaster remains usable.
Gauntlet offense is another option. It suits active attacks and multiple hits, with one-to-two-range gauntlets available when Speed is sufficient. Pugilist → Warrior → Battlemaster is not a mandatory final progression.
Archer is an independent role choice. There are practical archer examples but no full staged loadout. Prepare Bow and Hit first. The entire Myrmidon/Shido mastery route is not automatically required for an archer.
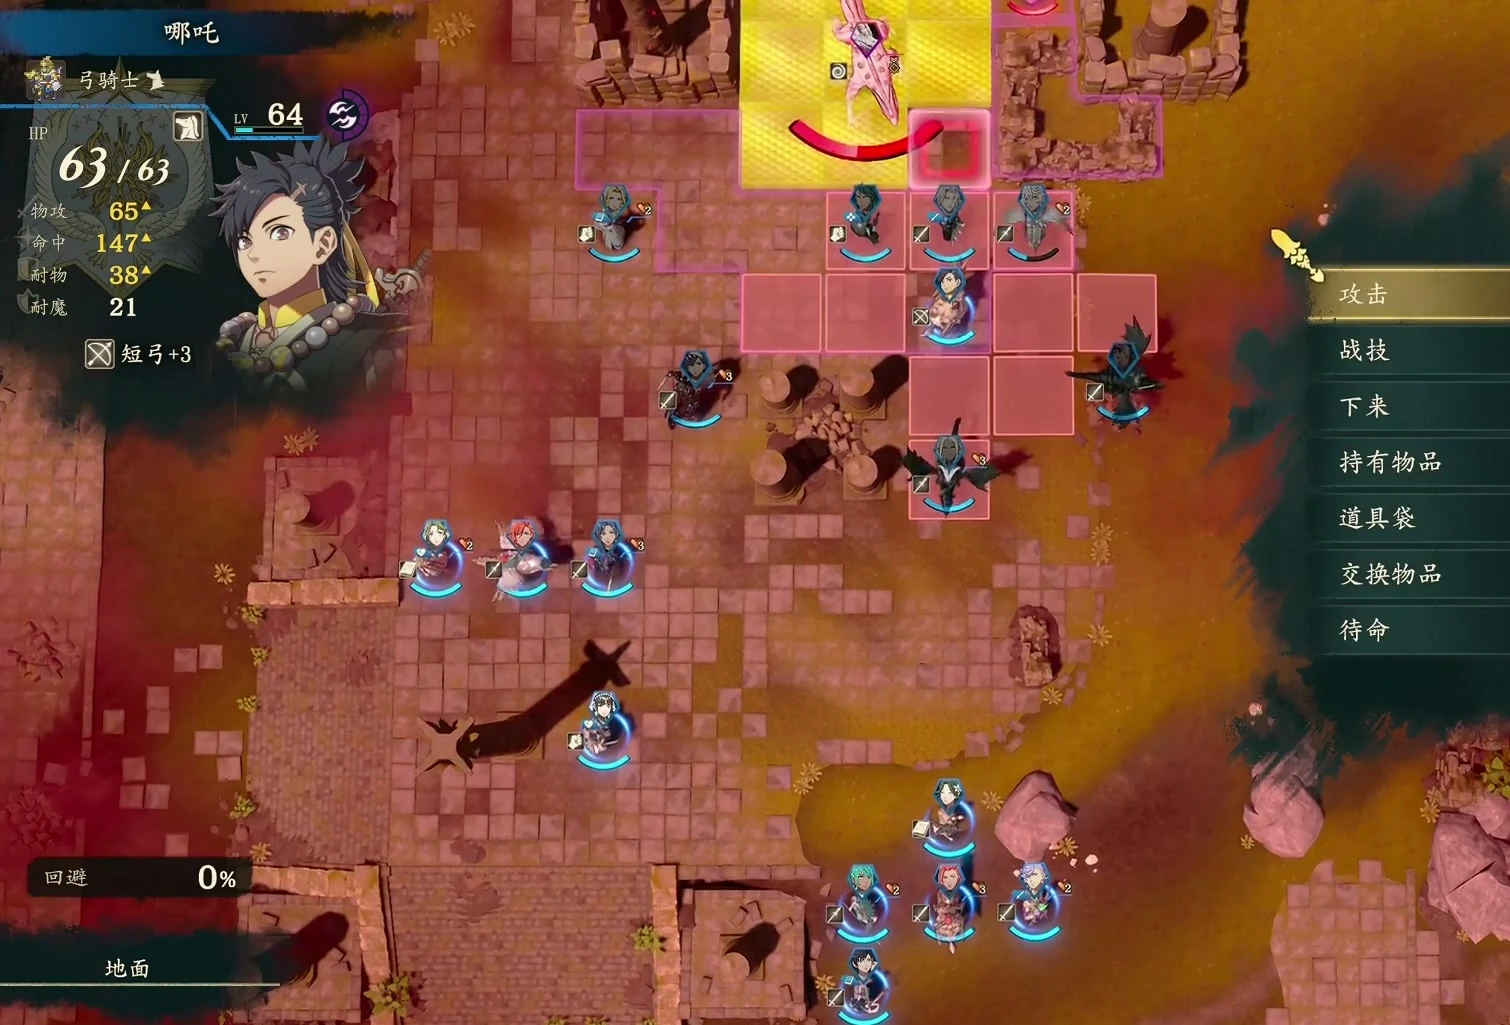
Heal through critical kills for sustained fighting
Position within reach of targets and allied support, prioritizing enemies you can reliably kill this turn. The sword route heals through critical kills, not by standing among enemies and taking hits.
On Theodora’s team, Theodora, Dadao, and others can provide unique Support Bonuses for Critical, even reclassing to Myrmidon to improve them. This costs teammates positioning and class resources. Nezha receives none of these while standing alone. If the team cannot accommodate changes, act from the current Hit, Critical, and damage forecast.
Recruitment details
All four routes need 3 Sandworm Meat. Cai needs Renown 6 and support 3; Dietrich Renown 10 and support 3; Theodora Renown 6 and support 2; Leda Renown 9 and support 3. Prepare materials early. See the recruitment page for appearance timing and acquisition locations.
Ever Vigilant needs critical kills; support needs team investment
- Counting chance-based initiating damage on every attack. Activation and multi-hit checks are not unified; calculate key kills conservatively.
- Treating Ever Vigilant as healing on every attack. It needs both a critical and a kill.
- Changing the whole team for support bonuses. Count lost roles and positioning first.
- Pursuing maximum Sword, Gauntlet, and Bow together. These are different resource plans. Fill the team's gap first.
Comments
Gladiator→Lv20Myrmidon→Lv35Shido→Lv45Swordmaster→The EternalGladiatorIron SwordMt 9 Hit 90 Wt 4Close Quarters[Infantry] Adjacent enemies suffer Movement -1 Attack BasicsStr+1
 Swords Lv. 1Hit +3 when wielding a sword
 DistractionAdjacent enemies suffer Hit -3Dodge[Infantry] Avo +5 in combat against enemies using bows or magicQuick Draw50% chance of Attack +3 when initiating combatWrath StrikeCost 2 Mt 4 Hit 10Crosswise CutCost 4 Mt 5 Hit 0Gale BlowCost 5 Mt 7 Hit 0
 Phantom RingEquippedWt 3
During Gladiator, first use Iron SwordFor routine battles; switch the key combat art to Da Mina Sword Improves Hit; equip Gale Blow only after reaching Sword B and learning it.
 Killing EdgeMt 11 Hit 90 Wt 6DexRavaging ArtsDamage dealt +6 on a critical hit
 In ShadowAvoid +10 after defeating an enemy (resets after 1 battles)Dodge[Infantry] Avo +5 in combat against enemies using bows or magic
 Swords Lv. 2Hit +5 when wielding a swordAttack BasicsStr+1Quick Draw50% chance of Attack +3 when initiating combat

 Wrath StrikeCost 2 Mt 4 Hit 10Crosswise CutCost 4 Mt 5 Hit 0Gale BlowCost 5 Mt 7 Hit 0Deadly BladeCost 2 Mt 0 Hit 0Phantom RingEquippedWt 3
Master Myrmidon first for increased critical damage; master Rogue for In Shadow when post-kill avoid is needed.Killing EdgeUse the innate combat art to increase critical rate.
Killing EdgeMt 11 Hit 90 Wt 6Never Stop+50% chance of Attack +5 when attacking after Quick Draw activatesDexRavaging ArtsDamage dealt +6 on a critical hitEver VigilantRestores a small amount of HP after defeating a foe with a critical hitHPIn ShadowAvoid +10 after defeating an enemy (resets after 1 battles) Swords Lv. 3Hit and Avo +5 when a sword is equippedQuick Draw50% chance of Attack +3 when initiating combat
 Crosswise CutCost 4 Mt 5 Hit 0Lunging GaleCost 7 Mt 0 Hit 0Gale BlowCost 5 Mt 7 Hit 0Deadly BladeCost 2 Mt 0 Hit 0Phantom RingEquippedWt 3
 Adept ArchersGambit: Disrupting Shot
Shido connects increased critical damage with healing on critical kills. Train Sword and complete mastery first; do not stake a crucial kill on two chance-based attack boosts.
Cleansing BladeMt 8 Hit 90 Wt 3Never Stop+50% chance of Attack +5 when attacking after Quick Draw activatesDexRavaging ArtsDamage dealt +6 on a critical hitEver VigilantRestores a small amount of HP after defeating a foe with a critical hitHPIn ShadowAvoid +10 after defeating an enemy (resets after 1 battles) Swords Lv. 4Hit and Avo +7 when a sword is equippedQuick Draw50% chance of Attack +3 when initiating combat
 Deadly BladeCost 2 Mt 0 Hit 0Sacred GemEquippedWt 4Elite HuntersGambit: Disrupting ShotCleansing BladeMt 8 Hit 90 Wt 3Never Stop+50% chance of Attack +5 when attacking after Quick Draw activatesDexRavaging ArtsDamage dealt +6 on a critical hitEver VigilantRestores a small amount of HP after defeating a foe with a critical hitHPDivine MightStr+10
 Swords Lv. 5Hit and Avo +10 when a sword is equippedQuick Draw50% chance of Attack +3 when initiating combat
 Combat Arts +3Equippable combat arts +3
 Axe Hit +10Hit +10 when wielding an axe
 Brawl Hit +10Hit +10 with gauntlets equippedDeadly BladeCost 2 Mt 0 Hit 0Sacred GemEquippedWt 4Elite HuntersGambit: Disrupting ShotGladiator→Lv20Light Cavalry→Lv35Bardinger→Lv45SwordmasterGladiatorIron SwordMt 9 Hit 90 Wt 4Close Quarters[Infantry] Adjacent enemies suffer Movement -1Attack BasicsStr+1Swords Lv. 1Hit +3 when wielding a swordDistractionAdjacent enemies suffer Hit -3Dodge[Infantry] Avo +5 in combat against enemies using bows or magicQuick Draw50% chance of Attack +3 when initiating combatWrath StrikeCost 2 Mt 4 Hit 10Crosswise CutCost 4 Mt 5 Hit 0Gale BlowCost 5 Mt 7 Hit 0Phantom RingEquippedWt 3
During Gladiator, first use Iron SwordFor routine battles; switch the key combat art to Da Mina Sword Improves Hit; equip Gale Blow only after reaching Sword B and learning it.
Killing EdgeMt 11 Hit 90 Wt 6Attack BasicsStr+1Swords Lv. 2Hit +5 when wielding a swordDexRavaging ArtsDamage dealt +6 on a critical hitIn ShadowAvoid +10 after defeating an enemy (resets after 1 battles) Knightly SensesAvoid +10 in combat against spear usersQuick Draw50% chance of Attack +3 when initiating combat
 Mount/DismountCan use “Mount” and “Dismount”Wrath StrikeCost 2 Mt 4 Hit 10Crosswise CutCost 4 Mt 5 Hit 0Gale BlowCost 5 Mt 7 Hit 0Deadly BladeCost 2 Mt 0 Hit 0Phantom RingEquippedWt 3
 Mounted by default for this class
The Cai-route Ferghanan Horse branch adds StrandDef, meeting actual mount and bond requirements first; complete the extra brief Myrmidon and Rogue mastery detours before equipping those skills.
Killing EdgeMt 11 Hit 90 Wt 6Never Stop+50% chance of Attack +5 when attacking after Quick Draw activatesSwords Lv. 3Hit and Avo +5 when a sword is equippedDexRavaging ArtsDamage dealt +6 on a critical hitIn ShadowAvoid +10 after defeating an enemy (resets after 1 battles) Aegis20% chance to halve damage taken from a magic attackQuick Draw50% chance of Attack +3 when initiating combatCrosswise CutCost 4 Mt 5 Hit 0Lunging GaleCost 7 Mt 0 Hit 0Gale BlowCost 5 Mt 7 Hit 0Deadly BladeCost 2 Mt 0 Hit 0Phantom RingEquippedWt 3Mounted by default for this class
Continue training Sword and Riding on horseback. After mastering Bardinger, use Aegis against magic damage; this branch has no Shido mastery, so do not count on Ever Vigilant healing in advance.
Cleansing BladeMt 8 Hit 90 Wt 3Never Stop+50% chance of Attack +5 when attacking after Quick Draw activatesSwords Lv. 4Hit and Avo +7 when a sword is equippedDexRavaging ArtsDamage dealt +6 on a critical hitIn ShadowAvoid +10 after defeating an enemy (resets after 1 battles)Aegis20% chance to halve damage taken from a magic attackQuick Draw50% chance of Attack +3 when initiating combatDeadly BladeCost 2 Mt 0 Hit 0Sacred GemEquippedWt 4Elite HuntersGambit: Disrupting ShotCleansing BladeMt 8 Hit 90 Wt 3Never Stop+50% chance of Attack +5 when attacking after Quick Draw activatesSwords Lv. 5Hit and Avo +10 when a sword is equippedDexRavaging ArtsDamage dealt +6 on a critical hitIn ShadowAvoid +10 after defeating an enemy (resets after 1 battles)Aegis20% chance to halve damage taken from a magic attackQuick Draw50% chance of Attack +3 when initiating combatDeadly BladeCost 2 Mt 0 Hit 0Sacred GemEquippedWt 4Elite HuntersGambit: Disrupting ShotGladiator→Lv20Pugilist→Lv35 Warrior→Lv45BattlemasterGladiator
 Iron GauntletsMt 8 Hit 90 Wt 3Wooden SwordMt 2 Hit 90 Wt 2
 Wooden GauntletsMt 2 Hit 90 Wt 1Qiankun CirclesMt 10 Hit 70 Wt 4
 VulneraryPhantom RingWt 3Close Quarters[Infantry] Adjacent enemies suffer Movement -1Attack BasicsStr+1
 Fists Lv. 1Hit +3 with gauntlets equippedDistractionAdjacent enemies suffer Hit -3Dodge[Infantry] Avo +5 in combat against enemies using bows or magicQuick Draw50% chance of Attack +3 when initiating combatDeal DeathCost 2 Mt 4 Hit 0One-on-OneCost 3 Mt 0 Hit -50Jack HitCost 1 Mt 1 Hit 0Phantom RingEquippedWt 3
Keep firstWooden Sword, after switching to gauntlets, useIron GauntletsFor close-range attacks,Qiankun CirclesAdds two-space range; equip Jack Hit after learning it at Gauntlet B.
PugilistDodge GauntletsMt 11 Hit 80 Wt 3Wooden GauntletsMt 2 Hit 90 Wt 1Qiankun CirclesMt 10 Hit 70 Wt 4VulneraryPhantom RingWt 3 Attack, Get BackAvoid +10 during combat using a combat art
 Fists Lv. 2Hit +5 with gauntlets equippedDodge[Infantry] Avo +5 in combat against enemies using bows or magicIn ShadowAvoid +10 after defeating an enemy (resets after 1 battles)Attack BasicsStr+1Quick Draw50% chance of Attack +3 when initiating combat
 Deal DeathCost 2 Mt 4 Hit 0One-on-OneCost 3 Mt 0 Hit -50Jack HitCost 1 Mt 1 Hit 0Phantom RingEquippedWt 3
Focus on Gauntlet as a Pugilist, with Attack & Retreat as a combat art;Qiankun Circlescovers two-space attacks; keep light gauntlets as a close-range backup.
WarriorDodge GauntletsMt 11 Hit 80 Wt 3Wooden GauntletsMt 2 Hit 90 Wt 1Qiankun CirclesMt 10 Hit 70 Wt 4VulneraryPhantom RingWt 3Never Stop+50% chance of Attack +5 when attacking after Quick Draw activatesAttack, Get BackAvoid +10 during combat using a combat art Practiced ArtHit +10 when attacking with a combat art
 Fists Lv. 3Hit and Avo +5 with gauntlets equipped
 Infantry Move[Infantry] Terrain movement cost -1 (minimum 1)Quick Draw50% chance of Attack +3 when initiating combat
 Combat Arts +2Equippable combat arts +2
 Axe Hit +5Hit +5 when wielding an axe
 Brawl Hit +5Hit +5 with gauntlets equippedDeal DeathCost 2 Mt 4 Hit 0One-on-OneCost 3 Mt 0 Hit -50Jack HitCost 1 Mt 1 Hit 0Phantom RingEquippedWt 3
Warrior continues Gauntlet training and masters Practiced Art. Improve combat art accuracy first, then use Never Stop+ for extra damage opportunities.
BattlemasterDodge GauntletsMt 11 Hit 80 Wt 3Windfire RingsMt 17 Hit 65 Wt 6Qiankun CirclesMt 10 Hit 70 Wt 4VulneraryPhantom RingWt 3Never Stop+50% chance of Attack +5 when attacking after Quick Draw activatesAttack, Get BackAvoid +10 during combat using a combat artPracticed ArtHit +10 when attacking with a combat art Fists Lv. 4Hit and Avo +7 with gauntlets equippedInfantry Move[Infantry] Terrain movement cost -1 (minimum 1)Quick Draw50% chance of Attack +3 when initiating combatCombat Arts +3Equippable combat arts +3
 Axe Hit +7Hit +7 when wielding an axe
 Brawl Hit +7Hit +7 with gauntlets equippedDeal DeathCost 2 Mt 4 Hit 0One-on-OneCost 3 Mt 0 Hit -50Jack HitCost 1 Mt 1 Hit 0Flame WheelCost 5 Mt 5 Hit 0Phantom RingEquippedWt 3Elite HuntersGambit: Disrupting ShotBattlemasterDodge GauntletsMt 11 Hit 80 Wt 3Windfire RingsMt 17 Hit 65 Wt 6Qiankun CirclesMt 10 Hit 70 Wt 4VulneraryPhantom RingWt 3Never Stop+50% chance of Attack +5 when attacking after Quick Draw activatesAttack, Get BackAvoid +10 during combat using a combat artPracticed ArtHit +10 when attacking with a combat art
 Fists Lv. 5Hit and Avo +10 with gauntlets equippedInfantry Move[Infantry] Terrain movement cost -1 (minimum 1)Quick Draw50% chance of Attack +3 when initiating combatCombat Arts +3Equippable combat arts +3Axe Hit +7Hit +7 when wielding an axeBrawl Hit +7Hit +7 with gauntlets equippedDeal DeathCost 2 Mt 4 Hit 0One-on-OneCost 3 Mt 0 Hit -50Jack HitCost 1 Mt 1 Hit 0Flame WheelCost 5 Mt 5 Hit 0Phantom RingEquippedWt 3Elite HuntersGambit: Disrupting Shot
Build approach and suitable stages
Sword initiation into The Eternal: The Eternal Lv 60; Mounted Defense training, then back to Swordmaster: Swordmaster Lv 45, Lv 60
Cleansing BladeHandles Netherworld Blessing,Killing Edgeand Astra provide damage; Astra requires Swordmaster mastery, so keep Gale Blow until then.
Brawling Battlemaster: Battlemaster Lv 45, Lv 60
Dodge GauntletsFor close combat,Qiankun CirclesProvides two-space range; obtain in Part III Windfire Ringsthen use Flame Wheel for magic damage; compare damage forecasts before use.
DexWidely recommendedDexVery strongDexUseful for specific strategies
 Swordfaire
 Reviving Fist
 Fistfaire
 Emergency Avoidance
 Dodge+
 Axe
 Axes Lv. 1
 Axes Lv. 2
 Axes Lv. 3
 Axes Lv. 4
 Axes Lv. 5
 Axefaire
 Bow
 Vital Shot
 Bows Lv. 1
 Bows Lv. 2
 Bows Lv. 3
 Bows Lv. 4
 Bows Lv. 5
 Bowfaire
 Black Magic
 Fire
 Black Magic Lv. 1
 Black Magic Lv. 2
 Black Magic Lv. 3
 Black Magic Lv. 4
 Black Magic Lv. 5
 Black-Magic Mastery
 White Magic
 Laia
 White Magic Lv. 1
 White Magic Lv. 2
 White Magic Lv. 3
 White Magic Lv. 4
 White Magic Lv. 5
 White-Magic Mastery
 Heavy Armor
 Timely Guard
 Armored Leap
 Armored Move
 Authority
 Attack Formation
 Distraction+
 Attack Formation+
 Spears Lv. 1
 Spears Lv. 2
 Spears Lv. 3
 Spears Lv. 4
 Spears Lv. 5
 Spearfaire
Nezha: Recruitable on Cai's, Dietrich's, Theodora's and Leda's routes (Renown 6–10).
 Cai's storyRecruitable
Steps
Available from Part I, Chapter 4. Give a gift to unlock recruitment, then reach renown 6 and support 3 with Cai. Hand over Sandworm Meat×3。
- NegotiateSandworm Meat×3
- TipPickled VegetablesBuy at Zoste Settlement Market for 100G each. Gifts or meals raise the bond with your route's protagonist; include the protagonist at the meal. Sandworm MeatRequires 3. Sold at Kira Village Market for 300G each; 3 cost 900G in total. Can also be obtained from sandworms in Heretics’ Cave.
 Dietrich's storyRecruitable
Steps
Available from Part I, Chapter 4. Give one gift to unlock recruitment, then reach Renown 10 and Bond Level 3 with Dietrich. Hand over Sandworm Meat×3。
- NegotiateSandworm Meat×3
- TipPickled VegetablesBuy at Zoste Settlement Market for 100G each. Gifts or meals raise the bond with your route's protagonist; include the protagonist at the meal. Sandworm MeatRequires 3. Sold at Kira Village Market for 300G each; 3 cost 900G in total. Can also be obtained from sandworms in Heretics’ Cave.
Theodora's storyRecruitableEasiest optionSteps
Encounter from Part I, Chapter 5. Give a gift to unlock recruitment, then reach Renown 6 and bond 2 with Theodora. Hand over Sandworm Meat×3。
- NegotiateSandworm Meat×3
- TipPickled VegetablesBuy at Zoste Settlement Market for 100G each. Gifts or meals raise the bond with your route's protagonist; include the protagonist at the meal. Sandworm MeatRequires 3. Sold at Kira Village Market for 300G each; 3 cost 900G in total. Can also be obtained from sandworms in Heretics’ Cave.
 Leda's storyRecruitable
Steps
Available from Part I, Chapter 4. Give one gift to unlock recruitment, then reach Renown 9 and Bond Level 3 with Leda. Hand over Sandworm Meat×3。
- NegotiateSandworm Meat×3
- TipPickled VegetablesBuy at Zoste Settlement Market for 100G each. Gifts or meals raise the bond with your route's protagonist; include the protagonist at the meal. Sandworm MeatRequires 3. Sold at Kira Village Market for 300G each; 3 cost 900G in total. Can also be obtained from sandworms in Heretics’ Cave.
 Renown level
 Bond Level with this route's protagonist. For all characters across the four routes, see Recruitment; see recruitment steps at How to recruit。
 Most effective gifts
All are favorites available in shops. Nezha mainly loves vegetables. Favorite gifts display double arrows in-game and grant the most bond points.
Find where to buy these on the map→ Where to buy all 6 favorite gifts→
Favorite6 items
Likes8 items
LikesExercise, justice, battle, fine foodInterestsBrawling practice, eating large meals
Bond partners8 characters · 3 can reach A · 1 have confirmed paired endings
 A
 A
 A
 B
 B
 B
 C
 C
Letters indicate the highest available support conversation (C = support Lv2, B = support Lv3, A = support Lv4); A paired ending is confirmed,For the rules, seeBonds。
An energetic young swordsman accompanying Anatolia. He trains diligently every day to become the strongest. Poor at keeping secrets, he often accidentally reveals his homeland's secrets, and is also self-conscious about his short stature.
Details
| Title | A young swordsman seeking to be the strongest |
|---|---|
| Affiliation | White Raven Brides |
| Height | 159 cm |
| Birthday | 7/7 |
| Likes | Exercise, justice, battle, fine food |
| Interests | Brawling practice, eating large meals |
| Japanese voice | Shota HayamaWikipedia (Japanese) |
| English voice actor | Paul Castro Jr.Wikipedia (English) |
Relationships


In the story
Traveling with Anatolia
Nezha accompanies Anatolia to the Heroic Games, determined to become the strongest swordsman. Though he trains every day, he struggles to keep secrets and often blurts out things about his homeland.
The origins behind a boyish appearanceSpoilers
Nezha's history records that he was created in Kunlun in year 1447 as a backup Mediator. His actual age is only 2–3 in Parts I and II and 7 in Part III; his youthful appearance does not indicate his age.
Continues training in the time remainingSpoilers
In his solo ending, the loss of his heart core leaves him with limited time to live, but he still crosses the sea in search of stronger opponents. The difficult journey does not stop him; in the East, he eventually finds a new master, gains insight, and lives out his remaining days peacefully.
Trivia
- His English name is shared with Nezha from Chinese mythology, who also appears in Investiture of the Gods.