

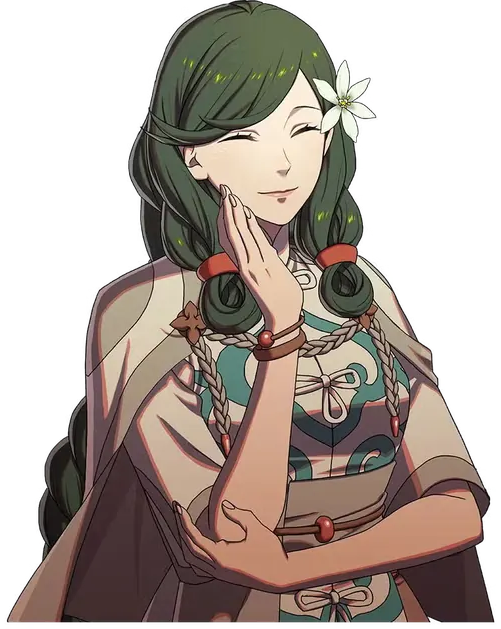
Sha Lan
Cサラン · Sha Lan Dietrich route· Recruitable
 Leda route· Recruitable
Prioritize White Magic. Support your core units with Draw Back followed by support magic, Rescue, and adjacent Speed. Sentinel is a branch for teams with a main healer already.
 Commoner Lv4
 Spear
 White Magic
 Authority


 Fan art →
Nine stats
| HP | Str | Mag | Spd | Dex | Def | Res | Lck | Cha | Total | |
|---|---|---|---|---|---|---|---|---|---|---|
| Growth rates | 35% | 30% | 45% | 35% | 50% | 30% | 45% | 35% | 40% | 345% |
| Overall rank63 characters total | Rank 50 | Rank 56 | Rank 5 | Rank 39 | Rank 8 | Rank 39 | Rank 2 | Rank 26 | Rank 18 | Rank 21 |
| Base statsCommoner Lv4 | 24 | 6 | 10 | 6 | 7 | 6 | 9 | 8 | 8 | 84 |
| Base stat ranking63 characters total | Rank 57 | Rank 56 | Rank 12 | Rank 51 | Rank 51 | Rank 39 | Rank 20 | Rank 30 | Rank 30 | Rank 48 |
| Lv60 expected statsTransition through both magic types into The Trident | 53 | 27 | 41 | 30 | 43 | 25 | 47 | 32 | 33 | 331 |
| Expected rank62 characters total | Rank 52 | Rank 49 | Rank 13 | Rank 45 | Rank 23 | Rank 40 | Rank 8 | Rank 18 | Rank 19 | Rank 19 |
Proficiency
SpearWhite MagicAuthorityWeakness SwordBudding talent—
Starting skills
| Category | Skills | Effect |
|---|---|---|
| Personal skill |  Cooler Heads | Use “Draw Back”, support magic can be used afterward |
| Level skillsLv20 |  Watchfulness | Adjacent allies'Spd+2。 |
| Level skillsLv35 |  Watchfulness+ | Adjacent alliesSpd+4 |
Then take The Avatar from the recommended table; Ovate is available on every route. Meet Sentinel’s separate Spear A requirement through training and manuals.
 Iron Gauntlets
 Vulnerary
 Magic Staff
 Archer's Ring
Use Mag、Res and White Magic to support the party; adjacent to Spd+4 alongside healing.
At level 35, train Spear and White Magic first, then certify as Sentinel with Spear A, avoiding the extra investment in Black Magic B for Ovate.
 Javelin
Sha Lan: Draw Back healing and Sentinel training
 Sha Lan primarily heals and adjusts positioning. The recommended route is Commoner into
 Diviner →
 Priest →
 Ovate →
 Sentinel, with
 The Avatar as a later option. Sentinel lets her use White Magic and improves her durability. Giving her a spear does not make her a primary physical attacker.
Prepare Spear A early
The beginner recommendation is Diviner at level 5 and Renown 1. You can prepare for the exam with either Black Magic D or White Magic D, and mastery grants the basic magic skill. Intermediate Priest is recommended at level 20, Renown 4, and White Magic C. The class provides White Magic Seeker and Magic Heal +5, and its mastery further supports healing. Training both kinds of magic early connects the midgame Ovate stage with her later White Magic duties.
Advanced Ovate recommends level 35, Renown 8, and Black Magic B, and is available on every route. It improves magic Hit and masters  SpdBinding Curse. If
 Guardian is already unlocked on Dietrich’s route, use Guardian as a transition instead. This branch connects to spears and white magic earlier. Other routes must also unlock Guardian before changing.
Sentinel is recommended at level 45, with Spear A as its main exam requirement. Healing with White Magic alone will not train that proficiency for you; schedule training and guidebooks. The class's Defense growth +10 and Resistance growth +15 address her weak HP 35% and Defense 30% growths, giving her more room to heal near the front line. It has  Magic Heal +10 and
 White-Magic Seeker, and mastery grants
 Resolute Stance, so support remains this route's focus.
For The Avatar as the Divine endpoint, prepare White Magic S or Black Magic S. Its all-magic enhancement, Magic Hit +10, Magic Heal +20, and  Divine Law mastery further improve her spell role.
Check HP as well as Magic
Near the end of Part 1, around level 40, Magic, Resistance, HP, and Defense above the expectations for your chosen route indicate a strong result. Her 45% Magic growth affects healing, and 45% Resistance growth helps her handle magical counters. However, HP 35% and Defense 30% limit which battlefield positions she can approach. Extra HP and Defense do not make her a replacement tank. They expand the area she can heal without always having to stay far back.
Her Strength growth is 30%. Even though Sentinel can use spears, do not sacrifice healing for physical damage. Below-average Luck or Charm does not immediately mean a bad result; normal Dexterity and Speed growth is sufficient. If her Magic grows poorly on this route, train her on another route and use Merge Causality to retain the higher value in each stat.
She excels in Authority, Spear, and White Magic, and struggles with Sword. She is rated B tier: Magic, Resistance, and Dexterity give her a reliable healing foundation, while her personal ability links Draw Back with support spells. However, her HP, Strength, and Defense are weak, her Part 1 recruitment routes and deployment time are limited, and she is not especially good at securing kills herself.
Cast a spell after Draw Back
Cooler Heads lets her use support magic after  Draw Back. Move herself and an adjacent ally back one tile, then heal. Draw Back is infantry-only and cannot target large units; check the target type.
Watchfulness+ grants adjacent allies Speed +4, while  Defensive Formation grants them Protection +1. The former can change Attack Speed and Avoid or help prevent an enemy follow-up, so her ending position is part of her support role too.
 Lend Defense costs 0 durability and grants one ally Defense +2 until the next player phase. Her offensive art
 Spike costs 2 durability and grants Might +4 and Hit +10, but does not change her healing focus.
| Spell on the original page | Properties and uses |
|---|---|
 Wind | 10 uses, Might 3, Hit 100, Weight 3, range 1–2; effective against fliers. |
 Nosferatu | 8 uses, Might 1, Hit 80, Weight 8, range 1–2; restores HP equal to half the damage dealt. |
 Wandering Wall | 5 uses, range 1; creates a wall at the selected position. |
 Heal | 10 uses, healing Might 10, range 1. |
 Recover | 5 uses, healing Might 30, range 1. |
Healing, major healing, and wall creation have separate uses. Check what remains before casting.

The paralogue window falls in October
In Part 1, only Dietrich’s and Leda’s routes can recruit her. Both need Bond Level 3 and Anatolia’s paralogue, with Renown 10 and 8 respectively. She appears in Chapter 4, but formal recruitment waits for the later paralogue clear.
Anatolia's paralogue occurs in Chapter 11 of Dietrich's route and Chapter 10 of Leda's route. Both have a window from October 5 to October 17. If you miss the paralogue, no amount of support or Renown replaces that requirement. Answer the three negotiation questions in order with “Kingdom of Saramis,” “Da Mina,” and “The stranded giant ship.” She is not on the Part 1 recruitment list for Cai's or Theodora's route.

Gifts for food, drink, and conversation
She likes good food, alcohol, and talking with people. Her favorites are  Energizing Ghosh,
 Garum,
 Common Coffee,
 Kitten Figurine,
 Blue-Rose Bouquet, and
 Rare Spices. Her ordinary likes are
 Special “Medicine”,
 Niiza Garum,
 Outdoor Cooking Set,
 Pastry Cookbook, and
 Select Coffee.
Her support partners are the Promised One,  Sirocco,
 Diego,
 Nezha,
 Hong Hua,
 Yang Jie,
 Loretta, and
 Halvin. Her Japanese voice actor is Sayuri Yahagi, whose representative roles include Haruna Sairenji, Suzu Hagimura, and Rima Mashiro.
More guides
Site guides

Train White Magic first and enter Bishop when qualified. After drawing an ally back, she can still cast support magic, making her useful for rescue and healing.
White Magic A teaches Rescue; S teaches Fortify. Adjacent Speed bonuses can change follow-up outcomes. She joins late, so use actions and spells already learned, then train whatever is missing.
Training route by stage
Focus on White Magic support and enter Priest, Bishop, or Wiseman according to current qualifications. There is no need to pass through each in order.
Part 1: Train White Magic after the paralogue
Complete the  Anatolia-related paralogue to open recruitment. After her late arrival, continue in an available magic class rather than returning to Commoner. If still at Specialty level, the table lists level 20, Renown 4, and White Magic C for Priest. With level 35, Renown 8, and White Magic B, prepare for
 Bishop. Go directly to Bishop if qualified.
Prioritize White Magic over extra physical weapons, aiming first for Rescue at A. Rescue is White Magic that moves a distant ally beside her. Her personal ability’s “Draw Back” is a different action; use Draw Back first to gain the extra support spell.
Draw Back’s listed learning rank is Authority C. Check that it appears in the action menu. Until learned, use ordinary healing.
Part 2: Learn Rescue at White Magic A
Rescue at White Magic A can move core units such as  Mu into useful positions or retrieve endangered teammates. The caster's position determines the ally's destination, so check the landing tile before selecting the target.
Once Draw Back is available, use Cooler Heads for Draw Back → support magic. The extra action allows support magic only, not attacks. After its level 35 upgrade, adjacent Speed is +4, potentially letting an ally follow up or avoid being doubled. This requires adjacency and Sha Lan’s own safety.
Secure her destination before considering the Speed bonus. Even if a frontline ally needs 4 Speed, find a safe adjacent tile for Sha Lan first. White Magic and Draw Back progress vary at Part 2’s start; plan around this save’s learned actions.
Part 3: White Magic S adds group healing
Continue White Magic to S for Fortify, healing several members of a large team. For a stronger White Magic focus, the class table offers  Wiseman at level 45 and White Magic A after clearing segment 1. Wiseman cannot use Black Magic, so compare staying Bishop if you still rely on those spells. A full cost comparison for her Bishop/Wiseman choice is unavailable; do not switch merely for a higher tier.
If  Sofia already covers healing, consider Sentinel for spears and White Magic. Sha Lan’s low Strength and durability keep her in support even with a spear; leave tanking to the main defender. Requirements are level 45, Spear A, and clearing segment 1, so the entire Spear discipline needs separate training. A Guardian transition also needs its unlock; weigh the extra work first.
The main path does not require a mount. Preserve White Magic access, safe rescue destinations, and healing coverage first; add damage equipment when resources allow.
Compare existing routes in the simulator. Check each certification requirement before switching and schedule around this save’s training progress.
Draw allies back, then heal
Find a safe position before rescuing. In Part 3, stand safely and use Draw Back to bring back an ally who entered fire terrain or miasma, then cast support magic to heal them. For distant allies, check Rescue’s range and destination. Do not confuse ranged Rescue with adjacent Draw Back.
Check enemy ranges before standing beside a core unit. If adjacent Speed changes follow-up attacks, move Sha Lan first and then check the attacker's combat forecast. Without a safe adjacent tile, preserving your support unit is more reliable than forcing the aura. She has no Physic, and Fortify's area healing is not equivalent to a ranged single-target heal.
Recruitment
She is recruitable on Dietrich’s and Leda’s routes. Complete the Anatolia-related paralogue, then meet that route’s Renown, Support, and negotiation requirements. Prepare each route’s Renown threshold separately. See Sha Lan’s recruitment details.
Only support magic follows Draw Back
- Only support magic can follow Draw Back. She cannot attack afterward.
- Treat Rescue and Draw Back separately. Range, acquisition, and actions differ.
- Accelerate only affects adjacent allies. Stay back if no safe adjacent tile exists.
- Sentinel remains a support role. Sha Lan has low Strength and durability; do not use her as an armored tank.
- Continue from current qualifications after late recruitment. Spend training on White Magic and missing actions.
Comments
Commoner→Lv5Diviner→Lv20Priest→Lv35Ovate→Lv45Sentinel→The AvatarCommoner SalamanderMt 2 Hit 80 Wt 3
 Fists Lv. 1Hit +3 with gauntlets equipped
 Black Magic Lv. 1Hit +3 when black magic is equippedDefensive FormationAdjacent allies gain protection +1
 Avoid Fatality[Infantry] Dodge +10
 Combat BasicsHit 、 Avoid +3Cooler HeadsCan use support magic after using Draw BackDraw BackCost 0 Mt 0 Hit 0Lend DefenseCost 0 Mt 0 Hit 0
 Curtail MagicCost 3 Mt 0 Hit 0
 Compressed LaserCost 2 Mt 10 Hit 20
 Healing StaffEquippedWt 3DivinerSalamanderMt 2 Hit 80 Wt 3Fists Lv. 1Hit +3 with gauntlets equippedBlack Magic Lv. 1Hit +3 when black magic is equippedDefensive FormationAdjacent allies gain protection +1Avoid Fatality[Infantry] Dodge +10
 Magic BasicsMag、Res+1Cooler HeadsCan use support magic after using Draw BackDraw BackCost 0 Mt 0 Hit 0Lend DefenseCost 0 Mt 0 Hit 0Curtail MagicCost 3 Mt 0 Hit 0Compressed LaserCost 2 Mt 10 Hit 20Healing StaffEquippedWt 3PriestSalamanderMt 2 Hit 80 Wt 3WatchfulnessAdjacent allies'Spd+2。Defensive FormationAdjacent allies gain protection +1Magic BasicsMag、Res+1
 PietyLck+3Avoid Fatality[Infantry] Dodge +10Cooler HeadsCan use support magic after using Draw BackWhite-Magic SeekerWhite magic uses ×2
 Magic Heal +5Healing allies with magic restores +5 HPDraw BackCost 0 Mt 0 Hit 0Lend DefenseCost 0 Mt 0 Hit 0Curtail MagicCost 3 Mt 0 Hit 0Compressed LaserCost 2 Mt 10 Hit 20Healing StaffEquippedWt 3OvateSalamanderMt 2 Hit 80 Wt 3Watchfulness+Adjacent alliesSpd+4
 White Magic Lv. 3Hit and Avo +5 when white magic is equipped
 Defensive Formation+Adjacent allies gain protection +2.Avoid Fatality[Infantry] Dodge +10Magic BasicsMag、Res+1Cooler HeadsCan use support magic after using Draw Back

 Draw BackCost 0 Mt 0 Hit 0
 Lend Defense+Cost 0 Mt 0 Hit 0Curtail MagicCost 3 Mt 0 Hit 0Compressed LaserCost 2 Mt 10 Hit 20HealMt 10RecoverMt 30NosferatuMt 1 Hit 80 Wt 8
 RescueWind
 Mt 3 Hit 100 Wt 3Wandering Wall
 BlizzardMt 4 Hit 80 Wt 6
 Cutting GaleMt 7 Hit 95 Wt 8Healing StaffEquippedWt 3Sentinel
 Iron Spear
 Mt 10 Hit 80 Wt 7Watchfulness+Adjacent alliesSpd+4
 White Magic Lv. 4Hit and Avo +7 when white magic is equippedDefensive Formation+Adjacent allies gain protection +2.Magic BasicsMag、Res+1Resolute StanceIn combat, if the unit'sHPis full, Protection +5Cooler HeadsCan use support magic after using Draw Back
 Combat Arts +3Equippable combat arts +3Magic Heal +10Healing allies with magic restores +10 HPWhite-Magic SeekerWhite magic uses ×2Draw BackCost 0 Mt 0 Hit 0Lend Defense+Cost 0 Mt 0 Hit 0
 Protective SpearCost 4 Mt 5 Hit 0Healing StaffEquippedWt 3
 Elevated PriestsGambit: “Area Heal”The AvatarSalamander +3Mt 15 Hit 80 Wt 3Watchfulness+Adjacent alliesSpd+4
 White Magic Lv. 5Hit and Avo +10 when white magic is equippedDefensive Formation+Adjacent allies gain protection +2.Magic BasicsMag、Res+1
 BarrierAdjacent alliesRes+3Cooler HeadsCan use support magic after using Draw Back
 All-Magic ZenithBlack and white magic uses ×3
 Magic Hit +10Hit +10 when magic is equipped
 Magic Heal +20Healing allies with magic restores +20 HPDraw BackCost 0 Mt 0 Hit 0Lend Defense+Cost 0 Mt 0 Hit 0Curtail MagicCost 3 Mt 0 Hit 0Compressed LaserCost 2 Mt 10 Hit 20HealMt 10RecoverMt 30NosferatuMt 1 Hit 80 Wt 8Rescue
 FortifyMt 20WindMt 3 Hit 100 Wt 3Wandering WallBlizzardMt 4 Hit 80 Wt 6Cutting GaleMt 7 Hit 95 Wt 8
 Ice BladeMt 12 Hit 75 Wt 10Healing StaffEquippedWt 3
 Holy ClericsGambit: Column RecoveryCommoner→Lv5Diviner→Lv20Priest→Lv35Bishop→Lv45WisemanCommonerSalamanderMt 2 Hit 80 Wt 3Fists Lv. 1Hit +3 with gauntlets equippedBlack Magic Lv. 1Hit +3 when black magic is equippedDefensive FormationAdjacent allies gain protection +1Avoid Fatality[Infantry] Dodge +10Combat BasicsHit 、 Avoid +3Cooler HeadsCan use support magic after using Draw BackDraw BackCost 0 Mt 0 Hit 0Lend DefenseCost 0 Mt 0 Hit 0Curtail MagicCost 3 Mt 0 Hit 0Compressed LaserCost 2 Mt 10 Hit 20Healing StaffEquippedWt 3DivinerSalamanderMt 2 Hit 80 Wt 3Fists Lv. 1Hit +3 with gauntlets equippedBlack Magic Lv. 1Hit +3 when black magic is equippedDefensive FormationAdjacent allies gain protection +1Avoid Fatality[Infantry] Dodge +10Magic BasicsMag、Res+1Cooler HeadsCan use support magic after using Draw BackDraw BackCost 0 Mt 0 Hit 0Lend DefenseCost 0 Mt 0 Hit 0Curtail MagicCost 3 Mt 0 Hit 0Compressed LaserCost 2 Mt 10 Hit 20Healing StaffEquippedWt 3PriestSalamanderMt 2 Hit 80 Wt 3WatchfulnessAdjacent allies'Spd+2。Defensive FormationAdjacent allies gain protection +1Magic BasicsMag、Res+1PietyLck+3Avoid Fatality[Infantry] Dodge +10Cooler HeadsCan use support magic after using Draw BackWhite-Magic SeekerWhite magic uses ×2Magic Heal +5Healing allies with magic restores +5 HPDraw BackCost 0 Mt 0 Hit 0Lend DefenseCost 0 Mt 0 Hit 0Curtail MagicCost 3 Mt 0 Hit 0Compressed LaserCost 2 Mt 10 Hit 20Healing StaffEquippedWt 3BishopSalamanderMt 2 Hit 80 Wt 3Watchfulness+Adjacent alliesSpd+4White Magic Lv. 3Hit and Avo +5 when white magic is equippedDefensive Formation+Adjacent allies gain protection +2.Magic BasicsMag、Res+1BarrierAdjacent alliesRes+3Cooler HeadsCan use support magic after using Draw BackWhite-Magic SeekerWhite magic uses ×2Magic Heal +10Healing allies with magic restores +10 HPDraw BackCost 0 Mt 0 Hit 0Lend Defense+Cost 0 Mt 0 Hit 0Curtail MagicCost 3 Mt 0 Hit 0Compressed LaserCost 2 Mt 10 Hit 20HealMt 10RecoverMt 30NosferatuMt 1 Hit 80 Wt 8RescueWindMt 3 Hit 100 Wt 3Wandering WallBlizzardMt 4 Hit 80 Wt 6Cutting GaleMt 7 Hit 95 Wt 8Healing StaffEquippedWt 3WisemanSalamander +3Mt 15 Hit 80 Wt 3Watchfulness+Adjacent alliesSpd+4White Magic Lv. 4Hit and Avo +7 when white magic is equippedDefensive Formation+Adjacent allies gain protection +2.Magic BasicsMag、Res+1BarrierAdjacent alliesRes+3Cooler HeadsCan use support magic after using Draw BackWhite-Magic SeekerWhite magic uses ×2
 Magic Heal +15Healing allies with magic restores +15 HPDraw BackCost 0 Mt 0 Hit 0Lend Defense+Cost 0 Mt 0 Hit 0Curtail MagicCost 3 Mt 0 Hit 0Compressed LaserCost 2 Mt 10 Hit 20Healing StaffEquippedWt 3Holy ClericsGambit: Column RecoveryCommoner→Lv5Diviner→Lv20Priest→Lv35Guardian→Lv45SentinelCommonerSalamanderMt 2 Hit 80 Wt 3Fists Lv. 1Hit +3 with gauntlets equippedBlack Magic Lv. 1Hit +3 when black magic is equippedDefensive FormationAdjacent allies gain protection +1Avoid Fatality[Infantry] Dodge +10Combat BasicsHit 、 Avoid +3Cooler HeadsCan use support magic after using Draw BackDraw BackCost 0 Mt 0 Hit 0Lend DefenseCost 0 Mt 0 Hit 0Curtail MagicCost 3 Mt 0 Hit 0Compressed LaserCost 2 Mt 10 Hit 20Healing StaffEquippedWt 3DivinerSalamanderMt 2 Hit 80 Wt 3Fists Lv. 1Hit +3 with gauntlets equippedBlack Magic Lv. 1Hit +3 when black magic is equippedDefensive FormationAdjacent allies gain protection +1Avoid Fatality[Infantry] Dodge +10Magic BasicsMag、Res+1Cooler HeadsCan use support magic after using Draw BackDraw BackCost 0 Mt 0 Hit 0Lend DefenseCost 0 Mt 0 Hit 0Curtail MagicCost 3 Mt 0 Hit 0Compressed LaserCost 2 Mt 10 Hit 20Healing StaffEquippedWt 3PriestSalamanderMt 2 Hit 80 Wt 3WatchfulnessAdjacent allies'Spd+2。Defensive FormationAdjacent allies gain protection +1Magic BasicsMag、Res+1PietyLck+3Avoid Fatality[Infantry] Dodge +10Cooler HeadsCan use support magic after using Draw BackWhite-Magic SeekerWhite magic uses ×2Magic Heal +5Healing allies with magic restores +5 HPDraw BackCost 0 Mt 0 Hit 0Lend DefenseCost 0 Mt 0 Hit 0Curtail MagicCost 3 Mt 0 Hit 0Compressed LaserCost 2 Mt 10 Hit 20Healing StaffEquippedWt 3GuardianIron SpearMt 10 Hit 80 Wt 7Watchfulness+Adjacent alliesSpd+4White Magic Lv. 3Hit and Avo +5 when white magic is equippedDefensive Formation+Adjacent allies gain protection +2.Avoid Fatality[Infantry] Dodge +10Magic BasicsMag、Res+1Cooler HeadsCan use support magic after using Draw Back
 Combat Arts +2Equippable combat arts +2Magic Heal +10Healing allies with magic restores +10 HPCompressed LaserCost 2 Mt 10 Hit 20Healing StaffEquippedWt 3SentinelIron SpearMt 10 Hit 80 Wt 7Watchfulness+Adjacent alliesSpd+4White Magic Lv. 4Hit and Avo +7 when white magic is equippedDefensive Formation+Adjacent allies gain protection +2.Magic BasicsMag、Res+1Resolute StanceIn combat, if the unit'sHPis full, Protection +5Cooler HeadsCan use support magic after using Draw BackCombat Arts +3Equippable combat arts +3Magic Heal +10Healing allies with magic restores +10 HPWhite-Magic SeekerWhite magic uses ×2Draw BackCost 0 Mt 0 Hit 0Lend Defense+Cost 0 Mt 0 Hit 0Protective SpearCost 4 Mt 5 Hit 0Healing StaffEquippedWt 3Elevated PriestsGambit: “Area Heal”
Build approach and suitable stages
Transition through both magic types into The Trident: Diviner Lv5; Transition through both magic types into The Trident: Priest Lv20; Transition through both magic types into The Trident: Ovate Lv35; Transition through both magic types into The Trident: Sentinel Lv45; Transition through both magic types into The Trident: The Avatar
Then take The Avatar from the recommended table; Ovate is available on every route. Meet Sentinel’s separate Spear A requirement through training and manuals.
Bishop and Wiseman dedicated healing: Commoner Lv4; Bishop and Wiseman dedicated healing: Diviner Lv5; Bishop and Wiseman dedicated healing: Priest Lv20; Bishop and Wiseman dedicated healing: Bishop Lv35; Bishop and Wiseman dedicated healing: Wiseman Lv45
Use Mag、Res and White Magic to support the party; adjacent to Spd+4 alongside healing.
Guardian for early Spear and White Magic access: Commoner Lv4; Guardian for early Spear and White Magic access: Diviner Lv5; Guardian for early Spear and White Magic access: Priest Lv20; Guardian for early Spear and White Magic access: Guardian Lv35; Guardian for early Spear and White Magic access: Sentinel Lv45
At level 35, train Spear and White Magic first, then certify as Sentinel with Spear A, avoiding the extra investment in Black Magic B for Ovate.
DexWidely recommendedDexVery strongDexUseful for specific strategies
 Tempest Spear
 Spears Lv. 1
 Spears Lv. 2
 Protective Storm
 Spears Lv. 3
 Spears Lv. 4
 Spears Lv. 5
 Spearfaire
 White Magic Lv. 1
 White Magic Lv. 2
 White-Magic Mastery
 Axe
 Axes Lv. 1
 Magic Throw
 Axes Lv. 2
 Axes Lv. 3
 Axes Lv. 4
 Axes Lv. 5
 Axefaire
 Bow
 Warning Shot
 Bows Lv. 1
 Bows Lv. 2
 Bows Lv. 3
 Bows Lv. 4
 Bows Lv. 5
 Bowfaire
 Gauntlet
 Retreating Fist
 Fists Lv. 2
 Fists Lv. 3
 Fists Lv. 4
 Fists Lv. 5
 Fistfaire
 Black Magic
 Black Magic Lv. 2
 Black Magic Lv. 3
 Black Magic Lv. 4
 Black Magic Lv. 5
 Black-Magic Mastery
 Infantry
 Sniper Evasion
 Riding
 Knightly Senses
 Flying
 Read the Winds
 Heavy Armor
 Resist Stance
 Resistant Armor
 Bld
 Subdue
 Swords Lv. 1
 Shadow Gambit
 Swords Lv. 2
 Swords Lv. 3
 Swords Lv. 4
 Swords Lv. 5
 Swordfaire
Sha Lan: recruitable in Dietrich's and Leda's stories (renown 8–10).
 Cai's storyCannot recruit
Cannot be recruited because Anatolia’s paralogue, a recruitment prerequisite, is unavailable on this route
 Dietrich's storyRecruitable
 10
 3From Chapter 4QuizAnatolia's Paralogue: Queen of the ErasedTime limited
Steps
Reach this route's Renown 10 and support 3 with Dietrich, and clear Anatolia's paralogue first. The paralogue opens on 10/5; accept before 10/14. During recruitment negotiations, choose Understood, Kingdom of Saramis, Da Mina and The Beached Giant Ship in that order.
- NegotiateChoose Understood, Kingdom of Saramis, Da Mina and The Beached Giant Ship in that order
- PrerequisiteClear Anatolia's Paralogue: Queen of the Erased first
- Time limitedAccept Anatolia's paralogue between 10/5 and 10/14; battle deadline 10/17. Missing it prevents recruiting Sha Lan on that route. Complete formal recruitment before Part I ends.
- TipGarumBuy from the gift merchant at the lower tavern in the imperial capital, Dagsion, for 50G each. Gifts and meals raise bonds with your route's protagonist; include the protagonist in the meal.
 Theodora's storyCannot recruit
Cannot be recruited because Anatolia’s paralogue, a recruitment prerequisite, is unavailable on this route
 Leda's storyRecruitableEasiest option83From Chapter 4QuizAnatolia's Paralogue: Queen of the ErasedTime limited
Steps
Requires Renown 8 and Bond 3 with Leda on this route, plus clearing Anatolia's paralogue first. It opens on 10/5; accept it before 10/14. During recruitment negotiations, choose “Understood,” “Kingdom of Saramis,” “Da Mina,” and “Stranded Giant Ship” in that order.
- NegotiateChoose Understood, Kingdom of Saramis, Da Mina and The Beached Giant Ship in that order
- PrerequisiteClear Anatolia's Paralogue: Queen of the Erased first
- Time limitedAccept Anatolia's paralogue between 10/5 and 10/14; battle deadline 10/17. Missing it prevents recruiting Sha Lan on that route. Complete formal recruitment before Part I ends.
- TipGarumBuy from the gift merchant at the lower tavern in the imperial capital, Dagsion, for 50G each. Gifts and meals raise bonds with your route's protagonist; include the protagonist in the meal.
Renown level Bond Level with this route's protagonist. For all characters across the four routes, see Recruitment; see recruitment steps at How to recruit。
 Most effective gifts
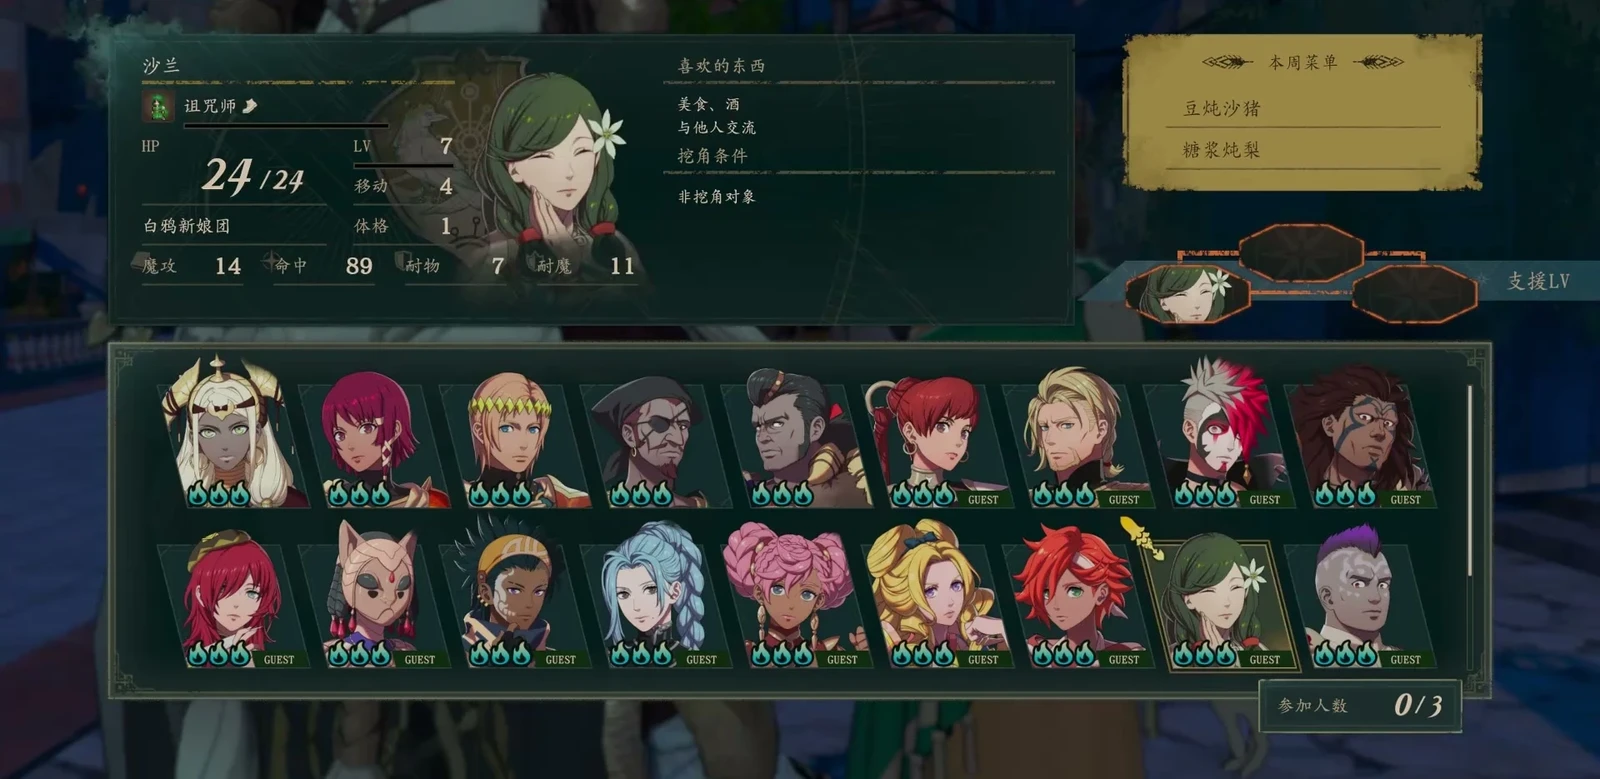
All are most-loved gifts available at shops. Most of Sha Lan's favorites are cooking items and books. Most-loved gifts show double arrows in-game and give the largest affection increase.
Find where to buy these on the map→ Where to buy all 18 favorite gifts→
Favorite19 items
Niiza Garum300G · CookingGarum50G · Cooking Concentrated Garum150G · Cooking
 Strong Seasonings200G · Cooking
 Village Recipes200G · Cooking
 Alecto Garum300G · Cooking
 Herbal Recipe Guide300G · Cooking
 Home-Recipe Book300G · Cooking
 Dual Fish Knives700G · Cooking
 School Scandal200G · Book
 The Knight's Suitors300G · Book
 Tome from Away500G · Book
 Everyday ScenesBook
 Sharp Fishhook100G · Fishing
 Flexible Fishing Rod400G · FishingSpecial “Medicine”1000G · Fermented drinks
 Sturdy Rucksack500G · TravelPastry Cookbook200G · Sweets
 Eastern Tea Leaves2000G · Drinks
Likes8 items




LikesFine food, drinks, socializingInterestsLooking after Anatolia, studying
Bond partners8 characters · 3 can reach A · 1 have confirmed paired endings
 A
 A
 A
 B
 B
 B
 C
 C
Letters indicate the highest available support conversation (C = support Lv2, B = support Lv3, A = support Lv4); A paired ending is confirmed,For the rules, seeBonds。
A composed woman traveling with Anatolia. She came to Dagsion from desert-covered lands in the west. Caring by nature, she often looked after children in her home village.
Details
| Title | A woman traveling with Anatolia |
|---|---|
| Affiliation | White Raven Brides |
| Origin | Western desert region |
| Birthday | 1/20 |
| Likes | Fine food, drinks, socializing |
| Interests | Looking after Anatolia, studying |
| Japanese voice | Sayuri YahagiWikipedia (Japanese) |
| English voice actor | Courtney LinVoice actor database |
Relationships


In the story
Leaving the western homeland
Sha Lan once lived in a western desert village, often looking after its children. She later accompanies Anatolia to Dagsion.
After the war: Solo endingSpoilers
Sha Lan moves to Dagsion and finally opens the restaurant she has always dreamed of. Her food and conversation attract many customers, and her business sense lets her open branches, eventually building a large trading company that employs many people connected to the White Egg people.
Trivia
- Japanese voice actor: Sayuri Yahagi.