

Fianna
Cフィアナ · Fianna Cai route· Recruitable
 Dietrich route· Recruitable
 Theodora route· Recruitable
 Leda route· Recruitable
Default to backline healing, earn useful Priest and Bishop masteries, then choose mobile dual-school casting. Ovate development and multi-route divine training require extra investment.
 Diviner Lv7
 White Magic
 Black Magic
 Riding
 Graceful LightWhen healing allies with magic, has aLck% chance to activate without consuming a magic use
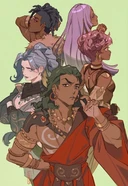

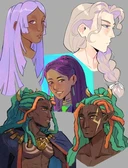 Fan art →
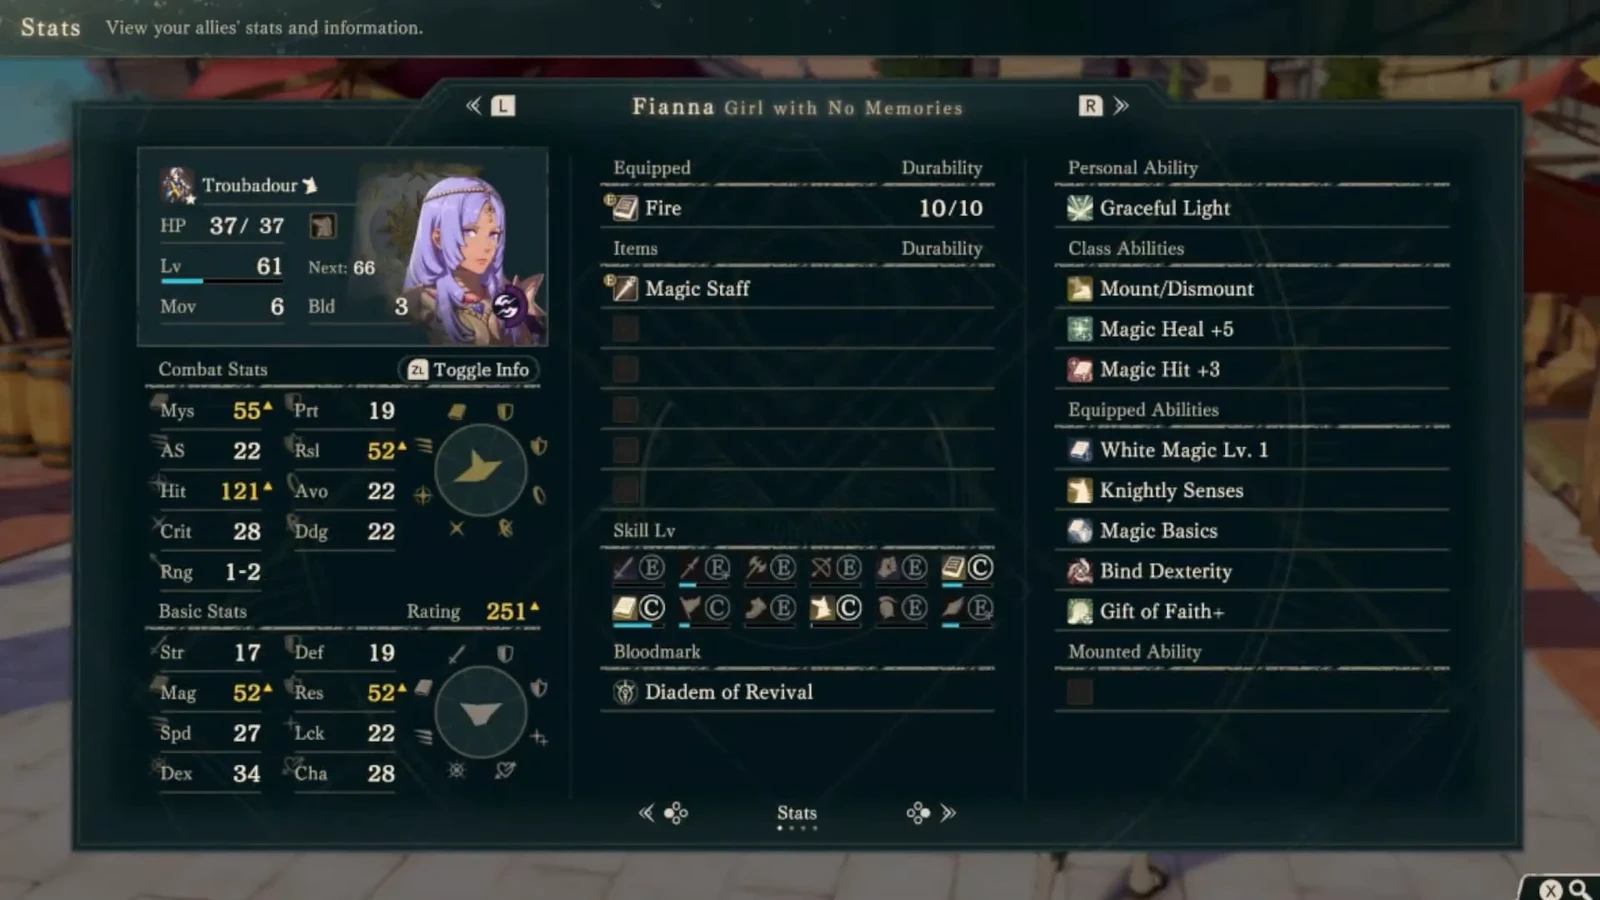
Nine stats
| HP | Str | Mag | Spd | Dex | Def | Res | Lck | Cha | Total | |
|---|---|---|---|---|---|---|---|---|---|---|
| Growth rates | 30% | 35% | 55% | 30% | 40% | 20% | 45% | 25% | 40% | 320% |
| Overall rank63 characters total | Rank 58 | Rank 39 | Rank 1 | Rank 52 | Rank 39 | Rank 60 | Rank 2 | Rank 55 | Rank 18 | Rank 47 |
| Base statsDiviner Lv7 | 23 | 5 | 14 | 6 | 8 | 4 | 10 | 5 | 9 | 84 |
| Base stat ranking63 characters total | Rank 61 | Rank 62 | Rank 7 | Rank 51 | Rank 38 | Rank 61 | Rank 16 | Rank 57 | Rank 24 | Rank 48 |
| Lv60 expected statsStandardLckMounted healing | 45 | 22 | 52 | 25 | 35 | 14 | 44 | 27 | 36 | 300 |
| Expected rank62 characters total | Rank 62 | Rank 56 | Rank 4 | Rank 50 | Rank 43 | Rank 61 | Rank 10 | Rank 36 | Rank 11 | Rank 49 |
Proficiency
White MagicBlack MagicRidingWeakness Sword
 GauntletBudding talent—
Starting skills
| Category | Skills | Effect |
|---|---|---|
| Personal skill | Graceful Light | When healing allies with magic, has aLck% chance to activate without consuming a magic use |
| Level skillsLv20 |  Gift of Faith | When healing allies with magic, has aLck% chance to restore +20 HP. |
| Level skillsLv35 |  Gift of Faith+ | When healing allies with magic, has aLck% chance to restore +30 HP |
| Bloodmark |  Diadem of Revival | 20% chance when attacking to restore a small amount of the unit's ownHP |
Qiongyuan Destiny's standard low-investment route from the full solo guide: train in Priest-line classes through the first two parts to raise Lck, then use Valkyrium's mobility in Part 3 to improve close-range healing without taking a Divine class slot.



 Vulnerary
Use Troubadour at Advanced tier, then Valkyrium for both offense and healing; use Ovate as a bridge if Troubadour is not unlocked.
Finish in The Avatar; do not use black magic during the Wiseman stage.

Fianna’s healing training and multi-route magic swords
For low investment, keep  Fianna on the Priest path and switch to
 Valkyrium in Part 3 for better positioning when healing nearby. With heavier investment, use armor to improve Defense or multi-route merging for a magic sword build. The sword path needs intensive training across multiple protagonist routes; a single-route healer can simply follow the healing path.
High Magic comes with healing limitations
Fianna has very high Magic growth, but her personal ability and learned spells lean toward healing. Her offensive spells do not fully use that advantage. As a healer, she still faces low Speed, poor physical durability, and no ranged healing.
For minimal resources, let her heal from the back and improve positioning through riding later. For dedicated single-route training, take extra class changes to improve Speed and defenses. To make her a mainstay who can both fight and heal, use each of the four routes for the growths it handles best.
Normal training raises Luck before switching to riding
Follow the  Priest line through the first two parts, avoid combat, and develop Luck. Both healing output and sustain benefit from Luck. Doing that job well is more practical than forcing damage from a slow mage. Positioning is simple: stay behind the front, rather than entering enemy range for one heal.
In Part 3, switch to Valkyrium. She needs to approach allies to heal, so mobility matters. Low movement leaves her behind the front or trapped when enemies arrive from the rear. Riding helps her follow the team and choose positions. Her spell uses and abilities already provide enough recovery. A normal healer can stop here without occupying a Divine slot indefinitely.
 Healing Staff improves healing,
 Silver Shield adds physical durability, and the remaining inventory can hold personal recovery items. Even an excellent healer needs a way to save herself. Keep Gift of Faith+,
 Barrier, and
 Piety, then fill remaining slots with learned White or Black Magic rank abilities valid for the current class. Piety grants Luck +3. Barrier adds Resistance to adjacent allies, useful when exhausting enemy spell uses.
Prioritize a mount with  Canto. After approaching an ally to heal, retreating two spaces reduces frontline exposure. Luck-focused mounts are suitable, but the ability matters more. I found Canto on a Ferghanan Horse and used it because it had the trait.
Intensive single-route training adds Defense and Intercept
For serious training on one route, start with  Leda, where she joins early. Instead of remaining in Priest classes, follow
 Shaman and
 Ovate for better Speed and Magic growth, helping with finishing blows and tough enemies. Once healing uses and output cover the role, use spare training to improve other areas.
Train Heavy Armor separately and change into an armored class once. The goal is not frontline tanking but minimum stat correction. If her Defense is below the class floor, reclassing raises it. After returning to magic classes and removing the armored class’s own bonus, the improved base remains. This does not repeatedly grant more Defense every time she changes class.
In Part 3, first use  Castle Knight to improve Defense and master
 Intercept, then return to Valkyrium. Intercept reduces damage by 5 when attacked, helping against physical and magical attacks alike. For further investment, use a Divine class to earn
 Divine Law for Magic +10, then free the slot after mastery.
This route improves Speed, Defense, and room for error compared with normal healing training. Keep equipment light and use  Gale Ring for Attack Speed. First avoid follow-ups from fast enemies, then pursue follow-ups against slow ones. Gift of Faith+ handles healing, Divine Law and mastery abilities support damage, and Intercept supports survival, making her a useful secondary combatant.
Intensive multi-route training splits her weaknesses by route
On  Cai’s route, train
 Charioteer with a Ferghanan Horse to improve HP, Defense, and Dexterity. This supplies the physical foundation; use another route for Speed.
Leda recruits her early, so follow  Hunter,
 Rogue, and
 Ranger specifically for Speed, focusing only on Speed when rigging level-ups. On
 Dietrich’s route, use Black Magic, Shaman into Ovate, specifically for Magic. On
 Theodora’s route, she joins late, so follow Priest classes for Resistance and Luck. Train each strength separately, then combine the results.
In Part 3, first use  Shadow Seeker to continue Speed training. Once Divine classes unlock, master
 The Blade, then end in
 The Avatar. The goal is a well-rounded character who deals sword damage and heals.
Magic-sword equipment must leave enough Attack Speed
Use  Levin Sword and
 Salamander as main damage options. When mages struggle to damage one another,
 Cleansing Blade offers physical damage. Use Black Magic as appropriate, and heal or rescue with White Magic when no good attack is available. With a trained physical foundation, swords become more than decoration.
Do not fill every accessory slot indiscriminately. Whether to carry Silver Shield and Healing Staff depends on remaining Attack Speed. Keep their utility if enough Speed remains; travel light if they slow her too much.
Take Speed +10 and Divine Law, then use learned Sword and Black Magic rank abilities and mastery abilities for remaining slots, adding offense and accuracy. Gift of Faith+ preserves healing output. If healing is already sufficient, optionally use  Wing Soldier to obtain
 Lightning Reflexes. Prioritize Dexterity, Defense, and Charm from the Battalion for more balanced bonuses.
Wiseman keeps raising Luck and healing
For dedicated healing, another complete route is Diviner → Priest →  Bishop →
 Wiseman → The Avatar. Beginner mastery
 Magic Basics improves Magic and Resistance. At Specialty, White Magic C and recommended level 20 lead to Piety mastery for Luck +3. At Advanced, White Magic B and recommended level 35 bring Barrier for adjacent allies. At Master, White Magic A and recommended level 45 lead to Wiseman’s Magic Heal +15. For Divine certification, prepare White Magic or Black Magic S and master Divine Law for Magic +10.
Wiseman adds Magic growth +20, Resistance +25, and Luck +20 percentage points. Her 55% Magic is a strength, but Luck at 25% limits Graceful Light and Gift of Faith+ activation. The former has a Luck-percent chance not to consume a use when healing an ally. The latter is learned at level 35 and has a Luck-percent chance to heal an extra 30. Higher Luck makes that sustain more reliable. Wiseman cannot use Black Magic, retaining only White Magic  Seraphim for offensive spells. It cannot combine Wiseman’s healing modifiers with every mounted dual-magic attack option.
Near Part 1’s end, around level 40, prioritize Magic, Luck, Resistance, and HP. Magic supports healing, Luck raises both recovery abilities’ chances, Resistance handles magical counters, and HP offsets fragile 30% growth. Low Strength, Dexterity, Defense, or Charm does not justify retraining a pure healer. Speed at 30% only needs normal growth. Manage Defense at 20% mainly through positioning. Do not leave her in physical enemy range for a single close heal. If Magic grows poorly, train her on another protagonist’s route and use Merge Causality to take higher individual stats.
Troubadour leads into mounted dual magic
To retain high-Magic offense and healing, choose Advanced  Troubadour, then Valkyrium. Still master Priest first at the Specialty stage for Piety. The mounted dual-magic endpoint requires Riding D and either White Magic A or Black Magic A, with its relevant temple request in Part 3 for the class unlock. Before Troubadour unlocks, use Ovate for higher Magic growth. A healer needing Barrier can stay in Bishop first.
On Cai’s route, Troubadour can also ride Monoceros, giving Luck +3 and Resistance growth +10 percentage points at bond level 5. It helps healer survival, but prioritize the Canto trait when choosing a mount. A Ferghanan Horse with Canto can also work first. Species determines growths, while individual traits determine Canto; check them separately.
More guides
- Developing Fianna: Secure healing first, then add Speed and durability for magical swordsQiongyuan Destiny
- Fianna class and recruitment recommendationsGameWith Fortune's Weave guide team
- Fianna training routes and recruitment requirements (Game8 Japanese)Game8 Japanese guide team
- Fianna's class and growth recommendations (English Game8)Game8 (English)
- Fianna's recommended classes and performanceAltema guide team
Site guides

Build Fianna as a backline healer through Diviner → Priest → Bishop, using Luck to save spell uses. She can work once she gains the mastery; intensive training is optional.
Keep her in the back as a short-range healer, and stay protected after healing. She lacks long-range healing and has low Speed and durability, so prioritize positioning before Magic. In Part 3, choose Valkyrium for mobility or Wiseman for dedicated white magic.
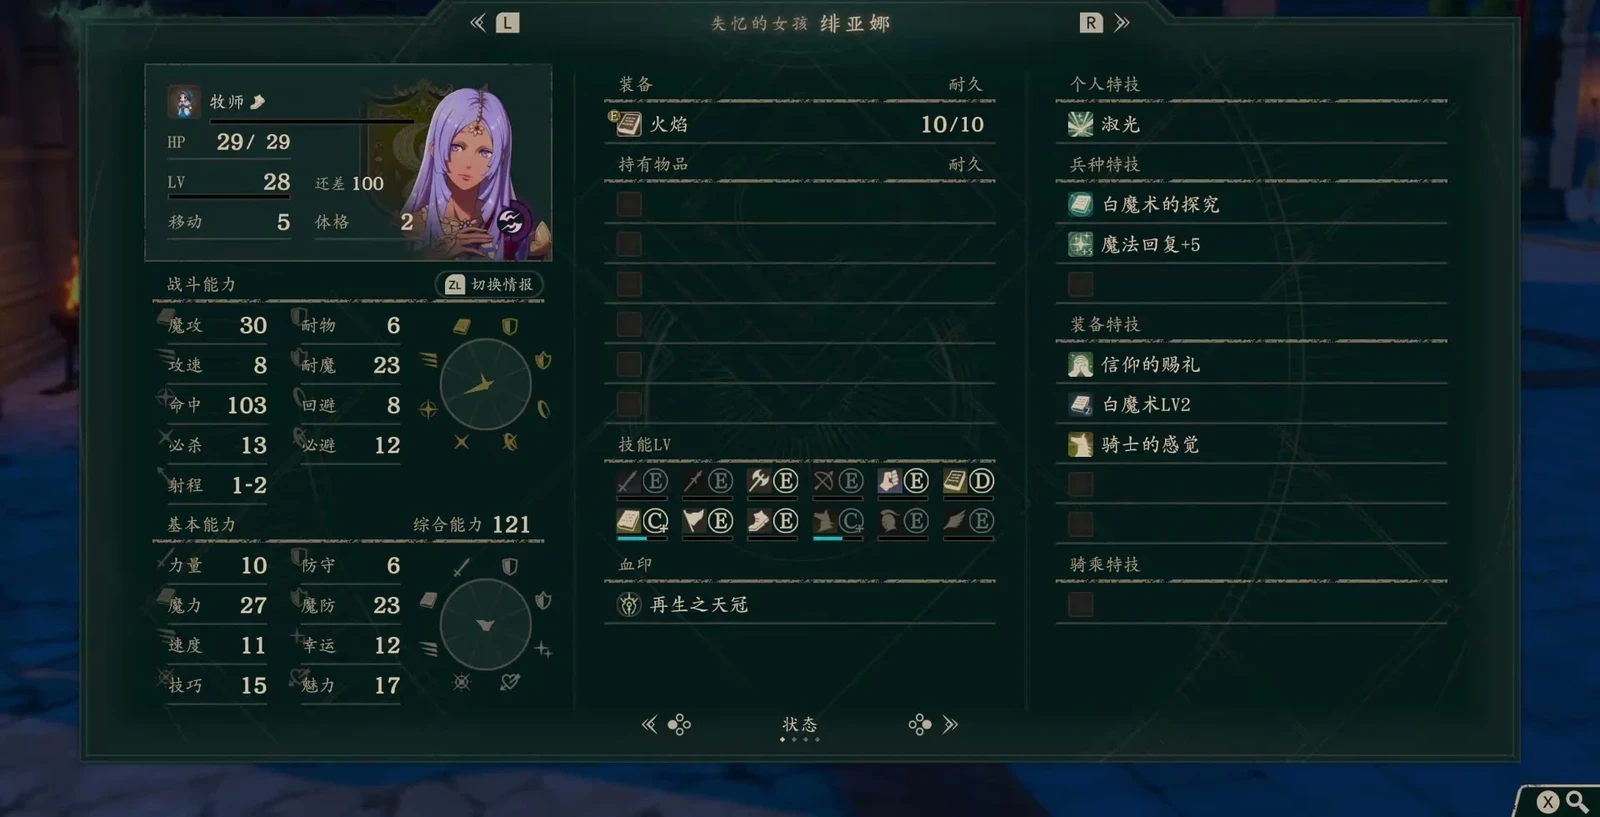
Training route by stage
Exams also require a pass, Renown, and the class unlock. Choose low-investment healing or added damage rather than training every branch.
Part 1: train White Magic first
- Take the Diviner exam at level 5 and Renown 1, with Black or White Magic D. Focus White Magic to C, then become a Priest at level 20 and Renown 4. Master Piety for Luck +3 to support her Luck-based personal ability.
- Take the Bishop exam at level 35, Renown 8, and White Magic B. Master Barrier to raise adjacent allies’ Resistance. Stay a Priest if you lack the requirements; there is no fixed Part 1 deadline for changing.
- Use a Healing Staff for stronger healing, a Silver Shield and defensive accessories for protection, and medicine to heal herself. This still cannot withstand repeated frontline engagements. Only count personal abilities such as Gift of Faith+ toward healing after learning them.
An alternative mobile healing chain is Diviner → Priest → Troubadour → Valkyrium. Prepare Riding D early. Troubadour requires level 35, Renown 8, Black or White Magic B, and its unlock. Choose either Bishop or Troubadour; you do not need both masteries before deploying.
Part 2: continue healing on the same route
The standard build stays on the Priest line through Parts 1 and 2, healing outside enemy range. Train Bishop for Barrier and prepare White Magic A. If already a Troubadour, keep healing with the team rather than repeatedly changing classes for mastery and delaying recovery. There is no shared recommendation for additional Part 2 class-change levels.
With more investment on one route, Shaman → Ovate improves Magic and Speed for finishing enemies and tougher targets. Prefer Leda’s route for early recruitment. The exams require Black Magic C at level 20 and B at level 35, plus Renown 4/8. On Cai’s route, Troubadour is also an Advanced option once mounts are available. You can also pass the Armored Knight exam for the Defense base stat floor, then return to magic. Calculate temporary class modifiers separately; they do not become permanent growth.
Skip these additions if you only need healing. Forcing her weak Sword proficiency to improve Speed usually consumes training resources needed by your core.
Part 3: add mobility or borrow a mastery
Choose Valkyrium for mobile healing. Its exam requires level 45, Riding D, Black or White Magic A, repairs to the relevant temple, and its unlock quest. It retains both magic types, making it easier to keep pace after approaching an ally to heal.
Choose Wiseman for white magic, with level 45, White Magic A, and its Part 3 unlock. It loses Black Magic, so you can no longer plan actions as a dual-magic caster.
Prioritize useful mobility on mounts, then Luck. Whether a Unicorn can gain Canto and trigger it after healing remains unconfirmed. Do not enter a dangerous tile expecting it to save her.
An extra step for intensive single-route training is mastering Intercept in Castle Knight in Part 3 before returning to Valkyrium. Castle Knight requires level 45, Heavy Armor C, and Lance or Axe A; you cannot skip that secondary weapon and armor training. With exceptional investment, also borrow The Avatar to master Divine Law for Magic, then free its slot. It requires Black or White Magic S, a Part 3 Divine item, and an available slot. Prioritize light equipment and a Gale Ring to reduce follow-ups against her. Recalculate Silver Shield, staff, and ring benefits for the equipment actually carried.
Another approach: multi-route optimization ending in The Avatar
This is a complete but expensive independent plan for players already committed to multi-route training.
| Assignment | Training direction | Reason |
|---|---|---|
 Cai route | Charioteer + Ferghanan Horse | Builds HP, Defense, and Dexterity; one card does not guarantee every stat is fixed |
 Leda route | Hunter → Rogue → Ranger | Uses the earlier joining window to build Speed |
 Dietrich route | Shaman → Ovate | Dedicated Magic training |
 Theodora route | Priest line | Builds Luck and Resistance after late recruitment |
| After Part 3 fusion | Shadow Seeker → borrow The Blade mastery → The Avatar | Continues Speed training before combining combat and healing |
Fusion takes the highest value for each stat rather than adding them. Shadow Seeker requires level 45, Sword or Bow A, and its unlock; The Blade needs Sword S, and The Avatar needs Black or White Magic S, alongside divine items and rotating slots. White Magic alone does not complete this setup.
Once developed, her main weapons are Levin Sword and Salamander, with spare actions for healing and rescue. Check Attack Speed after adding shields and staves, using her actual Speed in this run.
Approach wounded allies while staying under frontline protection
Stay within the front line’s protection and heal units that have just fought. Without long-range healing, she must approach the target. Check next round’s enemy movement and attack positions first. If no safe tile exists, use another healer or clear the threat before healing; do not walk into concentrated attacks.
Luck-based use saving improves endurance and gives more chances to earn healing experience, but does little when spell uses are plentiful. Calculate each current spell’s healing first, then schedule Seraphim and Recover after learning them.
Recruitment
All four routes require Bond Level 3 and 3000 gold in negotiations. Renown requirements are Leda 5, Dietrich 7, Cai 8, and Theodora 9, making Leda a common first choice for single-route optimization. See the recruitment page for chapter and schedule differences.
Ordinary healing does not require multi-route optimization
- Treating high Magic as a fast main attacker. Improving Speed on one route or investing across routes costs extra.
- Combining all three builds. Standard healing does not require Sword S, Heavy Armor, and a Divine class.
- Unicorn Canto after healing remains unconfirmed. Do not rely on it to retreat.
- Counting on black magic after changing to Wiseman. The class loses Black Magic; confirm the role before changing.
- Treating all temporary stats from an armor exam as a permanent floor. Calculate them separately.
Comments
Diviner→Lv20Priest→Lv35Bishop→Lv45ValkyriumDivinerHealing StaffWt 3Magic BasicsMag、Res+1 Black Magic Lv. 1Hit +3 when black magic is equipped
 Knightly SensesAvoid +10 in combat against spear users
 Steady Shot[Infantry] Hit +5 when a bow or magic is equippedGraceful LightWhen healing allies with magic, has aLck% chance to activate without consuming a magic use
 Priest TraineesGambit: “Area Heal”
Qiongyuan Destiny's standard low-investment route from the full solo guide: train in Priest-line classes through the first two parts to raise Lck, then use Valkyrium's mobility in Part 3 to improve close-range healing without taking a Divine class slot. Currently organized by Diviner's weapon access, mounted status, and battalion rules.
Healing StaffWt 3Gift of FaithWhen healing allies with magic, has aLck% chance to restore +20 HP.PietyLck+3Magic BasicsMag、Res+1Steady Shot[Infantry] Hit +5 when a bow or magic is equippedBlack Magic Lv. 1Hit +3 when black magic is equippedGraceful LightWhen healing allies with magic, has aLck% chance to activate without consuming a magic use White-Magic SeekerWhite magic uses ×2
 Magic Heal +5Healing allies with magic restores +5 HP
 Pure PriestsGambit: “Area Heal”
Qiongyuan Destiny's standard low-investment route from the full solo guide: train in Priest-line classes through the first two parts to raise Lck, then use Valkyrium's mobility in Part 3 to improve close-range healing without taking a Divine class slot. Currently organized by Priest's weapon access, mounted status, and battalion rules.
Healing StaffWt 3Gift of Faith+When healing allies with magic, has aLck% chance to restore +30 HPPietyLck+3BarrierAdjacent alliesRes+3 White Magic Lv. 3Hit and Avo +5 when white magic is equipped
 Black Magic Lv. 3Hit and Avo +5 with black magic equippedGraceful LightWhen healing allies with magic, has aLck% chance to activate without consuming a magic useWhite-Magic SeekerWhite magic uses ×2
 Magic Heal +10Healing allies with magic restores +10 HP
 HealMt 10
 RecoverMt 30Seraphim
 Mt 10 Hit 75 Wt 10
 Regenera
 FireMt 3 Hit 90 Wt 5
 ThunderMt 5 Hit 76 Wt 7
 BolganoneMt 10 Hit 85 Wt 8
 ThoronMt 20 Hit 55 Wt 25
 Elevated PriestsGambit: “Area Heal”
Qiongyuan Destiny's standard low-investment route from the full solo guide: train in Priest-line classes through the first two parts to raise Lck, then use Valkyrium's mobility in Part 3 to improve close-range healing without taking a Divine class slot. Currently organized by Bishop's weapon access, mounted status, and battalion rules.
Healing StaffWt 3Gift of Faith+When healing allies with magic, has aLck% chance to restore +30 HPPietyLck+3BarrierAdjacent alliesRes+3 White Magic Lv. 4Hit and Avo +7 when white magic is equipped
 Black Magic Lv. 4Hit and Avo +7 with black magic equippedGraceful LightWhen healing allies with magic, has aLck% chance to activate without consuming a magic use
 Mount/DismountCan use “Mount” and “Dismount”Magic Heal +10Healing allies with magic restores +10 HP
 Magic Hit +5Hit +5 when magic is equippedHealMt 10RecoverMt 30SeraphimMt 10 Hit 75 Wt 10RegeneraFireMt 3 Hit 90 Wt 5ThunderMt 5 Hit 76 Wt 7BolganoneMt 10 Hit 85 Wt 8ThoronMt 20 Hit 55 Wt 25Ferghanan HorseStr+2 Dex+1 Def+2
Qiongyuan Destiny's standard low-investment route from the full solo guide: train in Priest-line classes through the first two parts to raise Lck, then use Valkyrium's mobility in Part 3 to improve close-range healing without taking a Divine class slot. Currently organized by Valkyrium's weapon access, mounted status, and battalion rules.
Healing StaffWt 3Gift of Faith+When healing allies with magic, has aLck% chance to restore +30 HPPietyLck+3BarrierAdjacent alliesRes+3 White-Magic MasteryHit and Avo +10, Attack +3 when white magic is equipped
 Black-Magic MasteryHit and Avo +10, Attack +3 when black magic is equipped.Graceful LightWhen healing allies with magic, has aLck% chance to activate without consuming a magic useMount/DismountCan use “Mount” and “Dismount”Magic Heal +10Healing allies with magic restores +10 HPMagic Hit +5Hit +5 when magic is equippedHealMt 10RecoverMt 30SeraphimMt 10 Hit 75 Wt 10RegeneraFireMt 3 Hit 90 Wt 5ThunderMt 5 Hit 76 Wt 7BolganoneMt 10 Hit 85 Wt 8ThoronMt 20 Hit 55 Wt 25
 RescueFerghanan HorseStr+2 Dex+1 Def+2
Qiongyuan Destiny's standard low-investment route from the full solo guide: train in Priest-line classes through the first two parts to raise Lck, then use Valkyrium's mobility in Part 3 to improve close-range healing without taking a Divine class slot. Currently organized by Valkyrium's weapon access, mounted status, and battalion rules.
Diviner→Lv20Priest→Lv35Troubadour→Lv45ValkyriumDivinerHealing StaffWt 3Magic BasicsMag、Res+1Black Magic Lv. 1Hit +3 when black magic is equippedKnightly SensesAvoid +10 in combat against spear usersSteady Shot[Infantry] Hit +5 when a bow or magic is equippedGraceful LightWhen healing allies with magic, has aLck% chance to activate without consuming a magic usePriest TraineesGambit: “Area Heal”Use Troubadour at Advanced tier, then Valkyrium for both offense and healing; use Ovate as a bridge if Troubadour is not unlocked. Currently organized by Diviner's weapon access, mounted status, and battalion rules.
Healing StaffWt 3Gift of FaithWhen healing allies with magic, has aLck% chance to restore +20 HP.PietyLck+3Magic BasicsMag、Res+1Steady Shot[Infantry] Hit +5 when a bow or magic is equippedBlack Magic Lv. 1Hit +3 when black magic is equippedGraceful LightWhen healing allies with magic, has aLck% chance to activate without consuming a magic useWhite-Magic SeekerWhite magic uses ×2Magic Heal +5Healing allies with magic restores +5 HPPure PriestsGambit: “Area Heal”Use Troubadour at Advanced tier, then Valkyrium for both offense and healing; use Ovate as a bridge if Troubadour is not unlocked. Currently organized by Priest's weapon access, mounted status, and battalion rules.
Healing StaffWt 3Gift of Faith+When healing allies with magic, has aLck% chance to restore +30 HPPietyLck+3Magic BasicsMag、Res+1White Magic Lv. 3Hit and Avo +5 when white magic is equippedBlack Magic Lv. 3Hit and Avo +5 with black magic equippedGraceful LightWhen healing allies with magic, has aLck% chance to activate without consuming a magic useMount/DismountCan use “Mount” and “Dismount”Magic Heal +5Healing allies with magic restores +5 HP Magic Hit +3Hit +3 when magic is equipped
 HealMt 10RecoverMt 30SeraphimMt 10 Hit 75 Wt 10RegeneraFireMt 3 Hit 90 Wt 5ThunderMt 5 Hit 76 Wt 7BolganoneMt 10 Hit 85 Wt 8ThoronMt 20 Hit 55 Wt 25Ferghanan HorseStr+2 Dex+1 Def+2
Use Troubadour at Advanced tier, then Valkyrium for both offense and healing; use Ovate as a bridge if Troubadour is not unlocked. Currently organized by Troubadour's weapon access, mounted status, and battalion rules.
Healing StaffWt 3Gift of Faith+When healing allies with magic, has aLck% chance to restore +30 HPPietyLck+3Magic BasicsMag、Res+1White Magic Lv. 4Hit and Avo +7 when white magic is equippedBlack Magic Lv. 4Hit and Avo +7 with black magic equippedGraceful LightWhen healing allies with magic, has aLck% chance to activate without consuming a magic useMount/DismountCan use “Mount” and “Dismount”Magic Heal +10Healing allies with magic restores +10 HPMagic Hit +5Hit +5 when magic is equippedHealMt 10RecoverMt 30SeraphimMt 10 Hit 75 Wt 10RegeneraFireMt 3 Hit 90 Wt 5ThunderMt 5 Hit 76 Wt 7BolganoneMt 10 Hit 85 Wt 8ThoronMt 20 Hit 55 Wt 25Ferghanan HorseStr+2 Dex+1 Def+2Healing StaffWt 3Gift of Faith+When healing allies with magic, has aLck% chance to restore +30 HPPietyLck+3White-Magic MasteryHit and Avo +10, Attack +3 when white magic is equippedBlack-Magic MasteryHit and Avo +10, Attack +3 when black magic is equipped.Graceful LightWhen healing allies with magic, has aLck% chance to activate without consuming a magic useMount/DismountCan use “Mount” and “Dismount”Magic Heal +10Healing allies with magic restores +10 HPMagic Hit +5Hit +5 when magic is equippedHealMt 10RecoverMt 30SeraphimMt 10 Hit 75 Wt 10RegeneraFireMt 3 Hit 90 Wt 5ThunderMt 5 Hit 76 Wt 7BolganoneMt 10 Hit 85 Wt 8ThoronMt 20 Hit 55 Wt 25RescueFerghanan HorseStr+2 Dex+1 Def+2Diviner→Lv20Priest→Lv35Bishop→Lv45Wiseman→The AvatarDivinerHealing StaffWt 3Magic BasicsMag、Res+1Black Magic Lv. 1Hit +3 when black magic is equippedKnightly SensesAvoid +10 in combat against spear usersSteady Shot[Infantry] Hit +5 when a bow or magic is equippedGraceful LightWhen healing allies with magic, has aLck% chance to activate without consuming a magic usePriest TraineesGambit: “Area Heal”Finish in The Avatar; do not use black magic during the Wiseman stage. Currently organized by Diviner's weapon access, mounted status, and battalion rules.
Healing StaffWt 3Gift of FaithWhen healing allies with magic, has aLck% chance to restore +20 HP.PietyLck+3Magic BasicsMag、Res+1Steady Shot[Infantry] Hit +5 when a bow or magic is equippedBlack Magic Lv. 1Hit +3 when black magic is equippedGraceful LightWhen healing allies with magic, has aLck% chance to activate without consuming a magic useWhite-Magic SeekerWhite magic uses ×2Magic Heal +5Healing allies with magic restores +5 HPPure PriestsGambit: “Area Heal”Finish in The Avatar; do not use black magic during the Wiseman stage. Currently organized by Priest's weapon access, mounted status, and battalion rules.
Healing StaffWt 3Gift of Faith+When healing allies with magic, has aLck% chance to restore +30 HPPietyLck+3BarrierAdjacent alliesRes+3White Magic Lv. 3Hit and Avo +5 when white magic is equippedBlack Magic Lv. 3Hit and Avo +5 with black magic equippedGraceful LightWhen healing allies with magic, has aLck% chance to activate without consuming a magic useWhite-Magic SeekerWhite magic uses ×2Magic Heal +10Healing allies with magic restores +10 HPHealMt 10RecoverMt 30SeraphimMt 10 Hit 75 Wt 10RegeneraFireMt 3 Hit 90 Wt 5ThunderMt 5 Hit 76 Wt 7BolganoneMt 10 Hit 85 Wt 8ThoronMt 20 Hit 55 Wt 25Elevated PriestsGambit: “Area Heal”Finish in The Avatar; do not use black magic during the Wiseman stage. Currently organized by Bishop's weapon access, mounted status, and battalion rules.
Healing StaffWt 3Gift of Faith+When healing allies with magic, has aLck% chance to restore +30 HPPietyLck+3BarrierAdjacent alliesRes+3White Magic Lv. 4Hit and Avo +7 when white magic is equippedMagic BasicsMag、Res+1Graceful LightWhen healing allies with magic, has aLck% chance to activate without consuming a magic use

Finish in The Avatar; do not use black magic during the Wiseman stage. Currently organized by Wiseman's weapon access, mounted status, and battalion rules.
Healing StaffWt 3Gift of Faith+When healing allies with magic, has aLck% chance to restore +30 HPPietyLck+3BarrierAdjacent alliesRes+3White Magic Lv. 4Hit and Avo +7 when white magic is equippedMagic BasicsMag、Res+1Graceful LightWhen healing allies with magic, has aLck% chance to activate without consuming a magic useHealing StaffWt 3Gift of Faith+When healing allies with magic, has aLck% chance to restore +30 HPPietyLck+3BarrierAdjacent alliesRes+3White Magic Lv. 4Hit and Avo +7 when white magic is equippedDivine LawMag+10Graceful LightWhen healing allies with magic, has aLck% chance to activate without consuming a magic use All-Magic ZenithBlack and white magic uses ×3
 Magic Hit +10Hit +10 when magic is equipped
 Magic Heal +20Healing allies with magic restores +20 HP
 Noble BodyguardsAuthority B
Build approach and suitable stages
Mobile Troubadour route with dual magic: Valkyrium Lv 45, Lv 60
Use Troubadour at Advanced tier, then Valkyrium for both offense and healing; use Ovate as a bridge if Troubadour is not unlocked. Currently organized by Valkyrium's weapon access, mounted status, and battalion rules.
Wiseman white magic Divine route: The Avatar Lv 60
Finish in The Avatar; do not use black magic during the Wiseman stage. Currently organized by The Avatar's weapon access, mounted status, and battalion rules.
DexWidely recommendedDexVery strongDexUseful for specific strategies
 Black Magic Lv. 2
 Black Magic Lv. 5
 White Magic Lv. 1
 White Magic Lv. 2
 White Magic Lv. 5
 Knight’s Vanguard
 Cavalry Move
 Spear
 Flowing Spear
 Spears Lv. 1
 Focused Throw
 Spears Lv. 2
 Frozen Spear
 Spears Lv. 3
 Brilliant Strike
 Spears Lv. 4
 Spears Lv. 5
 Spearfaire
 Axe
 Half Spike
 Axes Lv. 1
 Magic Throw
 Axes Lv. 2
 Lightning Axe
 Axes Lv. 3
 Reflecting Dance
 Axes Lv. 4
 Axes Lv. 5
 Axefaire
 Bow
 Curved Shot
 Bows Lv. 1
 Encloser
 Bows Lv. 2
 Spell-Sealing Arrow
 Bows Lv. 3
 Spirit Smash
 Bows Lv. 4
 Bows Lv. 5
 Bowfaire
 Infantry
 Avoid Fatality
 Steady Shot+
 Infantry Move
 Avoid Fatality+
 Flying
 Read the Winds
 Heavy Armor
 Resist Stance
 Armored Move
 Bld
 Healing Armor
 Authority
 Lend Magic +
 Haze Slice
 Swords Lv. 1
 Secret Sword
 Swords Lv. 2
 Hexblade
 Swords Lv. 3
 Greater Hexblade
 Swords Lv. 4
 Swords Lv. 5
 Swordfaire
 Cautious Blow
 Fists Lv. 1
 Curtail Magic
 Fists Lv. 2
 Spirit Fist
 Fists Lv. 3
 Magic Fist Flurry
 Fists Lv. 4
 Fists Lv. 5
 Fistfaire
Fianna: Recruitable on Cai's, Dietrich's, Theodora's, and Leda's routes (Renown 5–9).
Cai's storyRecruitable 8
 3From Chapter 4
 3000G
Steps
Recruitable. Encounter recorded from Part I, Chapter 4; joining requirements still apply after the character appears. Give a gift in Dagsion to unlock recruitment, then reach Renown Lv8 and bond Lv3 with Cai. Pay 3000G in negotiation. Complete before this route's Chapter 12 main battle; regular recruitment closes in the War Arc. Gift options: Volcano Ghosh, available for 150G from the gift merchant at the tavern in lower Dagsion.
- Negotiate3000G
Dietrich's storyRecruitable73From Chapter 43000GSteps
Recruitable. Encounter recorded from Part I, Chapter 4; joining requirements still apply after the character appears. Give a gift in Dagsion to unlock recruitment, then reach Renown Lv7 and bond Lv3 with Dietrich. Pay 3000G in negotiation. Complete before this route's Chapter 12 main battle; regular recruitment closes in the War Arc. Gift options:Volcano Ghosh, available for 150G from the gift merchant at the tavern in lower Dagsion.
- Negotiate3000G
Theodora's storyRecruitable93From Chapter 53000GSteps
Recruitable. Recorded from Part I, Chapter 5; must still meet the joining requirements once available. In Dagsion, give one gift to unlock recruitment, then reach Renown Lv9 and support Lv3 with Theodora. Pay 3000G in negotiations. Complete before departure on 10/24 and before this route's Chapter 12 main battle. Gift options: Volcano Ghosh, available for 150G from the gift merchant at the tavern in lower Dagsion.
- Negotiate3000G
Leda's storyRecruitableEasiest option53From Chapter 43000GSteps
Recruitable. Recorded as available from Part I, Chapter 4; joining requirements still apply once the character appears. Give one gift in Dagsion to unlock recruitment, then reach Renown Lv5 and Bond Lv3 with Leda. Pay 3000G in negotiations. Finish before this route's Chapter 12 main battle; regular recruitment is unavailable after entering the War Arc. Gift options includeVolcano Ghosh, available for 150G from the gift merchant at the tavern in lower Dagsion.
- Negotiate3000G
Renown level Bond Level with this route's protagonist. For all characters across the four routes, see Recruitment; see recruitment steps at How to recruit。
 Most effective gifts



All are favorites and sold in shops. Fianna mainly favors coffee items. Favorite gifts show double arrows in-game and give the largest bond gains.
Find where to buy these on the map→ Where to buy all 9 favorite gifts→
Favorite9 items





Likes6 items






LikesPoetry collections, spicy food, coffee, reliable peopleInterestsPraying, theatergoing
Bond partners8 characters · 3 can reach A · 1 have confirmed paired endings
 A
 A
 A
 B
 B
 B
 B
 C
Letters indicate the highest available support conversation (C = support Lv2, B = support Lv3, A = support Lv4); A paired ending is confirmed,For the rules, seeBonds。
A beautiful but somewhat gloomy cleric. Found unconscious by a river several years ago, she was taken in by a temple and now belongs to Talimun's Vandal Trading Company. She loves spicy food and can tolerate heat that would make grown men faint.
Details
| Title | A cleric at the trading company |
|---|---|
| Affiliation | Vandal Trading Company |
| Likes | Poetry collections, spicy food, coffee, reliable people |
| Interests | Praying, theatergoing |
| Japanese voice | Aya SuzakiWikipedia (Japanese) |
| English voice actor | Nerida BronwenVoice actor database |
Relationships
In the story
From temple to trading company
Fianna once collapsed by a river and was rescued by the temple. She later joined the Vandal Trading Company led by Talimun, living among its members as a cleric.
A solo ending spent helping people through healingSpoilers
In her solo epilogue, she bids her companions farewell and begins working at a temple in Dagsion, using herStrShe heals the wounded and helps the people. Always gentle and sincere, she gradually comes to be regarded as a saint, with a constant stream of people bringing her their troubles.
Trivia
- Her name is shared with a warrior band in Irish mythology.