
Eshmel’s armored build with Healing ArmorMinor spoilers
In Part 3, train Heavy Armor and certification requirements, then obtain Intercept, Healing Armor, and movement bonuses. Stay with the team initially; once Healing Armor is learned, attacks can restore HP.

In Part 3, train Heavy Armor first, then use an armored class with Healing Armor equipped to test healing on counters. Stay with the team until the build is ready; healing is chance-based.
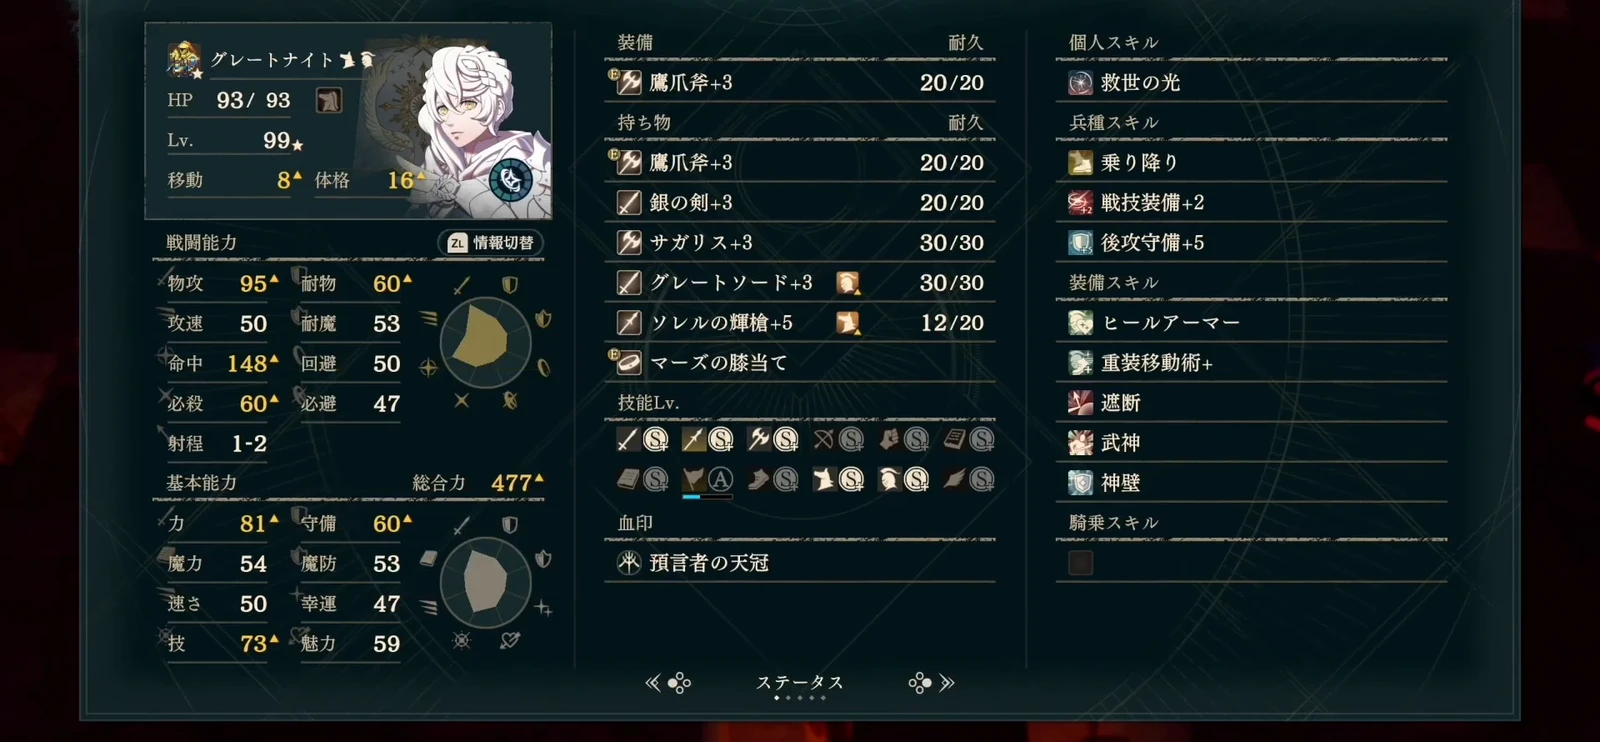
Learn Healing Armor at Heavy Armor B and equip it. Its activation rate equals Magic as a percentage, and it restores half the damage dealt. Magic 50/54 describes a late-game setup. Use your own Magic at joining and cover consecutive failures with healing support.
Preparation is moderate to high: class qualifications, Heavy Armor B, damage-reduction mastery, a two-range weapon, and Hit all matter.
You do not need to pretrain Eshmel’s skills in Part 1
This armored plan begins when Eshmel joins in Part 3. Training another unit’s Heavy Armor or spending manuals in Part 1 does not automatically train him. Progress normally on your protagonist route. Prologue challenge leveling is a separate method in the Three-unit challenge, not a required first step for an ordinary armored build.
Prepare carried items and skill targets in Part 2
The Part 3 targets are Heavy Armor B, Spear or Axe A, and Riding D. If you want to retain a range 1–2 spear or axe from Part 2, check who holds it before the end-of-part transfer. Character merging is separate.
You do not need to detour through all four routes or reach 99 first. A lower-resource route keeps Guardian/Sentinel while maintaining White Magic. Heavy armor is not the only choice.
Train requirements before Castle Knight and Great Knight in Part 3
Start with Castle Knight. Stay there if the Great Knight side quest is unavailable; level alone is no reason to force a change.
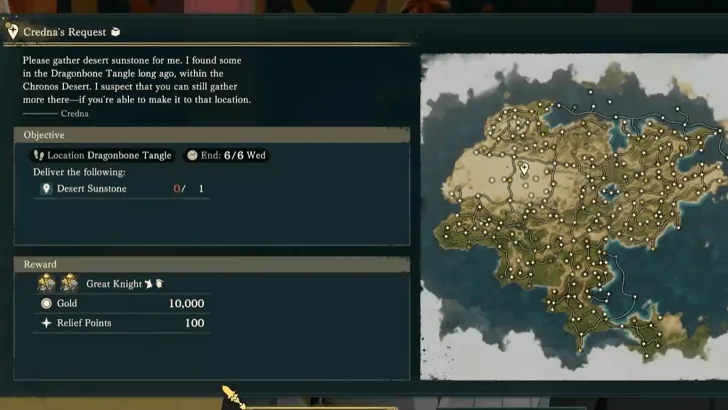
Get Intercept from Castle Knight, then switch to Great Knight for mobility and its combined cavalry and armor traits. Restore Credna’s temple and complete the side quest first.
Get reliable damage reduction from Castle Knight first, then decide whether to stay.
| Step | Level, class, and skills | Equipment and checks |
|---|---|---|
| Check upon joining | Keep a class that currently fights/heals effectively. Rebuild the training grounds and use manuals for Heavy Armor and Riding; train the better-established Spear/Axe discipline toward A | Carry healing items and stay with the team rather than assuming armored skills are already learned. Recovery spells can come first |
| Castle Knight stage | Recommended level 45, Heavy Armor C, Spear or Axe A, Master permit; unlocked after Section 1. Gain class EXP to master Intercept | Castle Knight uses only spears and axes. Start with a range 1–2 weapon to cover 2-space counterattacks after attacking/during enemy phase; keep training if requirements are short |
| Learn the core | Heavy Armor D teaches Armored Move for Movement +1; C teaches Armored Move+ for Movement +2; B teaches Healing Armor. Equip them after learning | Armored only; these do not remain usable in an ordinary magic class. |
| Switch for final mobility | Great Knight: recommended level 45, Heavy Armor D/Riding D, Spear or Axe A; restore Credna’s temple and finish the side quest | Counts as cavalry and armored; uses swords, spears, and axes. A Movement +2 example reaches 8. Stay Castle Knight until the quest opens rather than forcing a change by level |
Finish the temple quest before checking the certification list. After mastering Intercept in Castle Knight, equip it in the ability menu for 5 less damage when attacked. Healing Armor is learned at Heavy Armor B. When attacking, its activation chance equals Magic as a percentage, restoring HP equal to half the damage dealt.
Separate the armored core from optional and finished setups
| Tier | Components | Reasoning |
|---|---|---|
| Complete the core first | Armored class, Healing Armor, a weapon that can counter, sufficient Hit, and nearby healing | Estimate activation from current Magic and test against a few enemies; attacks beyond 2 spaces remain outside counter range |
| Reliable improvements | Castle Knight’s Intercept, armored Movement +2, healing items or a shield | Reduces pressure when healing fails to activate; check shield Weight and whether it causes enemy follow-ups |
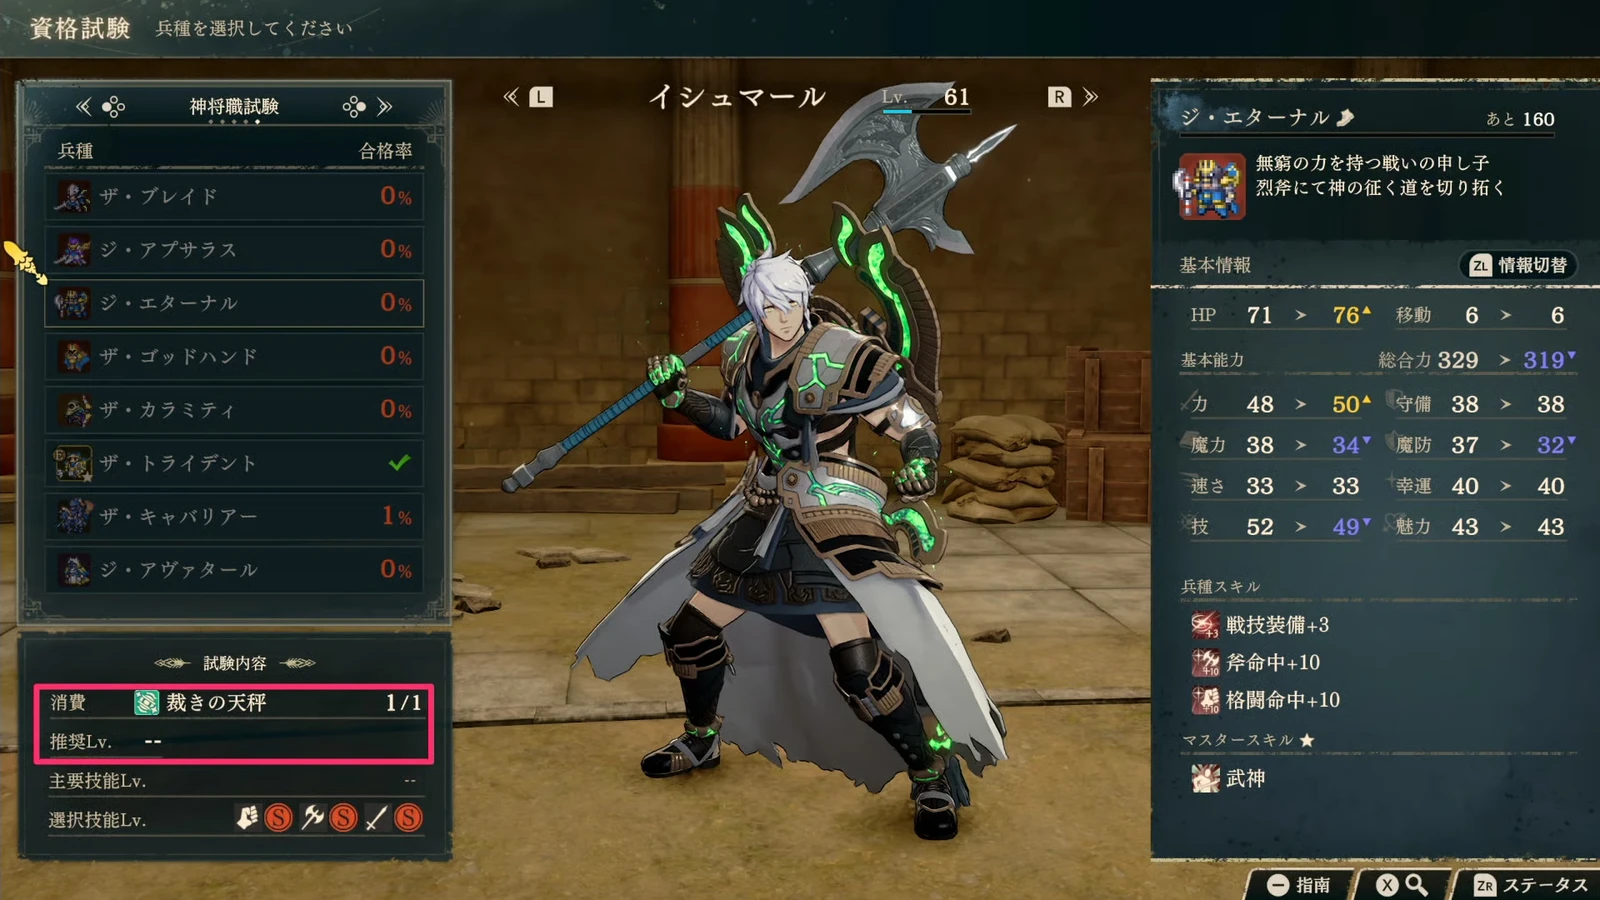
| Optional high investment | Divine Wall from The Trident for Defense +10; Divine Adornment from The Godhand for Resistance +10; Divine Might from The Eternal for Strength +10 | Each costs extra proficiency, Heavenly Crown items, and mastery time. They are not beginner prerequisites; Resistance investment is optional |
| Finished examples | Example one: Heavy Armor/Spear/Axe S+, Magic 50. Example two: level 99, all S+, Magic 54, total stats 477 | Shows these setups were used, without establishing that every save can immediately hold a frontline the same way or needs all S+ |
A mount with Paired Healing+ can add post-combat recovery. Stay Castle Knight if the right mount/bond is not available initially. Ally healing covers failed activations, and a Dancer can refresh either healing or damage. For temporary protection, choose available Aurora against magical damage or Jurah against effectiveness. Do not stack multiple Blessings in the same turn.
How do you train proficiency and test frontline survival?
Start with Skill borrowing and proficiencies. Clashes count at most 15 rounds, shared across waves. Another observation found a maximum of one rank gained in a proficiency per battle. Check the bar after 15 rounds, retreat, and restart. Leave earlier if a rank rises or enemies are nearly gone.
Around 140 Hit is only one playthrough reference. Magic, Hit, and actual damage all affect recovery.
Prepare for failed healing and 3-space magical attacks
Healing Armor requires an armored class. Use medicine and healing when it fails repeatedly. Test incoming damage against basic physical enemies first, then prepare separately for three-range attacks, guaranteed hits, area attacks, and high magic damage.