
Builds and training techniques
Choose builds for your current protagonist route and story part. Catch up levels when stuck; prepare classes and mounts before intensive training. Level-up previewing, fusion, and borrowed skills have separate guides, while small-team challenges are folded behind spoilers.

If stuck, catch up lagging units first. For intensive training, prepare classes and mounts before leveling.
You do not need level 99 before progressing. For one unit to hold enemies, consider Avoid, criticals, or armor. For smoother party actions, consider Dancer. Plan training around your current protagonist route and story part instead of working backward from an endgame setup.
Training builds
| Build | Core idea | Available route/part | First preparation |
|---|---|---|---|
| Ferghanan Horse Charioteer | Bond horses first, then amplify mount growth with two Charioteer horses | Main training in  Cai’s Parts 1 and 2, change roles in Part 3;  Io offers a starting-horse branch on other routes | Bow C/Riding D, Renown 4, bonds between the intended rider and individual horses; other routes cannot copy capture and feeding access directly |
| Dodge tank | Dodge attacks and kill on counterattacks | Depends on recruitable characters;  Catania on  Leda’s route is the example, with level-35 conditions especially important | Build Strength and Speed together; check actual Attack Speed gaps and range for each enemy. Flying does not directly receive terrain Avoid |
| Critical-hit lifesteal | A sword user who can kill heals through critical damage/kills | Obtain mastery on  Dietrich’s route; use an ordinary sword setup in Part 2 until the gem is ready, whose timing is not fixed here | Myrmidon/Shido mastery; add Brigand/Warrior for low Strength and keep healing support until the gem is available |
| Dancer extra actions | Give your action to the most useful unit this turn | Leda’s Chapter 9 side quest in Part 1; no ordinary first-part Dancer on other routes; can change holders in Part 3 | Sword/Bow foundation and eligibility; choose a safe destination first. One refresh gives two actions, two refreshes give three |
| Queen’s stone throws | Throw stones at range while healing restores HP | 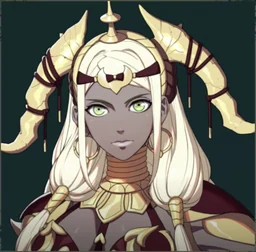 Theodora’s Parts 1 and 2; change to extra damage, mobility, or White Magic support in Part 3 | Chapter 1 Earthen Throw, current healing uses, and Blaze Gauge; separate strengthened arts from Burst penalties |
| Armored Eshmel | Armored counterattacks can heal, backed by reliable damage reduction | Separate Part 3 training; no need to pretrain another unit for him in Part 1 | Check starting proficiency, train Heavy Armor/Riding and Spear/Axe eligibility, then obtain Intercept from Castle Knight |
| Armored dodge tank | Build Speed in the first two parts, then combine Avoid and Defense in Part 3 | Leda’s Dancer or  Lysander’s early route, then Great Knight in Part 3 | High investment; keep the current class if requirements are short |
General training techniques
| Guide | What to do first | Before and after the setup is ready |
|---|---|---|
| Level catch-up and fixed EXP | Give weaker units Linked Attacks and finishing blows; unfinished Cai instruction allows leaving enemies alive and retreating | Dietrich’s level-20 immobilization plus healing; catch-up also works in Part 3. Level 99 is not required to clear the game |
| Level-up previewing and level-up rigging | Keep a save, preview at the inn, reload, then take certification | Improve one stat on one character first. Cloud recovery after an accidental save is separate; certification is not an actual level-up |
| Borrowed skills and proficiency | Distinguish the three EXP tracks and choose the class to borrow from | Manually test survival and enemy endurance, then retreat after 15 rounds; return to the original class and equip mastery |
| Merge Causality | Use two routes to fill one weakness first; replaying is not necessary for a tiny gain | Complete Part 2 to update each record, then preview in Part 3. Free same-route replay updates are explained separately |
| Teaching Hidden Arts | Have Dietrich learn the art through its challenge before visiting the teaching temple | Smyrnos access in Chapter 7; recipient upgrades cost extra materials; teaching remains available in Part 3 |
Battalions, Gambits, and adjacent supports complement your current tactics. See Battalion assignment and dispatch and Gambit formations and adjacent supports.
Challenge runs
The small-party Salvation challenge includes final-battle spoilers. Try it after learning the maps.
SpoilersRoute-skipping restrictions, three-unit roster, and successful roles
Skip the four protagonist routes at the Obelisk and fight with Eshmel, Hong Hua, and Troy. One setup uses Hong Hua for damage and Troy for Dance. Another uses the enhanced Normal/Classic battle with gates left intact, breaking a gate with Bolting and using Eshmel’s Astra. See the linked page for each setup’s full restrictions and resource gaps.