
Three-unit Salvation challenge: enter Part 3 without saving a protagonistMajor spoilers
Assign gate breaking and boss damage within the same turn. Different setups divide main damage, ranged gate breaking, and extra actions differently. Choose roles before preparing the three-unit team.

Assign gate breakers and boss attackers before the final battle so damage follows in the same turn. Reserve actions for healing or refreshing too, rather than training only one ace.
This challenge skips all four protagonist routes at the obelisk and enters Part 3 directly. For a first clear, finish the protagonist routes to obtain allies and resources.
Without recruiting the four protagonists, recorded battles have level-99 bosses and enemies. Recruiting one lowers the boss to level 78. Leaving gates around the world can strengthen the final battle further.

Gate-breaking roles in two three-unit setups
- Eshmel handles gates and threats while Hong Hua deals damage during openings.
- Troy becomes a Dancer to refresh Hong Hua, healing only when that turn requires it.
- Normal Classic with gates left intact: break gates at range with Bolting and preserve Hong Hua’s spell uses.
- Eshmel uses Astra, with two criticals finishing the successful attempt.
- Troy is The Godhand, so the Dancer role cannot be copied. Level 99 and all S+ proficiencies are this setup’s preparation.
The first setup initially trains only Eshmel and lacks enough damage during openings. Training Hong Hua and a Dancer adds a second main unit. Other recorded attempts use obstacles and rewinds to seek criticals.
Prologue leveling and the initial Part 3 setup
This challenge has no normal Part 1 or Part 2 training stage. One opening leaves Theodora on a healing tile and repeatedly uses Purifying Flash while waiting for her to recover. Eshmel reaches about level 45 in half an hour, while Troy levels through healing. You do not need to copy that exact starting level.
| Character | First steps on entry | Midgame training | Final-battle branches | |
|---|---|---|---|---|
 Eshmel | Survive with the current spear class, Javelin, and medicine; clear miasma with Blaze Arts | See Healing Armor for the armored plan: recommended level 45, training Armor, Spear/Axe, and Riding qualifications in stages | Setup one runs gates with mobility. Setup two uses Great Knight and Astra mastered from Swordmaster for main damage; mastery does not automatically equip it | |
 Hong Hua | Supplement limited spell uses with Salamander and attack along safe routes | Rebuild training grounds for black and white magic. Her joining White Magic C does not provide the ideal full spell list | Setup one uses offense and a life-drain accessory. Setup two uses The Avatar and Bolting for gates; resources differ | |
 Troy | Keep a class that permits personal gauntlets and current healing, checking which recovery spells are actually learned | Train White Magic for recovery, then level by casting. Physic requires A+, so she is not a ranged healer on joining | Setup one trains Sword/Bow B, Dancer qualification, and Renown 8 early. Setup two uses Gauntlet S/White Magic C, the Emperor’s Sash, and a 100% pass rate for The Godhand |
For setup one, check the Dancer exam entry and who holds the qualification first. See the Dancer page for Divine and Dancer prerequisites.
Survive the zero-gold opening before buying lasting equipment
This route starts with 0 gold. Progress using the starting spear, Javelin, personal gauntlets, and gifted Salamander. Restore HP/durability and obtain training needed for the immediate objective next. Only strengthen regular weapons and add lasting accessories once you can reliably farm resources. You do not need the entire final loadout first.
Late-game equipment:
| Character | Reference loadout | Acquisition and priority limits |
|---|---|---|
| Eshmel | Javelin, starting spear,  Chosen Lance,  Victory Gem; Silver Spear/Ridersbane as needed | Transition with spears and accessories currently owned; the entire setup is not required at the zero-gold opening |
| Hong Hua | Starting Salamander; prioritize Magic boosters for her | Adds spell uses and damage |
| Troy | Zerberus, Victory Gem, Healing Staff | Another battle record favors healing on kills over healing on critical hits for reliability |
| Spare slots | Concoction, Elixir, Dew of Protection | Cover immediate survival before spending extra money; titles alone do not establish quantities or prices |
This setup prioritizes maxing Aurora. If shards are short, use protection already unlocked. Fill current gaps with other Boons of Salvation and stat items. Prioritize forging regularly used main weapons and key durability, adding other upgrades when materials allow.
Setup two cleared only after changing equipment
In the first attempt, Troy has roughly 0–6% Critical against the target, making Sacred Gem healing unreliable and forcing Hong Hua to spend actions healing. The review also finds blocked routes from fliers and accuracy problems. Even level 99 can fail through healing, Hit, and pathing.
For the retry, Levin Sword and Sacred Gem moved to Eshmel, while Troy switched to Victory Gem for healing on kills. After adding stat boosters, the team tried again. Warp Eshmel near the boss first so he can attack as soon as the first gate opens. Clear low-Resistance armored blockers with Levin Sword, break gates using ranged Bolting, and finish with Eshmel’s Astra. Reserve spell uses for gates and durability for Astra. This run itself included a mistake from forgetting weapon repairs.
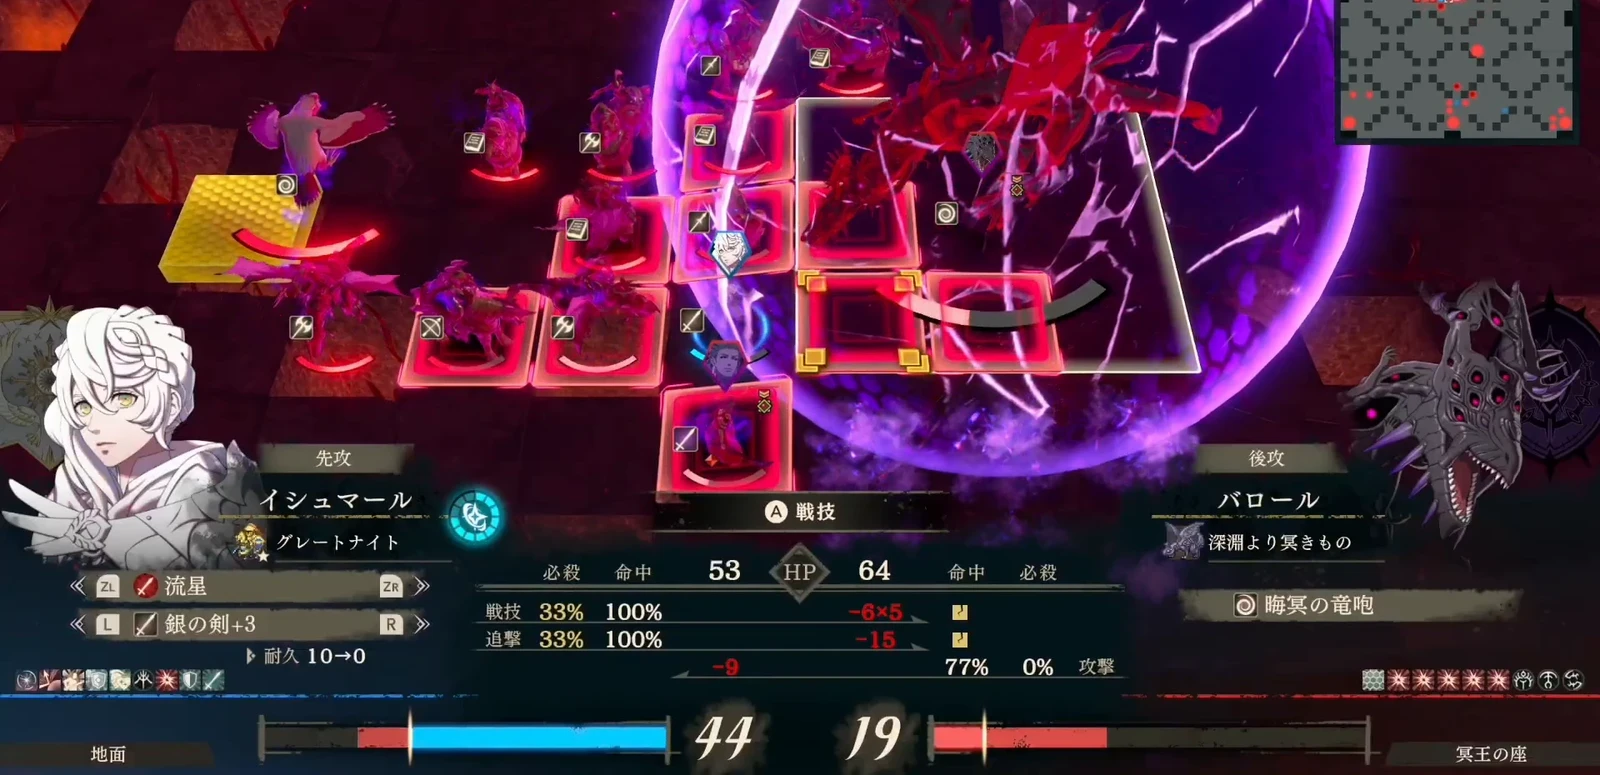
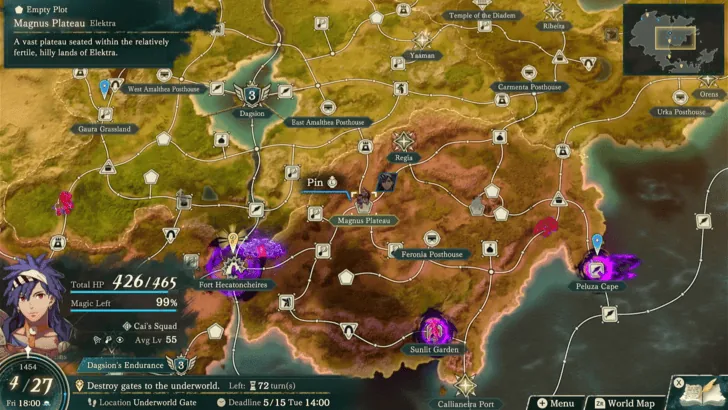
Split the team between three gates and base defense in Section 5
After two restarts, split the team across the three gates. Hong Hua dies easily at one gate, so defending home and clearing miasma is more useful.
Troy opens the upper-left gate first, while Hong Hua stays home to clear nearby and central miasma. Eshmel and Troy tackle the upper-left first. After closing it, Troy Warps back and splits with Hong Hua to open gates near home, then regroups to attack, leaving the lower right for last.
Hold the platform when healing reinforcements appear
Identify the healing spawn point and occupy it with Hong Hua’s Wandering Wall. Draw out and clear monsters first, since their area abilities can destroy the wall.
Reserve actions for damage, healing, and refreshes after breaking a gate
Use transitional classes before Divine classes unlock. Do not infer entry requirements from a finished all-S+ screenshot.