
Gambits: formations, range, and battlefield control
Equip a battalion, then use its gambit when the formation and target position qualify. Offensive gambits avoid counters. Check uses per battalion; gambits are unavailable in Clashes.

Offensive Gambits prevent counters during that engagement. Assign a Battalion and choose targets by its formation first. Gambits cannot be used in Clashes.
A Battalion must be assigned, with your formation and target position meeting its conditions, before the Gambit command appears. Uses are limited and tracked for each Battalion. See Battalion mechanics for acquisition, assignment, Authority requirements, mounted restrictions, and dispatch cycles.
Gambit access and formation range
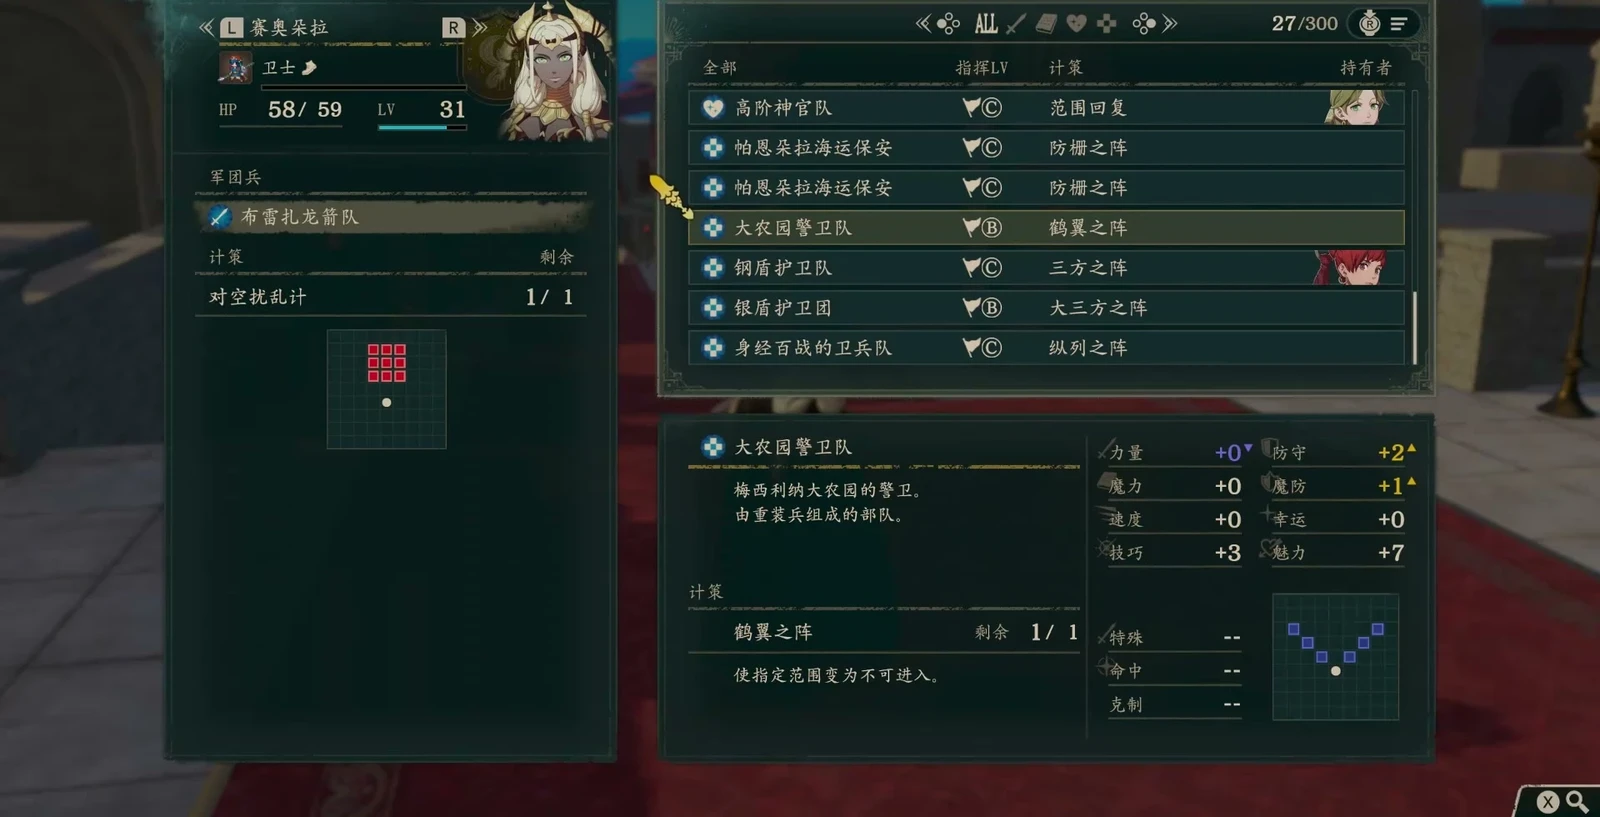
Charm improves gambit Hit; Authority determines which battalion you can equip. Their roles differ. Raising Charm alone does not let you carry high-rank battalions.
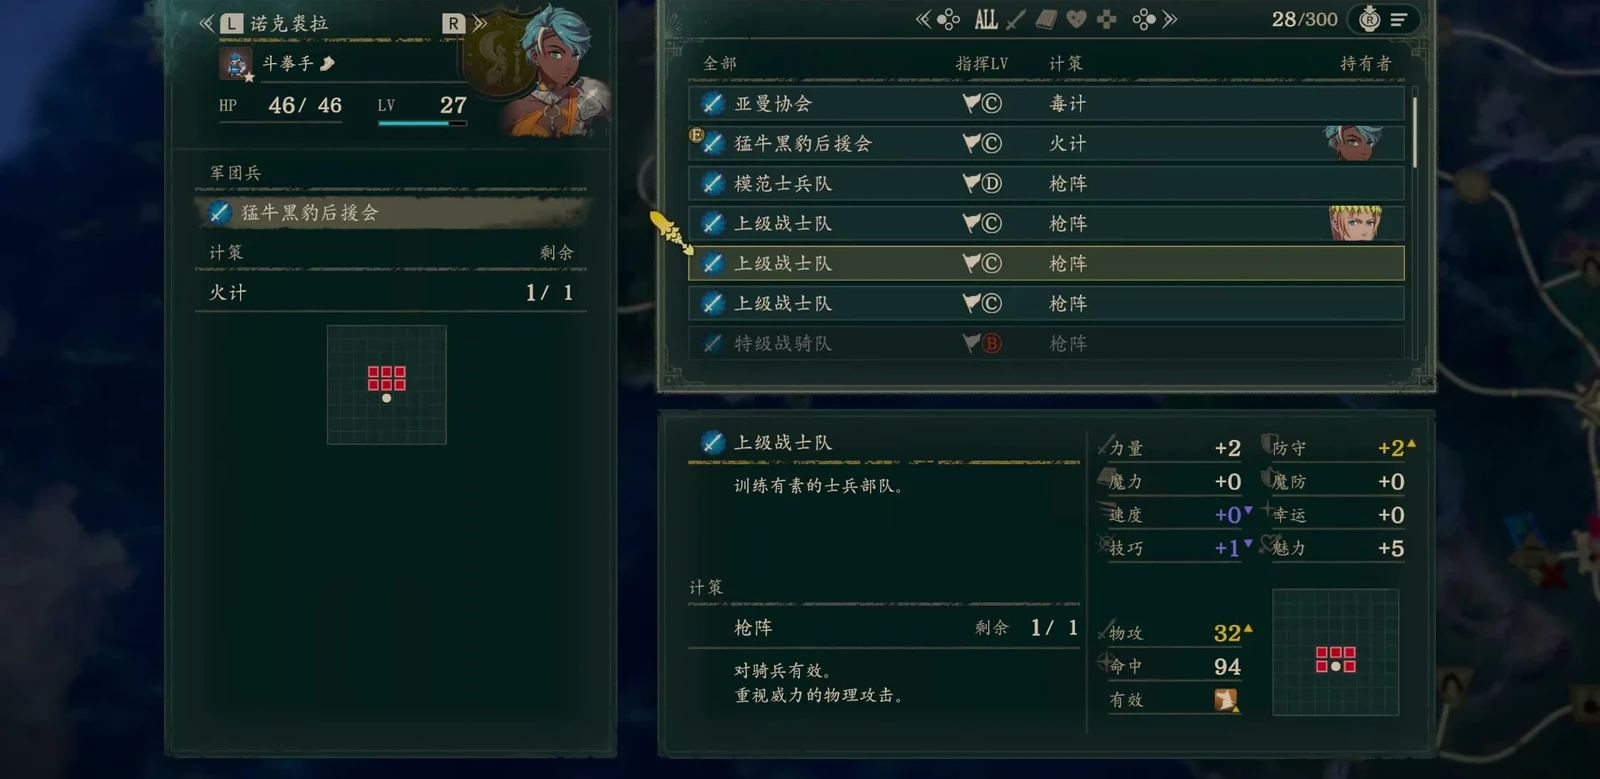
Avoid counters, block routes, and immobilize
If a normal attack would get you killed by a counter, compare whether a Gambit can deal enough damage or control the enemy. It prevents only that engagement’s counter. Check other enemies’ ranges after acting.
Use impassable areas at narrow paths, bridgeheads, or an exposed back line to keep enemies away. Leave allies an exit when choosing the area. Check accuracy and target restrictions for each immobilizing effect, and read each Battalion’s specific Gambit.
Fill the role the team needs in a suitable position. Theodora already has a straight-line Blaze attack, so diagonal Gambits cover gaps. Fragile backliners can restrict movement to gain distance. Tobias approaches the front and can carry a healing Gambit.
See choosing battalions for specific stat bonuses, uses, and recommendations, or the battalion database for the full list.
Adjacent support and gambits work separately
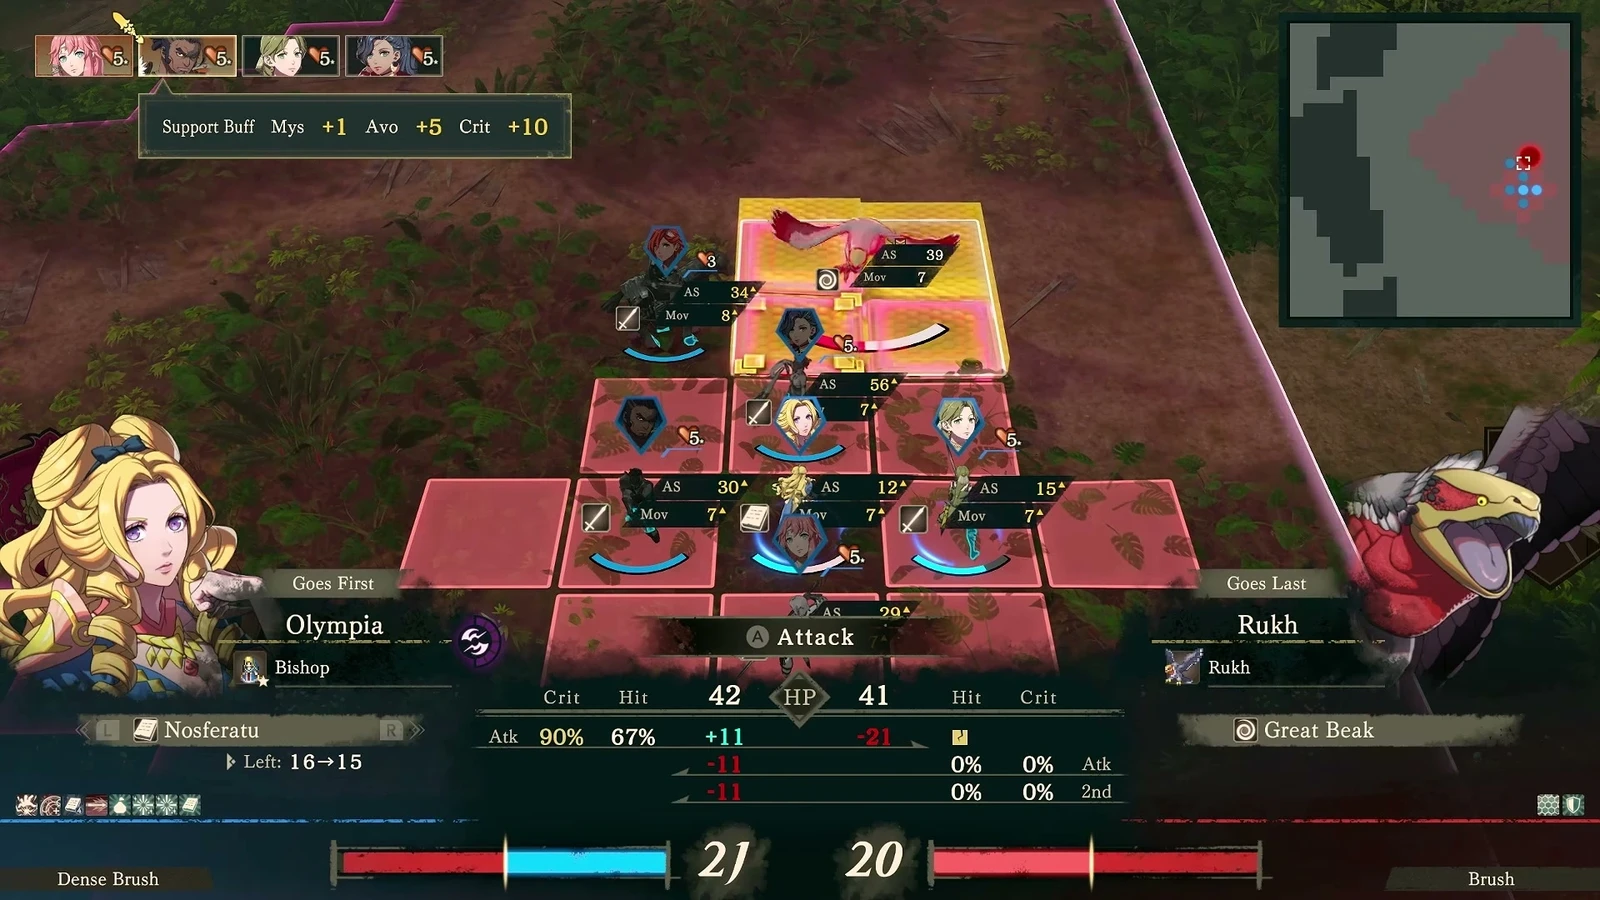
Adjacent support can give your attacker Hit, Crit, and durability, but clustering occupies action space and exposes you to area attacks. Arrange support needed for this attack, then check gambit range and the position you will occupy afterward. Adjacent support and battalion gambits are separate systems.
Adjacent support from classes and partners
Adjacent bonuses come from classes and specific partners
Position units that provide the desired bonuses beside your main attacker before attacking. Support has two layers. One depends on the teammate’s current class, beginning at Bond Level 2 and peaking at 5. The other is a specific pair’s Chain Bonus, granting its fixed effect from Bond Level 2. These bonuses apply directly in dungeon Clashes; map battles require adjacency.
In Part 1 at Bond Level 5, adjacent teammates provide the following by class family. Changing class changes what they give their allies.
| Adjacent teammate’s class family | Bonus to the main attacker |
|---|---|
| Myrmidon, Shido, Dancer | Avoid +5, Crit +10 |
| Hunter, Archer, Rogue, Sniper, Ranger | Hit +10, Dodge +5 |
| Gladiator, Brigand, Pugilist, Warrior, Blacksmith | Hit +5, physical Attack +3 |
| Soldier, Armored Knight, Dreadnought, Guardian | Hit +5, Protection +3 |
| Ornius Rider, Armored Ornius Rider, Wing Soldier, Caladrius, Dragoon | Hit +5, Avoid +10 |
| Light Cavalry, Charioteer, Forest Knight, Bardinger, Cataphract | Physical Attack +3, magic Attack +3 |
| Diviner, Shaman, Ovate, Priest, Bishop, Troubadour | Magic Attack +3, Resistance +3 |
Class bonuses stack, while Chain Bonuses are separate. Three bond-level-5 Myrmidon-family allies beside  Dietrich provide Critical +30, while his chain with
 Esmeralda adds another +5. First-strike skills and initial-hit Combat Art values in this example apply only under their own conditions; do not add them all on enemy phase. Part 3 Swordmaster, The Blade, and The Apsara also belong to the Myrmidon family.
A chain can exist without Support conversations. The table records a few such pairs, including Alexandra and Sofia for Resistance +1.
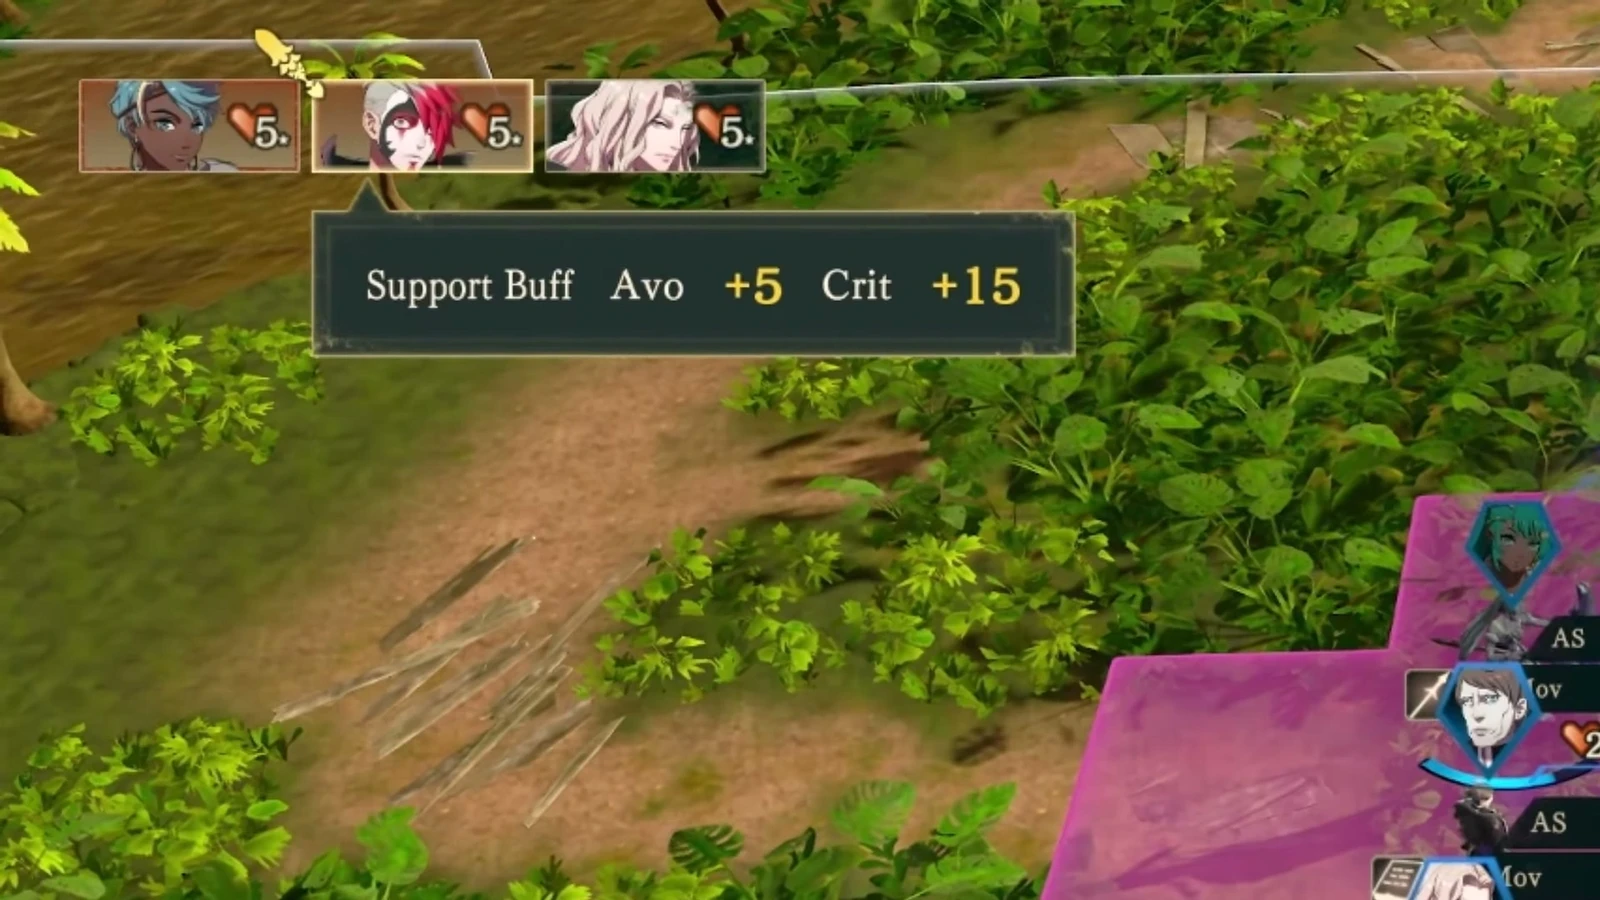
Adjacent allies can improve Crit, Hit, and survival
- Short on Critical: Shido Goliath can stack Chain Bonuses from Noctula and Jester with Myrmidon-family support. This illustrates how support changes a unit’s job, rather than an optimal build. Another Nezha example requires particular partners on Theodora’s route and does not apply to every route.
- Want a healer who can attack: Olympia can combine her personal Critical benefit from Nosferatu with Alexandra’s chain and Leda’s Dancer class support. This does not mean every healer should become an attacker.
- Short on Hit: For Peter using Longbow and Deadeye, add Hunter-family allies and Sofia’s Hit chain. Leda also has relevant partners. Check current bonds and chain partners, then confirm the forecast improves.
- Want safer proficiency training: Bring Fabio into a labyrinth with four bond-level-5 Soldier-family allies for Protection +12, reducing HP loss while training proficiency. See Borrow skills to train proficiency.
- Need frontline survival: Cai’s Defense support, Ultand’s adjacent recovery, and level skills have separate sources. Ultand’s personal Patch Up restores a little HP after an adjacent ally fights. Dodge comes from Pray for Safety: +10 at level 20 and +20 at level 35. These are not one personal skill.
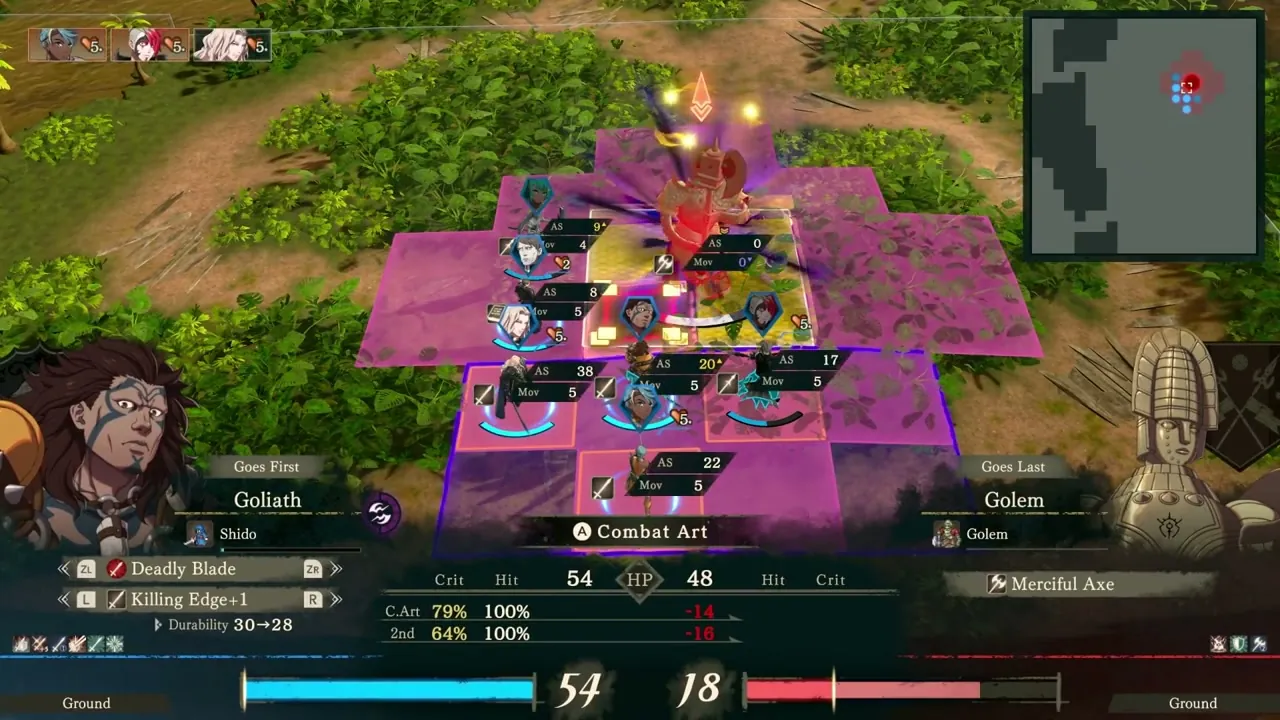
Position support first, then preserve action space
Place supporting units before the main attacker acts. Class bonuses peak at Bond Level 5; Chain Bonuses are already full at level 2. Check both a sufficient bond and current adjacency. After changing class, do not keep using the previous class’s Crit or defensive bonus.
Clustering has a cost. Three or four units around a main attacker occupy action space and expose the group to area attacks. Use these bonuses for a particular attack rather than clustering every turn. Gambits still have use and formation limits and cannot be used in Clashes. Teammate support working in a labyrinth does not make Gambits usable there.
One approach explores support through improvised fun combinations. Another prioritizes long-term military resources. You can also use battalions solely for stats. Each has a different goal: choose for immediate bonuses, long-term resources, or stat needs rather than calling them all one battalion build.