

Chapter 8: Cetus, the Sea Tyrant
Choose your class and bring ranged axes before sailing. Escape the central nine landing tiles, attack during the trap’s one-turn pause, and consider a direct kill if the armor repairs.
Switch  Dietrich to his leveling class before sailing. If you want a full armor break, equip your axe users with ranged axes. You have a separate 40 turns to search at sea. After detouring to islands, follow the enemy-presence clues toward the story objective. Running out of time before reaching it causes failure. The central nine tiles of Cetus's jump landing zone are lethal. When the warning appears, check everyone's Movement and make sure they can escape. Traps stop the boss for only one turn. If its armor is restored, you can abandon the full break and focus on killing it directly.
Set your class and ranged axes before sailing
If Dietrich uses  Myrmidon for mastery and
 Brigand for Strength growth when leveling, switch back to Brigand before sailing. Once the sea search begins, it is too late to change class, and battles along the way will still level him as a Myrmidon.
Axe users need ranged axes in advance if you want to break all the armor. Devices around the boss block access, so the upper and middle armor sections may be out of melee reach. Forcing a melee attack can also get the attacker killed by a counter.
Watch any support conversations you need before leaving the inn. They are available only there. Once you leave and cannot return, they must wait until next chapter.
The forty-turn sea search
To explore unmarked islands, head right before searching for the Sea Tyrant. Side routes contain level-30 enemies. If your party averages around level 25, choose your higher-level units for these fights. After exploring, keep checking the presence clues. If you return to an area with no enemy presence, work out the direction again. Do not spend all 40 turns without reaching the main objective.
Escape the central nine landing tiles
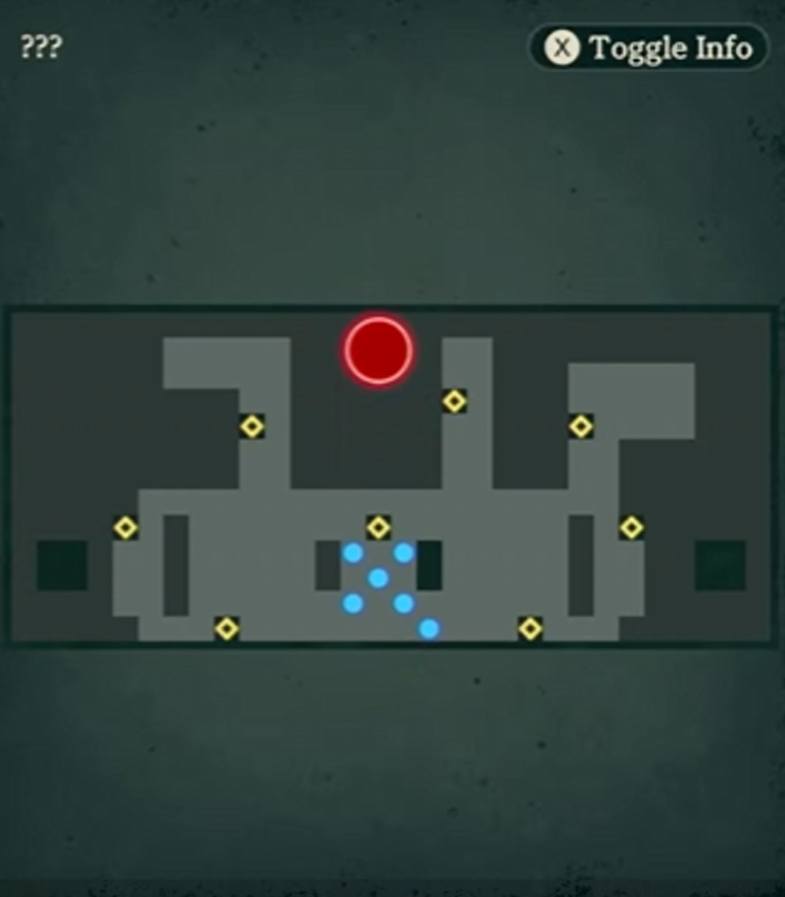
When Cetus's landing warning appears, check the Movement of units in the area and get them out of the central nine tiles. Those tiles cause instant death; remaining HP does not determine whether you can survive.
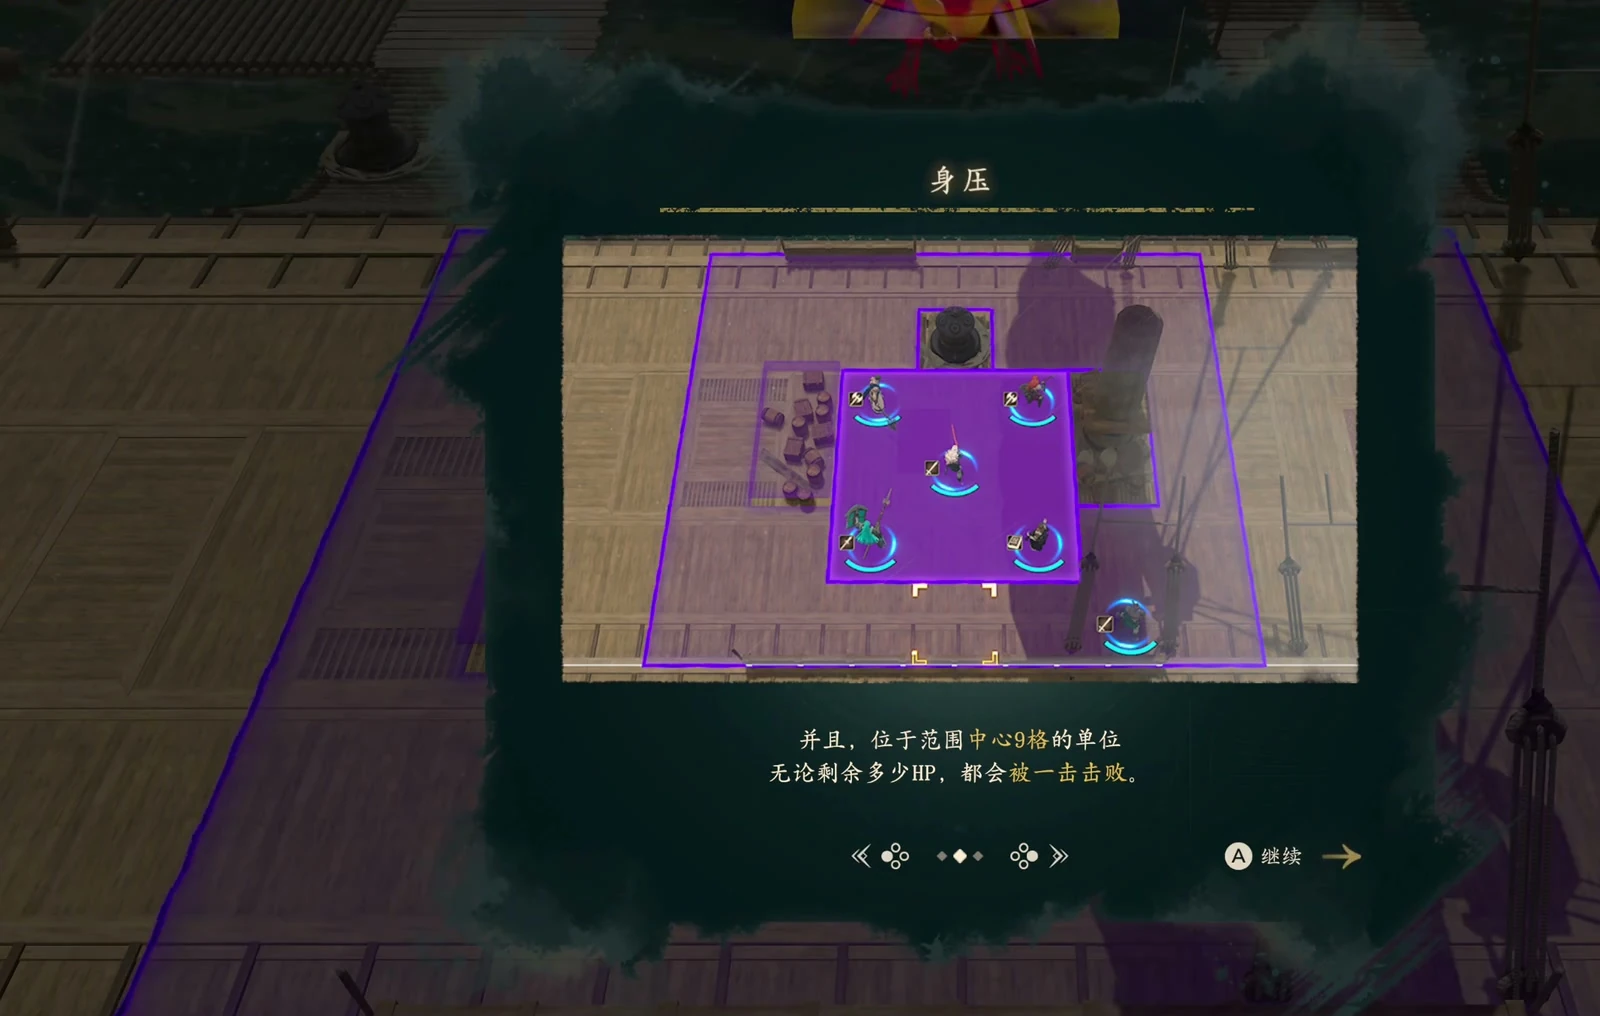
Check trap direction and use the one-turn pause
Before approaching a magic trap, check its arrow direction and whether the boss can hit the activation tile. Plan your approach around the device's position. A trap holds Cetus for only one turn, so attack during that pause and prepare to retreat again next round.
A trap placed in advance also lasts only one turn. If the boss jumps out of reach, wait for it to return before engaging. Setting a trap too early wastes it.
Full armor break or direct kill
For a full break, try using Dietrich's higher damage with a nine-tile area attack. When targeting the remaining armor, cancel any attack that cannot reach the upper section or would get the attacker killed by a counter.
If the armor has already been restored, you can give up the full break and kill Cetus directly. That clears the battle without a full break. Chasing the remaining sections means contending with blocked access and the boss's jumps again.
Repair the Royal Sword after battle
The Royal Sword's area attack consumes durability, so check that you have enough before using it. Inspect your equipment after the sea battle and repair the sword before traveling on.
Chapter objective and free time
| Category | Details |
|---|---|
| Victory condition | Defeat Cetus |
| Boss | Cetus |
| Free time on land | 120 turns |