

Trailer analysis: What tactical maps need beyond development activitiesMinor spoilers
Adjacent support strengthens corner formations, summons can lure enemies, and Divine Sand must cover Rewind and Blessings. Maps need to make those choices matter.
Original video: I'm Chovy—get the tactics right! Latest Fire Emblem: Fortune's Weave analysis; Bilibili creator Koudaimi ag; https://www.bilibili.com/video/BV1sbub6EEby/
Where tactical maps should create pressure
After this pre-release presentation, maps remain my biggest concern. The Heroic Games show a square arena with different fences, rocks, and obstacles, then an advance toward defeating a boss. Outside battle, gifts, meals, training, exploration, and mining pile up. The rhythm I want is simple: adjust equipment, buy weapons, train the proficiency I need, then enter the next map and spend most of my time positioning units.
Maps should do more than let trained characters steamroll. Holding a point for ten turns, escaping a two-sided attack, or crossing difficult terrain within a turn limit forces changes in approach. More activities and stronger abilities cannot replace that map pressure.
High weapon Might still needs reliable Hit
Axes have high Might but worrying accuracy. An impressive damage number still becomes zero on a miss. When choosing axe users, check whether their personal abilities add Hit or lower enemy Avoid. Leave room for accuracy among equipped abilities too.
 Levin Sword provides magic damage and ranged attacks, but its user needs Magic. A pure Strength character does not automatically become an anti-armor mage by equipping a magic sword. Likewise, judge gauntlets by the attack behavior and range actually shown in this game. Do not import consecutive attacks directly from earlier games.
A corner formation makes adjacent support easier to maintain
With a small army, I dislike casually splitting into two groups. Enemies you could defeat together become harder when damage scatters, and healing and support may fail to connect.
When enemies swarm and there is no brush or cover nearby, retreat to a corner to reduce attack directions. Place durable or evasive units outside, adjacent to partners with support. Attack with two-range weapons from inside. Units with  Canto can withdraw after attacking to free the outer spaces.
Support particularly suits this defense. On offense, different Movement and directions easily separate partners. In a defensive formation, staying together makes adjacent Hit, Avoid, Defense, and Critical bonuses easier to maintain. The demonstrated support pairing provides these bonuses, meaningful in every exchange.
| Stat | Support bonus |
|---|---|
| Avoid | +10 |
| Critical | +5 |
Movement, summons, and engaging enemies
 Dietrich can move across walls and attack afterward. Someone who previously required a detour can now be approached directly. Three spaces may not sound far, but they matter greatly across a wall.
 Leda buffs an area of allies. When everyone gathers, raising all stats can change several units' combat outcomes at once. Summons offer another use: if enemies refuse to move and a regular unit would risk focused attacks, send a summon to lure them. Arrange your main army in an ambush behind it and wait for enemies to approach.
However, a summon killing enemies directly also removes opportunities for regular units to attack and level. Choose between luring and finishing based on whether you need safe engagement or experience for the army more.
Let enemy information guide training investment
You can inspect the next story battle's enemies beforehand, so use that information. Against many magic units, low-Resistance armor may be killed immediately. Knowing enemy classes first tells you whom to train and which weapons to bring.
Training raises proficiency for two units together and builds intimacy. For forging, look beyond the plus sign: ore needs gathering, and weapons also consume durability. I prefer saving materials for long-term weapons whose upgrades meaningfully change damage or Critical, rather than repeatedly upgrading every iron weapon I see.
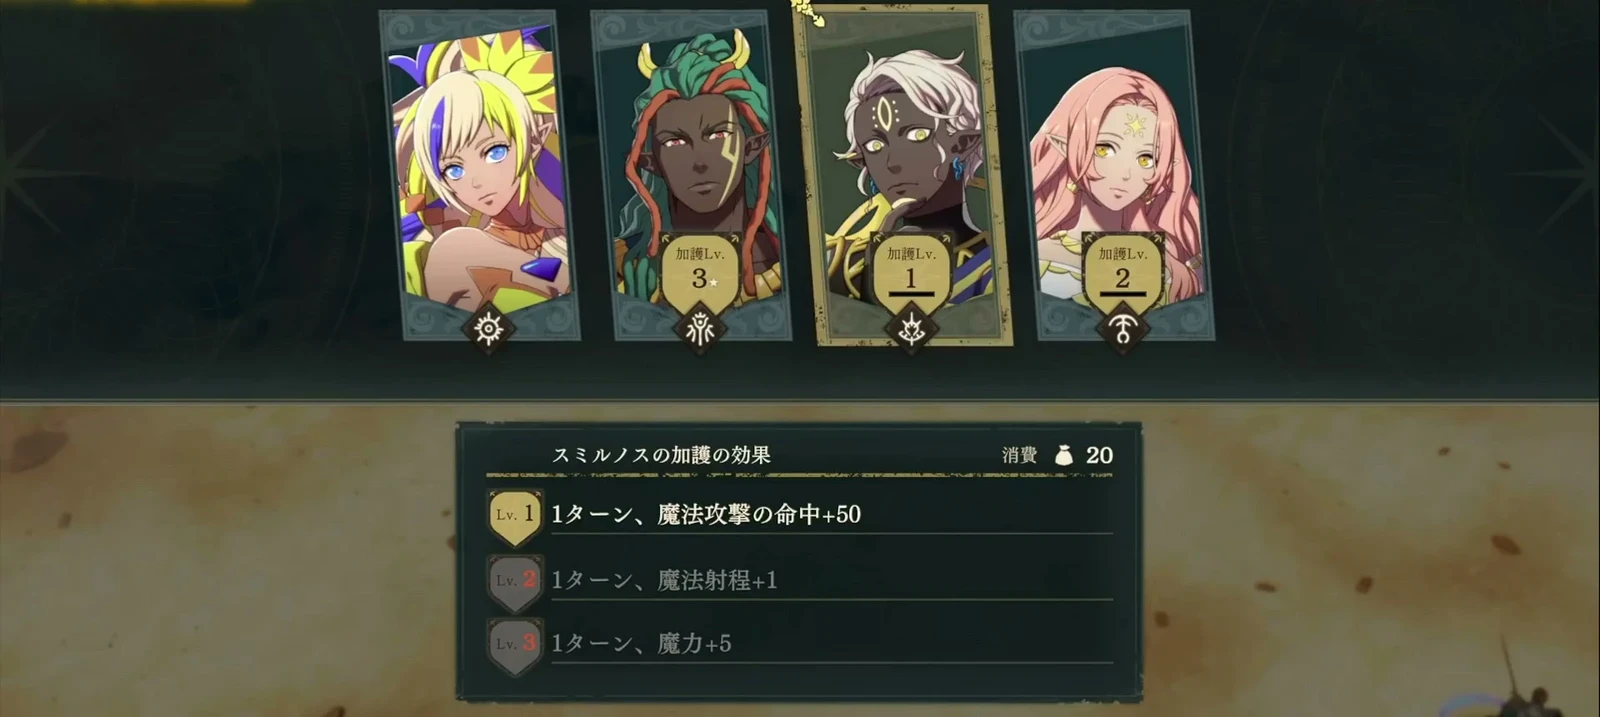
Blessings’ Divine Sand costs
When I first saw the Sand count, I guessed it meant rewind uses. The Blessing menu then made clear that it also pays for Blessings. Adding Hit or damage to this attack, or reducing damage next enemy phase, all depends on the Sand cost.
Rewind can rescue miscalculations and unexpected losses, but “100 Sand means 100 rewinds” was only a guess from the trailer and cannot budget a whole battle. Higher Blessing levels can combine more effects, so consider this turn’s full benefit before deciding how much to spend.
Take only needed upgrades and reach the maps sooner
My plan is to collect only the resources and upgrades I actually need, then get into maps quickly. Exploration, gifts, and mining all strengthen the army. There is no need to complete every activity simply because it exists.
The four stories advance within one save, avoiding separate fresh starts. I also want to try challenging the game with  Eshmel's army without collecting all four protagonists, to see how far positioning can take me. What I most want to test is whether later maps deliver good tactical play.