The shard cost of carryover: focus your training and check inventory and rollback costsMajor spoilers
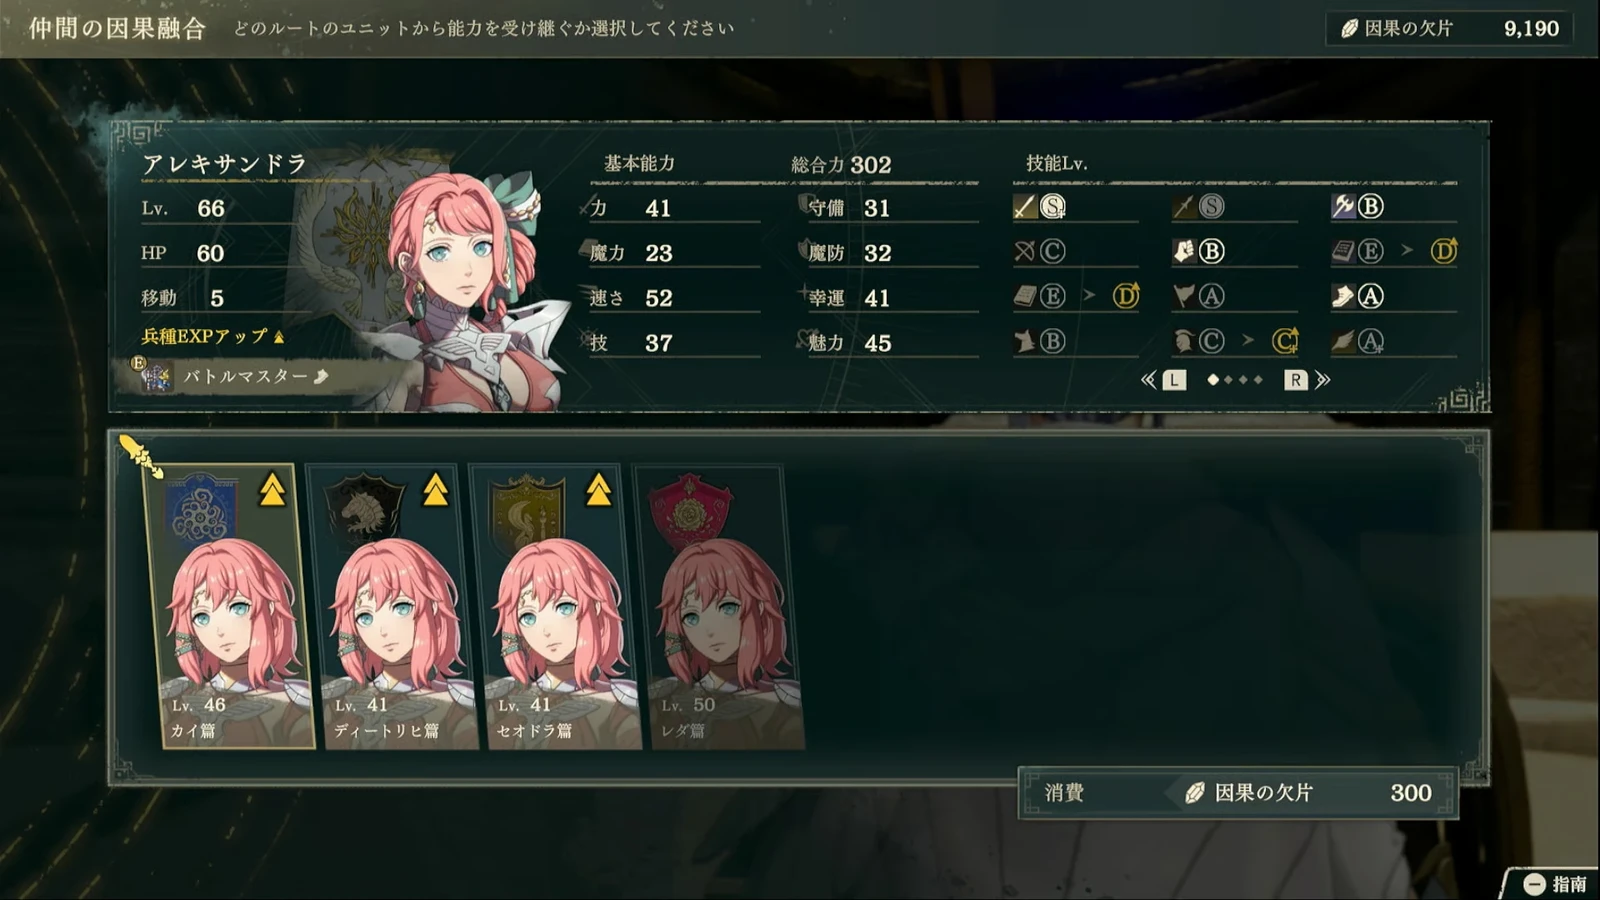
Train levels, skills, and magic in the same protagonist’s save data. Merging across routes costs 300 Karma Shards per character; handle redeemed items before restarting a chapter.
Original video: Repeat-playthrough precautions and carryover traps | Japanese gaming channel なにとぞ
When clear data updates
Causality changes after you finish Part 1. You then need to finish Part 2 before levels, stats, learned abilities, magic, and skill ranks update in your clear data. Dark magic learned from ancient tomes also carries over, so you can stockpile tomes and teach spells in bulk when you can finish the game quickly.
Once you have completed Part 2 in full, you can skip it on subsequent runs. You only need to fulfill the recruitment conditions for  Creek and
 Nathan once, too. They can still join in Part 3 after you skip Part 2.
Training on one route saves Karma Shards
To build a well-rounded character, train their levels, skills, and magic within the same protagonist’s save data whenever possible. If you train the same character again under the same protagonist, your clear data preserves the strengths of both builds. If you split high levels and dark magic between different protagonists’ routes, combining them into one character requires an extra use of Merge Causality, costing 300 Karma Shards per character.
That fee adds up quickly across a large roster. Decide which route will train each character before you start, and you can avoid paying it for every character later.
Renown still restricts the map on your second run
Your second playthrough starts at Part 1, Chapter 1, with previously discovered towns, dungeons, and carriage stations already unlocked. Travel is easier, but Renown gates still block your progress, and strong enemies do not disappear just because the map is open.
Some ordinary quests you completed before can finish automatically. You must redo Creek’s special quests, hand over recruitment items again, repeat item searches, and clear paralogues again. If you want a paralogue’s money and Renown again, you have to fight it again. Your second run also adds new quests, including mutually exclusive branches: taking one prevents you from accepting the other.
Renown restarts at level 1. You still cannot immediately recruit characters who require high Renown, and advanced Certification Exams remain locked behind it. Do not focus so heavily on fast leveling that you spend a long stretch unable to enter the class you want.
The exclusive weapon event in the second run’s final battle
On this repeat playthrough, the final battle did not trigger the event that upgrades  Dietrich’s exclusive weapon again. I had to fight the boss with the unupgraded weapon. When preparing for the second run’s final battle, develop your characters and other options fully. Do not count on that event upgrade as guaranteed combat power.
Rolling back after redeeming items in Part 3 wastes shards
After clearing Part 1 twice, you can spend Karma Shards to bring registered items, materials, animals, and Battalions into Part 3. The problem is that if you buy a batch of ancient tomes during Part 3, then use chapter select to return to its beginning, the items disappear without refunding your shards.
Account for that expense before rolling back a chapter. Before redeeming items in bulk, complete the Boons of Salvation that increase EXP and skill EXP gains, so you do not spend shards on items that a rollback will immediately erase.
Losing inventory added on the second run
Another loss I tested was Part 3 continuing to read the first playthrough’s item data. I gathered Combat Art upgrade materials again on my second run and replayed everything from Chapter 1 through the final chapter, plus Part 2, but the extra quantities still did not carry into Part 3.
To get value from those materials, spend them in Part 1 to upgrade the characters you plan to carry over. If you wait until Part 3 and redeem them with shards, each material costs 100 shards. One Combat Art upgrade takes 20 to 70 materials, bringing the price to 2000 to 7000 shards.
To save that cost, finish as much training and upgrading as possible on the same route first.