

Before Part 3: Data integration, supplies, and progression in the Promised One’s storyMajor spoilers
Improve stats through same-route integration first and save Karma Shards for key characters. In the Promised One’s story, restore stations and temples before splitting teams for reconstruction and interception.
Original video: Before Part 3: Nineteen things to do before Part 2 and in the Promised One’s story, covering data integration, Merge Causality, Master and Divine classes, and hidden events | Japanese gaming channel Wight’s Game Guides
Before the Promised One’s story, integrate stats for free and prepare animals and weapons. After entering, regroup companions and restore travel points first, then split teams for reconstruction and gate breaking.
Free integration keeps the higher stats
Repeated Part 2 clears with the same protagonist can integrate each higher stat into the clear record. Lower Strength on the second run will not reduce existing Strength. Higher Magic, Resistance, or Luck replaces the old value. Skills, abilities, and learned classes can expand too, so train differently on a second run. Axes first and swords next address more gaps than repeating the same path.
You need not restart at chapter one. Continue from the point where you want to change development, finish Part 1 chapter twelve to update the War story’s starting point, then begin the War story from chapter one. Skipping it still counts as a clear, but loses actual Part 2 leveling and skill training. Finish this process before entering Part 3 if you want it to strengthen your starting team there.
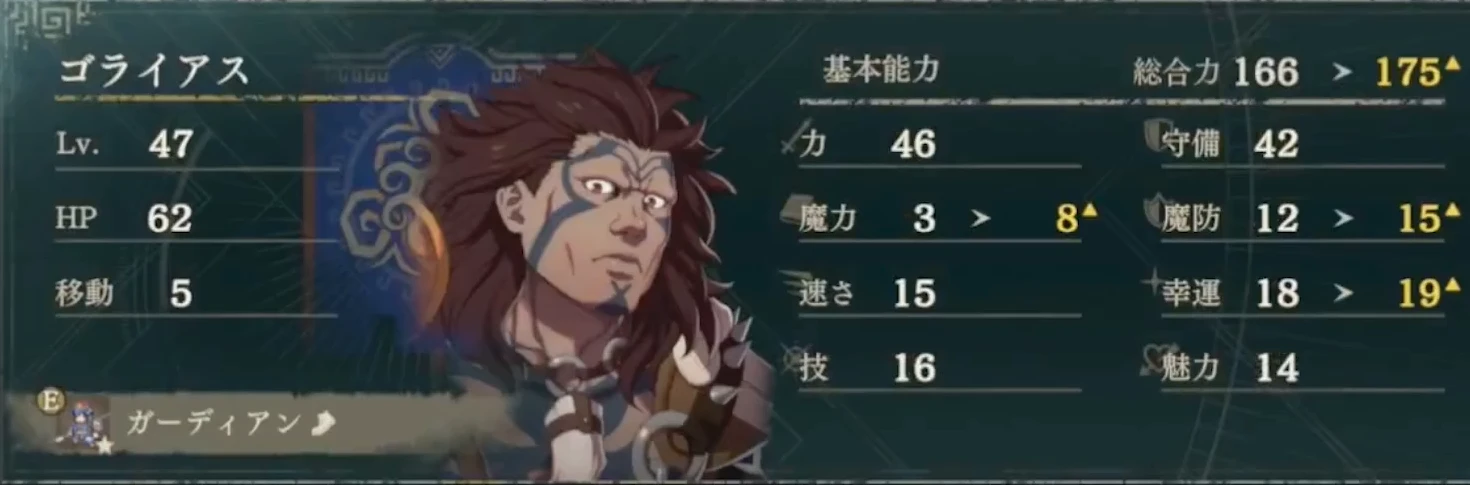
Reserve Karma Shards for core units’ merges
Merge Causality combines stats, skills, and classes for the same character trained on different protagonists’ routes. Even after entering Part 3, you can merge data developed later in Parts 1 and 2. It costs Karma Shards, earned through goals such as Notable Deeds. Avoid repeatedly merging everyone; reserve shards for core units you intend to improve.
Items obtained in later clears can also be generated with shards and brought into Part 3. Exchange when missing a key weapon, animal, or a few materials. Large quantities drain shards quickly. For a missed item, return to Part 1, obtain it, then complete Part 2 with that data to add it to generation stock.
Prepare supplies and exclusive events in Part 1
Animals affect growth. Decide everyone’s Part 3 mount, then collect them in  Cai’s story. Capture is available in Part 3 too, but reconstruction and story objectives compete for turns, leaving little room for last-minute mount farming.
Stock and upgrade several  Cleansing Blade weapons for Underworld Boon. Other approaches work, but having more units independently remove damage reduction saves actions. Save money and materials too: ore for forging and ingredients for reconstruction requests. Buy fewer gifts if needed. Support has other training methods, so preserve funds for later costs.
Complete Part 2 with all four protagonists before entering the Promised One’s story to bring all their unique commands. Finish Part 1 Paralogues where possible, since some later companions depend on them.
Open the map early when possible. Exploration information, hidden paths, and dungeons save later travel. If a gap looks like a path, try exploring or waiting nearby.
During free time in  Dietrich’s chapter twelve, speak to
 Fabio for the personal weapon upgrade event. Missing this conversation prevents the later upgrade event too. Collect the event, but prioritize actual upgrade materials for weapons you will use.
Regroup companions, then reforge common weapons
When free time begins, speak to green-icon companions in Dagsion to regroup characters recruited in Part 1. If someone was trained on multiple routes, choose the data best suited to the current role. Use Merge Causality later if needed.
Weapons gain new upgrade stages. Forge regular tools such as Cleansing Blade and  Levin Sword first. Upgraded Iron Sword weapons issued in Part 2 are reclaimed, so do not count them in permanent loadouts. Part 3 updates dungeon enemy levels and chest contents. Revisit old locations for ore and leveling.
Split protagonist teams and train those left in town
Unique commands follow the protagonist’s team. Put every protagonist together and one team can do everything while others lack functions. Let Cai lead cultivation and capture, and Dietrich lead fighting and dungeon clearing, traveling separately for convenience.
Not every team needs all your strongest units. Characters left in Dagsion gain experience each turn and can train, perform service, and eat. Traveling with a team that rarely fights sacrifices those opportunities. Returning expedition teams weekly is difficult in Part 3.
Restore travel points before buying exam supplies
Reach a base, deliver its materials, then let turns pass to complete reconstruction. Restore stations and temples first to save many turns on later travel.

After villages and towns recover, buy Master exam seals and  Building Materials. Save the former for class changes and take the latter back for city facility tasks, without which functions such as training grounds remain closed. Enter restored temples and accept their tasks too; completing them further unlocks classes and travel functions.
Dungeon chests and  Anna’s secret shop offer stat boosters. Reconstruction raises Salvation level and can reward
 Shoes of the Wind for +1 Movement. Supplies are scarce, so decide the recipients first.
Temple tasks and class unlocks
To upgrade the Nameless Lance, start by restoring Credna’s temple. Enter the main temple, accept the task, and complete its delivery. Then return to the Dagsion branch and speak to Credna to trigger weapon evolution.
Consider Master classes after level 45. Question marks in the class list require more temple tasks. Seals are limited, so try to reach 100% exam success first.  Shadow Seeker offers good Speed and Dexterity growth plus better exploration, fitting characters already pursuing Speed.
Divine classes unlock with special items rather than regular certification tickets. Only one person can hold each class at a time; relinquish the qualification to give it to someone else. The five keys are in chests across five dungeons. Open chests in the updated Part 3 dungeons to collect  Key of the Diadem, then open the relevant temple door to obtain the qualification.
Train skills in Clashes and Bond through feasts
- 1Fight dungeon enemies in Clashes with weaker weapons that still deal damage.
- 2Attack and heal repeatedly to gain skill experience.
- 3Retreat when the enemy is nearly dead. Its HP recovers, so enter combat again.
This loop consumes no turns.
For Bond training, cast a spell at the start of the section, then gather all teams on the same feast tile. Choose ingredients that do not restore spell uses to feast repeatedly.
Restarting retains Support but requires redoing reconstruction and other progress in that segment. It suits concentrated training at the segment’s start.
Keep one team guarding town while clearing miasma and gates
At the start of free exploration, split up for reconstruction. Once progression adds gate objectives, clear surrounding miasma first. Each tile may need multiple clearings, so reserve turns for travel and actions. Only after all miasma is gone can you fight inside the gate. After completing objectives, use remaining time for reconstruction and training.
In the middle and later portions, enemies advance toward Dagsion and trigger defense battles on arrival. Rather than await strong enemies in town, intercept them in Clashes. Leave one team patrolling near the city and send others to gates. Failed defenses reduce city durability; reaching zero returns you to the segment’s start.
Battlefield miasma drains HP, consumes durability, or applies debuffs. Clear safe areas with protagonists’ Blaze Arts, then heal the HP cost with recovery magic. Fliers can avoid ground miasma too.
Underworld Boon reduces ordinary damage. Address it before focusing attacks. Nearby  Eshmel removes surrounding enemies’ Boons; Cleansing Blade,
 Leda’s support Blaze Art, and magic effective against netherfiends also help. Effective or super-effective attacks matching enemy types can bypass the reduction as well.