

Chapter 11: A Sudden TurnMinor spoilers
Split nine units to handle the artillery. Clear enemies before opening walls and leave units on the mechanisms. Withdraw when Cai signals his attack, then lure him off his healing position to finish him.
You can deploy nine units this chapter, so fill the roster before battle. With Physic, Theodora can heal front-line units on separate routes. You can send one main unit down each side to rush the artillery, or keep a tank alive with healing until all ten shots are spent. Before opening the final wall, shoot the regular enemies inside, leave someone guarding the mechanism, and keep units Cai can kill in one hit behind. When Cai signals his area attack, withdraw from its cross-shaped range. When engaging him directly, lure him away from his healing position first.
Fill all nine slots and learn Physic
If you lack units, recruit enough during free actions to fill a nine-unit team. When equipping sword users, give low-Magic units a Killing Edge instead of relying on a Levin Sword for damage.
If Theodora will help the split advance, train Physic before battle so she can heal frontliners who move away from the group. Use ranged healing once both routes advance; the rear line does not need to charge toward the artillery with the front.
Before scheduling paralogues and gathering trips, check whether your boat has returned. While it remains on loan, you cannot reach the sea gathering spots for Lir Fish and Sea-Star Stone. If Talimun’s paralogue deadline is close, head straight to its destination and return to recruit more allies afterward. Returning to the city midway costs another six hours.
Steal finishing blows with stones in Bertrand’s paralogue
Approach 1: take the final hit from range. Wait for your opponents to weaken the giant, then claim the kill with a thrown stone. Even if a melee unit cannot reach it, a ranged throw can still secure the finishing blow.
Approach 2: clear blockers and keep your lead. Wait for your opponents to weaken a target before stealing the kill. If it keeps getting healed and a mounted armored unit blocks your attempts, deal with the blocker first. Once you lead by one point, take the left target and let your opponents have the right to maintain that lead. Confirm a target actually fell before planning the next move. Reload if a missed kill disrupts the rest of your plan. You cannot throw stones without enough Blaze Gauge, so find another way to take the kill when it is low.
Guard the upper exit in Talimun’s paralogue
Approach 1: let Loretta clear enemies first. Have Loretta charge forward to open the route. Leave the cargo for now, rout the enemies, then collect it. Keep healers behind instead of rushing them forward with her.
Approach 2: intercept birds at the upper exit. Post a unit at the upper exit to stop birds carrying cargo from escaping. After removing one HP bar, check whether you successfully interrupted them.
Bring two healers to Anna’s paralogue
Approach 1: use Loretta to hold enemies. Even enemies with only 7% Hit can connect. If the first attack at 10% Hit lands, stop fighting alone and deal with the mages behind them first, reducing the number of threats Loretta must face at once.
Approach 2: use both support slots for healing. Choose healers for both extra slots to sustain your deployed units. When planning Anna’s Onslaught, her talent raises the total uses available for the battle; it does not let her use Onslaught twice in the same turn.
Shoot through the wall to clear enemies first
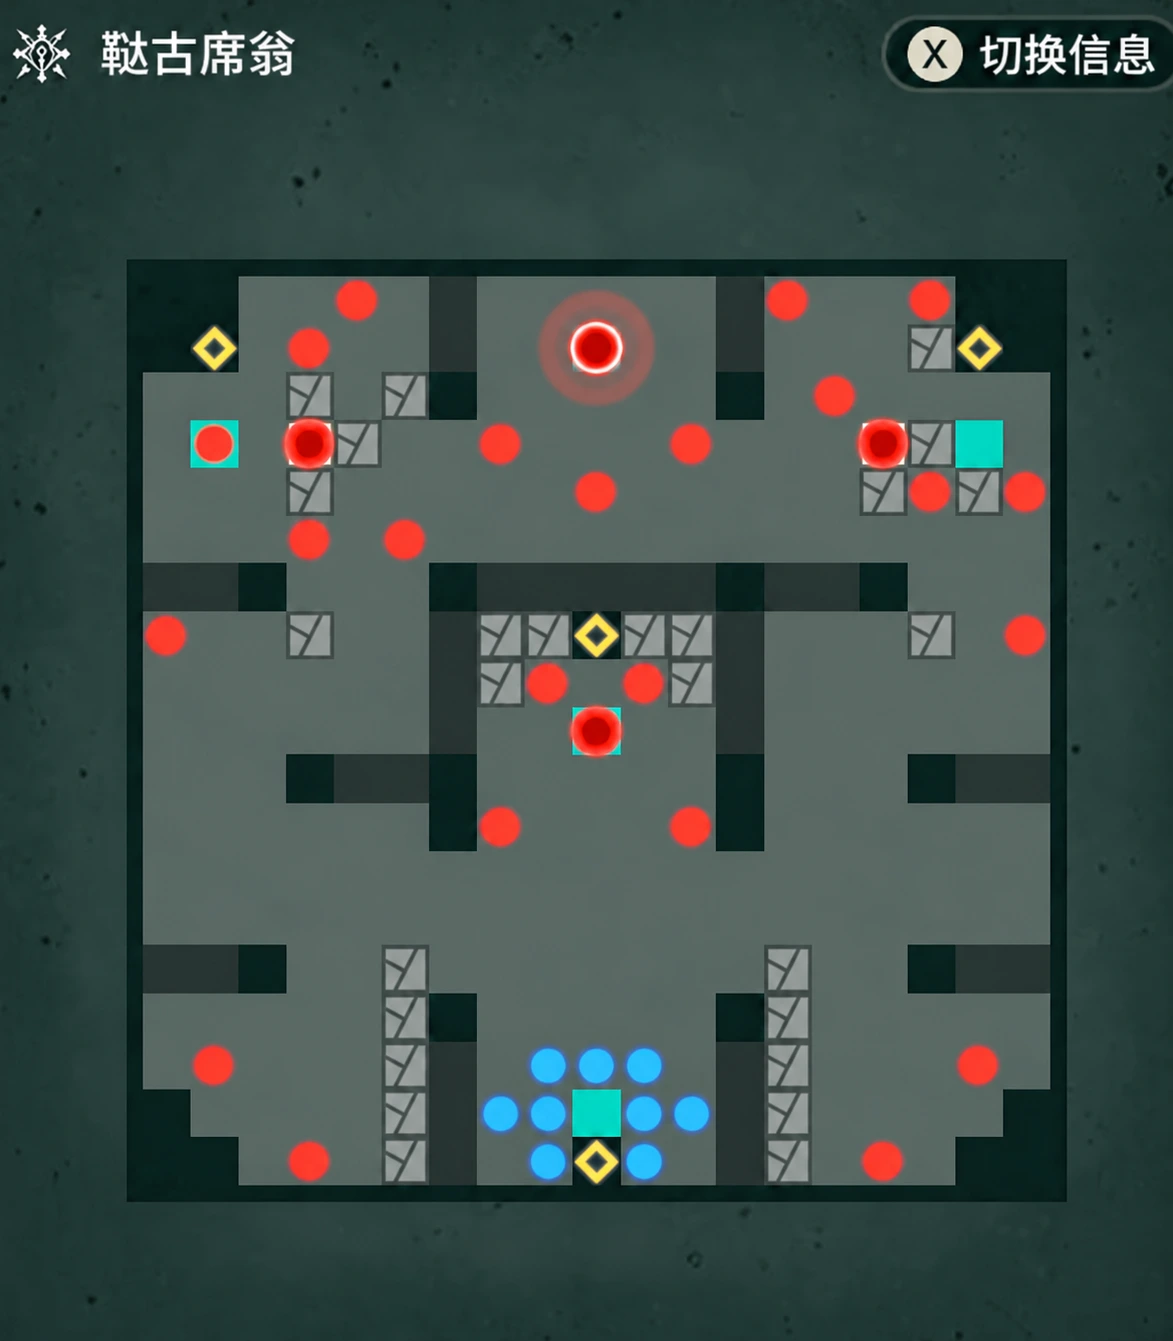
At the start, finish mages who could threaten your front line. Lure outer enemies toward the center to fight, then push toward the artillery after thinning their numbers.
When you reach paired mechanisms, confirm that you can activate both. Before fully opening the second pair, have Archers shoot the regular enemies through the wall. Clear nearby mages before using the mechanisms too, reducing the number of enemies you must face at once after the wall opens.
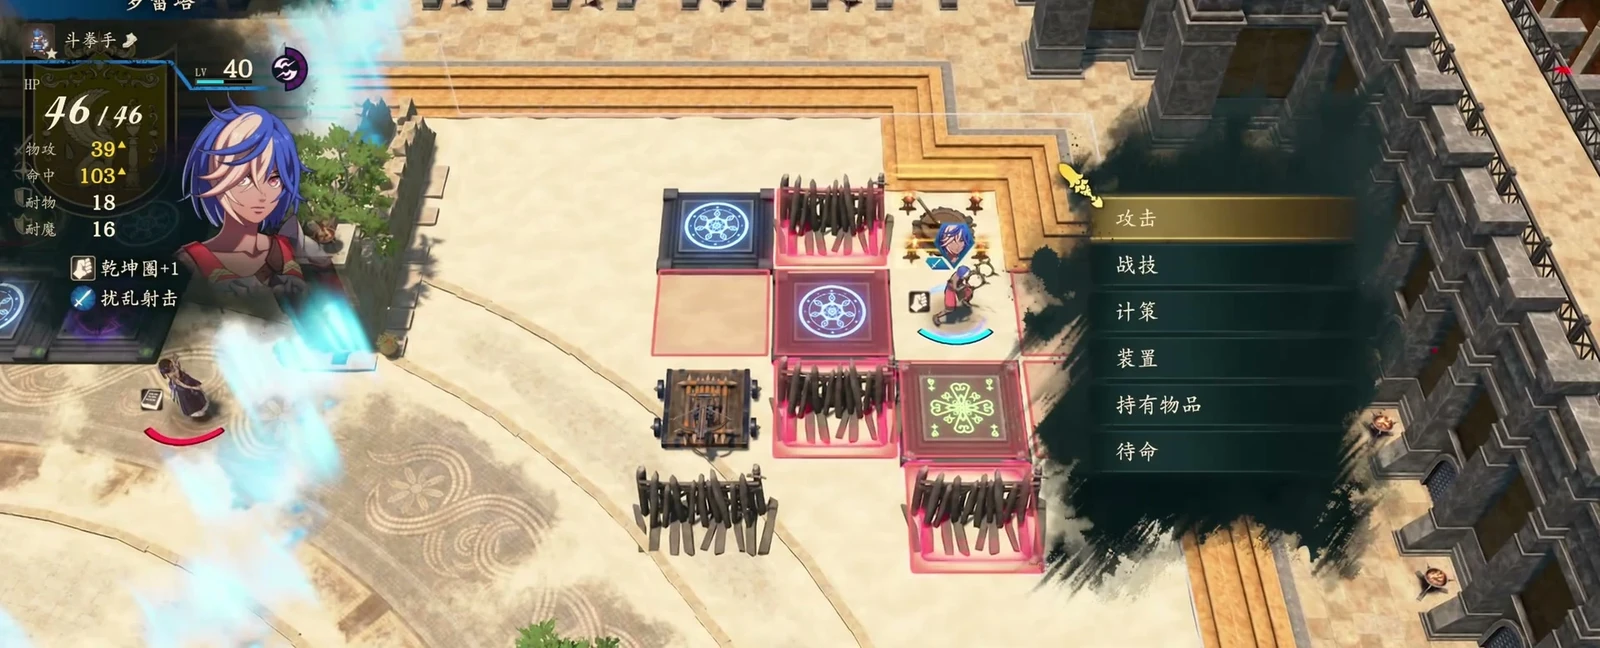
Rush both routes or wait out all ten shots
Approach 1: send one unit down each route. Use a high-Resistance unit against the magical artillery on the left. Send Theodora forward with a Javelin to wait, while an Avoid-trained Loretta advances on the other route. Keep everyone else behind with ranged healing. This lets you advance while taking attacks, but the frontliners must repeatedly face artillery and surrounding enemies.
When Loretta is surrounded, attacks with 24%, 25%, and 30% Hit can all connect. Heal promptly and reduce the number attacking her. Even when physical enemies on the right show 0 Hit, check the remaining mages separately instead of continuing to tank their spells.
Approach 2: wait for all ten shots before advancing. The magical artillery and ballista each have ten shots. Leave a tank in range with ranged healing to sustain them. Keep waiting even with three shots left, and send the main group forward only after the last shot. This is slower, and one tank cannot necessarily stay there throughout: switch units after taking a hit for 23 damage.
Keep someone guarding each activated mechanism
Mechanisms reset, so leave someone watching them after activation. Prefer slow-moving units for this job. If a guard cannot reach Cai with a thrown stone from the mechanism, use a Javelin user to support instead. Do not abandon the position just to let its guard join the fight.
Hold off on opening the final barrier pair. If the lance user behind the wall can still come out to attack and the preview shows 28 enemy Attack Speed with a possible second hit, delay opening it further.
Cai may kill Tobias in one hit too. Calculate incoming damage before putting him in front of Cai. Keep any other units who cannot survive Cai behind as well.
Leave the cross-shaped area when Cai signals his attack
Check survival against Cai’s Blinding Starlight as a magic attack. Do not choose a tank based on Defense alone.
When Cai prepares his cross-shaped area attack, follow the warning to withdraw or protect your units. Pull the whole team back if possible. If a low-Resistance armored unit cannot escape in time, use a damage-reduction blessing to save them.
Approach 1: take attacks with an Avoid blessing. When Cai starts moving, activate an Avoid-raising blessing for the unit engaging him. His Hit against your front line is high, so do not expect the same dodges you had against minor enemies. Keep allies who cannot survive behind, and use a ranged stone throw for the finish if needed.
Approach 2: lure him off his healing position. After opening the wall, draw Cai out before fighting. Engaging him where he stands lets him heal and prolongs the fight. Clear mages blocking your approach first, then send units capable of fighting the boss forward. Everyone else does not need to crowd in.
You can empty the Blaze Gauge after battle
After the post-battle meeting scene, you can actively reduce the Blaze Gauge to zero. Use this to control the gauge when you need to keep throwing stones later.
 Cai
 Ultand
 Peter
 Tialla