
Blaze Arts: HP costs, Overblaze, and gauge control
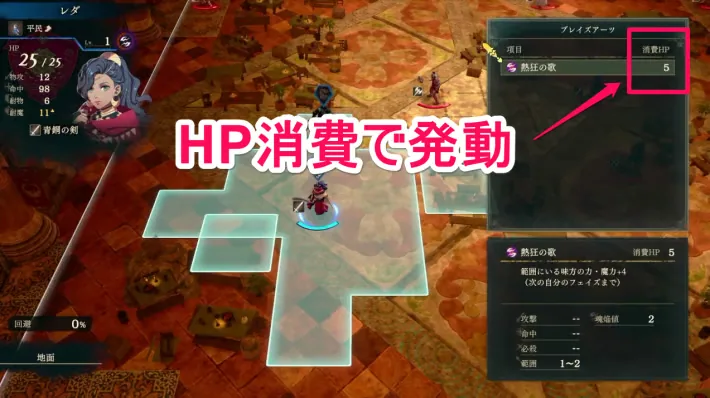
Blaze Arts spend HP. Check the art’s conditions and the character’s gauge type, then manage Overblaze and Burst according to their control skill.

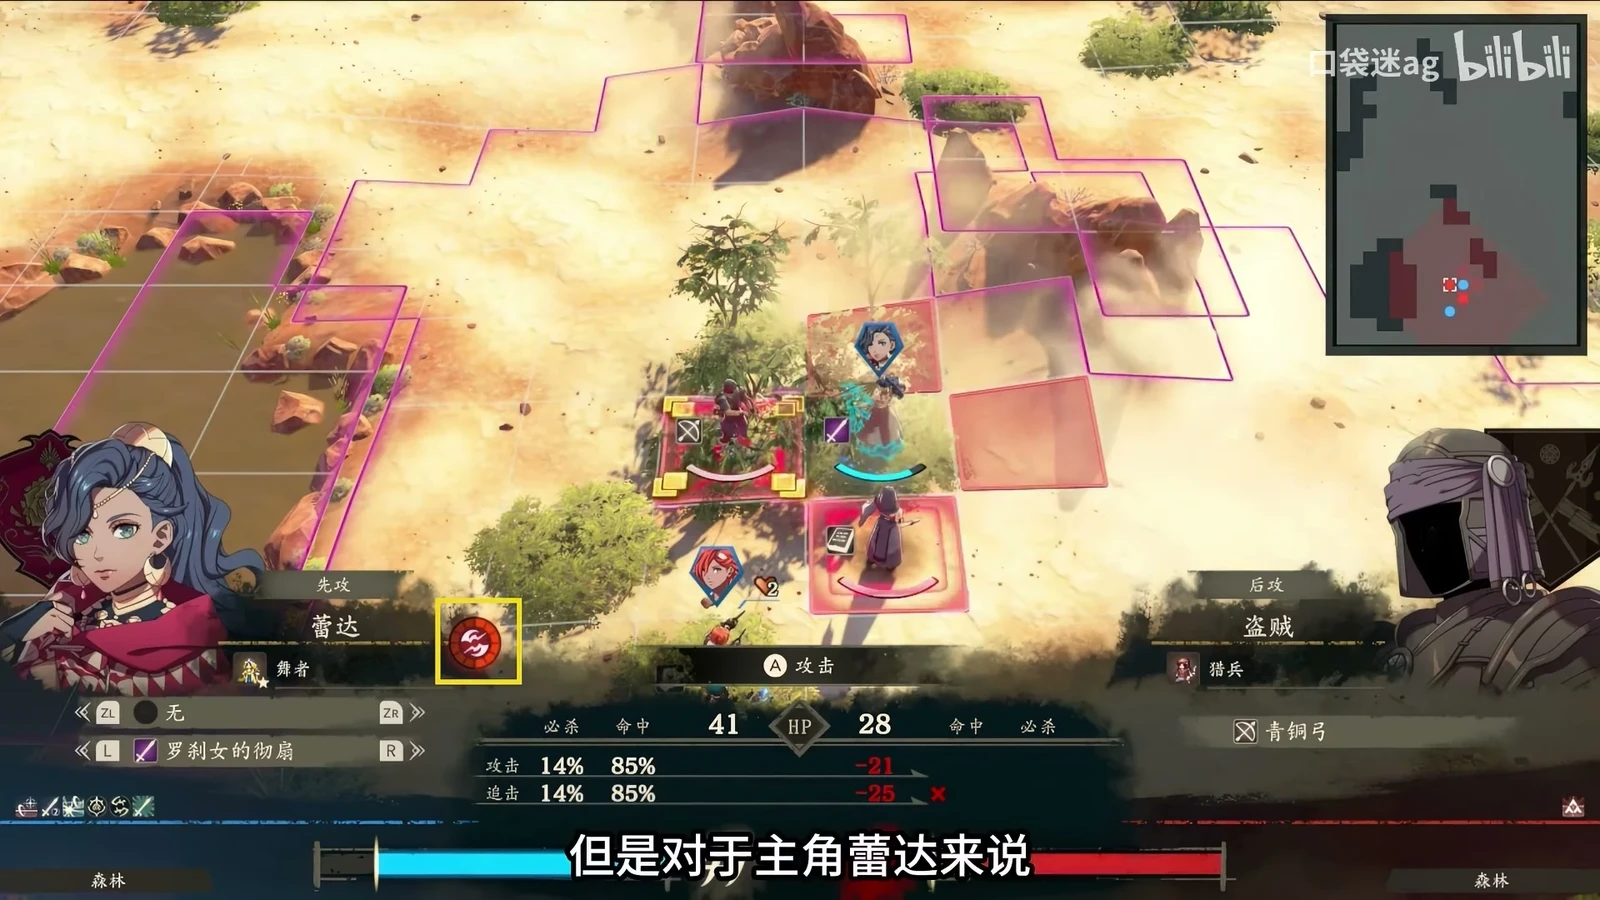
The four protagonists enter Overblaze at 6 gauge segments. Do not blindly equip cursed treasures to build gauge; the cost of filling it depends on character skills.
Blaze Arts cost HP; ordinary Combat Arts cost weapon durability. Activate Blaze Arts on player phase, once per character per turn. Some also have a once-per-map limit.
The four protagonists have 12-segment gauges and enter Overblaze at 6. Overblaze strengthens stats and Blaze Arts. Burst normally removes those buffs, and the Underworld type also loses maximum HP. Characters without Blaze Arts have only a 6-segment gauge and Burst immediately at 6 without Overblaze. Do not casually give them cursed treasures.
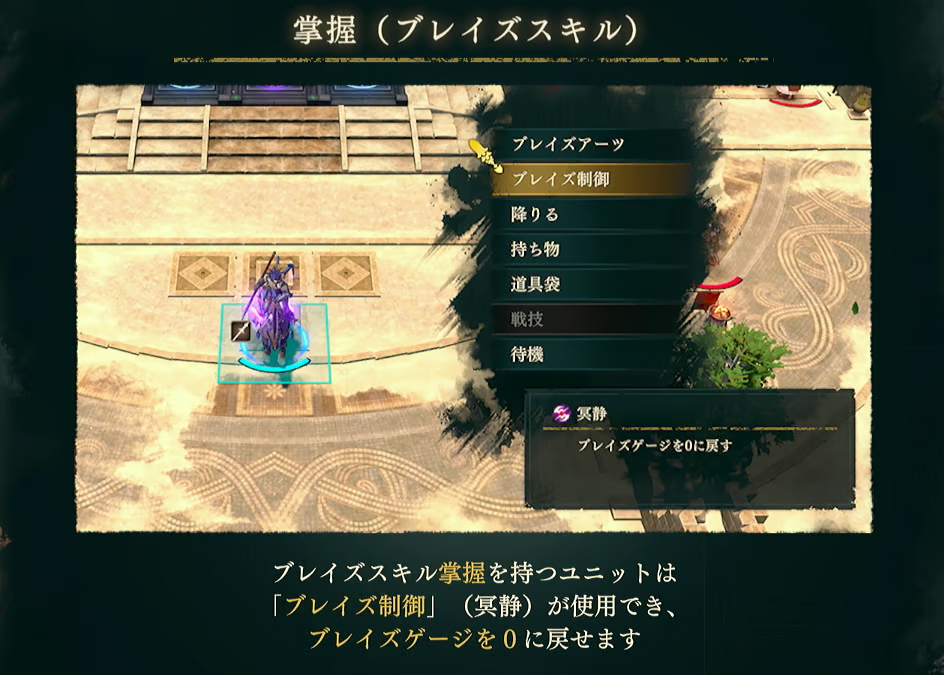
Gauge control depends on the character. Dietrich and Talimun have Resistance and lose no maximum HP on Burst. Cai and Theodora can empty the gauge, while Leda and Bertrand can set it directly to 6 and retain Overblaze. Celestial Wells types and Orchel follow different rules.
Why build half a gauge without blindly filling it?
When normal attacks suffice early on, Overblaze can feel like a bonus. In paralogues and battles with more complex objectives, its improved stats, effects, or range can help break through. The gauge has 12 segments, with Overblaze at 6, and cursed treasures can speed up the buildup.
But deliberately activating a boost and filling the gauge are different things. Burst’s cost is often summarized as halving maximum HP, yet gauge types and skills have exceptions.
Treat each Blaze Art as two costs: you need enough current HP and enough gauge capacity. The menu’s Soulflame value shows how much gauge the art adds; Release shows the gauge required before use. Keep them separate. Dietrich’s Ruinous Shadow, for example, requires 6 segments first and adds another 6, so plan gauge control before using it.
Cursed treasures affect the three gauge types differently
 Eshmel
 Anatolia
 Talimun
Combat with cursed treasures does not affect  Orchel’s gauge. Guardian Angel Release makes it usable, so Underworld gauge-building methods do not apply.
Cursed treasures include weapons and equipment, identified by color and Curse values. Underworld types gain extra gauge when attacking with cursed weapons or fighting with relevant equipment. Track equipment changes as well as your active Blaze Art uses. After finding a cursed treasure, check whether it was automatically equipped, then review Curse and potential gauge gains from enemy engagements. Using no active art this turn does not mean the gauge will stay still.
Check character exceptions before controlling gauge. One approach prioritizes preventing a full gauge: ordinary allies have 6 segments and Leda has 12, so do not keep building gauge just for a purple weapon’s stats. Filling it may remove buffs and lower maximum HP. Another approach gives Dietrich cursed weapons to prepare faster because Resistance prevents maximum-HP loss on Burst. Judge full-gauge penalties from skills such as Resistance and Rampage.
Five Blaze control skills
| Skill | Characters | Rule and practical meaning |
|---|---|---|
| Overblaze |  Eshmel,  Anatolia | Higher gauge enables higher-tier arts; check each art’s Release requirement |
| Rampage |  Leda,  Bertrand | Underworld Madness sets the gauge to 6; Burst does not end Overblaze, but this does not imply immunity to maximum HP loss |
| Control |  Cai,  Theodora | Underworld Calm empties the gauge to manage risk; emptying it also means preparing high-tier arts again |
| Resistance |  Dietrich,  Talimun | Burst does not lower maximum HP; still watch changes to normal Overblaze bonuses |
| Guardian Angel Release |  Orchel | Elizabeth enters Overblaze and lets him continue attacking, once per map; use Blaze Arts before the gauge runs out |
Accelerate Overblaze or save key arts by role
To enter Overblaze faster, Dietrich can actively build gauge with a Fell Sword, since his own low-Soulflame arts prepare too slowly. Resistance makes this more forgiving. Ordinary 6-segment characters risk filling their gauges with Fell Swords; do not copy the setup.
When you need terrain or positioning changes. Cai can support through Underworld Flame: enter his boosted state, then position allies around Underworld Flame tiles and related skills. Blaze Arts can also clear miasma within their area.
When you need one key damage or support action. Pick the target position and check Release requirements first, then reserve healing and gauge room for next turn. Leda’s area support, Dietrich’s displacement, and Talimun’s ranged debuffs solve different problems. Do not spend a once-only opportunity just to use a powerful art. Dismount a war elephant before using Blaze Arts.
- Each character can activate one per turn, with some arts also limited to once per map.
- A full gauge is not a stronger Overblaze tier. Check maximum-HP penalties and exemptions individually for Underworld types.
- Resistance specifically prevents maximum-HP reduction; Rampage specifically preserves Overblaze. They are different exemptions.
- HP costs change with maximum HP. Check before activating rather than treating one character’s observed cost as fixed.