

Chapter 12: Just One WishMinor spoilers
Dismount Cai and use the Levin Sword against Castor, retreating if HP runs low. Once the barrier falls, clear both sides and defeat Bertrand last to end the battle.
Cai duels in the center. Outside, bring units who can move after attacking, Peter as a Charioteer, and healers to clear enemies in separate groups. Use the Levin Sword against Castor in the center. Dismount before approaching to avoid his spear's effectiveness bonus. If Cai cannot win, operate the outer mechanisms to remove the magic barrier. The duel is most dangerous when a missed attack leaves Cai too low on HP. At 23 HP, move away instead of forcing another close-range hit. After defeating Castor, mount up and clear both sides. If you want more EXP from smaller enemies, leave Bertrand until last: defeating him ends the battle immediately.
Keep your chariot growths and healing slot
Peter can remain a  Charioteer rather than immediately changing to
 Forest Knight just to enter an advanced class. The reason to stay is the Charioteer's growth rates. Once his Bow proficiency reaches A, check his inventory and equip bows he could not previously use.
If you have developed a healer around a Unicorn, keep using  Troubadour. Even if their Strength and Magic suit a hybrid build, changing to
 Caladrius costs you a healer and requires preparing the appropriate mount in advance.
Do not assume a low-chance certification succeeded just because a musical note appears. The exam can still fail and consume an Advanced License. For units waiting until level 35 to take the exam, prioritize field kills before battle; have your level-36 main units leave those kills for them. Also check that newly obtained passives are equipped in the ability slots before starting. They do not activate automatically.
Win the central duel or use the outer mechanisms
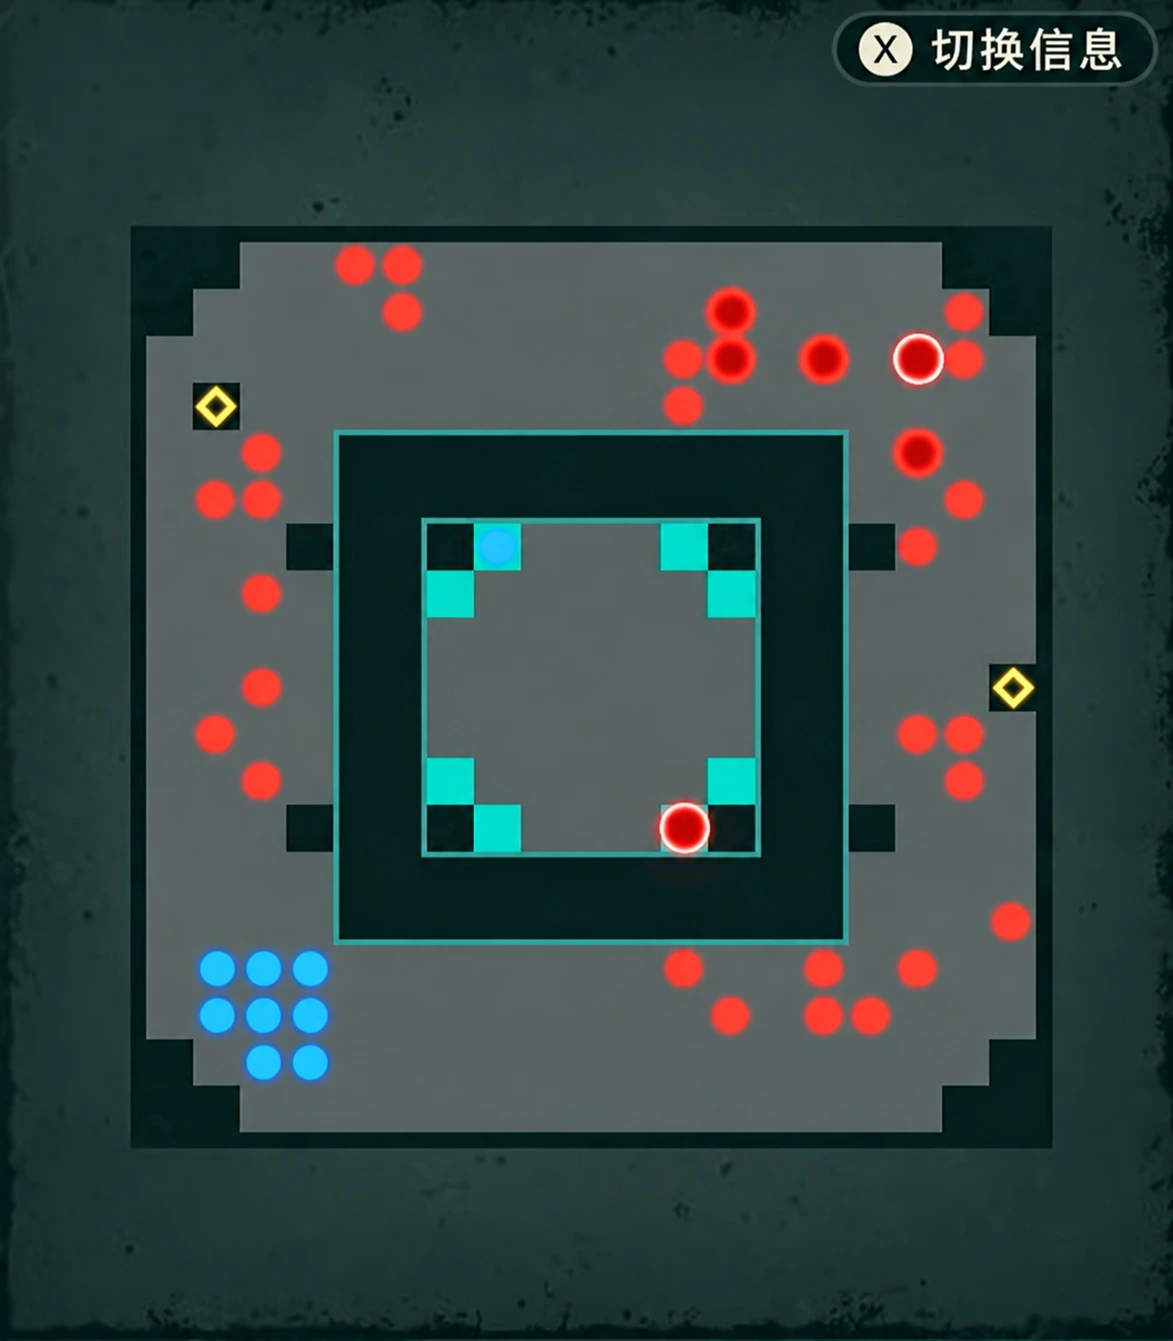
You can deploy nine units. Cai and Castor are isolated in the center. If Cai can win, defeat Castor directly to remove the barrier. If he cannot, take the outer mechanism route instead of insisting on the duel. Castor stands on a Healing Circle, so include its recovery when calculating damage and finishing blows.
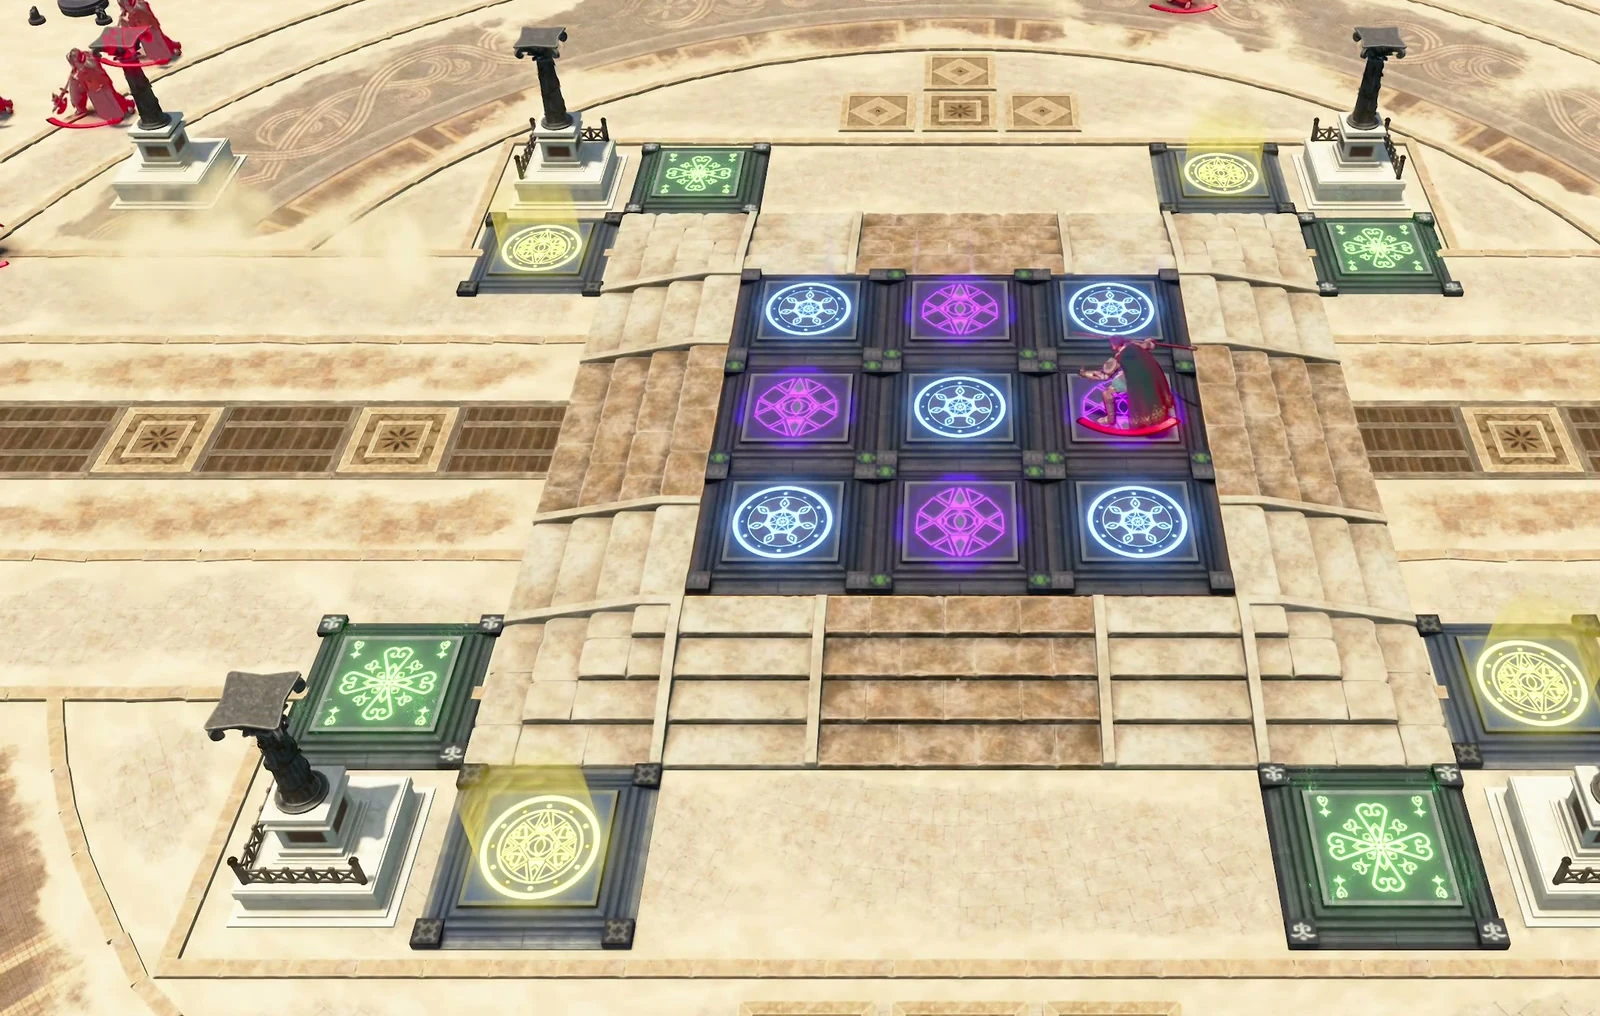
Outside, use Canto to retreat after attacking rather than remaining exposed. If a single spear hit cannot kill an enemy, have another unit weaken it before assigning the finishing blow.
Dismount before the duel to avoid the spear's effectiveness bonus
When Cai uses the Levin Sword against Castor, dismount before attacking at close range. Castor's spear is effective against Cai while he is mounted and deals heavy counterattack damage. Check whether Cai can survive before attacking.
The Levin Sword can miss repeatedly. If Cai has only 23 HP and neither a close-range attack nor a combat art is safe, move far away to avoid another Castor attack next turn. Do not force a hit even when Castor has very little HP left. He can heal, so check his current HP again before attempting the finisher.
Clear both sides for EXP once the barrier falls
After Castor falls and the magic barrier disappears, remount Cai. Clear the enemies on the right first, then send Cai to the upper left to handle three archers.
To raise Seteth's level, have allies weaken enemies with Javelins and leave him the last hit. Do not let high-level main units take every kill. If your current unit cannot reach an enemy in the back, send a Levin Sword user who deals magic damage instead.
Defeating Bertrand ends the battle
When Bertrand approaches, decide whether you still want to clear the remaining soldiers. If you want the EXP, defeat them first, then focus on finishing Bertrand. Defeating him ends the battle immediately.
Leave enough free time to turn in requests
Before the main battle, open the temple's detailed map and find its requests as well. They are easy to miss on the world map alone. Distant requests require time to return and turn them in, not just time to reach the monsters.
If you want to recruit  Nezha, prepare Sandworm Meat and find him early. Do not leave material gathering until just before the finals: by the time you obtain the meat near the main battle, he is no longer in town.
If only 10 free-time turns remain and your mounts still need attention, keep feeding them and delay harvesting. Finish feeding them early rather than leaving it until the end.
After this chapter, you can complete the other protagonists' Part 1 routes before entering Part 2. You do not need to start the War story immediately after finishing Cai's route.
 Bertrand
 Dante
 Jester
 Gaitz
 Goliath