

Nintendo Direct breakdown: Underworld Boon, class roles, and four intertwining routesMajor spoilers
Follow the Promised One and four routes through combat screens, class previews, and temple effects to understand the gameplay shown in this Direct.
Original video: “[Fortune's Weave] Media previews prove our analysis was right! Frame-by-frame Nintendo Direct breakdown,” Bilibili creators Jidan vs Mantou and Fenghua Chuixue ACC, watch the original video.
Plan classes, weapons, and temple Boons from pre-battle information, then check each battle's victory and defeat conditions. This prerelease analysis also links the four fighters' pasts to a future apocalypse; the following preserves the trailer-based speculation from that time.
Return to the past to rescue four fighters
When  Eshmel arrives, the Demon God's revival has brought the world close to destruction. Fighting alone is difficult, so you travel into the past, change the four fighters' fates, and bring them back to fight together. That connects the four routes: you follow both their participation in the Heroic Games and how they become your final companions.
The infant before the Underworld gate in the opening deserves attention. The English narration says “second birth,” while the official site says “the Demon God's revival.” That makes the infant being held look more like a being reborn than an ordinary newborn.
The protagonist's changing lance and different Blaze Gauges
You can change the Promised One's gender, skin color, hairstyle, hair color, outfit, and name. Cutscenes show your custom appearance. The demonstration introduces a level-40  Guardian with
 Hong Hua behind them. Lances, white magic, and infantry movement are visible directions.
 The Nameless's description says it has lost its original power. In the still image, its tip differs from
 Solel's weapon, yet its shape becomes similar at the moment a Blaze Art activates. Could the hole at the lance's center gain a new mark once its power returns? Connecting those shots makes this a particularly interesting clue.
The protagonist has a full blue circular Blaze Gauge. The four fighters have red and purple portions, while ordinary units show only the right half. Area combat arts can also center on an empty space to cover multiple targets, making aiming more flexible than selecting only an individual enemy.
Capital facilities and character clues
The Heroic Games progress from preliminaries to finals, with a city of markets, docks, taverns, and temples between them. Market fruit, trading ships, and tavern stages establish Dagda's everyday life. Town visits offer more than weapon shopping: finding people, watching performances, and accepting quests fit between matches.
Solel promises the winner a wish. But if winning and wishing could easily prevent the Demon God's revival, why would the Promised One go to such lengths to travel through time? Possible limits on that promise provide another story hook.
New faces carry clues too.  Talimun makes Answerer ring,
 Anatolia carries a pistol,
 Orchel wears a sturdy cat mask, and the formidable
 Bertrand longs for peace. Profiles establish personalities, while short scenes connect them with the routes.
Why the four fighters enter
 Cai leaves Ribera Village because his father must serve a sentence for a crime committed before his birth. Childhood friends join him. The route looks like a youthful journey, but the real question is which taboo his father broke. The gem in his palm releases underworld fire and appears alongside different Bloodmarks. That deserves more attention than guessing family ties from eye color alone.
 Dietrich hears about the Heroic Games only after a sea beast overturns his ship and he washes up in Dagda. He comes seeking battle. Answerer's ringing links the shipwreck, a merchant, and later encounters. When
 Fabio meets him,
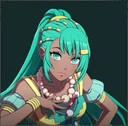 Esmeralda faces being offered as a sacrifice, and that encounter brings the group together.
 Theodora loses her father to murder and her own right arm, then obtains a new arm and lance before pursuing the throne. Her dialogue also addresses the goddess's reputation and the long conflict with Mosa. Her challenge involves both revenge and ruling a country.
 Leda follows a list left by her mentor to pursue killers. Learning her father's murderer still lives brings her into the Heroic Games. Bertrand's connection to that old case pushes them directly toward confrontation, yet he also appears among potential companions. How this hatred resolves becomes a particularly compelling question for Leda's route.
Weapon access and defeat conditions
Distinguish what a character trains well from what their current class permits. Strengths guide development; class permissions determine usable weapons right now. A weapon in the bag is not necessarily equippable.
Training a weapon's proficiency does not mean the current class can use it. Check weapon permissions when changing classes.
 Tialla's permissions include swords, axes, and gauntlets alongside magic, leaving room for later class changes.
This demonstration's stats allow a calculation of the relationship between Build and Strength.
 Guzran's stats
Strength = Attack 21 −  Bronze Sword Might 4 = 17.
Estimated Build = ⌊17 / 5⌋ = 3.
These numbers connect Strength with the equipment Weight a unit can offset.
When the cursor rests on cavalry, attack lines from anti-cavalry lances turn purple. Fences can be destroyed, and a line of attack range lights up before a chariot. Review all of this before acting. Do not check only the leader in victory and defeat conditions: in this demonstration, losing any of Cai, Dietrich, or Anatolia causes defeat. Temporary companions need protection too.
Weigh weapon categories alongside combat-art effects
With  Killing Edge, Dietrich shows impressive Attack Speed and Critical. Cursed weapons tend to be heavier and less accurate, so assess them together with their attached combat arts.
 Zanbato, lances, and anti-cavalry bows expose cavalry's weaknesses. Fast movement still requires avoiding those threats.
Pistols are not a new weapon category exclusive to Anatolia. Salamander belongs to gauntlets but fires at range, preventing a melee-sword enemy from retaliating. Do not confuse a weapon's appearance with its actual category.
Combat arts offer more than damage. Insight Strike provides very high Hit at the cost of halved damage. Against an evasive target on good terrain, securing a hit and letting an ally finish feels better than repeatedly gambling on low accuracy. Adjacent support improves attack, defense, Avoid, and Critical. Without a turn limit, claiming terrain and receiving enemies before advancing also works.
Blaze Arts' HP costs
Using Blaze Arts consumes HP while increasing the gauge, linking healing with special abilities. If healing can keep replacing the cost, could you use them repeatedly? The full gauge and purple glow are what to watch next.
Leda's same moves show different HP costs across two promotions:
| Blaze Art | HP costs shown in two promotions |
|---|---|
| Song of Passion | 7, 8 |
| Summon Beast | 11, 12 |
The beast's tactical uses are more immediately clear: its size blocks passages, while surrounding area attacks handle groups at once.
Choose class roles by weapon access
Cavalry moves far but fears lances; armor withstands physical attacks but needs protection from magic. Combining the two labels does not automatically produce a good class.  Cataphract needs enough Defense and weapon flexibility to compensate for those weaknesses.
Changing classes also changes usable weapons. Proficiency remains, but using another weapon set requires the corresponding class. Consider movement, weapons, and skills together. Riding a mount alone does not guarantee more usefulness than infantry.
Choose temple Blessings after checking battle information
Prebattle information shows deployment numbers, recommended equipment, classes, and terrain. Knowing whether the next battle needs physical defense or magic lets you plan town training, forging, and Temple Service around it.
My first concern about Underworld Boon was that later enemies would all reduce damage, leaving the army dependent on white magic and sacred weapons. But not every enemy that looks like a netherfiend carries it, so the situation is less uniform.
Then consider level-three Aurora's Blessing: it disables enemies' Underworld Boon, offering another solution without making everyone learn white magic. Activation costs Divine Sand, while Temple Service raises Blessing levels.
Separate growth from class modifiers
In the class preview, Dietrich changing from  Brigand to
 Shido loses a little Strength and Defense but immediately gains 7 Speed and 3 Dexterity. Shido clearly relies more on follow-ups, Avoid, and Critical.
 Ever Vigilant actually restores a little HP when a critical hit defeats an enemy, connecting that approach to sustain.
Exam requirements dividing “main skills” and “optional skills” are convenient too. An armored class requires Armor proficiency, then either lances or axes. You do not need to train a second weapon you never plan to use. Class growths, immediate stat modifiers, weapon permissions, and mastery rewards answer different questions. Check each column when choosing a route.
Meal recovery and route progress
Meals restore HP and spell uses, while lodging also restores Motivation. Fighting repeatedly during exploration means planning both consumption and recovery, beyond whether you can win the immediate battle.
Switching routes preserves each protagonist's progress separately, and chapter restart is also available. After recruiting the same person, opening the same chest, and training different classes, how everything ultimately combines becomes the multi-route system's real question.
Renown gates and resource roles across four routes
The world map does not open everywhere immediately. Checkpoints block roads through Renown requirements. Villages have shops, merchants keep schedules, and roadside inquiries reveal a stranded ship with treasure inside. Exploration's appeal lies between these place names, junctions, and rumors.
Linked Attacks in labyrinths also consume Linked Attack points. Spells and other party resources cannot be used endlessly throughout a journey.
Each protagonist manages a different resource. Dietrich uses sword ringing to find hidden enemies, Theodora recruits and dispatches battalions, Cai catches animals, and Leda performs for money and supplies. Bright and dim mount icons also correspond to characters' riding setups. After catching animals, consider who should equip them.
The future apocalypse and rescue five years earlier
The future capital is ruined, and the four fighters' statues are damaged. After the Promised One faces a powerful enemy, Fortuna intervenes and takes them out of danger. Time's power then returns them five years to meet the fighters. The opening apocalypse, each route's competition, and the eventual joint war become one story.
An earlier clue needs rethinking too: Talimun once caused sword ringing, but ringing also reveals ordinary enemies. That alone cannot prove a god is beside him. Comparing the same ability across scenes before identifying someone is more persuasive than isolating one shot.
In the obelisk chamber, Cai, Dietrich, Theodora, and Leda correspond to tiger, lion, wolf, and eagle. Touching the obelisks to return to the past, changing their destined failures, and bringing allies into the future is the goal on which the Direct ultimately lands.