
Nine paralogue walkthroughs: acceptance, tactics, and recruitmentMajor spoilers
Find all 9 paralogues by availability: defeat 4 giants first in the friendly match, block the exits before recovering cargo, and protect residents during escorts.

Check the paralogue's victory condition before chasing enemies. Some battles require scoring or escorting, so a full rout is not always the answer.
The 9 paralogues cover scoring, recovery, escorting, devices, and timed defense.
| Current priority | First action | Battle |
|---|---|---|
 Dietrich, early September | Accept  Leda on 9/2 and  Theodora on 9/3, then plan travel; do not skip directly to the forced battle date | 1, 2 |
| Dietrich, 9/17 | Protect  Bertrand’s friendly-match window that day; schedule  Talimun separately | 3, 4 |
Cleansing Blade and  Ursula | Check cargo-carrying thieves and exits before chasing large birds | 4 |
Save every resident and recruit  Sha Lan | Do not block the escort with allies; focus the boss when danger rises | 6 |
 Cai and  Orchel in mid-October | Finish Orchel’s outdoor battle before returning to Cai to advance the date | 8, 9 |
Dietrich has only one day to accept Bertrand’s paralogue: prioritize acceptance on September 17. After accepting, finish before the battle deadline, allowing for the outdoor round trip. For route windows, chapter restarts, and carryover, see paralogue list and timing rules.
1. Leda’s Paralogue: Diversionary Tactics
Victory: rout the enemy. The challenge is securing the quest entrance first, then protecting Leda and your current protagonist in battle. Leda's Paralogue: Diversionary Tactics
| Route | Acceptance window | Battle schedule |
|---|---|---|
| Cai | Unavailable | — |
| Dietrich | Chapter 9, 9/2–9/8 | Forced battle is recorded as both 9/8 and 9/9; accept by 9/7 for a buffer |
| Theodora | Chapter 10, 9/2–9/8 | As above; advance through Leda’s conversation |
| Leda | Unavailable | — |
Where to accept: find Leda outside Kalla's temple in Dagsion. On Dietrich's route, also accept Theodora's paralogue before starting Leda's quest. You can fight Theodora's battle later.
Accept both quests before ordering the battles
There are two schedules. One accepts Leda on 9/2 and Theodora on 9/3, leaves town for the statue quest, then returns to advance to 9/9 through Leda's dialogue. Both quests have short acceptance windows, and the trip outside town takes time; skipping ahead yourself can miss an entrance. The other schedule fights Leda's battle after accepting Theodora's quest, then heads to the statue quest. Accept both quests before scheduling either battle. Check the quest log if you are unsure about travel time.
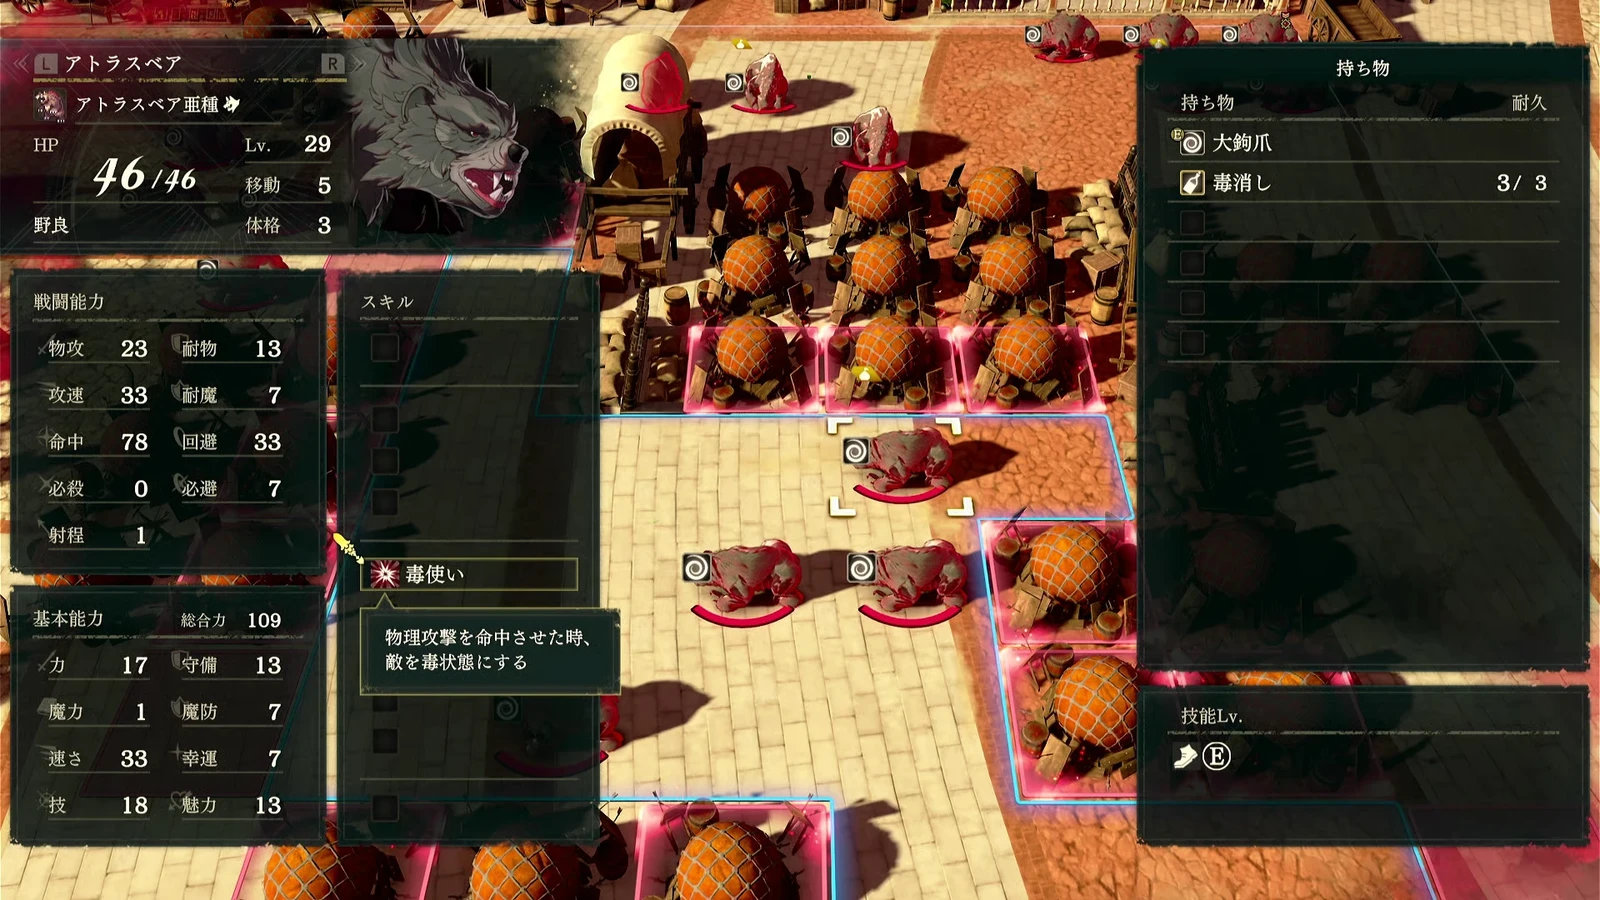
The diversion unexpectedly attracts bears, so you need to clear them out. This fight is easier than the device battle. The boss is Atlas Bear. You lose if the current protagonist or Leda falls, so do not leave either alone in enemy range just because the quest looks easy.
Preparation and positioning: bring Armored Knights to handle the bears. Inference: let durable units take first contact, with healers behind them, and keep Leda from rushing into the pack. Wait until you can focus your attacks, then take the bears down one at a time.
Do not replace Leda’s conversation with a date skip: advancing through dialogue and manually skipping days are different actions. Do not skip to this paralogue’s start date before accepting it. Records differ between 9/8 and 9/9; accepting early avoids relying on that disputed day.
Rewards and recruitment: Silver Shield ×1, 20,000G, and 150 Renown. This satisfies one prerequisite for recruiting  Buccar on Dietrich's and Theodora's routes. You still need the required Renown, Support, and negotiation; see recruiting difficult characters. Buccar's prerequisite belongs to this paralogue, not Theodora's.
2. Theodora’s Paralogue: Missing Brave-Warrior Statue
Victory: activate every device. One record lists 8 deployed units including Theodora. Balance combat with activating devices on the underworld battlefield. Theodora's Paralogue: Missing Brave-Warrior Statue
| Route | Acceptance window | Battle deadline |
|---|---|---|
| Cai, Theodora, Leda | Unavailable | — |
| Dietrich | Chapter 9; records give 9/3–9/8 or a 9/12 cutoff | 9/15; plan to accept by 9/8 |
Acceptance and destination: find Bonaventure near Dagsion's lower approach. The battle takes place at the Altar of Purification, reached through the Divine Gate at Mars's temple. Travel and combat take about two days; allow enough turns for your route before leaving.
Activate devices instead of only clearing enemies
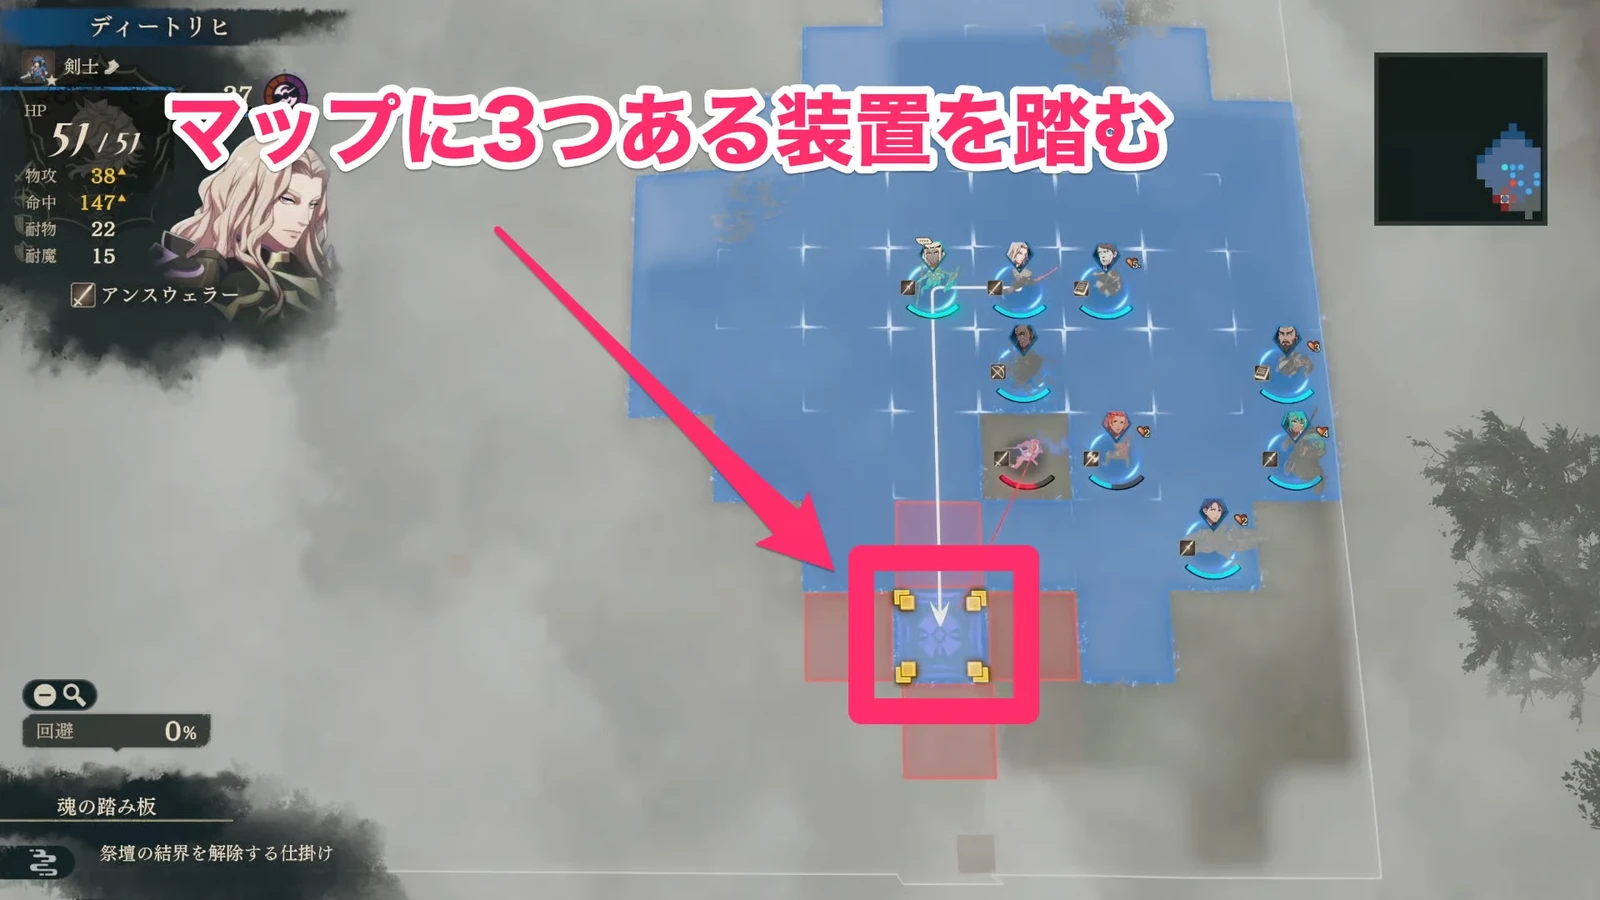
This battle requires more attention to the objective than the bears. Defeating nearby enemies is not enough: you must fight in the Underworld and step on three stone slabs. The formal objective is to activate every device, and the boss is Golem.
An objective-based plan: locate all three devices on the map at the start, put durable units in front to clear a path, and reserve units who can trigger the devices in time. Do not crowd all 8 units around the boss and leave yourself a long trip back to the slabs. After each advance, check which devices are active before choosing the team's next destination.
Protect both Dietrich and Theodora. Do not rely on routing the enemy before looking for switches: the devices are the victory objective. See the paralogue list for Underworld mechanics.
Allow a buffer using the earlier cutoff: records give 9/12 and 9/8. Assuming you can return to accept on 9/12 is risky. If fighting this first, leave time to return to Leda; if fighting the bears first, allow travel to the altar.
Rewards and recruitment: Pilum ×1, 20,000G, and 150 Renown; no separately associated recruit unlock. Theodora’s guest participation does not make her a permanent recruit, and Buccar’s prerequisite does not belong here.
3. Bertrand’s Paralogue: Friendly Match with Brigid’s King
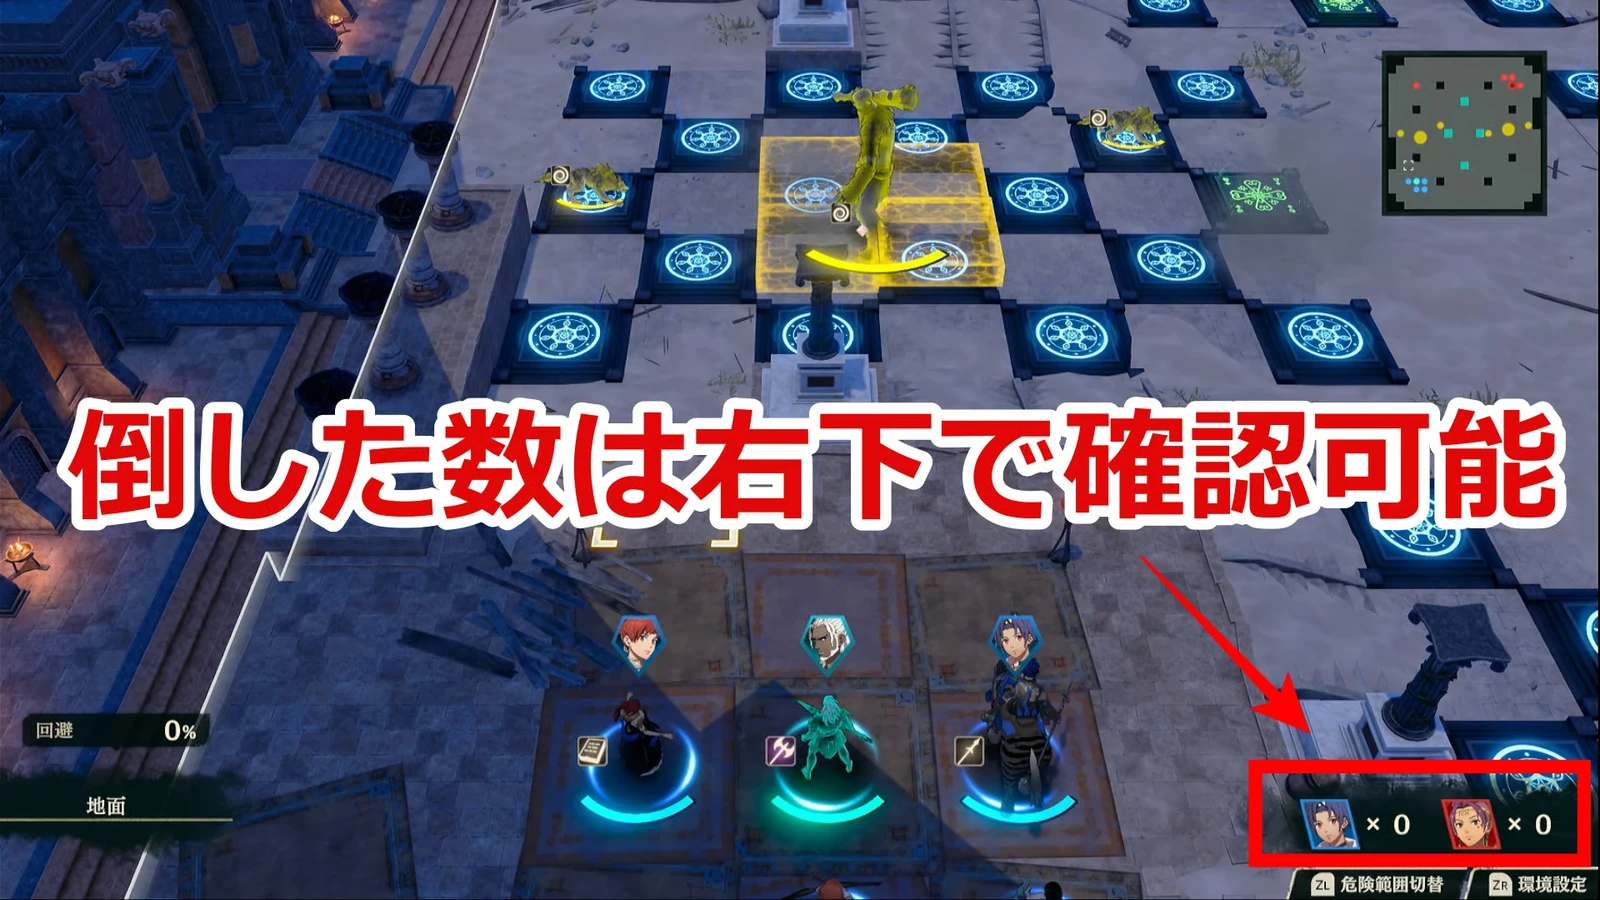
Victory: defeat 4 giants before the opponent. Defeat: the opponent reaches 4 first. Expect interference from feed bags. Bertrand's Paralogue: Friendly Match with Brigid's King
| Route | Acceptance/completion schedule |
|---|---|
| Cai | Chapter 10, 9/17–9/25 |
| Dietrich | Chapter 9, only 9/17; do it first that day |
| Theodora | Chapter 11, 9/17–9/25 |
| Leda | Unavailable |
Where to accept: find Gabriel outside Dagsion's Grand Arena during the day. Dietrich can also accept Talimun's quest that day, but prioritize this battle. Check the paralogue list for main-story locations you should visit beforehand.
Score while preventing the opponent from feeding
Your opponent is  Peppe, but the contest is a race to defeat giants: the first side to defeat four wins. Feed bags make the opponent's target giant invincible. Reaching 0 HP in this battle does not cause permanent death, so you can feed a giant on turn 1, remove nearby interferers, then push for points. Being knocked out still costs actions.
Opponents actively attack beasts, and interferers respawn. Use targeted feeding and positioning to prevent enemy approaches for feeding. A low-level Peppe should not consume every action; prioritize scoring and stopping interference. A highly trained team’s battle supports this tradeoff, but its damage cannot be copied directly.
Focus your attackers on scoring and keep one unit to block the opponent. Concentrate on a giant you can currently defeat, while another unit disrupts the opponent's route. If everyone attacks, the opponent can freely approach and feed giants. When invincibility blocks your target, switch to a giant you can score from instead of wasting attacks. Even after blocking a route, check whether the opponent can still feed.
Keep scoring while interfering: repeatedly downing respawning interferers buys time but does not replace the four-giant objective. Attacking only Peppe or soldiers can let the opponent finish first. Your scoring team must keep working while feed delays the other side.
Rewards and recruitment: 20,000G and 150 Renown. Cai, Dietrich, and Theodora can satisfy one prerequisite for recruiting Peppe. Only Dietrich can recruit  Gaitz, after his original team is eliminated. This also fulfills a Part 3 joining prerequisite for Bertrand. All three still need their later conditions met.
4. Talimun’s Paralogue: Secret of the Vanished Carriage
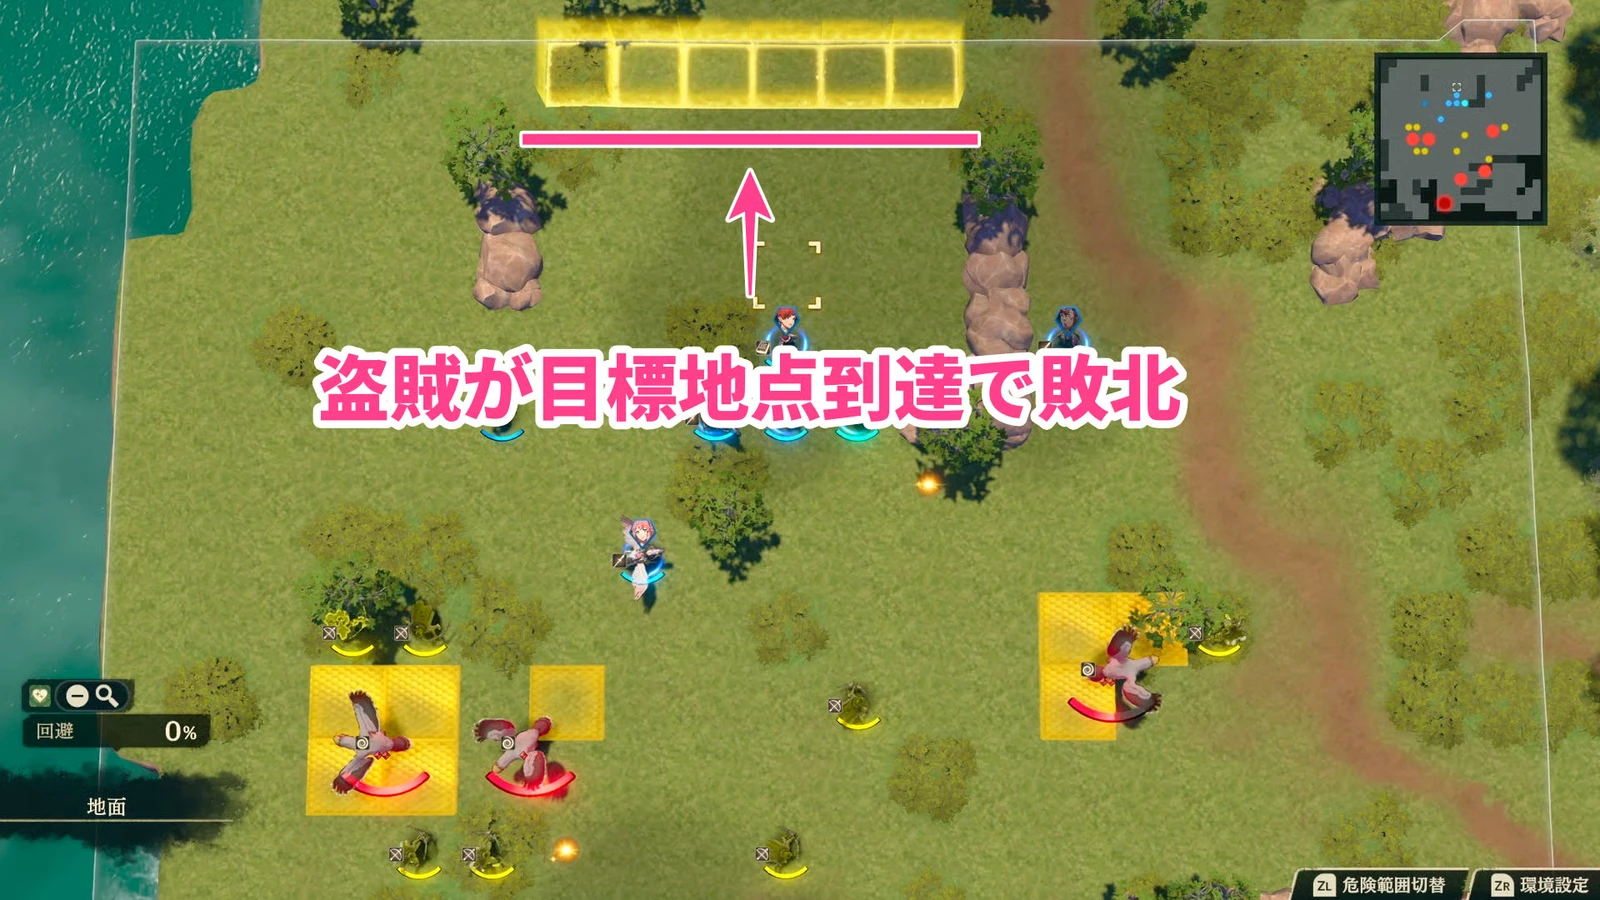
Victory: recover all cargo or rout the enemy. Defeat: a cargo-carrying thief reaches the destination, or the current protagonist/Talimun falls. Expect a three-way fight between birds, humans, and your team. Talimun's Paralogue: Secret of the Vanished Carriage
| Route | First acceptance period | Second acceptance period | Battle deadline |
|---|---|---|---|
| Cai | Chapter 10, 9/17–9/22 | Chapter 10, 10/1–10/10 | 10/12 |
| Dietrich | Chapter 9, 9/17–9/19 | Chapters 10–11, 10/1–10/10 | 10/12 |
| Theodora | Chapter 11, 9/17–9/22 | Chapter 11, 10/1–10/10 | 10/12 |
| Leda | Unavailable | — | — |
Acceptance and destination: find Talimun near the Vandahl Trading Company at Dagsion’s lower harbor, then go to Dragdon Ridge. Missing the first period still leaves a second, so restarting immediately is unnecessary. But 10/12 is the completion deadline, not the second acceptance cutoff.
Choose cargo recovery or a full rout
Large birds and thieves surround the carriage, and both compete for cargo. One approach recovers the cargo while preventing enemies from reaching their destination. You can also win by routing the enemy. The boss is Harpiya.
Before choosing a rout, check whether your team can clear the field quickly. Even a highly developed team that finds ordinary birds harmless must watch the boss. Adjust battalions for the birds, use bows to break barriers, and watch for enemies escaping or taking dropped items.
Suggested roles: first check cargo carriers and exits. Send mobile units to cover escape routes while the main force handles birds blocking the way. Break bird barriers to recover cargo when necessary. If your team clears quickly, use the rout option, but recheck cargo thieves each turn. Dragging everyone after one bird while struggling with the flock can let someone escape on the opposite side.
The brawl will not guard your cargo: intercept cargo-carrying thieves before the birds and thieves finish fighting. Conversely, if you have already recovered enough cargo to meet the victory condition, you need not take extra risks just to follow a rout strategy.
Rewards and recruitment: Cleansing Blade ×1, 20,000G, and 150 Renown. All three available routes can fulfill  Ursula's paralogue prerequisite.
 Talimun joins in Part 3, Segment 1. He is a guest in this battle and joins permanently in Part 3.
5. Anna’s Paralogue: Golden Secret
The victory condition is defeating the Abnormal Giant; another overview describes clearing all enemies. Manage the order of ore piles and giant triggers. Anna's Paralogue: Golden Secret
| Route | Acceptance window |
|---|---|
| Cai | Chapter 10, 9/24–10/5 |
| Dietrich | Chapters 10–11, 9/29–10/5 |
| Theodora | Chapter 11, 9/24–10/5 |
| Leda | Unavailable |
Where to accept: find Anna outside Dagda's temple in Dagsion. Dietrich can reach it after unlocking the uppermost travel point in Chapter 10. Speak to Anna again to start the quest. Handle Fabio's evening event on 9/29 first, since the paralogue consumes turns. If you want to see that event, check the missable checklist beforehand.
Check HP bars and remaining actions before breaking ore
You control Anna,  Solel, and siege weapons. Wizards are gathering Orichalcum on the field. Enemies include Vinicius and the Abnormal Giant; you lose if the current protagonist or Solel falls.
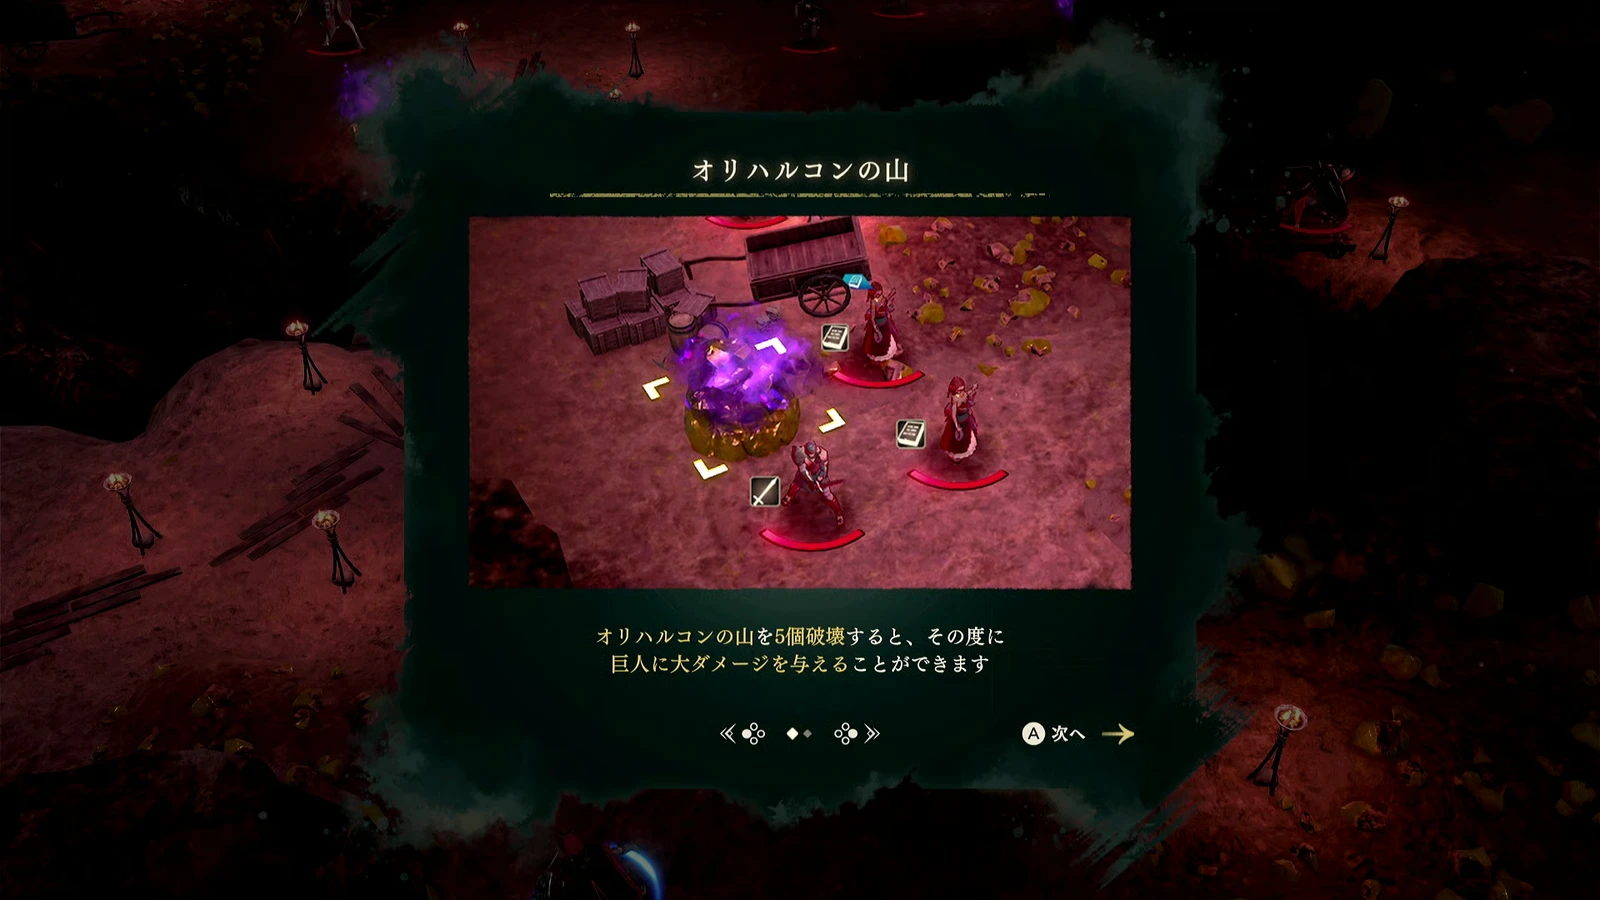
- One approach saves the final pile until you can finish. Send Anna and Solel ahead, have Solel wait while you destroy Orichalcum piles, and deal with Vinicius first. Break the 10th pile only when you can defeat the giant in one push. Keep enough actions and firepower for the phase triggered by the final pile.
- Another approach divides the first and last five piles between two HP bars. There are 10 piles, and destroying 5 deals heavy damage. Use the first 5 against the first bar, then have Solel attack or use a Combat Art to reach the second bar before breaking the last 5. This keeps the second burst from being wasted on the previous bar. The initial objective is a rout; it changes to defeating the giant when it is summoned. You may still need a finishing attack after all 10 piles are gone.
Check the current objective, giant’s HP bars, and destroyed-pile count before choosing a sequence that fits the battle state. Do not combine the trigger orders from the two plans.
Use strong guest units and siege weapons to handle immediate threats. Do not leave Solel unprotected while scouting.
Trigger the next phase only after these checks.
Check the victory condition again when the giant appears. Clear the wizards first, then follow the quest log to finish after the giant arrives. Do not send everyone to break ore at the start.
Rewards and recruitment: Orichalcum ×1, 20,000G, and 150 Renown. Anna then opens shop in uppermost Dagsion at night, the next day. She is a guest only in this paralogue and cannot be recruited from it; no other recruit is linked.
6. Anatolia’s paralogue
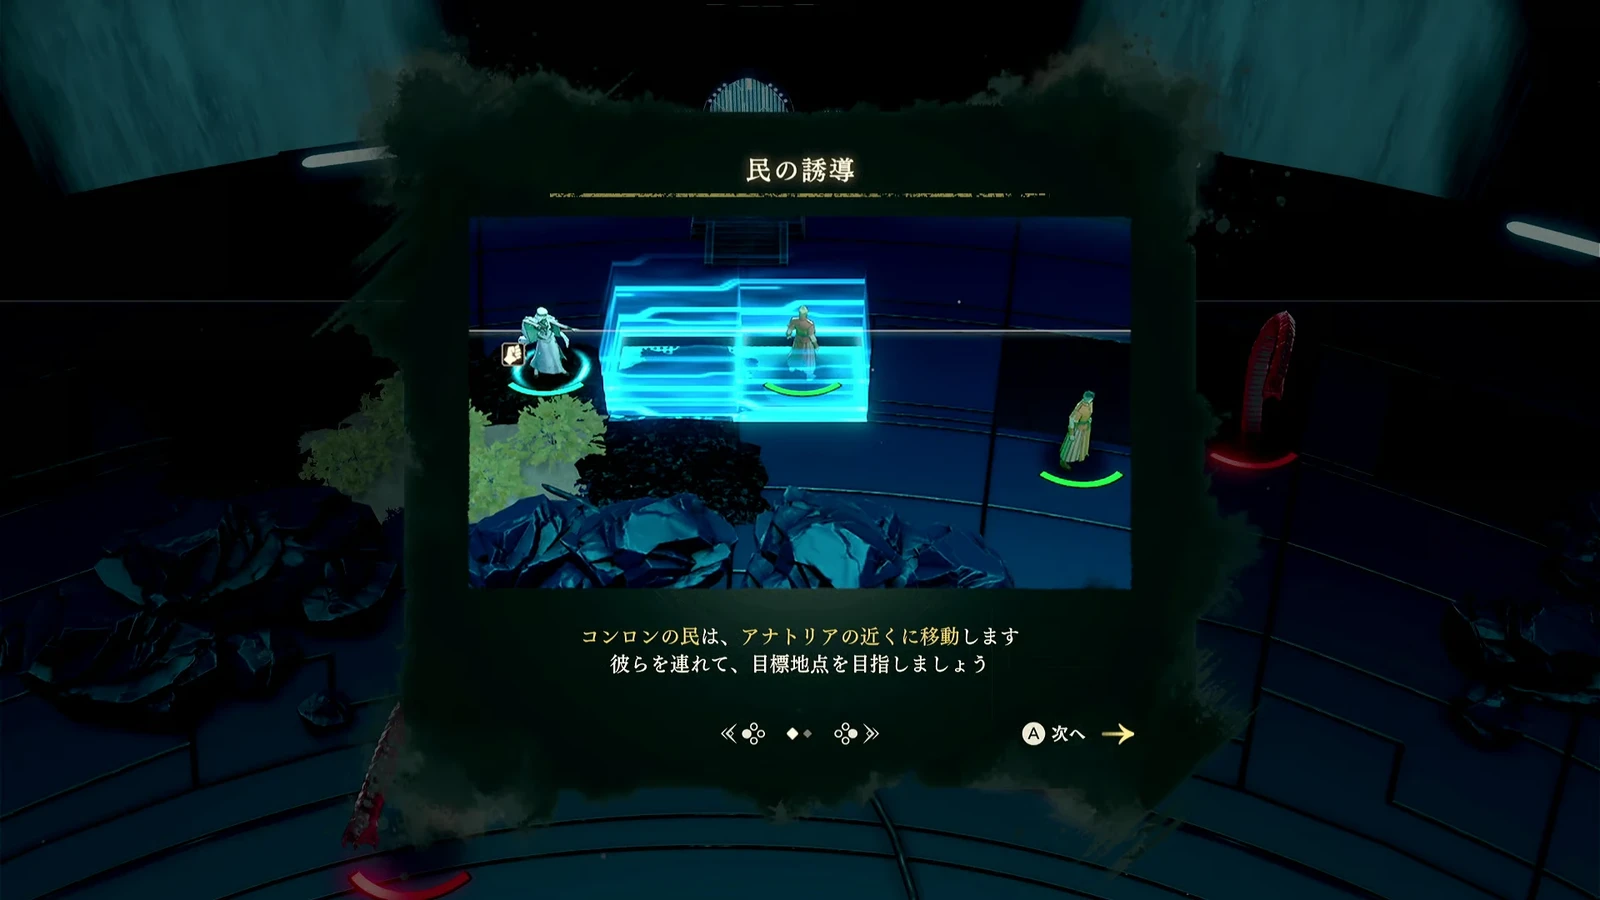
Victory: get all surviving Kunlun residents to the destination, or defeat the boss Pentkehydra. Defeat: 3 residents fall, or the current protagonist/Anatolia falls. Manage the escort and boss control together. Anatolia's Paralogue: Queen of the Erased
| Route | Acceptance window | Battle deadline |
|---|---|---|
| Cai, Theodora | Unavailable | — |
| Dietrich | Chapter 11, 10/5–10/14 | 10/17 |
| Leda | Chapter 10, 10/5–10/14 | 10/17 |
Acceptance and destination: find Anatolia in northeastern Dagsion city and travel to Silver Terrace. Strange insects appear as villagers evacuate, so escort them while fighting. Accept by 10/14 and complete by 10/17; do not wait until the last moment to leave town.
Control damage and leave the residents a clear escape route
Avoid unnecessary fights during the escort, clear the way while retreating, and check the formation from front to rear for isolated allies and approaching pursuers. The specific enemy and trigger for leaving a foe at low HP are unconfirmed; plan your retreat around the enemies' current positions.
Team and positioning (based on battle footage; exact tiles are inference): attackers clear the escape route ahead while healers move with residents and protected characters. Move aside after clearing a junction so residents can continue. Before ending each turn, inspect the entire formation for isolated allies, blocked residents, and pursuers able to reach fragile targets. Looking only at the exit can hide danger at the rear.
You can also target the boss: its attacks inflict confusion. Defeat red Digamma to stop it, then sequence Charioteer Smash, control involving red Digamma, barrier breaks, and focused damage. Before committing, make sure you can complete the follow-up attacks that turn. This is a separate approach from retreating with the residents; do not combine them into one fixed sequence.
Resident count affects defeat and bonus rewards: even if you aim to kill the boss, do not let a third resident fall. Watch the count especially for bonuses. Base rewards are Electron Agitator ×1, 20,000G, and 150 Renown. Escaping with 5 adds Spellshard and Dew of Peace; 4 adds Spellshard; 3 adds no bonus.
Recruitment: Dietrich and Leda can satisfy one  Sha Lan prerequisite.
 Anatolia is tied to joining in Part 3.
7. Dietrich’s Paralogue: Sealed-Off Past
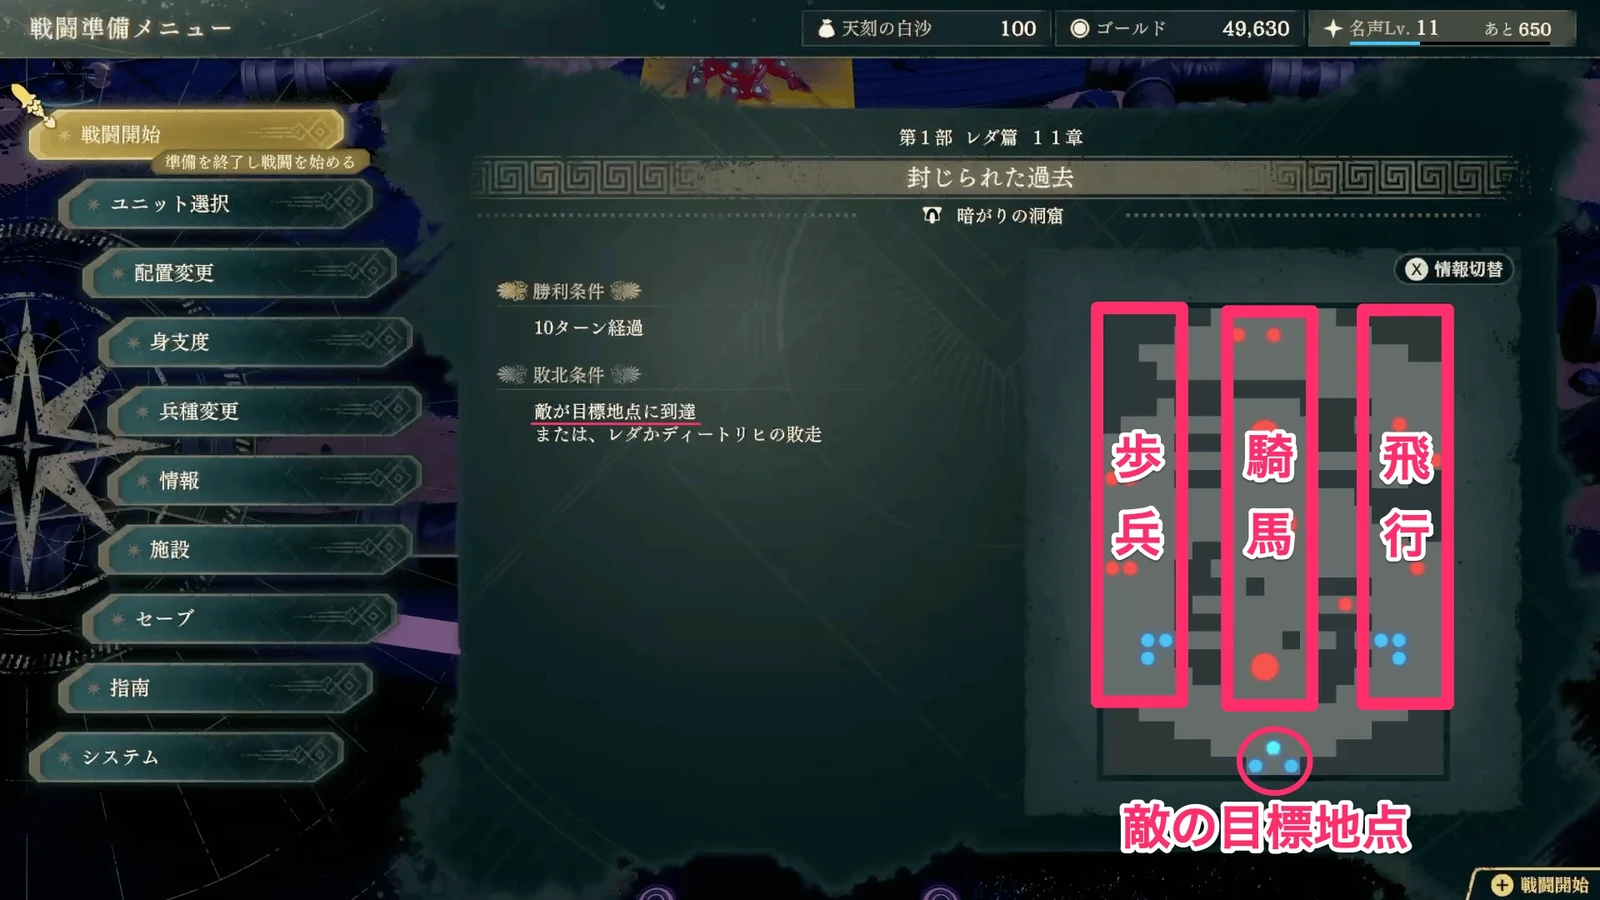
Victory: survive 10 turns. Defeat: an enemy reaches the destination, or the current protagonist/Dietrich falls. This is a defense objective, not a boss chase. Dietrich's Paralogue: Sealed-Off Past
| Route | Acceptance window | Battle deadline |
|---|---|---|
| Cai, Dietrich | Unavailable | — |
| Theodora | Chapter 12, 10/16–10/21 | 10/24 |
| Leda | Chapter 11, 10/16–10/29 | 11/1 |
Acceptance and destination: find Fabio in the plaza outside Dagsion’s Grand Arena. The battle is in Shadow Cave. Despite its title, do not wait for this entrance on Dietrich’s own route.
Leave travel time and defend three lanes
Leda can finish the escort around 10/5, accept the other three on 10/18, complete what is immediately available, and leave the forced-date battle until last.
Set up three defensive lines, then concentrate on the large central enemies.
| Enemy approach | Enemies | First assignment |
|---|---|---|
| Left | Infantry; listed melee enemies have 1-space attack range | Magic, bows, or ranged lances attacking from 2 spaces |
| Center | Cavalry, plus 3 large central enemies | Bring lances and main attackers able to focus the large enemies |
| Right | Fliers | Keep archers on the approach instead of sending all to the middle |
Hold all three lanes while focusing the 3 large central enemies. They do not respawn. After clearing them, spread back across the lanes, preserving HP and weapon durability for the full 10 turns. Soldiers continue spawning, so do not abandon defense for a rout.
The boss is Titanus. Inference: each turn, stop enemies who can reach the destination before calculating damage against large enemies. Keep healers within support range of Dietrich.
Hold for 10 turns rather than chasing the boss: moving everyone toward a large boss may let an ordinary enemy reach the destination first. 10 turns is the victory timer, not a deadline to kill Titanus.
Rewards and recruitment: Salamander ×1, 20,000G, and 150 Renown. Only Leda can use this prerequisite to recruit  Fabio. Theodora can fight the paralogue but cannot recruit him. Fabio also requires his original team’s elimination and negotiation; see recruiting difficult characters. Receiving rewards does not complete recruitment.
8. Cai’s Paralogue: Great Escape
Victory: defeat Centurio. Defeat: an enemy reaches the destination, or the current protagonist/Cai falls. Pursuers have high mobility, so reach the exit approach first. Cai's Paralogue: Great Escape
| Route | Acceptance window | Battle schedule |
|---|---|---|
| Cai | Unavailable | — |
| Dietrich | Chapter 11, 10/16–10/22 | Forced battle recorded as 10/22 or 10/23; accept by 10/21 for a buffer |
| Theodora | Chapter 12, 10/16–10/22 | As above |
| Leda | Chapter 11, 10/16–10/22 | As above |
Where to accept: find Cai in Dagsion city. Accept without rushing to advance to battle day. Orchel’s paralogue in the same period needs outdoor travel; see the next battle for ordering.
Protect the escapees and intercept pursuers first
Leave Cai's quest until after Orchel's. Cai and Tialla break their father out of prison, but  Centurio blocks their escape. Stop pursuers from catching the escapees. You must defeat Centurio to win; an enemy reaching the destination causes defeat. Reaching the exit with your own units does not end the battle: Centurio still has to fall.
Enemies are highly mobile. Use movement-hindering incense burners to slow them while you reach the exit first. Fewer enemies come from the right, where you can defend the bridge.
Suggested roles: do not send every attacker after Centurio immediately. Leave bridge defenders and blockers on the right, send mobile units to seal pursuers’ approaches near the destination, then seek a boss kill. Each turn, check whether any enemy can reach the target before calculating damage. Read incense burners’ actual range and remaining effect; their name does not imply map-wide control.
Keep guarding the exit while pursuers remain: moving your guard after defeating one group may let the next mobile enemy trigger defeat. Do not expose Cai while chasing the boss.
Rewards and recruitment: Gem Box ×1, 20,000G, and 150 Renown. All three available routes satisfy one  Tialla prerequisite. She still needs route-specific Renown, Support with the current protagonist, and negotiation. Theodora has especially little time afterward, so recheck her recruitment entrance promptly.
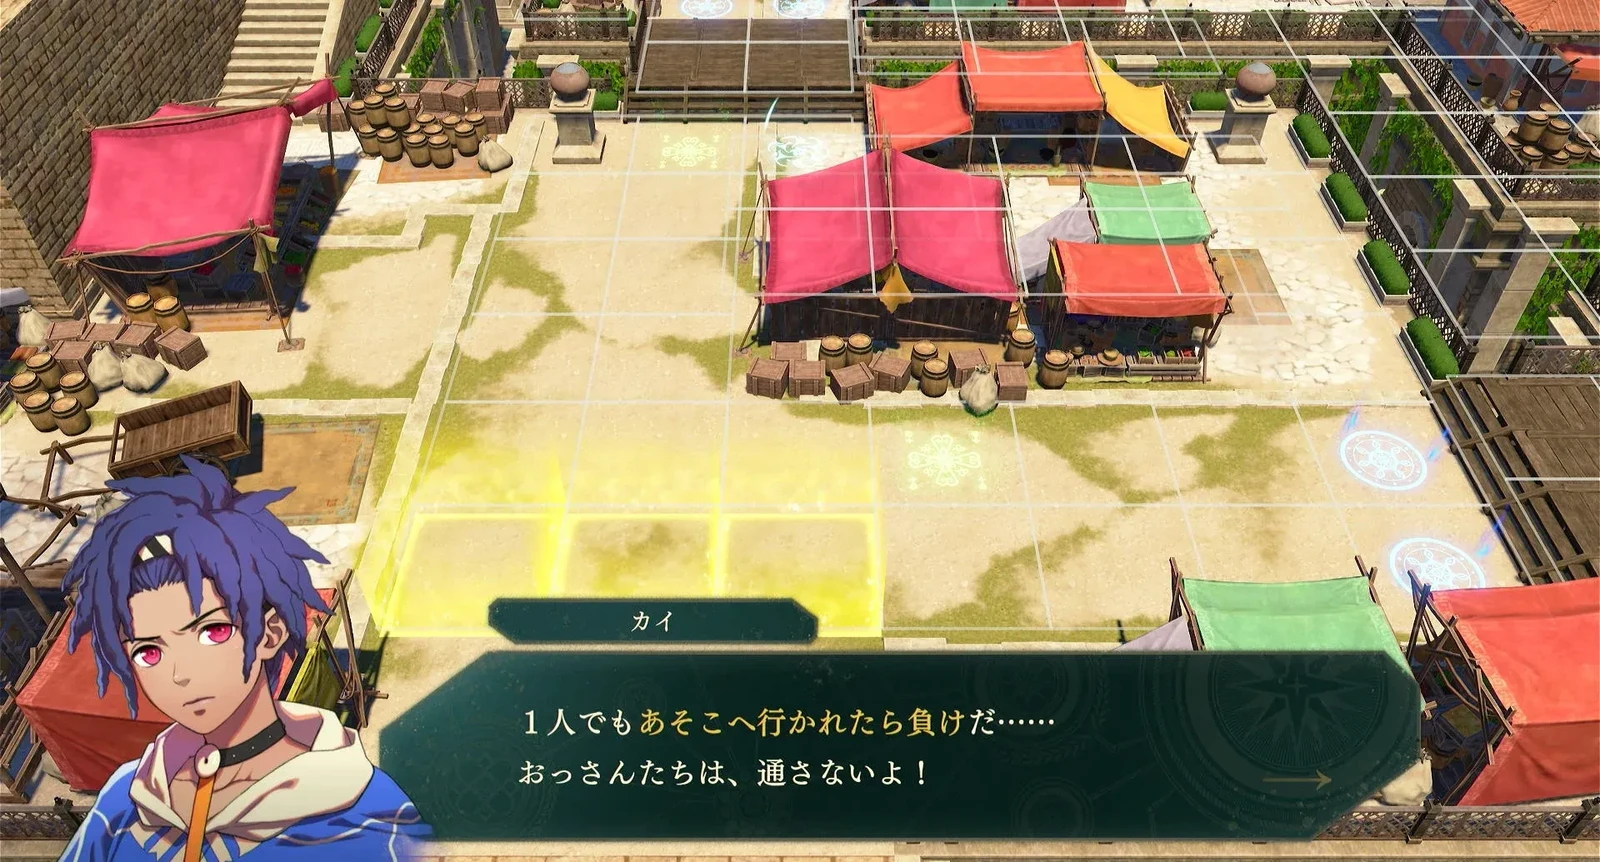
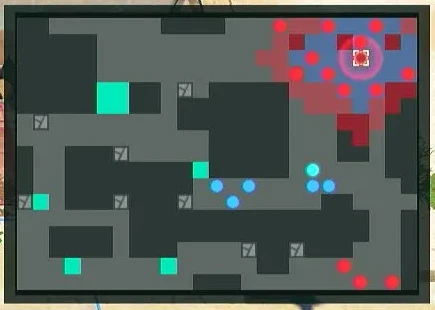
Image sources:
9. Orchel’s Paralogue: Orchel’s Regret
Victory: rout the enemy. Defeat: the current protagonist or Orchel falls. Bring anti-air tools and synchronize the artillery devices. Orchel's Paralogue: Orchel's Regret
| Route | Acceptance window | Battle deadline |
|---|---|---|
| Cai | Chapter 11, 10/18–10/20 | 10/21 |
| Dietrich | Chapter 11, 10/18–10/25 | 10/27 |
| Theodora | Chapter 12, 10/18–10/22 | 10/24 |
| Leda | Chapter 11, 10/18–10/25 | 10/27 |
Acceptance and destination: find Orchel on the lower approach outside Credna's branch temple in Dagsion, then travel to Fort Galcar. Cai has the shortest window, so leave as soon as you accept. The four routes have different windows.
Secure the schedule before building an anti-air team
When Cai's and Orchel's paralogues are available together:
- 1Leave town and complete Orchel's paralogue first:defeat every enemy in this battle.
- 2Return to Cai:advance the date through his dialogue.
One example leaves early on 10/18, travels for 3 turns, arrives that evening, and returns after finishing on 10/19, still in time for Cai's paralogue.
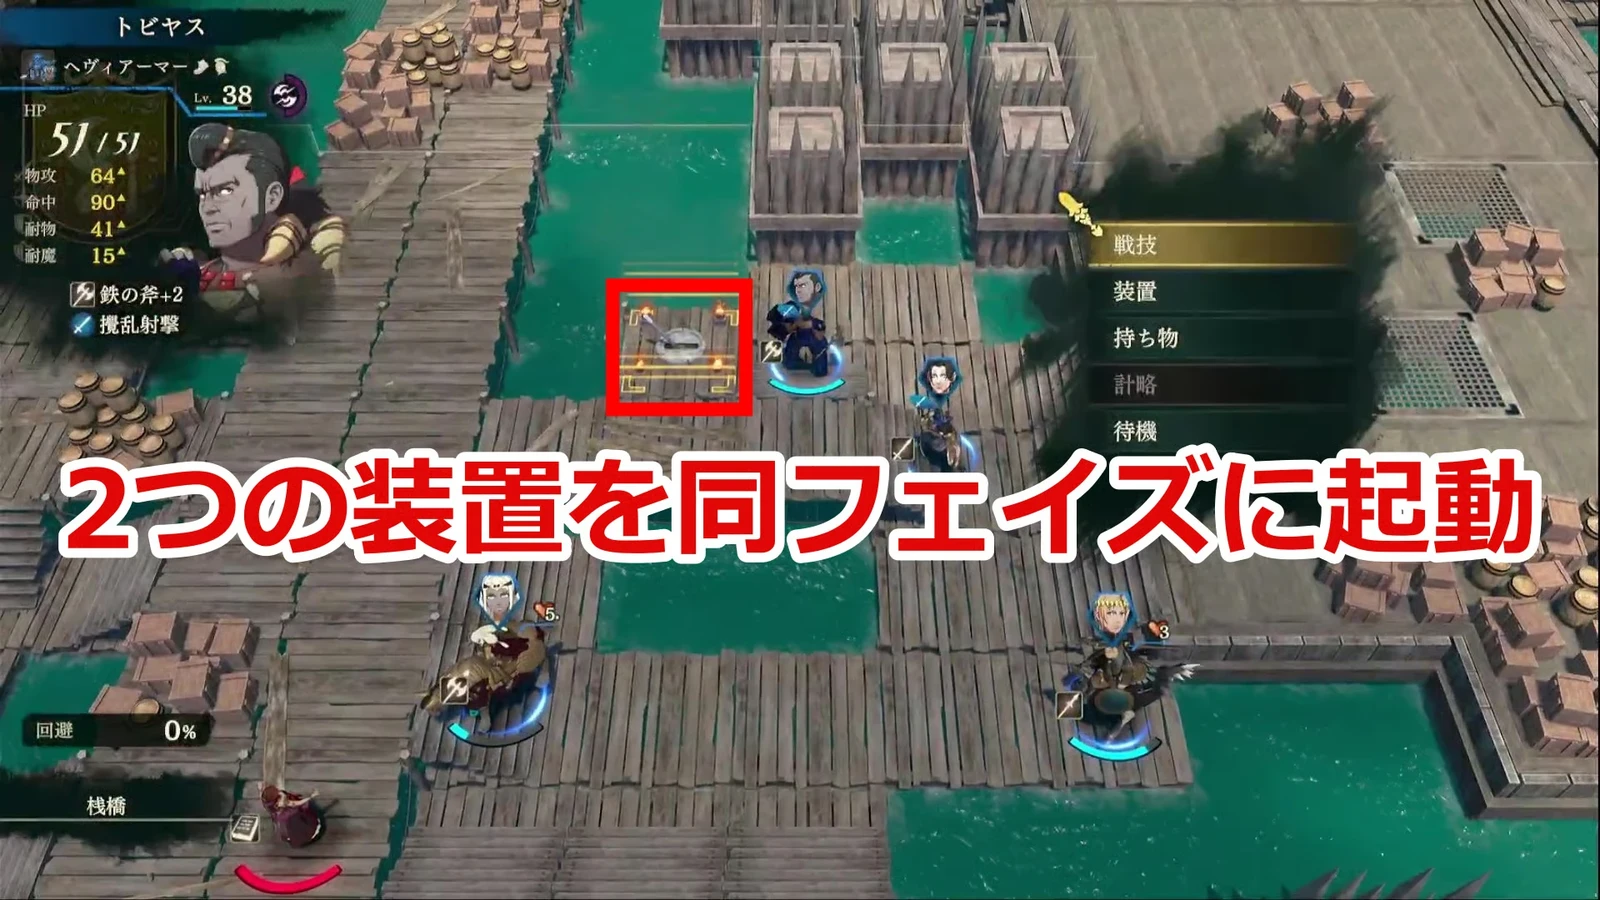
The boss is Jakam. Many enemies fly, so archers are useful. Operate both artillery devices in the same turn. The chests contain Pure Water and can be skipped if needed.
General clearing roles: keep archers within mutual support range against fliers instead of splitting off for chests at the start. Send one unit toward each device, then operate both on the same turn when both units are ready. Protect Orchel and the protagonist as you advance, and regroup after clearing one direction to handle the remaining enemies. Check danger ranges on the field first.
Another option on Normal: use a developed Kalla blessing to clear faster, cover the map with mobile and flying units, bring ranged healing, and activate the blessing at the start. This suits a prepared Normal replay. On your first Hard run, advance in stages. See dodge-tank tactics for blessings and Avoid setups.
Operate both devices in one turn: avoid reaching them separately and activating on different turns, or wandering between devices and chests while forgetting the rout objective. Even with a mobile plan, explicitly check surviving enemies instead of stopping after the boss.
Rewards and recruitment: Healing Staff ×1, 20,000G, and 150 Renown. All four routes satisfy one  Diego condition.
 Orchel is tied to Part 3; one record places formal recruitment in Section 2, while another lists conditional participation in Section 1. The distinction between participation and permanent joining remains unresolved.
Check recruitment and the next date after each paralogue
After receiving paralogue rewards, check the linked recruits before skipping more days. See recruiting difficult characters for Renown, Support, negotiation, and team-elimination requirements, and all-character recruitment planning for route allocation. Clearing a paralogue on another route does not let you skip prerequisites on your current route. General carryover rules are in the paralogue list.