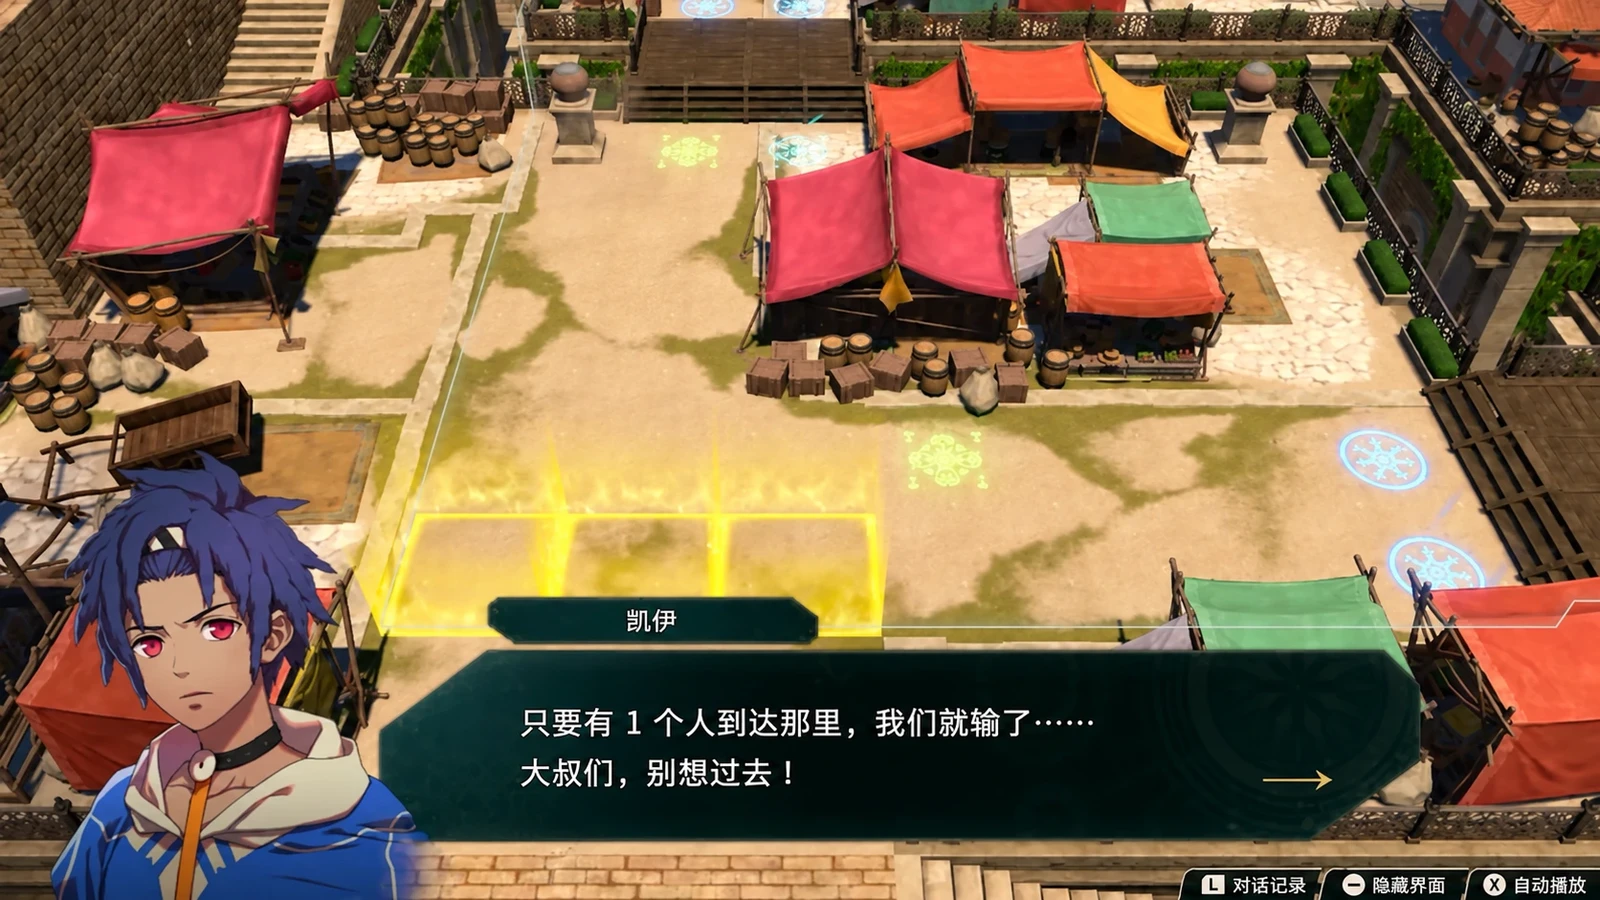
Leda Part 1 walkthrough: fund your team through performances and win with songs and extra actionsMinor spoilers
Build around your starting allies, finish performances, and unlock Dancer first. Train a second frontliner for Chapter 9, save the devices in Chapter 10, and push down one side in Chapter 11.

Earn money and Renown through tours first. Unlock Dancer in Chapter 9 and train a frontline substitute for Buccar when he temporarily turns hostile.
Singing costs HP; Dance requires its exclusive request unlock. Early on, Buccar holds the line, Sirocco casts, and Leda supports with bows and songs. Plan these as separate stages. Tours also unlock secret exploration spots. Finish performances and timed requests along your route, then gather ingredients needed for drinks and the trading company.
| Progress | What to do first | Key battle tactic |
|---|---|---|
| Chapters 1–3 | Open the Mini Bow chest in Chapter 2 before defeating the boss | In Chapter 3, flank the outer flames and finish 10 turns with more blue flames than red |
| Chapters 4–6 | Perform, recruit  Catania, train and take exams, and check Kalla’s event | Remove Pure Water in Chapter 5; defeat 3 Priests to break the barrier in Chapter 6 |
| Chapters 7–8 | Turn in expiring quests during the 120 turns; avoid long trips in the following 36 turns | Each onager has 3 shots; take the Cleansing Blade and defeat  Hong Hua first in Chapter 8 |
| Chapter 9 | Finish the Dancer and accessory quests during 7/12–10/15; train a replacement for  Buccar | Allegiances change at the start; prepare for 6 third-party reinforcements later |
| Chapters 10–11 | Finish  Anatolia’s paralogue first; complete outdoor paralogues before speaking to  Cai | Each of the 4 devices protects you for one turn; advance down one side against the netherfiends |
| Chapter 12 | Finish recruitment, shopping, and support conversations in the last 80 turns | Clear both flanks’ artillery and chests first; prepare for fire blocking the route on turn 7 |
Give your archer, healer, and Leda separate jobs
 Leda,
 Buccar,
 Sirocco, and
 Mu are your starting four.
 Olympia joins next, followed by
 Catania. Build Buccar as an armored physical tank, let Sirocco handle magic, and use Olympia for both magic and healing. Keep Leda where she can safely shoot or sing. Buccar moves slowly, so deploy him toward the front. Leda needs to keep up to support the team, but do not send her into overlapping enemy ranges just to cover everyone with one song.
Once Leda is busy dancing later on, use someone else as your regular archer.  Kiroc fills this role well; recruitment requires Renown 4, Bond Level 1, and 3 bottles of
 Pure Water. You can use another archer if you do not recruit him. Avoid forcing Leda to choose between firing an arrow and giving your main attacker another action every turn.
After unlocking Dancer, let your main attackers act before deciding whom Leda should refresh. Give magic users the extra action against armored enemies, or give it to someone who can reach and kill a dangerous enemy mage. For area buffs, gather the team and sing first, then spread out to attack. Give healers and frontliners their own healing items. Bring  Cleansing Blade, anti-armor weapons, and ranged options, and switch to match the enemies ahead.
Chapter 1: The Vengeful Dancer
Clear nearby enemies with all four units, and keep routing the enemy even if the boss falls first. Leda and Buccar handle the left while Sirocco and Mu take the right. Use their different attack ranges to engage together. Keep Buccar and Mu in front, with Leda’s bow and Sirocco’s magic supporting from behind. Do not scatter all four beyond each other’s reach.
Leda’s songs strengthen allies but consume her HP, and you lose if she falls. Have Sirocco heal her with support magic after she sings, then check the remaining enemies’ attack ranges. Victory requires defeating every enemy. Killing the boss does not stop nearby soldiers from acting, so keep protecting Leda if her HP is low.
Chapter 2: Battle at Coris Mine
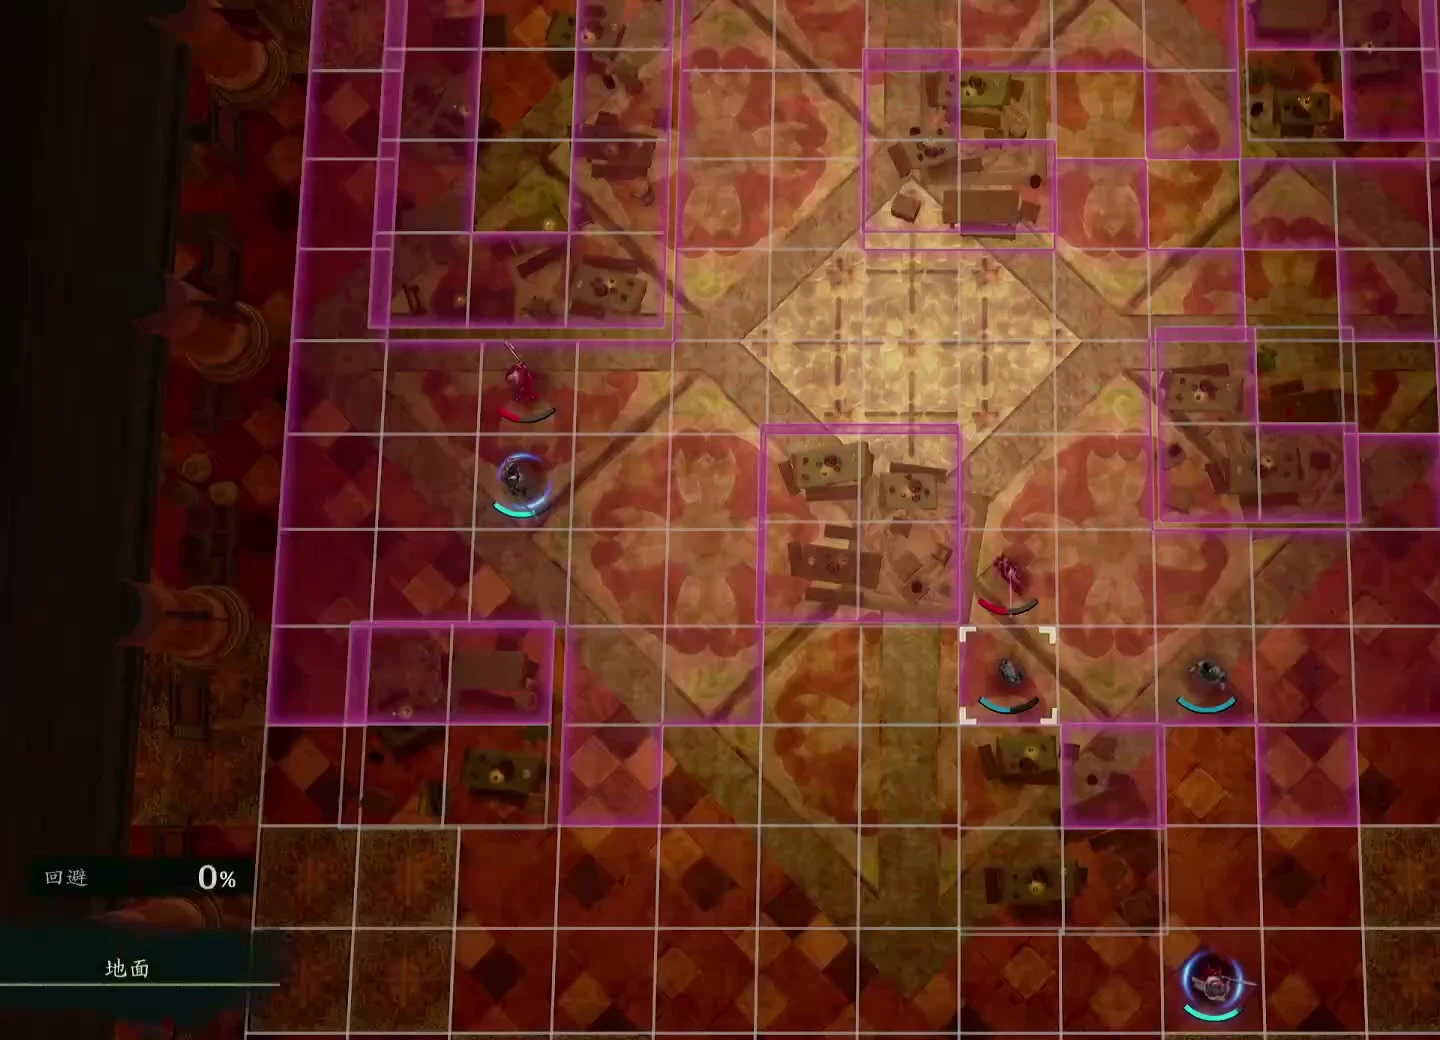
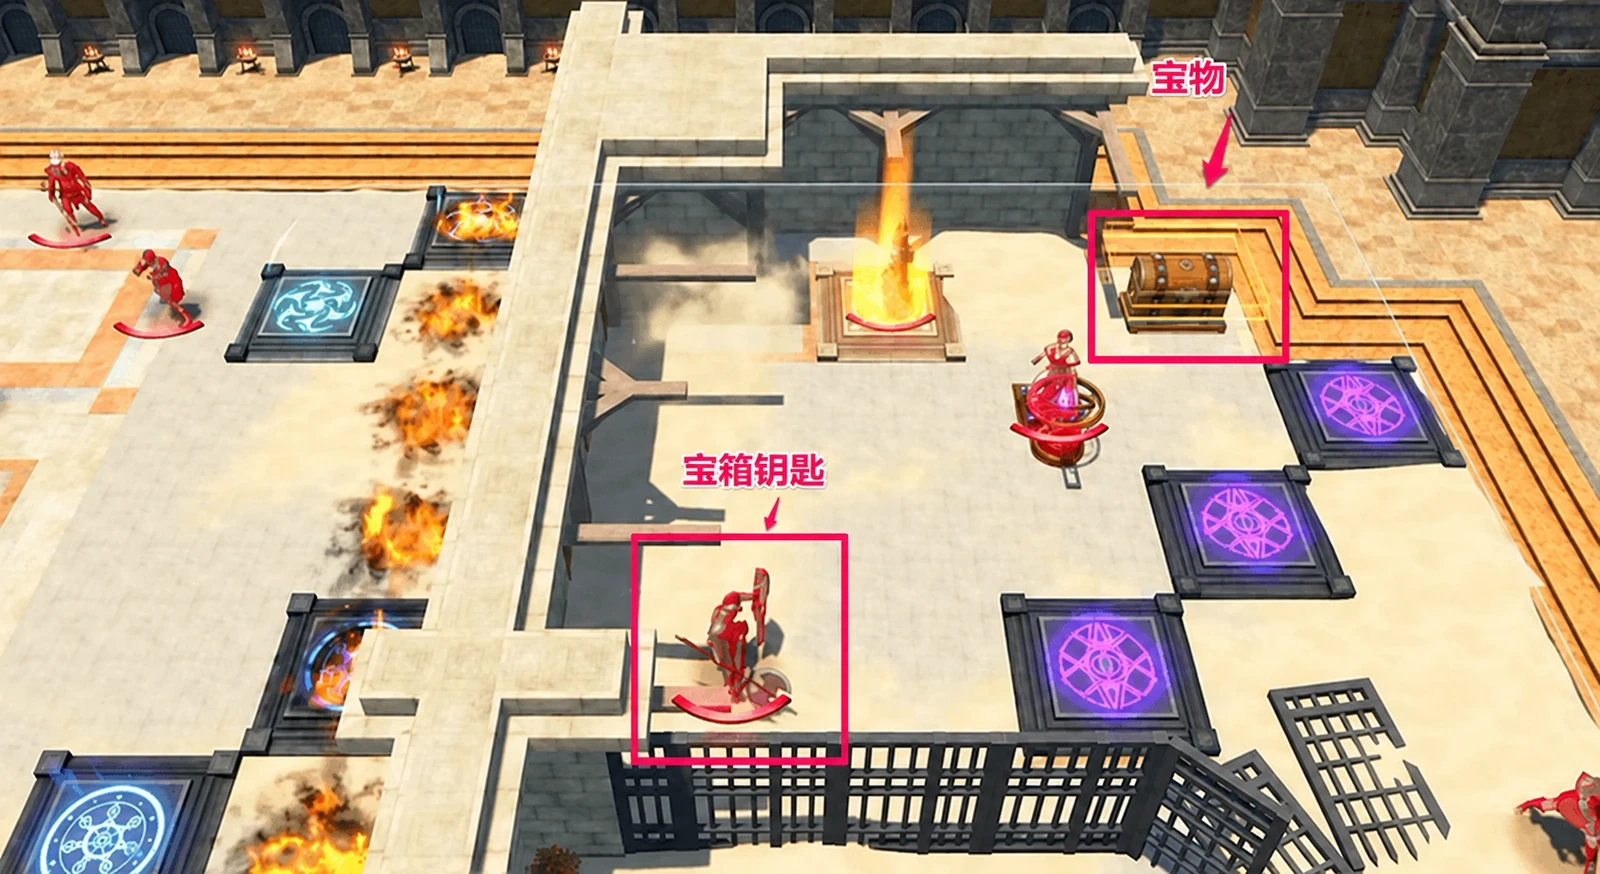
Take the key, break the fence on the right, and open the Mini Bow chest before defeating the mine boss. Coris Mine begins with a dungeon and Clashes. Break crates and open chests along the way. The dungeon’s 3 chests contain  Vulnerary,
 Archer's Ring, and
 Large Coin. Search everything before examining the target gold ore, which triggers the main battle.
The main battlefield’s narrow paths allow units through one at a time. Send Buccar and Mu ahead, supported by Leda’s bow and Sirocco’s magic. During deployment, move Sirocco to the right so he can more easily attack the nearby starting enemies. The Hunter carrying the key is near the fence. Defeat him, break the obstacle on the right, go around the boss, and open the chest farther in for  Mini Bow.
Defeating the boss also gives you  Lakshashi's Iron Fan. The Mini Bow covers your one-space blind spot and remains useful when Leda needs to attack up close later. Killing the boss ends the battle immediately, so open the chest before finishing him.
Chapter 3: The Rose of Caelus
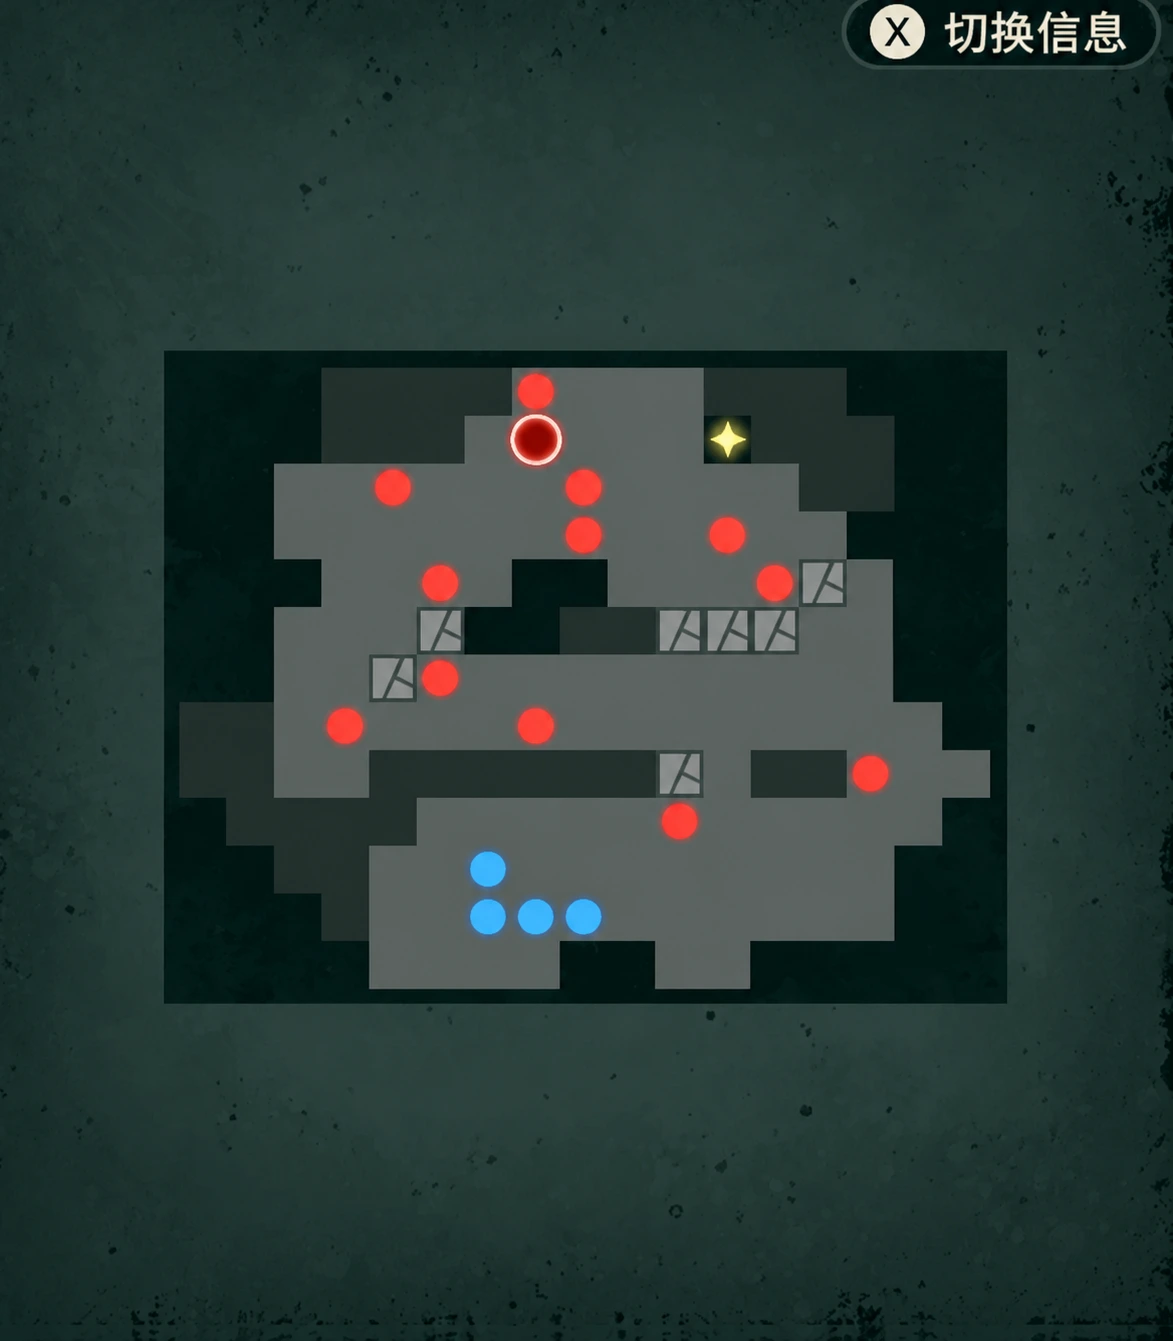
This is a color-flipping contest: finish 10 turns with more blue flames than red. Prioritize the outer flames. Flank a line of flames from both ends to turn the whole line blue. Leda’s Blaze Arts can also change several flames at once. Position her before using them instead of changing every flame individually.
Split your four units into an enemy suppression pair and a flame-flipping pair. Give Leda the Mini Bow from the Chapter 2 chest and have her pursue Olympia, keeping Olympia near her respawn point whenever possible. Olympia can flip several flames at once; left unchecked, she can turn a fresh stretch of blue flames red. Have the other attacker handle the Priest near your team, while the remaining two units circle the outer edges on opposite sides. Do not crowd all four into the middle.
Defeated enemies return to their starting point and lose one turn. Knock them out to deny them a chance to flip colors. On turn 5, 3 flames near the center turn red, so have your flame-flipping units ready to reclaim them. Sirocco cannot keep healing Mu while focusing on damage. Give each frontline unit Vulnerary so they can heal themselves at low HP without abandoning their suppression role to find a healer.
On turn 10, still guard against Olympia’s last color flip. A blue lead at the end of your own actions is not enough. Keep suppressing her and hold both ends of the outer lines until the full turn resolves. Use Blaze Arts where they can flip several flames, rather than wasting them on one isolated flame. You do not have a Dancer yet, so extra actions are not part of this chapter’s solution.
Olympia joins after the contest and takes on magic and healing duties. Plan her training around her learnable spells so Sirocco no longer has to cover every attack and heal alone.
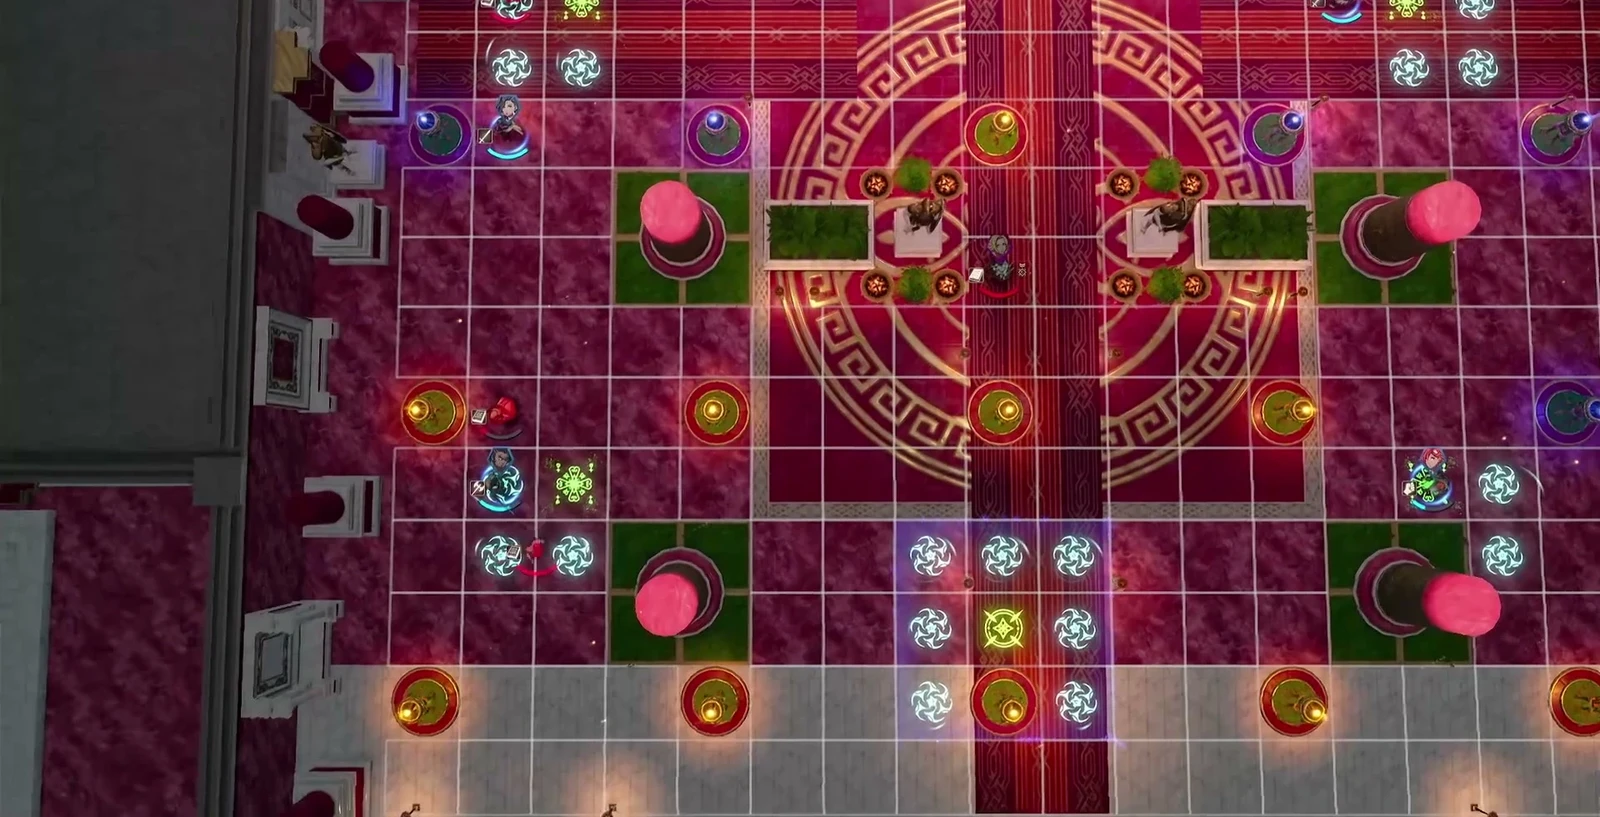
Chapter 4: The Indelible Past
Use the 58 turns to perform and raise Renown, then defeat the boss in the main battle and escort Leda to safety. After the tavern tutorial, perform at Yaaman Village and explore the newly revealed secret site. Performances provide both Renown and money. Once your Renown is high enough, return to the tavern to check new songs, recruits, and feature unlocks. This gets you established more easily than roaming between dungeons from the start.
The tavern quest “Simple Drink Recipes” requires Renown 3, 1  Sweet Leaves, and completion of the Yaaman Village performance. If you cannot find Sweet Leaves yet, continue to Chapter 5. Performances at Callianeira Port and Aguino Village each give you 1. The Callianeira Port performance also unlocks Traveler’s Hill, so there is no need to search the same roads repeatedly in Chapter 4.
Catania requires Renown 2 and Bond Level 1, with no extra negotiation payment or items. Give gifts, negotiate, and confirm her recruitment to form a six-person team. Your first five already cover frontline, physical damage, magic, and healing; Catania adds mobility. See Catania for her training options.
In the main battle, put melee units in front and ranged units behind. Use woods to improve Avoid, have Sirocco and Olympia handle armored enemies with magic, then focus on the boss. Once an event reveals the yellow escape tile in the northeast, move Leda toward it while allies clear the route and cover her. Stop spending every action on the boss, and keep your escorts from occupying the exit first. The objective has shifted from attacking to escaping.
Chapter 5: Women at Battle
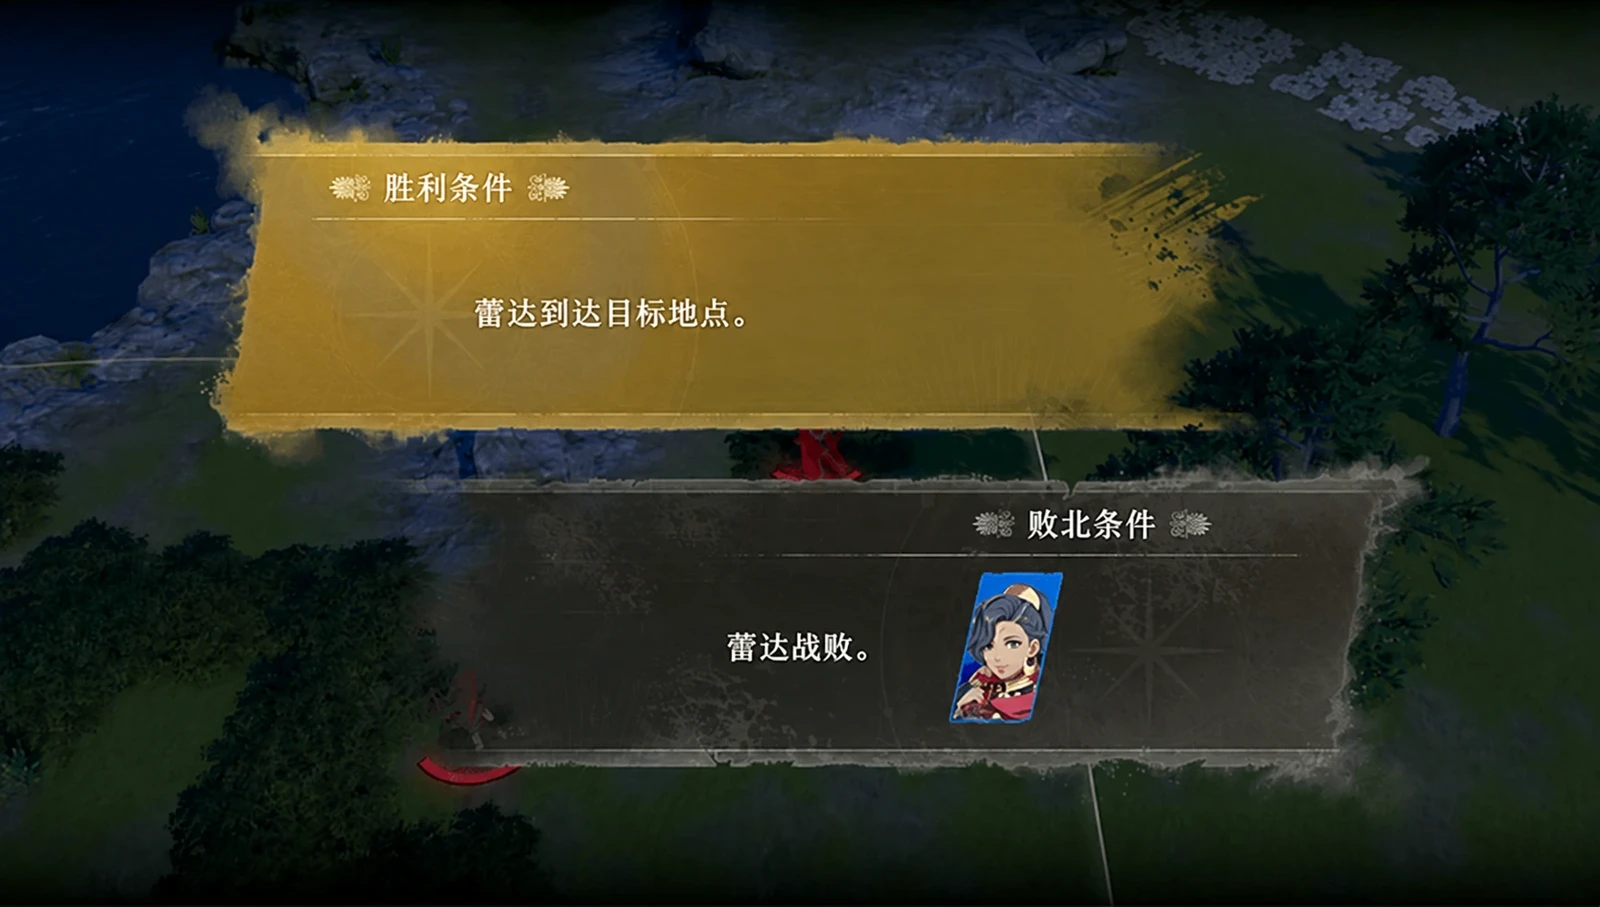
Activate the yellow devices to remove Pure Water from armored enemies before attacking with mages. As you advance past the fences, enemy armored units use Pure Water to raise Resistance. Each device removes the effect from only its assigned enemies. Check which targets it affects before having Sirocco and Olympia cast. Do not spend all your spell uses on enemies whose Resistance buffs remain active.
You lose if Leda,  Orchel, or
 Anatolia falls. Keep healing available for all three leaders instead of charging with your main team while a guest takes damage on the other side. Pick up the
 Quality Weapon Crate dropped on the field as you pass, then defeat Jasmine to finish. You still have no Dancer; break through with better attack positions and devices that weaken enemies.
During the 120 free-action turns, complete the training and certification exam tutorials first. Leda can become a  Hunter. Specialty classes unlock at Renown 4, so allocate training toward your intended class requirements. Once free action begins, speak to Kalla's Blessing at Kalla’s branch temple in the upper Imperial Capital for a hidden event. From 4/7, accept the Callianeira Port performance at the lower tavern and finish it before 6/28 for 5000G, 200 Renown, 1 Sweet Leaves, and access to Traveler’s Hill. Return to give the Sweet Leaves to the owner and continue toward unlocking the Song of Madness and the drinks attendant. To recruit
 Jasmine as a future frontliner, you need Renown 4, Bond Level 2, and 500G.
Chapter 6: The Soaring Maiden
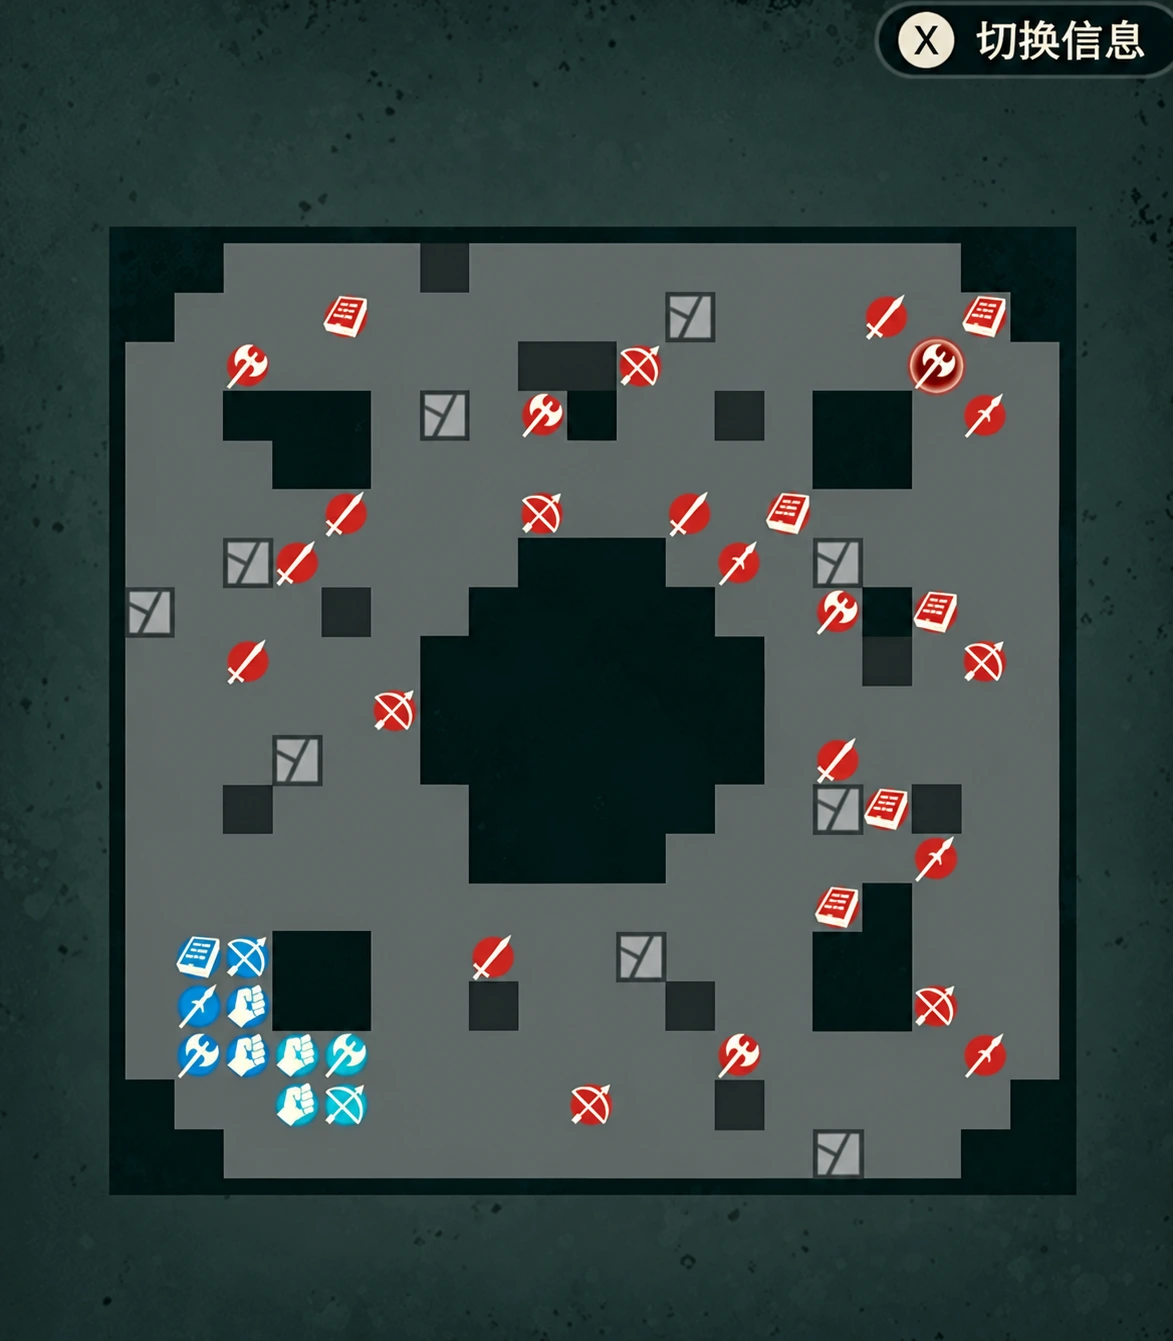
Defeat the 3 Priests first, then attack Alexandra after the barrier disappears. Attacking the boss while the barrier remains has no effect. Move ranged allies into position to hit the Priests while your frontliners clear a path. Do not waste your main attackers’ actions on the boss. After  Alexandra loses her first HP bar, she dismounts and calls reinforcements. Save healing and damage for phase two.
The guest queen’s story-triggered Blaze Burst reduces her maximum HP. Clear Priests while checking her current HP, and switch the unit taking enemy contact when needed. Lure enemies back into an area where allies can heal each other rather than rushing north on every lane.
Use the 76 turns to unlock the Vandal Trading Company and forge first. Repair your regular weapons and stock personal healing items. Find Olympia for her event at the start of the chapter, speak to Alexandra in the city, then visit the slums. Turn in old quests and performances due on 5/28 before setting out on longer expeditions.

Chapter 7: Rose of Retribution
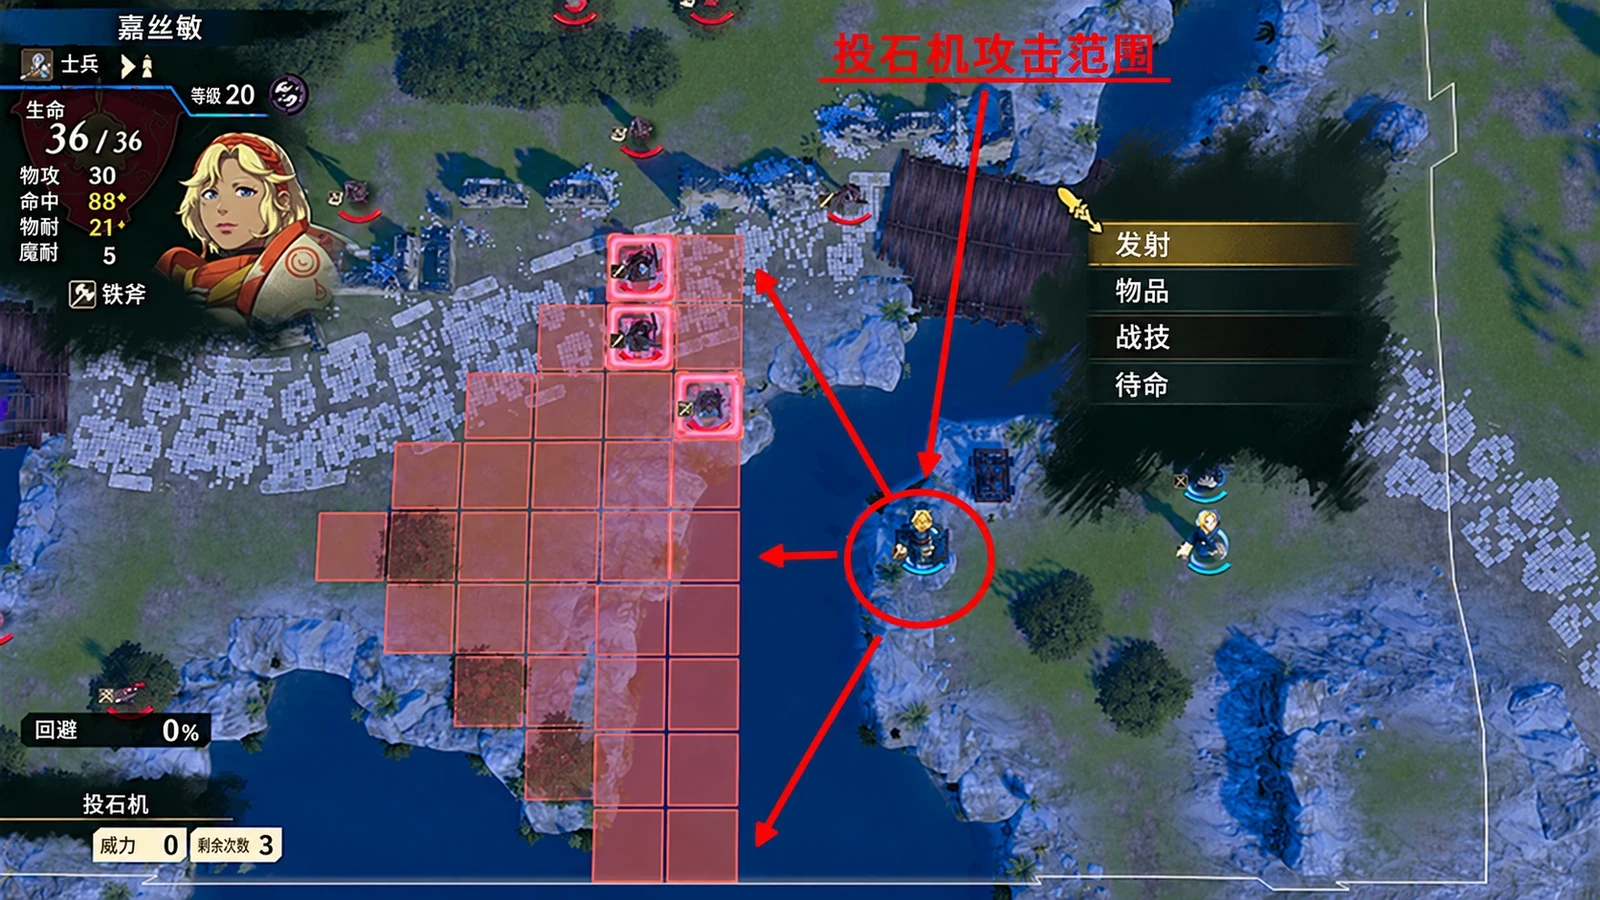
Do not pack the narrow bridge with melee units. Let your backline use onagers to clear the bridgehead. The nearby starting onagers can hit the bridge and opposite bank, with 3 shots each. The bridge limits melee movement, but backline units can still deal damage from the onagers. Once their ammunition runs out, move the operators forward with the team.
Enemies summon 7 risen in 3 waves, then stop. Clear the summoned soldiers near the center first and wait for reinforcements to end before pushing forward. This prevents your whole team from crossing the bridge and being surrounded. Buccar handles the front while Leda supports with her bow and currently learned songs. She still cannot dance.
During the 120 turns, accept Sirocco’s investigation quest first and turn in performances and side quests due on 6/28. Complete the tavern product chain in order: the second step requires Renown 6 and 1  Pepper Leaves; the third requires Renown 8 and 1
 Bitter Leaves. If you lack materials, check regional performance rewards before planning gathering trips. Do not spend an entire chapter wandering aimlessly for one new quest.
Chapter 8: Shape of the Conspiracy
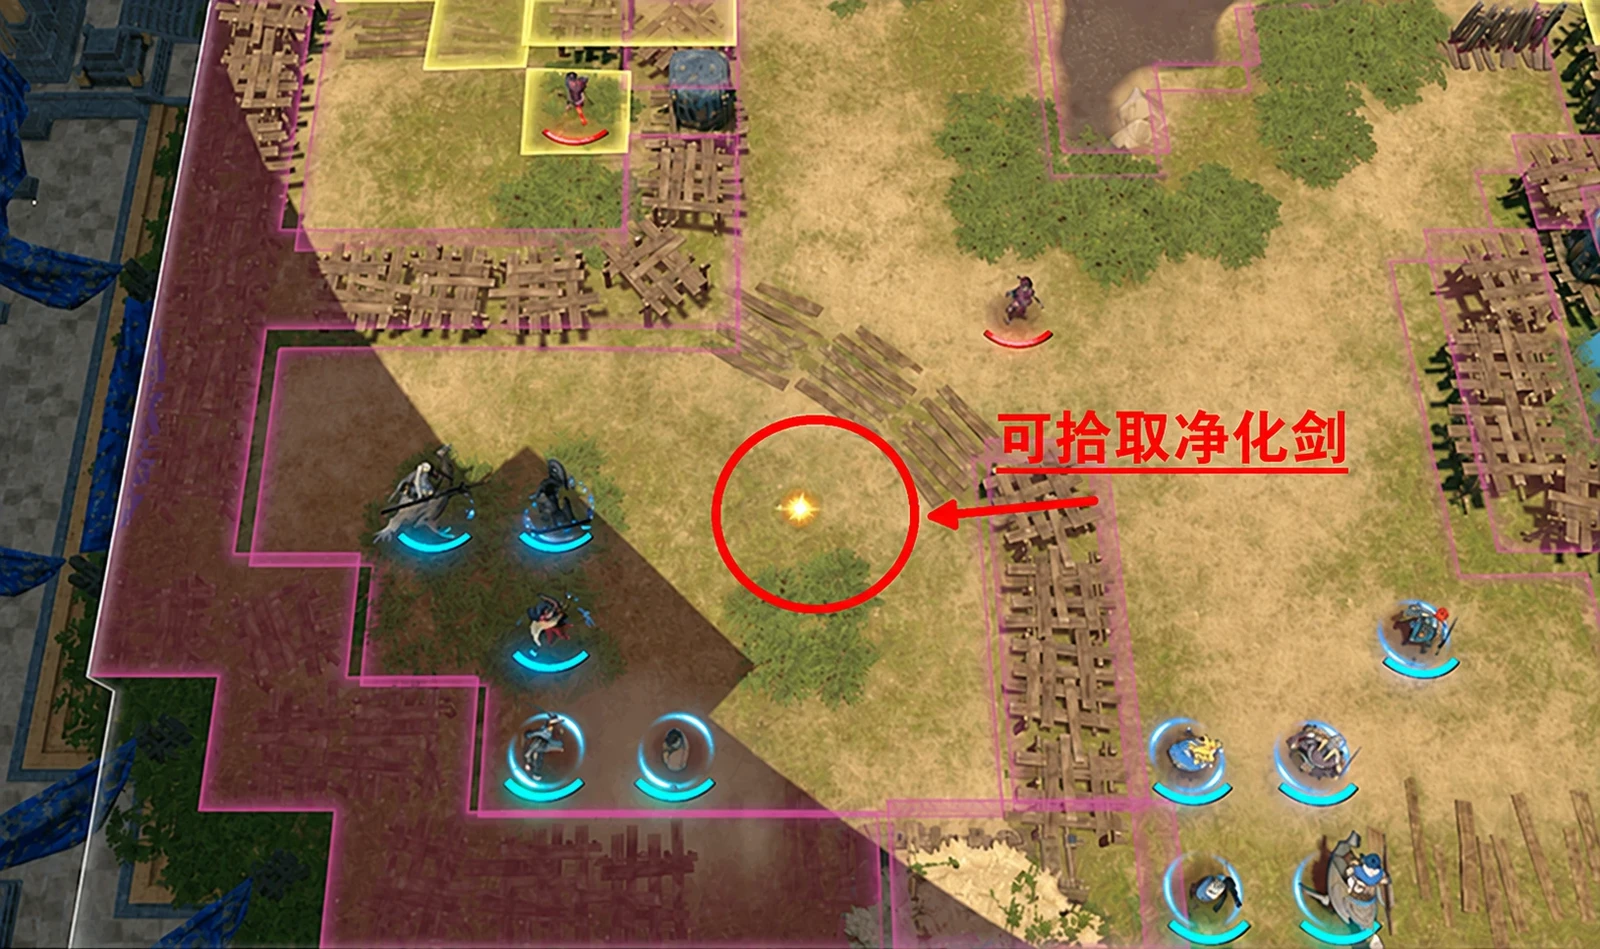
On turn 1, pick up the Cleansing Blade near Talimun, then head northwest to defeat Hong Hua.  Hong Hua maintains the wall blocking the main enemy force and summons netherfiends in the center. Move north from your southwestern deployment point to deal with her before approaching
 Inyoni. You can deploy 7 units. There are many artillery weapons and archers, so dismount your fliers before crossing the central crossfire.
Cleansing Blade is useful against Netherworld Blessings. Have a melee unit collect it and clear netherfiends. Leda’s Song of Abjuring also supports allies without effective weapons. Inyoni prepares a long-range Deadeye every 3 turns. When the warning appears, heal fragile units and guests first;  Talimun especially needs healing after his debuff drains HP.
After Hong Hua falls, take the chance to advance north. Inyoni powers up and fully heals when he loses an HP reserve. Gather melee attackers and healing in advance, then finish the remaining HP in the same turn. Avoid using everyone’s actions just to remove his first bar.
You have only 36 free-action turns and no new regional performances. Handle existing quests and weekly activities first, fitting training and supplies into your return route. From Chapter 9, recruiting Inyoni requires Renown 7, Bond Level 1, and 3000G.
Chapter 9: Discordance
Use the 204 turns for Dancer, the accessory quest, and a frontline substitute before spending spare time leveling. Buccar temporarily joins the enemy when battle starts; teams relying entirely on him must prepare someone else.
Jasmine needs Renown 4, Support 2, and 500G and can fill an armored role.  Dadao needs Renown 5, Support 2, and two Kothar Gar, and can also be trained in armor.
| Quest | Completion | Deadline and rewards |
|---|---|---|
| Great Dancer's Successor | After the opening conversation, accept it in the upper Imperial Capital’s recreation district; obtain 1  Hingosh at Baina Oasis Market and deliver it back in the capital | 7/12–10/15; receive  Dancer's Necklace, then visit the certification examiner to become a  Dancer |
| My Late Sister's Accessory | Accept from  Creek; find the Violet Brooch in Axion Valley and report back to him | 7/12–10/15; 3000G, 100 Renown, and a recruitment prerequisite for the War Arc |
After finishing the accessory quest, defeat Creek in War Arc Chapter 2 so he joins in Chapter 3. Then have him defeat  Nathan, who joins in Chapter 4. Once you have Dancer, use Leda’s extra action on whoever can best resolve the current danger: magic against armor, physical attackers to chase mages.
During free action after 7/12, approach Sirocco on the lower approach in the upper Imperial Capital between , then find him in the northwestern passage to trigger consecutive hidden events. Do not leave town after only checking the daytime main map.
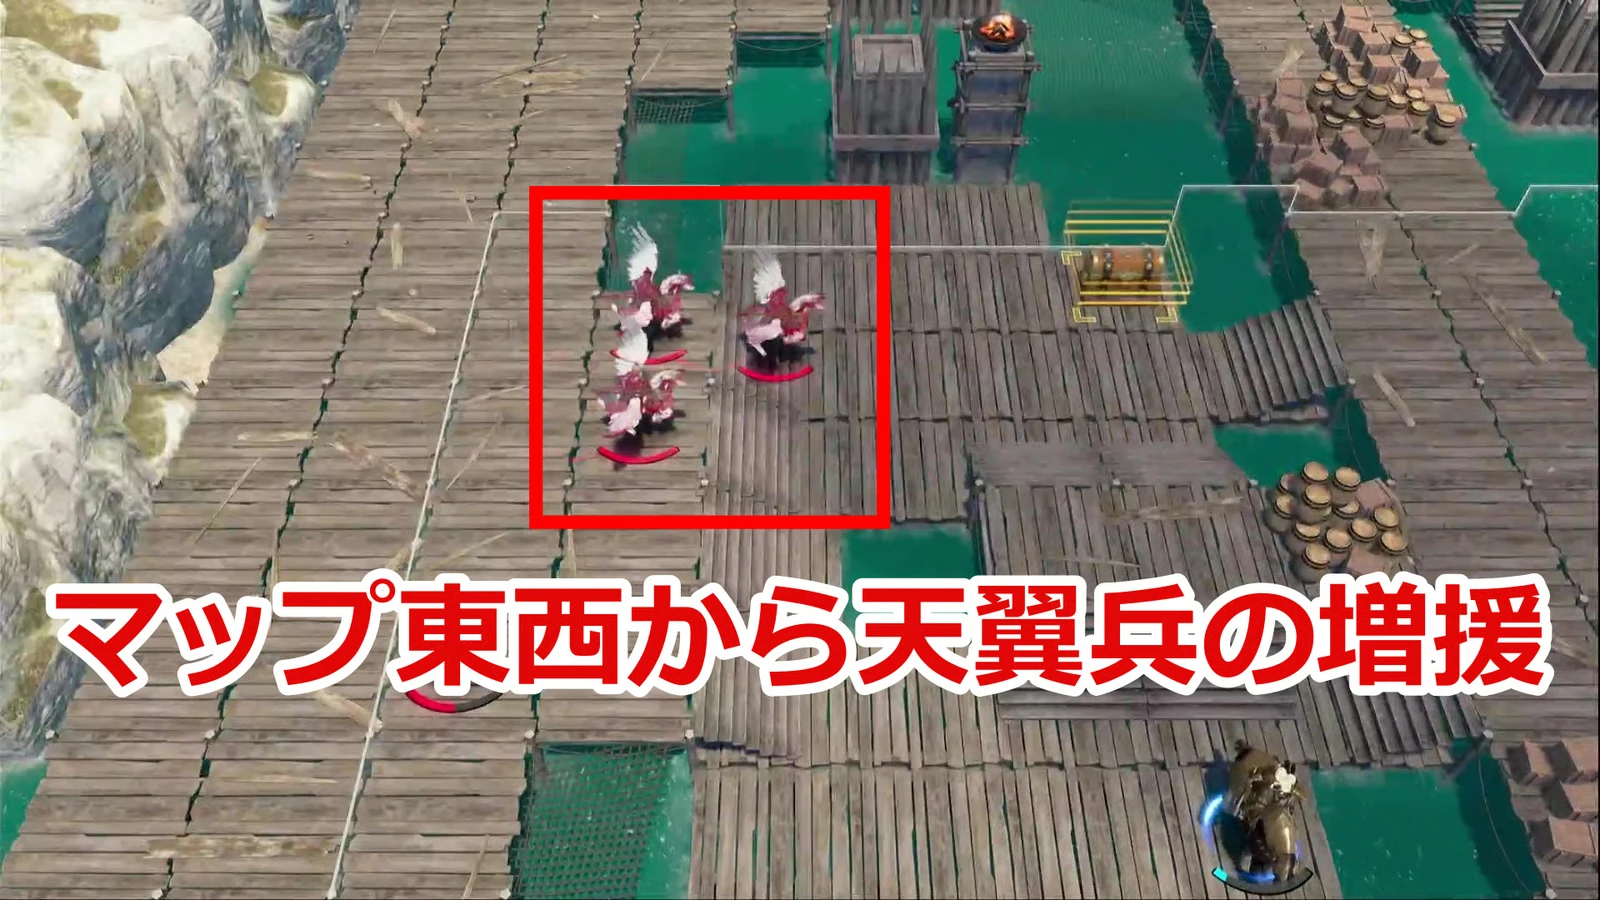
Partway through the main battle, allied beasts switch to a third army, joined by 6 reinforcements. Keep your units within reach of each other. Striking explosives on the map causes area damage and prevents enemies from moving for 1 turn. Use them to stop groups about to reach your backline. Enemies can use them too, so keep fragile units away from explosives. Despite the long free-action period, do not miss the 9/1 deadlines for old quests and performances.
Chapter 10: A Father’s Request and a Daughter’s Wish
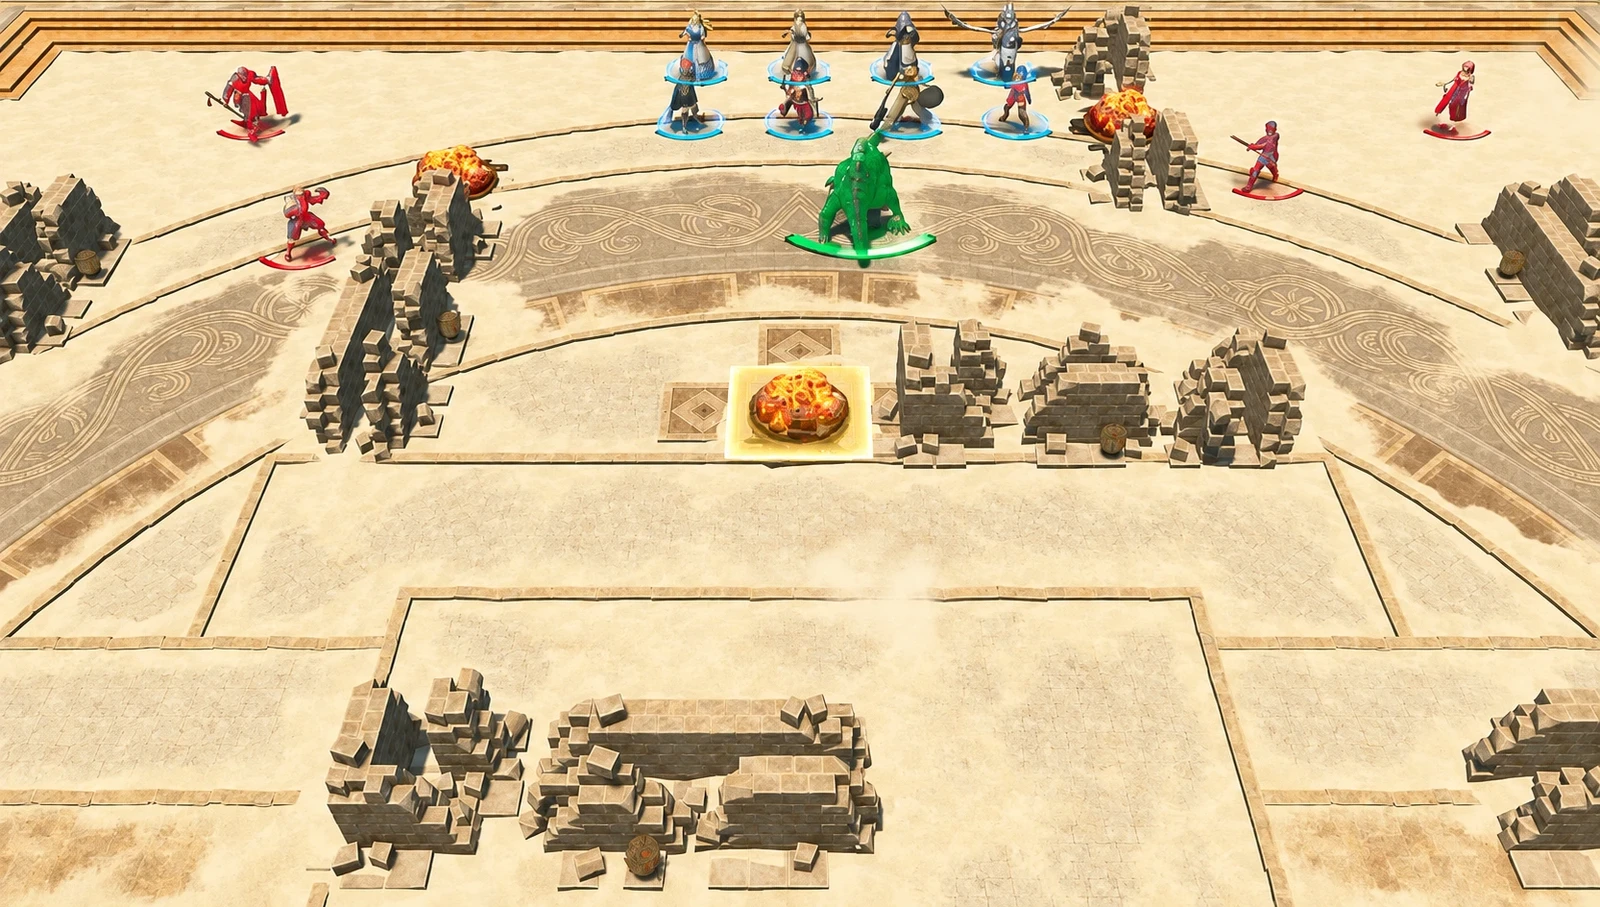
Put tanks and anti-armor damage on the left, and fast enemy clearers who can guard devices on the right. You can deploy 9 units, and walls divide the map. The left faces Tobias and other armored enemies. Bring anti-armor weapons and magic, with Leda providing buffs and healing. The right faces Bonaventure and mixed defenders. Have mobile melee units clear the switches and stay close enough to operate them in time. Keep healing available on both sides.
The four devices on the right can each be used once, protecting the left side for one turn per use.
- 1Use one device for each new warning.A warning appears on player phase before the queen’s major Earthen Throw. Activate one unused device when a new warning appears rather than spending all four at the start.
- 2Clear enemies outside both protective walls.Defeat every enemy outside the walls on both sides to remove the barrier in front of the queen.
- 3Finish after the barrier disappears.Focus magic and anti-armor tools on the final attack.
Prioritize Anatolia's Paralogue: Queen of the Erased within your 68 turns: accept it in the northeastern city during 10/5–10/14 and complete it before 10/17. It is tied to recruiting  Sha Lan. After reaching Renown 8 and Bond Level 3, you must also negotiate, answering the four questions with “Understood,” “Kingdom of Saramis,” “Da Mina,” and “The stranded great ship,” in that order. Later, she can pull allies back with Resquia, but you will not have her on your first attempt at this paralogue. Prepare the escort using your existing team.
After hearing Kalla’s hint at the start of the chapter, speak to the receptionist at Kalla’s main temple to attempt the trial. Victory awards  Kalla's Bow. The trial consists of two consecutive Clashes against enemies with high Speed and Avoid. Equip accurate weapons and combat arts first. There is no standard quest marker, so do not limit your search to map icons.
Chapter 11: Banquet of the Risen Dead
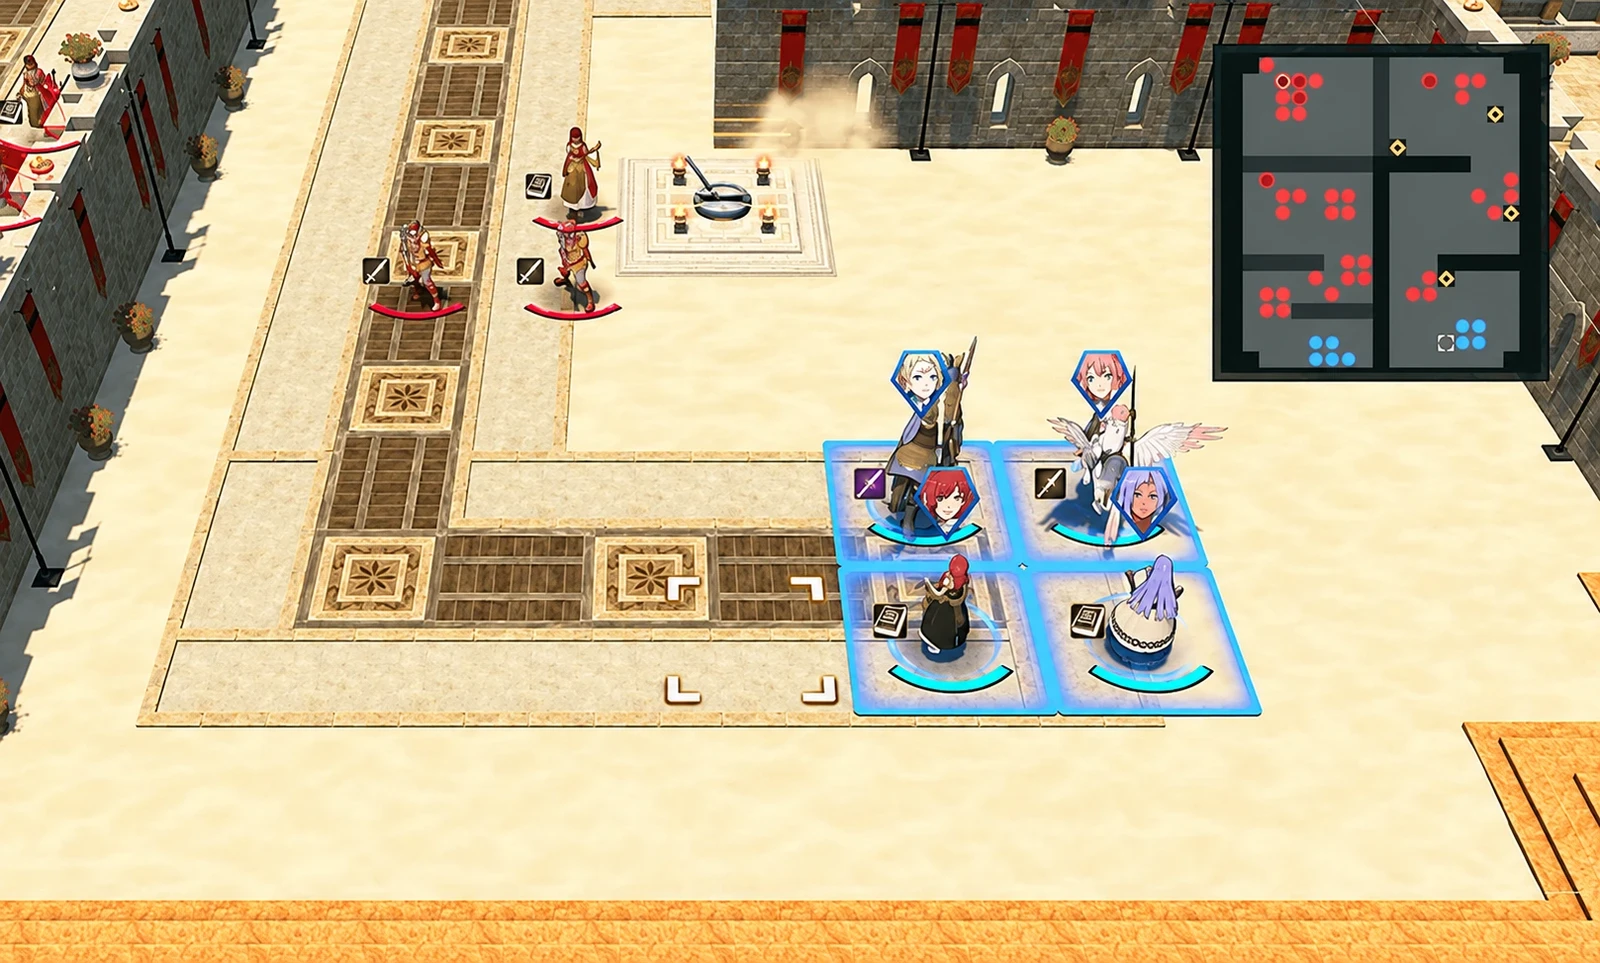
Focus on one side to clear netherfiends, then advance north after defeating the key central enemy. Enemies keep summoning soldiers. Splitting evenly exposes both groups to reinforcements and makes it hard for Leda’s area songs to cover everyone. First grant netherfiend effectiveness with Song of Abjuring, or equip sword users with Cleansing Blade, then engage mainly on one side.
Defeating the key central enemy opens the route to the boss and brings a large reinforcement wave. Save healing and enough damage for the next round. Deal with the new threats before advancing through the opening; an open route does not mean the battlefield is safe. A compact team is easier for Leda to support. Prioritize refreshing whoever can remove a threat to the backline.
Fit 3 paralogues into your 85 turns. Dietrich’s and Cai’s become available on 10/16, and Orchel’s on 10/18. Finish the two outside the capital before speaking to Cai to advance time. Accept Dietrich’s by 10/29 and finish by 11/1; accept Orchel’s by 10/25 and finish by 10/27.
Chapter 12: Revenge’s End
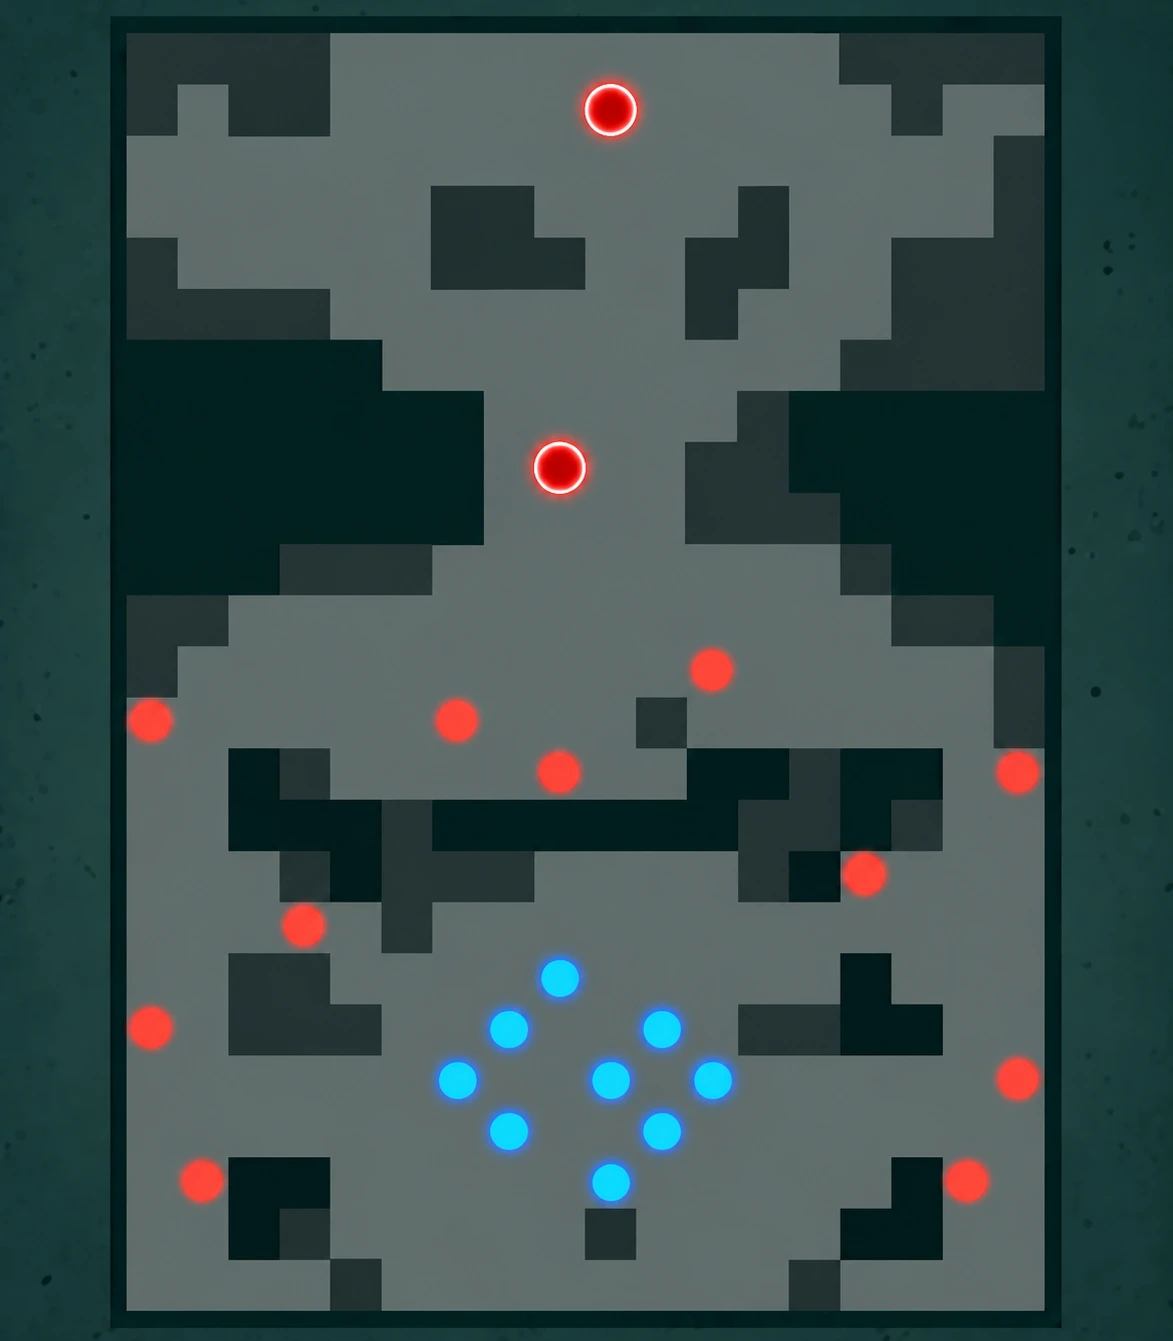
Split your 10 units between the flanks, clear artillery and collect chests, then use the northern teleporters to reach Bertrand in the center. Rushing straight into the center exposes you to bow and magic artillery on both sides. The right needs more magic and armored units; bring archers and physical melee units on the left. Use Avoid, Defense, and Resistance tiles along the way to reduce damage.
A  Luxury Weapon Crate chest sits at the northern end of each artillery corridor, with keys carried by marked enemies. Collect the keys and open the chests, then deal with armored and mage reinforcements near the teleporters. Teleporters move only one unit at a time. Bertrand and Gaitz’s troops wait on the other end, so do not send a fragile unit through first to be surrounded.
On turn 7, fire spreads and seals the central entrance, making the northern flank teleporters even more important for returning to the middle. After clearing the artillery, leave 1–2 units to provide covering fire if needed. Transfer the others one at a time, regroup, then focus down  Bertrand. Heal the team before attacking so wounded units emerging from the fire do not immediately take the boss’s counterattack.
Use the final 80 turns to finish shopping, equipment upgrades, desired Part 1 Support conversations, and recruitment. For  Fabio, first complete Dietrich’s paralogue, wait for his team’s elimination and November 4, then meet Renown 9, Support 3, and the weapon negotiation requirement. If you missed Kalla’s Bow trial in Chapter 10, complete it at Kalla’s main temple before leaving Part 1. The missables checklist also covers hidden weapons and carryover preparations.
Accept all four paralogues before leaving town or advancing time
| Chapter | Paralogue, contact, and location | Acceptance / completion window | Related rewards and allies |
|---|---|---|---|
| 10 | Anatolia's Paralogue: Queen of the Erased; Anatolia in the northeastern city | 10/5–10/14 / before 10/17 |  Sha Lan recruitment prerequisite; Anatolia in Part 3 |
| 11 | Dietrich's Paralogue: Sealed-Off Past;  Fabio in the plaza before the arena | 10/16–10/29 / before 11/1 | Fabio prerequisite; wait until 11/4 to negotiate afterward |
| 11 | Orchel's Paralogue: Orchel's Regret;  Orchel outside Credna’s branch temple | 10/18–10/25 / before 10/27 |  Healing Staff,  Diego prerequisite, and Orchel in Part 3 |
| 11 | Cai's Paralogue: Great Escape; Cai in the city | 10/16–10/22 |  Tialla recruitment prerequisite; conversation advances the date |
Each awards 20000G and 150 Renown, making them valuable late-game stops when money is tight. Completing a paralogue is only one recruitment prerequisite. You still need the required Renown, Support, and negotiation. See the paralogue list and route recruitment guide for full conditions.
Defeat one red insect each turn in Anatolia’s battle
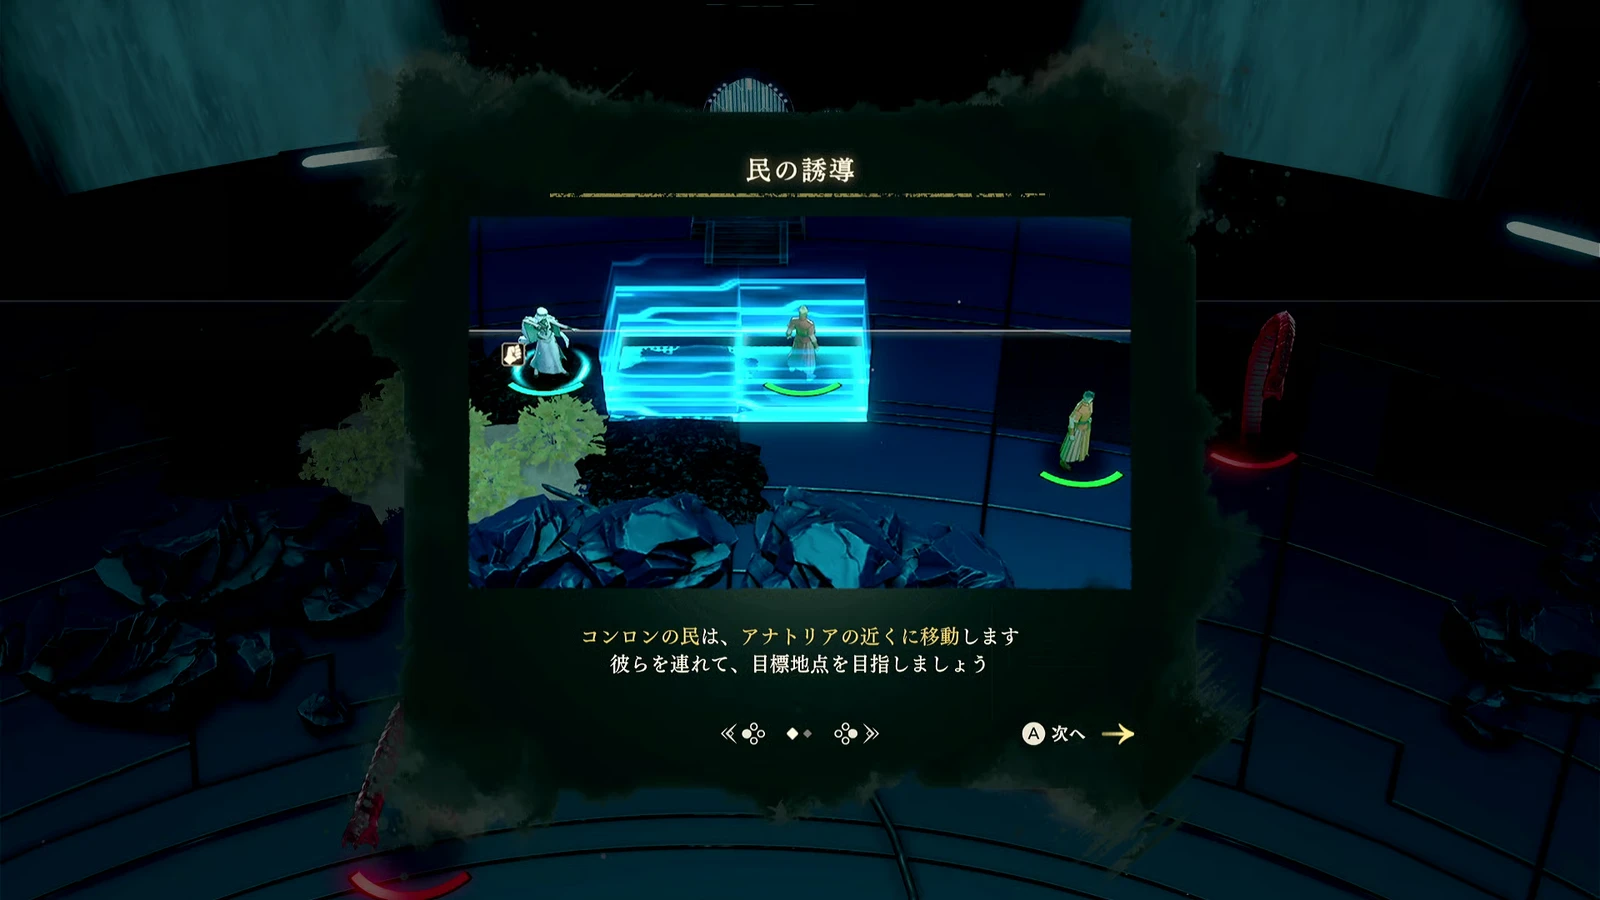
Residents follow Anatolia. Lead them clockwise to the two exit tiles in the north, then have both the residents and Anatolia escape. You lose if 3 residents fall. Clear the route ahead of them instead of using all your damage to pursue the boss.
Defeating 1 special red insect stops the boss for 1 turn. Save them and kill 1 per turn; killing them all together wastes future control. If an area attack confuses a resident, move an ally adjacent and call to them to clear it. Keep your formation short enough for someone to reach them promptly. Do not send Anatolia through teleporters, because residents will not follow. Other rescuers can use them to reach danger quickly. Enemies also inflict poison, so bring  Antitoxin.
Escaping with all 5 residents earns two bonus rewards, including  Dew of Peace. Four residents earn one fewer reward, and three earn none. To save more residents, keep one red insect available each turn for control.
Clear the center before defending three lanes in Dietrich’s battle
Keep enemies out of the target area for 10 turns. Routing them is pointless because soldiers continue appearing every enemy phase. Focus first on the 3 large central enemies. They do not respawn, so defeating them reduces pressure.
The infantry on the left have one-space range. Chip them safely with bows, magic, or ranged lances. Prepare lances for the cavalry in the middle and bows for fliers on the right. Clear the large central enemies before splitting to defend all three lanes. Save healing and weapon durability for the second half. Fabio remains unrecruitable until his team is eliminated in the story; speaking to him immediately after the paralogue will not meet the requirement.
Take the keys before synchronizing devices in Orchel’s battle
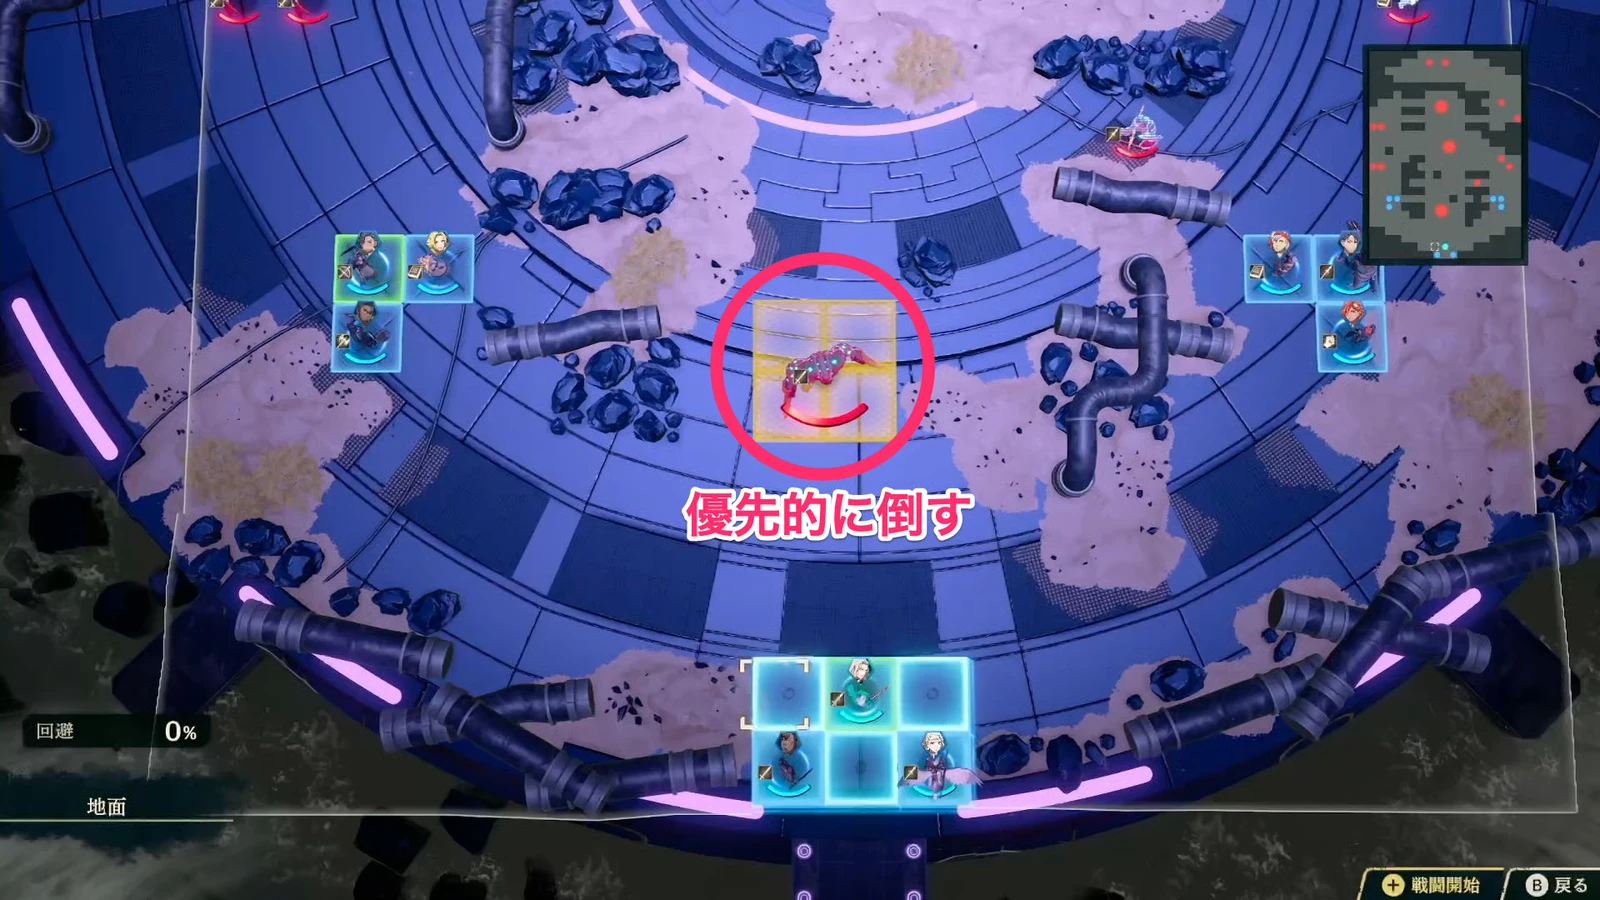
The objective is to rout the enemy. Launch devices sit in the north and south and fire only if both are operated in the same phase. Split into two groups and clear nearby enemies. Wait until both groups can operate their device and healing is ready, then activate both. Flying reinforcements arrive after the bombardment, so do not rush the devices at low HP.
Both southeastern and northwestern chests contain Pure Water, and both keys are held by southern enemies. Collect the keys first, then send mobile allies around to open the chests. Orchel’s close and ranged healing can support both sides. Victory completes the paralogue without another report. Return to the capital for recruitment before speaking to Cai to advance the date.
Intercept pursuers in the southeast and focus the boss in Cai’s battle
You lose if any enemy enters the southwestern yellow area, but your main team only needs to defeat  Centurio, not every soldier. Put an ally with good range or mobility in the southeast. Destroy incense burners to reduce nearby enemies’ movement for 1 turn while everyone else focuses on the boss.
Use Leda’s extra action to cover this round’s gap. If pursuers are nearing the yellow area, reinforce interception first. Once it is safe, give a boss attacker another action. Afterward, finish  Tialla’s Renown and Support requirements. Complete outside paralogues, purchases, and deliveries before speaking to Cai so advancing time does not skip unfinished plans.