
Fast certification and proficiency training: what to train and when to change classMinor spoilers
Use a high-proficiency partner each week, or retreat after 15 rounds when you need ranks quickly. Check level gaps and route unlocks before exams, and plan certification, mastery, and Stargazing separately.

If reclassing is blocked, check the unlock, level, and missing proficiencies first. Train with an expert in that proficiency during normal play; use Clashes when you need weapon ranks or mastery quickly.
Build proficiencies and prepare licenses before changing class
| What is blocking you? | What to do now | When to stop |
|---|---|---|
| Your level is high enough, but the target exam is unavailable | Check the class unlock, then train its required proficiencies | The exam is available and the pass rate meets your risk tolerance |
| A proficiency starts from zero and training is slow | Pair the beginner with someone strong in that subject; proficiency rank is what matters | Meet the next exam’s requirement, rather than taking every subject to S+ |
| You want concentrated weapon proficiency or class mastery | Find a survivable Clash, press + to skip 15 rounds, then retreat and reenter | Reach the target ability/mastery or next certification requirements |
| You only lack Riding, Flying, or your first recovery spell | Check training and the matching manuals first | Cavalry/flying appearances do not train Riding/Flying inside dungeons |
| An exam shows 50% and you want to reload until you pass | Check the recommended-level gap; restarting under identical conditions repeats the result | Do not treat chapter restarts as free rerolls |
Train the skills needed for your next exam or deployment first. The war story can raise character levels, but weapon ranks do not automatically catch up enough to reclass. A “level 36 Commoner” is what happens when you only raise levels.
Proficiency experience table · Exam licenses and results
Train levels, proficiencies, and mastery separately
Track character levels, proficiency ranks, and class mastery separately. Reaching level 20 does not mean you have mastered a Specialty class. Proficiency ranks cover disciplines such as Sword, Bow, and White Magic. Class mastery uses the current class’s experience bar, awarding a mastery ability when filled. Certification alone is not enough: you must earn experience in that class to master it.
Even some attackers who do not use bows benefit from mastering  Archer for Crescendo. Kills build Hit, making later attacks more reliable. The whole team does not need to stay in bow classes. Decide whether a class change is for certification, growths, or mastery before deciding when to switch back.
Focus on Sword for the Shido exam. For Archer mastery, qualify first, then switch to Archer and earn class experience. You can leave after getting the mastery you need. If you switch to cover an urgent team need, previously earned certifications remain available; a route is not an irreversible upgrade tree.
Inference: Give each main unit a one-line goal, such as “Bow C for Archer → Crescendo → return to original damage class.” A specific goal is easier to finish than maxing every proficiency, and keeps limited training and manuals focused on subjects you will actually use.
Let proficient partners teach weaker units each week
Prioritize subjects that are hard to train and needed soon, and choose a partner strong in them. In a partner comparison, the same target with low magic proficiencies first trained with a partner at D+ in three subjects, then with Tialla at Black Magic B+, White Magic B, and Authority C. The second pairing earned more proficiency experience. Choose by the partner’s relevant rank, not character level.
Plan weekly training in these four steps:
- Open the target exam and identify whether you lack a weapon rank or a secondary subject such as Riding, Flying, or Heavy Armor.
- Check which subjects this week’s training covers, then find a partner strong in them. If you need spells, the best swordsman may not help.
- Read the results and check whether the missing subject reached its next rank. Choose next week’s pair from the remaining gap instead of fixing one pair forever.
- Give future units their target subjects now, even if they are benched this chapter and will receive a level boost later. High levels can still leave them stuck in a Base class through low proficiency.
Schedule arena spectating too: dates are limited, and the whole roster can benefit. Training targets two characters, while spectating benefits everyone; the disciplines raised depend on the event. See proficiency mechanics for session counts, prices, and experience tables.
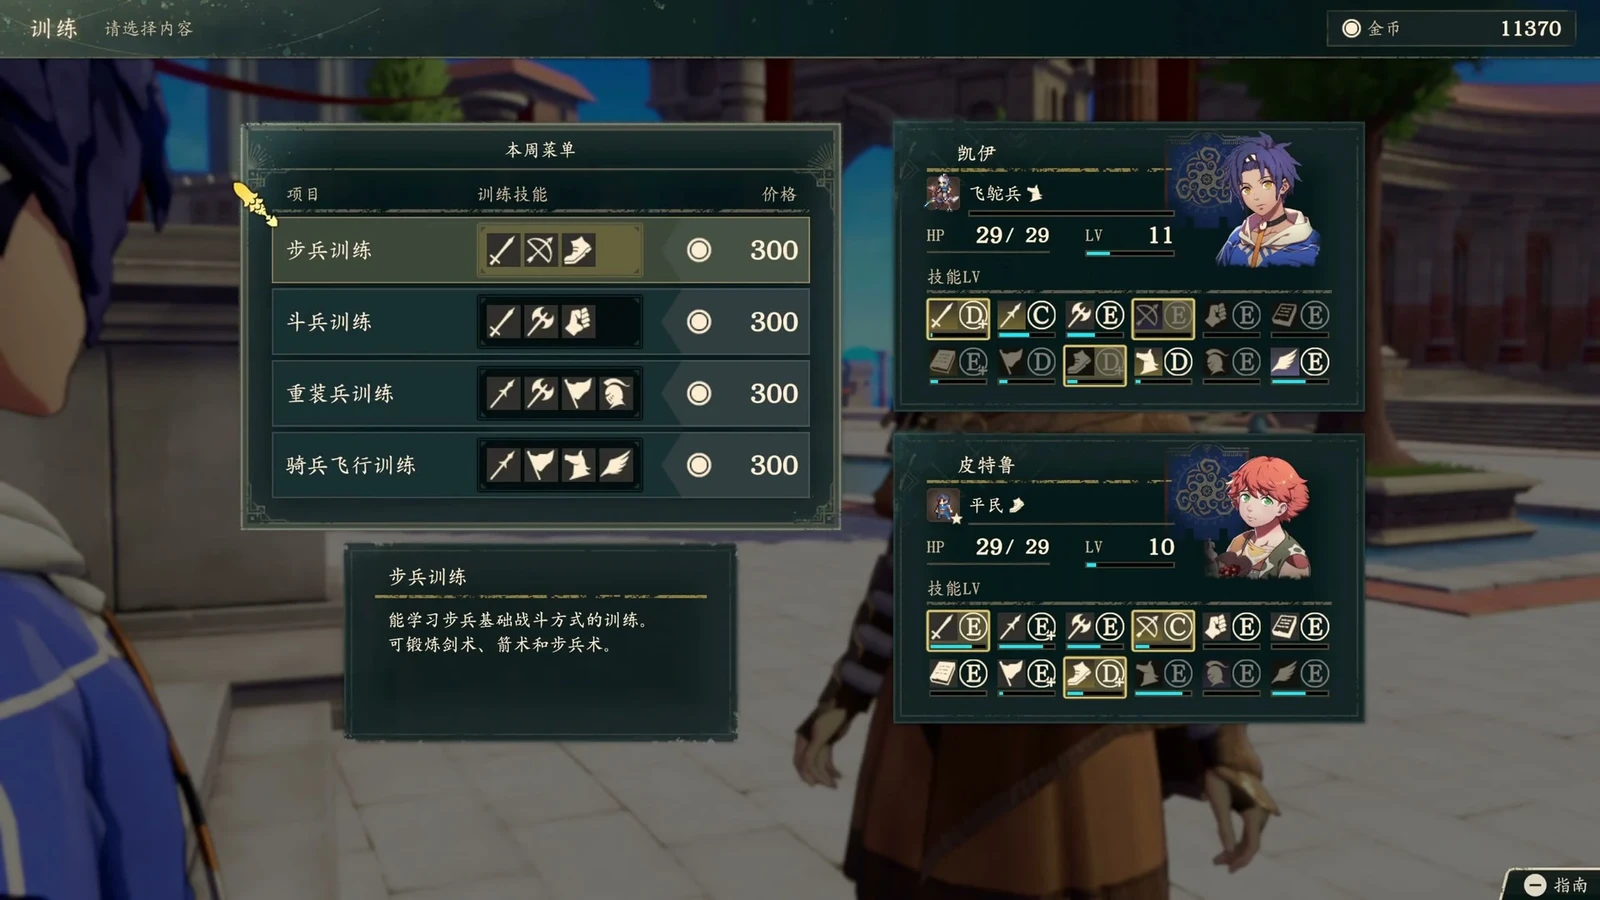
Two characters with low ranks in the same discipline gain less experience together than a novice paired with an expert. Start White Magic early for backup mages; do not spend every training session on a main weapon that already meets the exam requirement.
Retreat every 15 rounds for urgent proficiency training
Retreat and reenter after every 15 rounds of a Clash. You keep the experience earned. Offensive proficiency experience is awarded per combat round and requires a hit that deals damage. Follow-ups and multihit attacks do not multiply it per strike. Tests used a Heavy-Armor Manual to check remaining experience: after 15 manual rounds or repeatedly pressing + to skip more rounds, the character still needed 9 experience. Two enemy groups did not provide a second allowance. In these tests, proficiency, class, and movement-type experience counted at most 15 rounds per Clash.
Four steps for the retreat loop
- 1Choose enemies you can survive against.Bring healing and protection. Give the trainee a weaker weapon, but attacks must hit and deal at least 1 damage. The weaker weapon keeps enemies alive for enough rounds.
- 2Make sure you will not defeat every enemy.Pull in two groups as insurance; if the first falls, the second still lets you retreat.
- 3Enter the Clash and press + once combat starts.Skip 15 rounds, then retreat immediately.
- 4Check progress after retreating.You keep experience and the enemy groups recover. Reentering starts the next Clash’s 15-round allowance. Stop at your target rank or mastery.
One recorded Fabio Gauntlet S→S+ example earns 4 experience per round in its setup, gaining 600 experience over ten loops in about three and a half minutes.
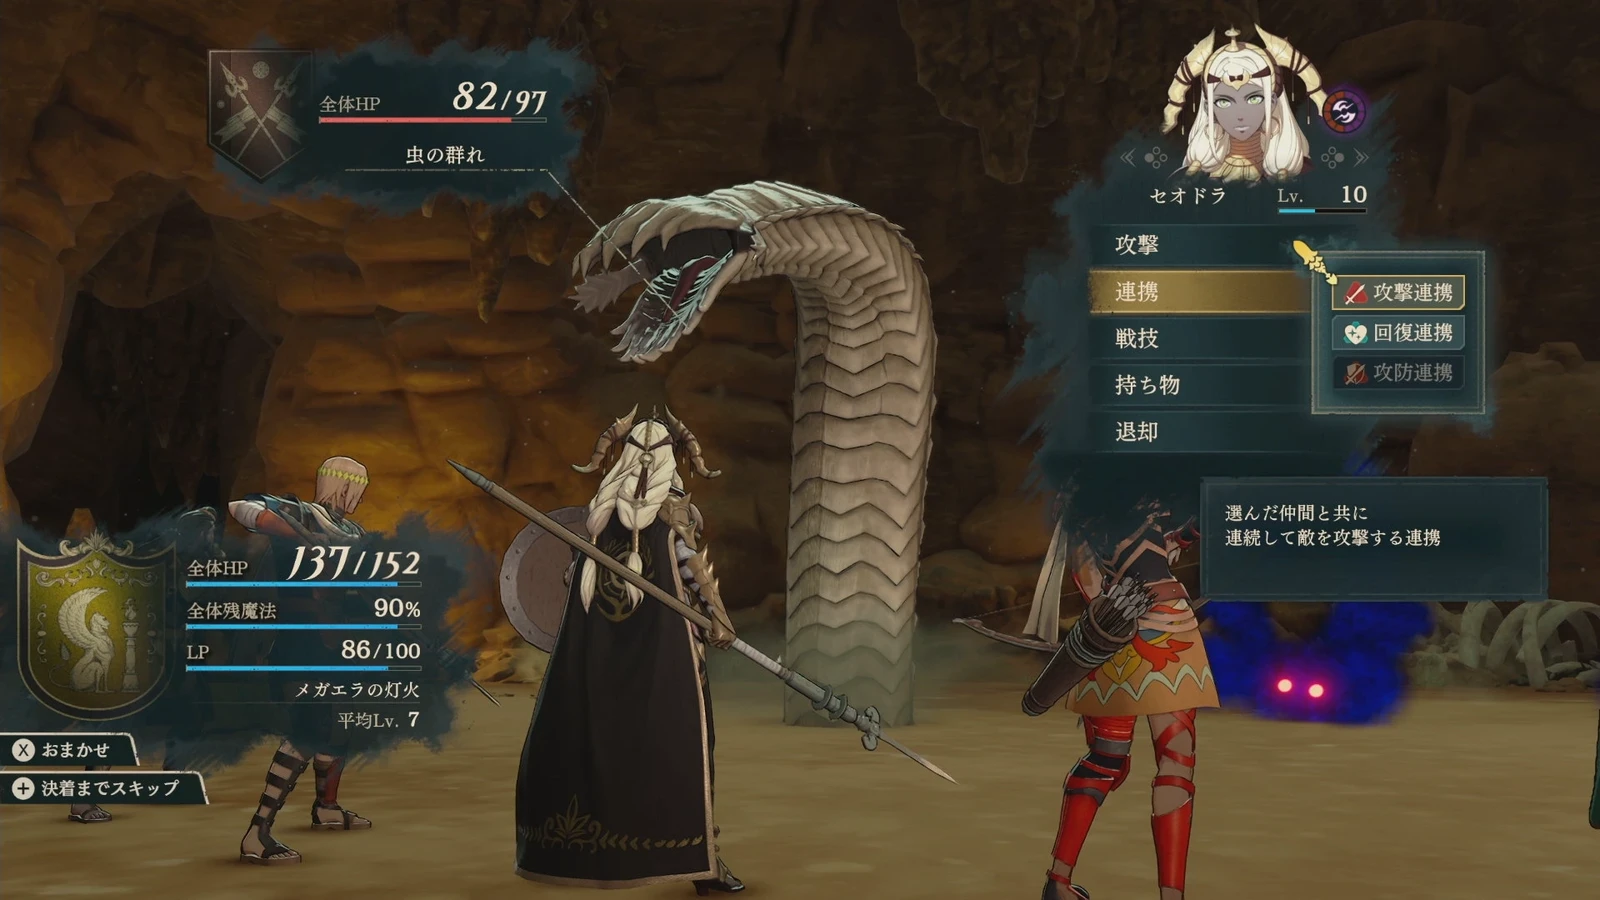
Training Riding, Flying, and White Magic
Cavalry and fliers fight as infantry inside dungeons, so you cannot train Riding or Flying there. Magic is also limited by spell uses. For these secondary subjects, return to training and manuals. A character normally riding a mount does not mean they earn mounted proficiency here.
White Magic has a separate starting method: learn at least one recovery spell, let an ally take damage, then heal repeatedly. Retreat and refill uses when spells run out or enemies are nearly defeated. The attack requirement of at least 1 damage does not apply to healing. Adding healing to the short loop above lets low-Strength healers train without scratching enemies with weapons.
Two things most often break the loop: a critical kills the last group, or damage is lowered to 0 to preserve enemies, so repeated attacks do not raise the target proficiency. Pressing + after the same battle has reached 15 rounds does not reset its allowance.
Keeping enemies alive with a minimum-damage accessory
Another setup uses an accessory from a quest chain that makes successful sword/bow attacks deal at least 5 damage. Use a class that can wield swords or bows, equip a low-Attack weapon, find physically durable enemies, and bring a strong healer. This avoids both 0-damage experience failures and killing enemies too quickly. One Cai example gained nearly two-fifths of a mastery bar in a single attempt. Unequip the accessory afterward and pass it to the next trainee.
Set up equipment in this order: the minimum-damage accessory prevents 0 damage → a low-attack weapon keeps enemies alive → healing keeps you alive. Fist-only and magic-only classes cannot simply copy the sword/bow setup to grind mastery. The accessory’s official Simplified Chinese name, full quest-chain prerequisites, and exact availability date remain unconfirmed.
Retreat every 15 rounds and start a fresh loop. If you have not confirmed that you own the accessory, simply use a weapon that naturally deals at least 1 damage.
Use manuals for starting spells and exam gaps first
Training builds ranks over time; manuals close immediate thresholds. With spare gold, check the capital item shop, other bases, and merchants. Manuals cannot be used in Part 2, so prepare skills needed for War beforehand. Check how many you can buy before leaving town and preserve enough proficiency for your next exam.
| Current gap | Best manual use | Reason | |
|---|---|---|---|
| No recovery spell yet; you want to start White Magic training | Use  White-Magic Manual or arena training until you learn a heal | Healing loops require a spell first | |
| Target class only lacks Riding/Flying | Check Riding Manual,  Flying Manual, and matching training | Dungeon loops cannot fill these subjects | |
| Heavy Armor is just short of a rank | Check Heavy-Armor Manual, then revisit the exam pass rate | A small gap does not need a whole grinding setup | |
| You want class mastery | Switch to the target class and fight | Manuals raise their matching proficiency, not the class experience bar directly |
In one Heavy Armor test, a manual granted 20 proficiency experience, allowing it to measure how much remained. This 20 applies only to that standard manual; check Advanced Manuals separately. After use, check whether you reached the target rank.
Inference: Narrow gaps with weekly training before spending manuals. In particular, prepare White Magic early for units intended to become  War Monk in Part 3, instead of reaching the Gauntlet requirement and discovering the other subject is still E. You can save books beforehand or catch up later with healing and arena training. Not everyone needs to consume every manual in Part 1; decide whether the benefit is needed in Part 2 or can wait until Part 3.
Check your level gap before adding more proficiency
Prepare for a high pass rate when you can wait. Below 100%, failed exams still consume a seal. One test failed a 56% exam, restarted the chapter, and got the same result under the same conditions. Repeated reloads under identical conditions repeat the outcome.
Five checks before an exam
- Is the class unlocked? If it still shows “???”, complete the route quest first. Renown and proficiency cannot replace the quest.
- How far below the recommended level is the character? Check this before deciding which discipline to grind.
- Main and alternative proficiencies. Main proficiencies are an additional required combination; for alternatives, only one listed discipline needs to meet the requirement. Charioteer, for example, needs both Bow and Riding. Meeting recommended requirements is safer, though slightly lower ranks may pass.
- Seal tier and quantity. Every attempt consumes one seal, including failures. Include cheap seals in the cost when using filler exams.
- Preview level-ups before exams when comparing growths. Exams autosave and may change later level-up results. Do not take the exam first and then try to inspect the original level-up.
Examples below the recommended level:
| Unit and target | Sample conditions | Displayed pass rate | What it shows |
|---|---|---|---|
 Nuzzuo →  Shido | Level 34, proficiencies well above requirements, 1 level below recommendation | 50% | Excess proficiency does not erase every level penalty |
 Lilian →  Sniper | Level 33, enough proficiency, 2 levels below recommendation | 32% | More Bow grinding may be less useful than character levels |
 Theodora →  Warrior | Level 37, Gauntlet two ranks short | 100% | Incomplete proficiency requirements may already be sufficient; do not train blindly |
The table applies only to these characters and conditions. Check the displayed rate for a one-level gap in other classes. The full formula and further level-gap thresholds remain unknown. See certification mechanics for conflicts with other recommended-level records; use the current game screen for your actual attempt.
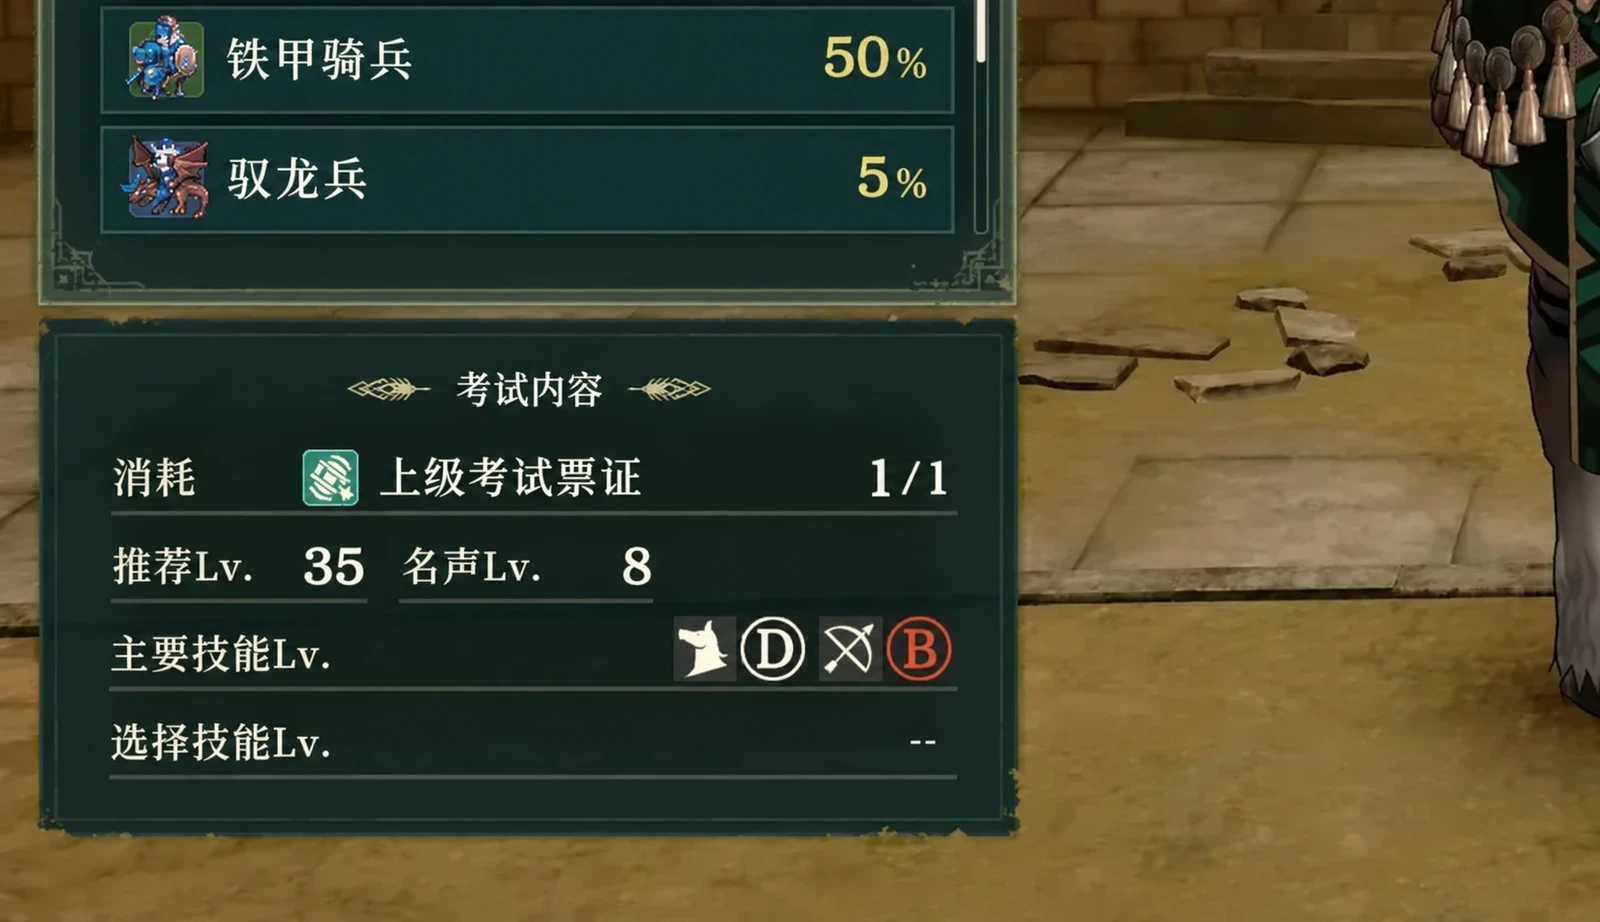
Low-tier attempts advance the next result
Two observations about preliminary exams conflict. One player took another exam before passing the original 56% attempt and concluded that other characters could advance the result too. Another compared characters: Peter failed twice and passed third. Having Peter take two Beginner exams before the Specialty exam also succeeded, but having Cai take exams did not skip Peter’s two failures.
To apply this license-saving idea, use the more cautious same-character preliminary exams. Test the target at chapter start and record consecutive results. If you need to roll back, replay the chapter, have that same character take the corresponding number of low-tier exams, then attempt the target class. Every attempt costs a license, and a 0% exam cannot pass.
Inference: If you are only one or two levels below the recommendation and do not need to deploy immediately, raising the character level and checking again is usually easier. Filler exams require recorded results and enough seals. Restarting rolls back some chapter progress; see the exam reproduction steps for retained progress and resource rollback.
Recommended levels are preparation targets, not fixed change dates
Identify the stat or ability you need before choosing the class in which to level. Sword users do not need a straight progression. Myrmidon offers mastery and Speed-focused training; add Brigand if Strength is lacking. After Shido mastery at Advanced tier, you can take Warrior for combat art accuracy. Shido’s Speed modifier and Warrior’s Strength focus serve different needs. Choose around weaknesses rather than taking every new exam as it appears.
5/20/35/45 are recommended character levels for their respective tiers. Judge early attempts by the current pass rate instead of treating recommendations as absolute minimums.
| Stage | Exam preparation | Priorities | |
|---|---|---|---|
| After exams unlock: Beginner preparation at level 5/Renown 1 | Main attack subjects commonly D; Ornius Rider also needs Riding E+ | Choose for the next goal:  Gladiator for physical melee,  Hunter for bow/sword,  Soldier for Defense,  Ornius Rider for mounting,  Diviner for spells | |
| Specialty preparation at level 20/Renown 4 | Main weapon commonly C; hybrid classes add secondary subjects | Myrmidon for mastery/Speed, Brigand for physical growth, Archer for Crescendo; Priest for healing and Shaman for Black Magic. Charioteer also needs Bow C + Riding D | |
| Advanced preparation at level 35/usually Renown 8 | Main subject commonly B; route classes need unlocks | Shido for swords, Warrior for Strength; Sniper or Forest Knight for bows; Ovate for spells, Bishop for healing. Schedule unique classes below | |
| Before Part 1 ends | Check reserve proficiencies and mastery rewards you want to carry | Prepare exam ranks instead of only waiting for War’s levels; use manuals needed for Part 2 now | |
| After Part 3 Section 1: Master preparation at level 45 | Main subjects usually A; check secondary ranks and quests per class | Battlemaster, Bow Adept, Sentinel, Castle Knight, Bau Lord, Druid, Wiseman, and others enter consideration; Swordmaster and others need temple quests | |
| Part 3 Sections 2–3 | Restore matching temples and finish the quests that appear | Recheck Swordmaster, War Monk, Bow Knight, and others. Sources differ on exact sections; do not put all of them at Part 3’s opening | |
| Part 3 Section 4 | Celestial Crown Temple qualification items and relevant high ranks | Plan divine classes; each allows one holder at a time. Recheck team weaknesses before assigning |
The table lists chapter, Renown, and proficiency requirements.
Turn licenses into needed qualifications before Part 1 ends
Licenses stored in Part 1 cannot be directly brought into Part 2 for use. Certify the units who need classes before leaving so they are ready for War. Confirm reserves’ proficiencies and goals first; do not spend licenses on useless classes just to empty storage.
Part 2 records include each seal tier being topped up to 5 per chapter, alongside descriptions of “5 per tier” or “5 per stage.” Without chapter-transition comparisons starting with 0, 3, and 5 seals, a universal resupply rule is unconfirmed. Check inventory before scheduling Part 2 exams; do not stockpile on the assumption that each chapter adds another 5.
When the four routes unlock unique classes
“Route classes” here refers to how you first unlock them. Classes unlocked on other protagonists’ routes become available on later routes. If an earlier route has already unlocked a class, do not reapply the first-playthrough waiting table. Completing an unlock quest shares it immediately; you do not need to finish the entire route. A replay to unlock Blacksmith on Dietrich’s route also shows no need to finish the chapter after unlocking it. See the mechanics page for other resources retained after chapter rollback.
Each character must still earn certification separately. Check the unlock conditions for your route first, so you do not keep training Flying on Leda’s route while waiting for a Dragoon unlock that route does not provide.
Cai: mounted classes and instruction quests
Later options for Cai’s mounted team include Caladrius and Troubadour. Archers can stay in Charioteer rather than switch solely for a higher class tier. Switch to mounted classes when you need mobility; other characters can keep following their existing paths.
| When to check | Unlock/proficiency preparation | Current plan |
|---|---|---|
| Exams open in Chapter 5 | Review current units and Beginner qualifications | Prepare Bow and Riding early for a chariot route; train more than the protagonist |
| Castor-related instruction quest at Renown 7 |  Caladrius; Black Magic B + Riding D | Train Black Magic for mounted casting, not as a natural upgrade for a pure physical unit |
| Aurora-related instruction quest at Renown 8 |  Dragoon; Flying C + either Spear B or Axe B | Prepare Flying through training ahead of the Dragoon change |
| White-haired fiend’s instruction quest at Renown 10 |  Troubadour; Riding D + either Black Magic B or White Magic B | Wait for this point for mounted healing/spells; use available caster classes beforehand |
Where exact Chinese quest names are incomplete, identify them by instructor and Renown.
Dietrich: fix Strength before moving to Shido
Dietrich has a long free-time period before class changes unlock. Heavy early grinding leaves many level-ups in a Base class. The protagonist can go Gladiator → Brigand, then Myrmidon for mastery. If Strength remains low, use Warrior at Advanced tier before rushing Shido. In Part 3, choose Swordmaster and mastery from The Eternal and The Blade as needed.
| When to check | Route unlock | What to train first |
|---|---|---|
| Chapter 5 | Exams become available | Choose Gladiator, Brigand, or Myrmidon for its purpose; Strength training and Myrmidon mastery need not happen in the same leveling stage |
| After completing the Renown 6 challenge |  Guardian | Lance B; attempting the exam at low levels can still have a low pass rate after the unlock |
| After 10 total Combat Art upgrades and speaking to the Smyrnos temple receptionist |  Blacksmith | Axe C + Black Magic D; prepare the secondary discipline for mixed damage |
| After completing the relevant Renown 10 challenge |  Ranger | Either Bow B or Sword B; a Ranger class that has not appeared is not a proficiency shortage |
Inference: You do not need to stop playing before exams unlock to avoid every lost growth point. Explore and handle necessary quests. If you intend to grind substantial experience, first decide which class should receive those level-ups. Avoiding an early rush into the teens or twenties has a training rationale, but suppressing levels is not required to clear.
Theodora: military-preparation unlocks
From Chapters 6–7 onward, look for Advanced Licenses while traveling and keep stocking up for later reclassing. The exact resupply locations remain unknown; see certification mechanics for general stock rules and prices.
This route opens exams in Chapter 4, while later route classes depend on military preparation:
| Progress check | Class to watch | Proficiency preparation |
|---|---|---|
| Chapter 4 | Exams open; qualify for classes suited to current units | Use the common Beginner/Specialty goals above |
| Military preparation by Chapter 8 |  Cataphract | Heavy Armor E+ + Riding D + either Spear B or Axe B |
| Military preparation by Chapter 9 | Guardian | Spear B |
| Military preparation by Chapter 11 | Dragoon | Flying C + either Spear B or Axe B |
Complete military preparation chapter by chapter, then schedule exams after the class-unlock notification appears.
Choose classes around weaknesses: Shido for Speed, Warrior for Strength, and Dreadnought for physical defense while avoiding magic. Until you confirm Cataphract, Guardian, or Dragoon is unlocked, fill roles with qualified classes you already have instead of halting progression to wait for a name.
Leda: watch for Dancer qualification in Chapter 9
Leda can wield bows, but when she handles Dance, someone else must cover the archer role. A Dancer must survive near the frontline and flying reinforcements. If a fragile mage takes the job, arrange safe landing spaces and protection first.
| When to check | Unlock/preparation | Team plan |
|---|---|---|
| Chapter 5 | Exams open; train bows, swords, and magic by role | Do not rely on your future Dancer for all bow damage |
| After the quest related to tavern promotion’s item 4, “new product creation and launch” | Ranger, Troubadour; the full Chinese quest title still needs interface verification | Prepare either Bow B or Sword B for Ranger; add Riding D and either Black Magic B or White Magic B for Troubadour |
| From Chapter 9, after the dancer succession side quest |  Leda receives  Dancer through the story; show the examiner Dancer’s Necklace | This automatically grants qualification. Do not wait for the normal exam table’s level 35 or Bow/Sword B; complete the story quest first |
Handle Leda’s story certification separately from Part 3 transfers. After completing the succession side quest and obtaining the necklace, show it to the examiner to receive certification automatically, without a normal exam. Early reclassing and level 1 reclassing have both been demonstrated, but the story quest must come first. Normal training does not require deliberately staying at level 1. The quest’s full appearance prerequisites remain unknown.
After returning the ordinary Dancer certification in Part 3, other characters use the general exam requirements, special item, and displayed pass rate. Only then do the normal table’s reference level 35, Renown 8, and either Bow B or Sword B apply. You can have one ordinary Dancer at a time, alongside a separate The Apsara; the two different classes can each grant another action.
Return to your usual class after Part 3 mastery
Take abilities for your gaps, then return to the role your team needs. Sword users can follow Shido mastery → Warrior mastery → Swordmaster. Low-Strength archers can temporarily use Brigand or Warrior for physical growth before returning. Divine qualifications can also be released after mastery rather than occupied forever.
Three preparation examples:
- Sword damage: Get the Myrmidon and Shido masteries you need, adding Brigand or Warrior when Strength is lacking. Wait for the relevant temple side quest for Swordmaster. Earlier classes serve training purposes; you do not need to certify in every preceding class to attempt a later one.
- Bow damage: Start with Archer for accuracy, then choose Sniper for reliable Hit or Forest Knight for mobility. In Part 3, certify as Bow Adept or Bow Knight as needed. Compare Hit, Mini Bow counter conditions, and mounted mobility rather than growth totals alone.
- Lance and support: Guardian can lead into Sentinel, combining attacks with healing, unlike Castle Knight’s physical-wall role. Even with Lance certification, check which White Magic spells the character actually knows.
You do not need everyone to take every Divine exam. Each Divine class requires its own special item, and exams require a 100% pass rate. Prepare Sword S for The Blade; either Sword S, Axe S, or Gauntlet S for The Eternal; and either Black Magic S or White Magic S for The Avatar. Check the class entry for exact requirements and the unique certification, then use the 15-round method above to fill gaps. Do not apply low-rate filler-exam methods to Divine exams that cannot be attempted below 100%.
Preview Stargazing results before spending licenses
Certification, changing class, and Stargazing are three separate actions. Switching to an already qualified class changes growth thresholds. Taking an actual exam advances later growth checks whether you pass or fail. Even a normal exam can therefore alter level-ups you just previewed; preview again afterward.
In a Halvin level 29→32 demonstration, the level-ups to 29 and 30 include the desired Strength gain, 31 does not, and 32 does. Taking the two good level-ups normally, then taking one exam, brings the former level 32 result forward to 31. This selectively skips an unwanted set rather than guaranteeing Strength. A comparison of consecutive Noctola level-ups also observes the result sequence advancing after an exam.
A practical routine has four steps:
- 1Save at the start of the chapter, then use the inn’s “Combat” Automated Activity to preview the target character’s next few levels.
- 2Return to the title screen and reload the save from before the preview, discarding the turns it consumed.
- 3If you need a normal new-class exam or decide to use one exam to skip poor growths, have the target character take it. You can also compare growth results in already-certified classes.
- 4Preview again after the exam, then return to the title screen and reload the save from before this preview. Once satisfied, head out and level normally.
Inference: If you only want a smooth clear, combine an exam you already need with one useful Stargazing check. You do not need to reroll every unit at every level. Each exam still costs a license and uses an available exam option. Reports still disagree on how returning qualifications and retaking exams advance checks in Part 3, so this is not an unconditional infinite loop.
For full procedures, guarantees, and disagreements over returning certifications, see level-up rigging and certification mechanics. The “seed table” is an explanation for these observations; no datamined formula is available.