
Part 3 Promised One’s story walkthrough: six sections, squad reconstruction, and the final battleMajor spoilers
Recall old allies and restore transport first. Defeat subjugation targets before the deadline: visiting does not complete them. Regroup attackers at gates while another squad guards the capital; clear miasma and underworld protection, then break gates and attack the final boss in the same round.

Recall old allies and repair transport in the Promised One’s story, then gather your core squads at gates. You must actually defeat subjugation targets before the deadline.
Restore transport before planning squad reunions
| Current stage | First priority | Reason |
|---|---|---|
| Free action begins | Recall old allies through dialogue, choose their records, and separate protagonists | Separate squads can use their protagonists’ exclusive commands |
| Most map facilities are unavailable | Restore stations and temples first, rebuilding towns and buying materials along the way | Transport saves turns when gathering teams at gates later |
| A subjugation target appears | Actually defeat it before the deadline, reserving travel, miasma clearing, and combat time | Visiting its tile does not complete subjugation; waiting as in Part 1 can fail |
| Section 3 begins | Keep an interception squad near the capital while core squads converge at the gate | Defend and break gates together instead of leaving the capital empty during expeditions |
| Attacks barely damage enemies | Check miasma, Netherworld Blessings, and attack type before levels | Extra stats may still deal little if terrain and reduction remain unresolved |
| Final battle preparation | Repair weapons and assign gate breakers, attackers, healers, and refreshers | Breaking gates creates an opening; attackers must be ready that round to exploit it |
Separate free exploration from subjugation periods. Reconstruct when no destination is assigned early on. Once a subjugation objective appears, finish its battle within the deadline. A recorded failure visited the target, kept exploring, and reached the deadline without defeating it.
Normal/Classic three-unit challenges and Hard-mode teams use different levels of training. Prepare for the conditions in each section.
Check all four routes’ completion records before entering
For a standard run, complete Part 1 and War Arc records for the routes you want to import. Two or three can be enough; finishing all four prepares more fully because records affect exclusive systems, weapons, money, and materials as well as characters. Choose manual play or skipping the War Arc for your goals; see Part 2 walkthrough.
You can still gather materials in Part 3, but free-action time is busy, so last-minute supplies cut into story preparation. Part 1 inventory left out of Part 2 becomes usable again in Part 3. Basic iron +3 equipment supplied in Part 2 cannot serve as permanent Part 3 equipment.
If your team is already well trained from the previous part, proceed. Replaying Dietrich or changing classes to gain Strength and Defense is extra investment. A standard clear does not require playing Parts 1 and 2 twice or maximizing stats.
Choose core units and records before Merge Causality
When recalling a character, choose the record best suited to the current role. Fuse only when another route adds useful abilities. Find green icons in town and speak to previously recruited allies. Compare development when multiple records are offered. For example,  Sirocco may train swords on one route and spells on another; fusion can fill higher stats and class masteries.
| Action | Best timing | Distinction |
|---|---|---|
| Consolidate repeated clears of the same protagonist | Before Part 3, when you want more training on that route | Part 1 Chapter 12 updates the War Arc starting record, then Part 2 must be completed; stats do not simply add together |
| Merge Causality | After recalling the character and assigning a role in Part 3 | Spend fragments to import higher fields, skills, and classes; inspect the preview first |
| Item reacquisition function | After replaying for equipment you actually lack | A separate purchase from character fusion; fusing does not automatically duplicate every weapon |
Separate free completion consolidation from paid Merge Causality. For training completed after entering Part 3, one account warns it does not automatically update the active Part 3 character. Another demonstration highlights altar differences, costs about 300 fragments, and describes updates after later same-route clears more broadly. See New Game+ carryover for detailed same-route completion and cross-route paid fusion rules.
Before fusing now, budget fragments. Other lasting upgrades also need them, so prioritize regular units. Different routes can add classes, weapons, and masteries. If the second record has the same setup and no higher stats, save the fragments.
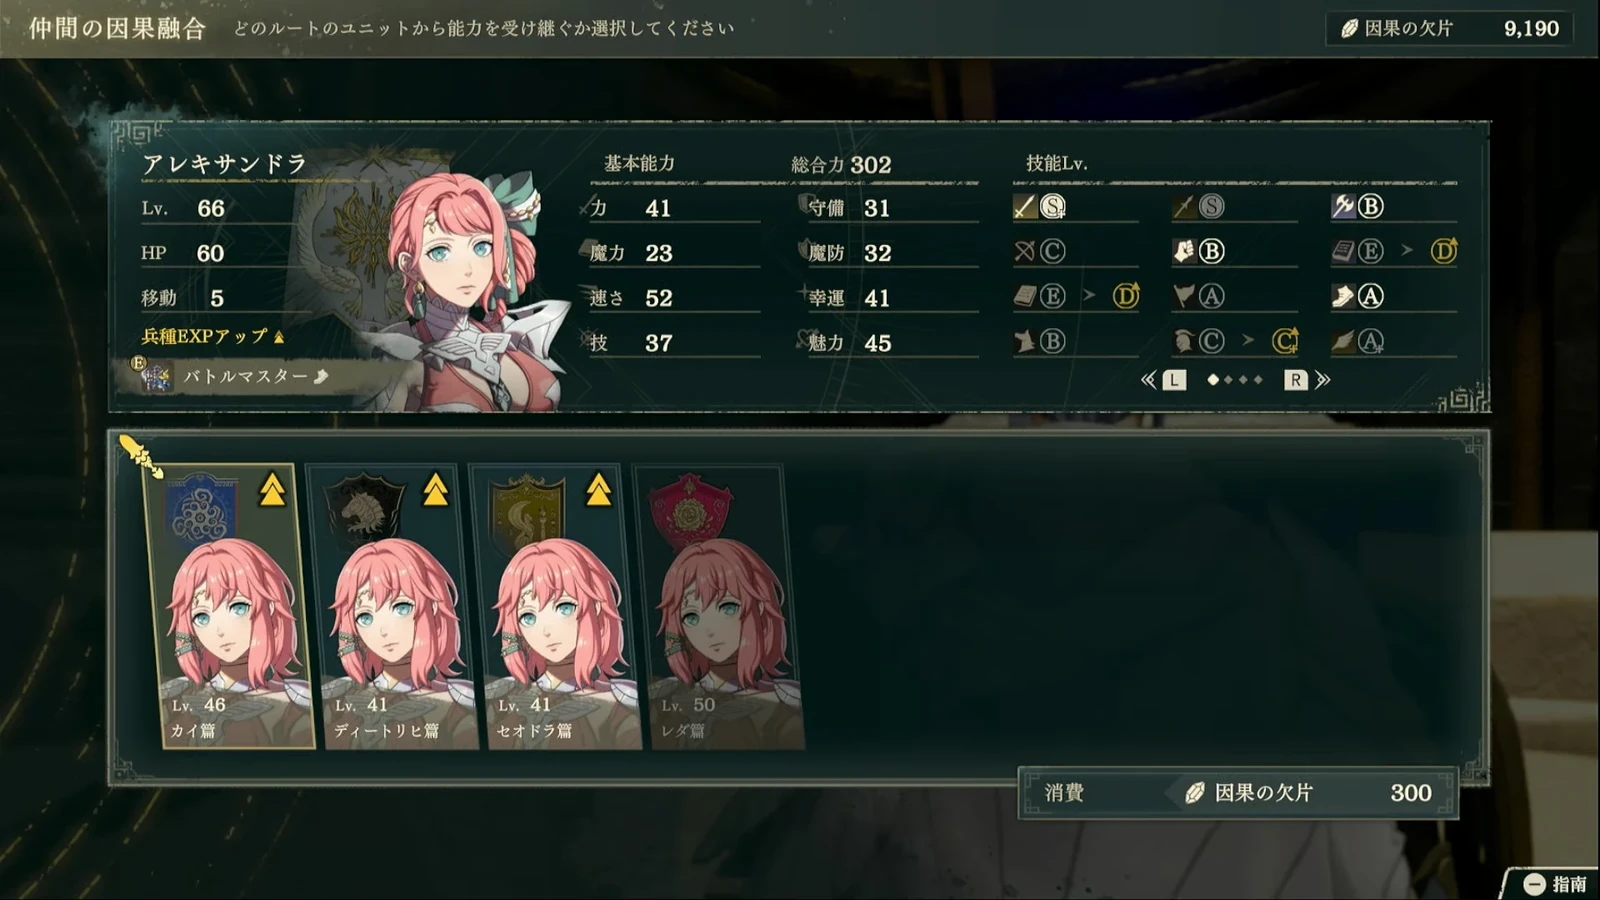
Watch chapter restarts: they erase fusion performed in the current chapter, and restarting an entire section also rolls back training. Inference: if you plan to restart for Support or reconstruction experiments, finish those first and fuse your core units afterward. Save screenshots before and after fusion for comparison. Fragment refunds and which progress carries over remain unclear, so save before testing builds.
Split expeditions by task and gather your core for main battles
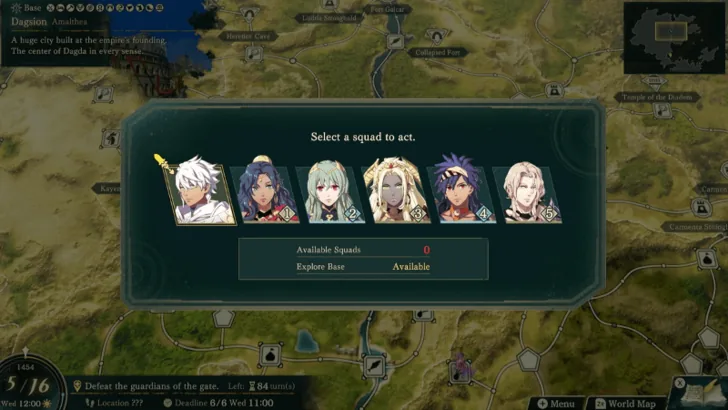
Do not stack every strongest unit into one squad, or evenly train forty-one people just to fill five squads. An eight-unit reference setup has two healers/supports, two magic attackers, two physical attackers, and two durable units; roles may overlap. Include at least one Physic user per squad. Separate  Cai and
 Theodora so two squads can use cultivation, troop dispatch, and other exclusive commands.
Once an assigned squad leaves town, its members cannot participate normally in town training and similar activities. Unassigned reserves can gain experience automatically in the capital. Dragging new units along on a gathering squad may be less efficient than leaving them to train. Squads need not be full, and you can adjust them at the capital node.
Organize for enemy types, covering physical attacks, offensive magic, white magic, flight, and bows in each squad. Late bosses and effective weapons punish armor, so total stats and Protection are insufficient measures. Include Hit, Avoid, and adjacent support in skill planning; 90% Hit is not guaranteed.
Three inferred squad roles:
- Expedition core: handles enemies, clears miasma, and attacks gates, with healing and bows; converge on the objective before battle.
- Reconstruction/gathering: divide work by protagonist commands and materials; eight units are not mandatory.
- Capital interception: stay near invasion routes and engage early to avoid harder defense battles.
Before a main gate battle, gather combat squads on the same node according to deployment capacity. Several squads can converge instead of leaving a weak squad alone on a Hard story map. Retain interception forces near the capital. The five squads hold forty-one units in total, but main battles still have deployment limits: the final battle caps at 25, while some others allow about 17. One clear used about 15 strong core units and others for functions; a 25-unit cap does not demand 25 primary attackers.
Restore transport first and calculate travel time
Restore stations and temples before buying reconstruction materials, Master exam passes, and other supplies from rebuilt town shops. Use map filters for stations and temples instead of memory. In the capital, begin with inexpensive basic arena repairs before other facilities and costly upgrades. You need not maximize everything at the start.
- 1Choose the nearest squad and check missing materials.Find the squad that can reach an unrestored transport point fastest. For shortages, check nearby exploration and restored shops rather than sending every squad across the map for the same fish.
- 2Deliver materials, then work nearby.Reconstruction takes turns to finish.
- 3Once transport is restored, work backward to plan your core squads’ travel to the gate battle.
The map you explored in Part 1 carries over, but damaged transport facilities still need repairs in Part 3.
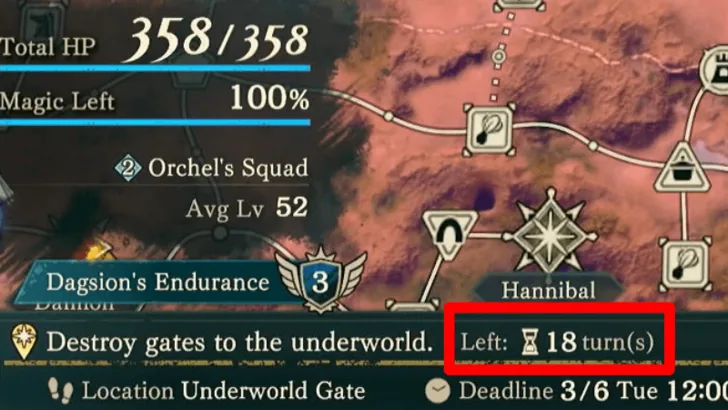
Initial free exploration can wait for the phase change; subjugation requires actually defeating targets before expiry. In the initial period with “no destination,” the counter reaches zero and squads return before the main gate objective appears. Miasma near a gate may need repeated clearing. Once subjugation begins, finish the target before the countdown ends.
Later subjugation works differently: even visiting the destination early does not prevent failure if you miss the kill deadline. Reserve travel, miasma clearing, reunion, and combat time as soon as the quest appears. Part 1’s green checkmark cannot fight the gate for you. The exact boundaries between sections remain unclear; distinguish exploration from timed subjugation using your save’s objective panel.
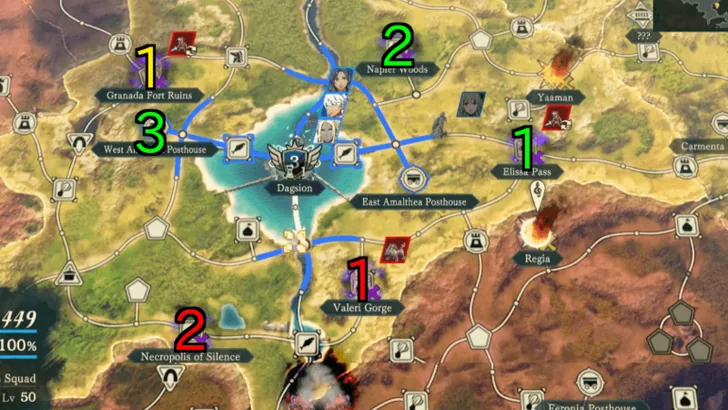
From Section 3, enemies advance toward the capital. Engage them proactively in Clashes to avoid a stronger city defense battle. If defense triggers, Aurora’s underworld protection helps focus enemies down. Units returning after battle have only been recorded in this type of defense battle. Prevent deaths on other Classic-mode maps. See Fate Reversal for rewind/restart differences.
Handle underworld damage reduction and miasma
Check underworld reduction in the forecast, then the effect of the standing tile. Underworld blessings reduce attacks without effectiveness or special effectiveness. Prepare Eshmel’s close-range nullification, Cleansing Blades, Leda’s support Blaze Arts, and anti-netherfiend spells such as Seraphim. Do not casually sell Cleansing Blades, and watch Seraphim uses.
| Problem | Options | Practical check |
|---|---|---|
| Normal damage is heavily reduced | Cleansing Blade, Aurora Level 3,  Leda’s relevant support,  Eshmel’s close-range effect | Check actual range and this turn’s forecast; standing nearby alone is insufficient |
| Enemy has flying/armor weakness | Matching effective/specially effective attacks | Match enemy type and weapon properties; any bow or spell does not counter everything |
| Tiles drain HP/durability or distort Hit | Clear miasma with Blaze Arts, detour, or use suitable fliers | Battlefield tile clearing and world-map miasma commands are separate actions |
| Protagonist nearly dies after using a Blaze Art | Heal before the next clearing | Blaze Arts cost HP; after clearing, check whether your remaining HP can withstand an attack |
Use Blaze coverage to open safe areas gradually, then advance into them. Clearing also requires the right protagonist and state. See Blaze Arts, blessings, and attack order.
Inference: before a main attack, check enemy reduction removal, tile penalties, then attacker Hit and durability. Separate them to identify the missing resource rather than blaming every zero-damage forecast on levels.
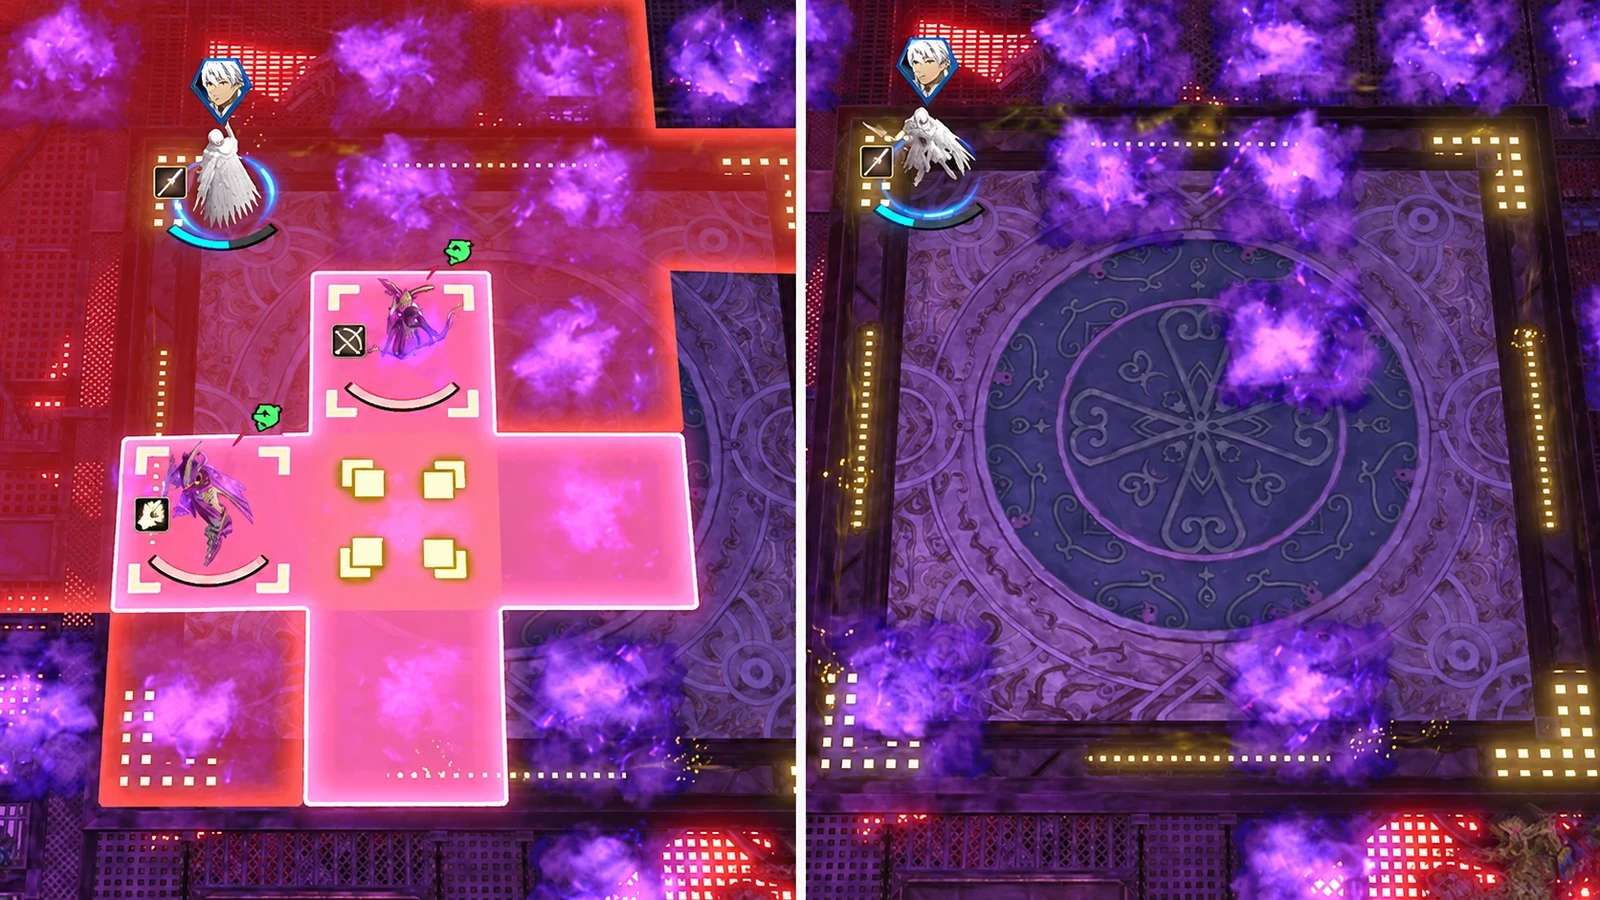
Section 1: The Liberation of Dagsion
Victory: defeat Underworld General Dagda | Level threshold/deployment cap: uncertain; guests increase with previous clears and paralogues | Main threats: a multi-phase summoning boss, golems, and protagonist HP.
Stabilize the south and break barriers with arriving allies
Use Blaze Arts actively, especially Eshmel’s area attack. Allies join in this battle, so do not let opening soldiers stall you just to conserve skills. Fight the boss from the south without rushing behind it, then join arriving allies for the next phase. Reinforcements depend on completed Part 1 routes and paralogues; do not copy the numbers from a four-route record.
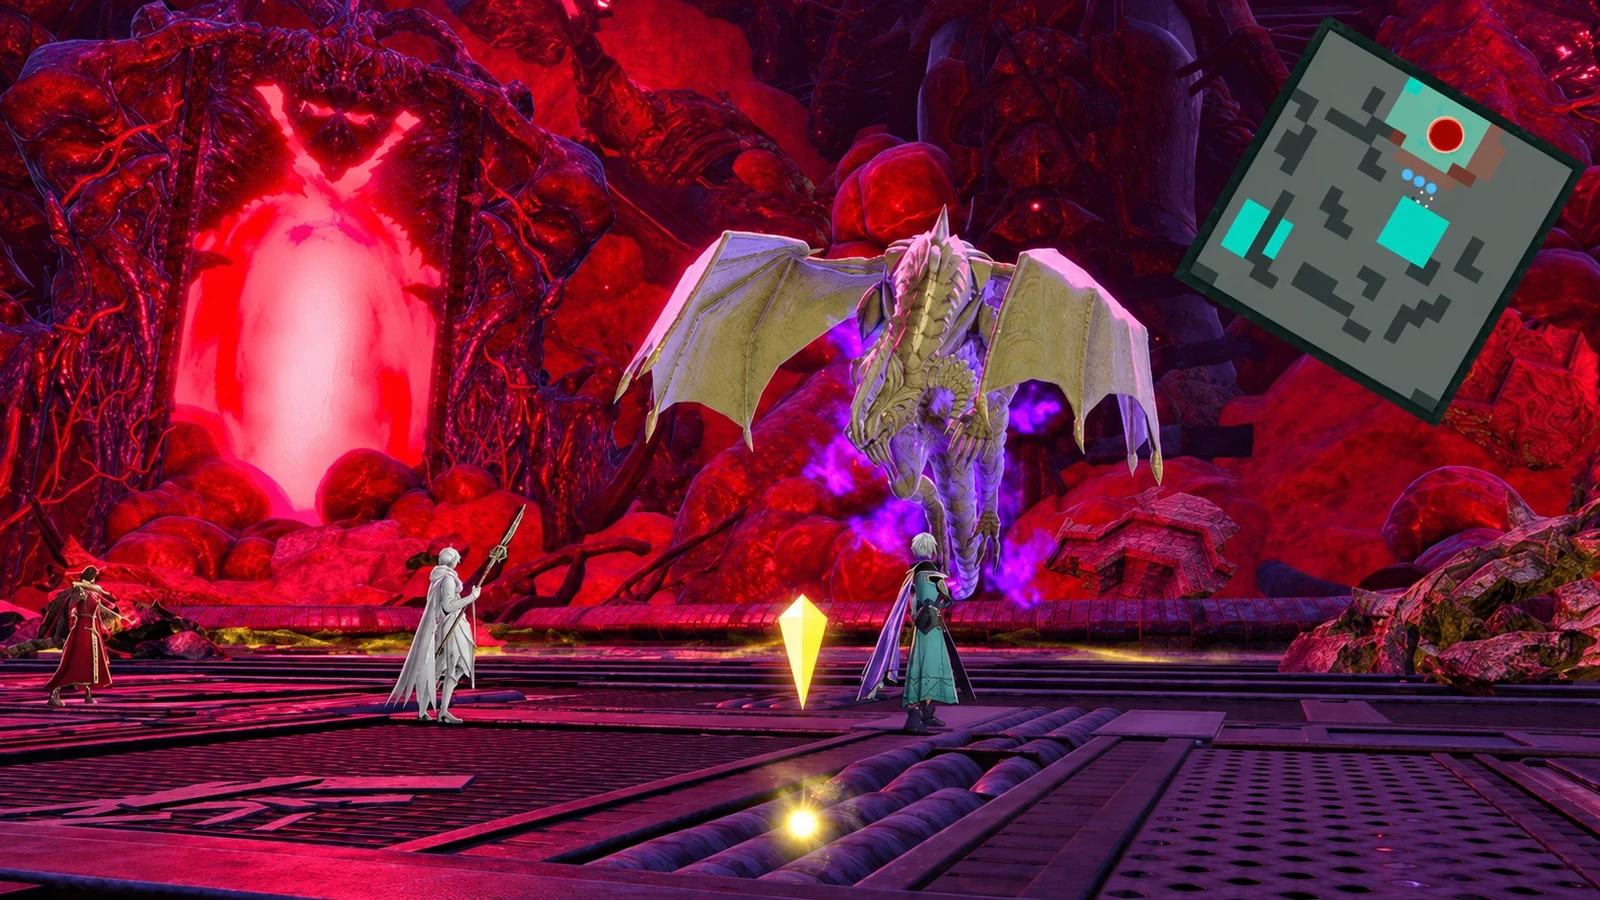
With fewer allies, defend around recovery platforms
Find healing platforms, use narrow paths to block golems, and keep Hong Hua outside boss range. Clear miasma with Blaze Arts when it blocks pursuit, and retreat to clear soldiers when summons arrive. This “solo route” includes cooperation from  Eshmel,
 Troy, and
 Hong Hua, not a single unit.
Locate green recovery platforms on the minimap and entrances too narrow for large enemies, then let enemies approach in stages. Pull back when soldiers press, prioritize dangerous melee enemies, and keep protagonist HP high enough for arts and incoming attacks. Recover, charge the gauge, and lure on platforms before the next barrier break; keep clearing adds before finishing the boss. Platforms only heal; use positioning and retreats to reduce incoming damage.
When HP is too low to use the skill, heal before the nine-tile attack. Inference: in a small team, HP pays both incoming damage and Blaze costs; check both before ending each round.
Recall allies and choose records after battle
From Section 2, speak to old allies to recall them. Recruit, choose records, and arrange squads before traveling. Many guests in battle 1 do not mean everyone automatically enters permanent deployment. Check each green icon.
Section 2: True Strength
Victory: defeat Breza | 36 free-action turns; level/deployment cap uncertain | Main threats: fliers, Greed miasma, and HP spent clearing ground.
Reconstruct according to transport priorities, then converge at the gate. Bring more bows because many units fly; tough Part 3 enemies are no reason to replace every archer with armor. Assign anti-air duties in each eight-unit squad before departure.
Handle Balboa in the center, then Ianuarius farther up, then focus Breza. The two deputies’ complete Simplified Chinese names remain uncertain. Greed miasma sets occupants’ Defense to zero and damages HP at the next player phase. Heal Eshmel promptly after clearing. Inference: reserve healer actions until the cleared stretch shows whether another push is safe. If clearing leaves him low, pause instead of assuming clear ground guarantees survival.
After victory, prepare the third squad and capital defense for Section 3.

Section 3: The Inheritors
Victory: defeat Shenlo | 36 free-action turns and 3 controllable squads; level/main-battle deployment cap uncertain | Main threats: intercepting at the capital while attacking the gate, and durability-draining miasma.
Decide who stays to defend the capital first. Keep one squad nearby to engage approaching enemies while the others head to the gate. For example, intercept around  Talimun and gather the others. Assign capable teams, not one independent gate per squad or eight units mechanically sent in each of three directions.
Durability-draining miasma covers this map, including the boss area. Eshmel can clear it; advance slowly if needed. It also drains equipped spell uses. Inference: before entering the boss zone, check for two rounds of weapon durability and remaining healing spells. Waiting on miasma steadily reduces next turn’s options. Clear a corridor before focusing damage for better endurance than consuming and replacing weapons each turn.
Keep archers for fliers instead of letting capital defense take every ranged attacker. After battle, check invasion routes before dispersing expeditions for reconstruction.  Centurio’s recruitment differs between Section 2/3 in the project chapter table and Japanese explanation. Check the rescue quest and dialogue conditions on the recruitment page.
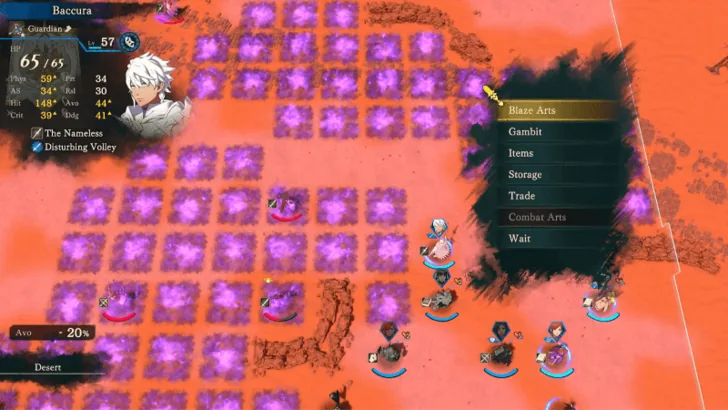
Section 4: The Hopes of Monarchs and the People
Victory: defeat Hanno and Baozi separately; order the two gates around travel | 56 free-action turns; levels uncertain, some gate battles allow 17 units | Main threats: vision and Hit miasma make some ground unsafe to occupy.
Secure Divine qualifications for core units first
Reenter Part 1 dungeons in Part 3. Enemies, ore, and chests update. Chests opened in Part 1 contain new items in Part 3.
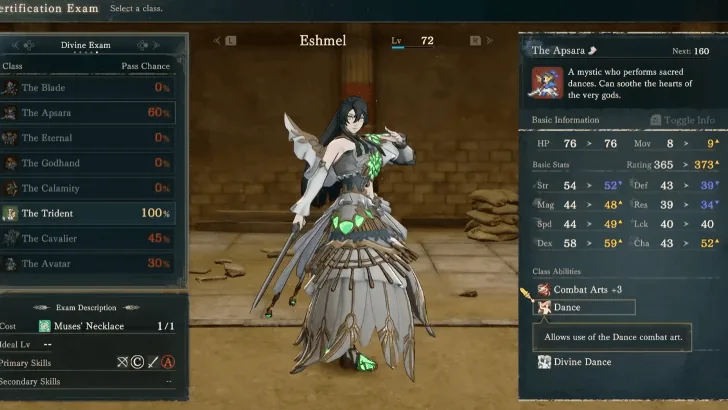
Heaven’s Crown Temple opens in this section. Collect five keys from five refreshed Part 3 dungeon chests, take them to the temple, open the door for Divine class-change items, then check qualifications with the examiner. New allies often lack proficiency. Prioritize qualified core units’ needed Divine roles rather than spending all your time retraining every newcomer from scratch.
 The Apsara’s refresh matters for final-battle action planning, so prepare it early if needed. See classes for uniqueness limits, skills, and exams; “skill S” alone does not cover every condition. More gates appear next, so continue developing rotation units rather than only upgrading one protagonist weapon.
Hanno’s vision miasma and Baozi’s Hit miasma
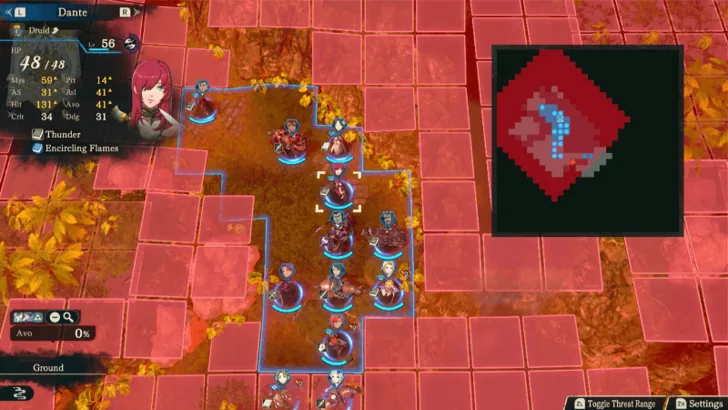
Hanno’s battle restricts vision. Clear ground while advancing southeast and use Credna’s blessing for visibility. Against Baozi, check levels and Arrogance Miasma’s Hit effect. Clear northeastern ranged healers before the target. Hit penalties favor slower advance in this section, but the two maps do not share only one identical miasma type.
Inference: when an attacker lacks guaranteed Hit, reserve someone to finish or heal. A low-level soldier is no reason to isolate an ally suffering accuracy penalties. After both gates, use remaining time for reconstruction or training before Section 5.
Section 5: Song of the Living
Victory: three gates against Drake, Mahadu, and Cohen with Maria | 76 free-action turns, up to 5 squads; valley/fortress battles allow 17 | Main threats: cross-map coordination, critical hits, and allied survival.
Plan reunions before sending five squads out
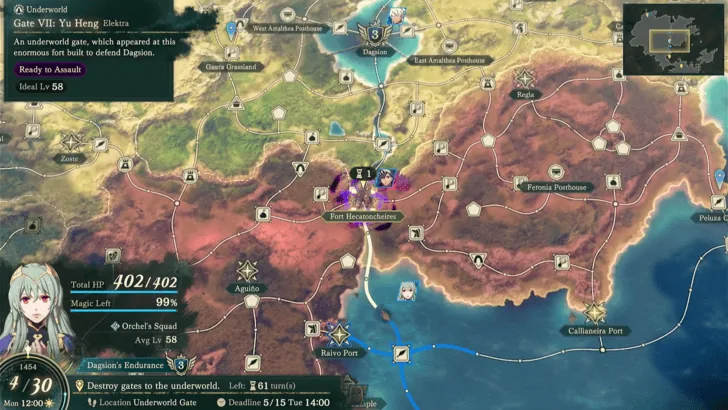
Three battles take place at Death Valley, Kurdelinde Ruins, and Hecatoncheir Fortress. If you kept  Aswan and
 Tahonia alive in the first two parts, check here that both have joined. With five squads, still gather expedition cores and retain interceptors rather than forcing every new squad into an independent boss team. Two eight-unit squads need to reunite to use the slots of some 17-unit maps. Check colocated squads and deployable units before starting.
Critical-related miasma can kill a unit in one hit. With enough time, gather several expedition squads instead of starting with a weak one. On Hard, restore transport, retain an interception squad, and calculate reunion travel before arranging this.
Terrain and targets on all three battlefields
| Battlefield | Check before battle | Advance priorities |
|---|---|---|
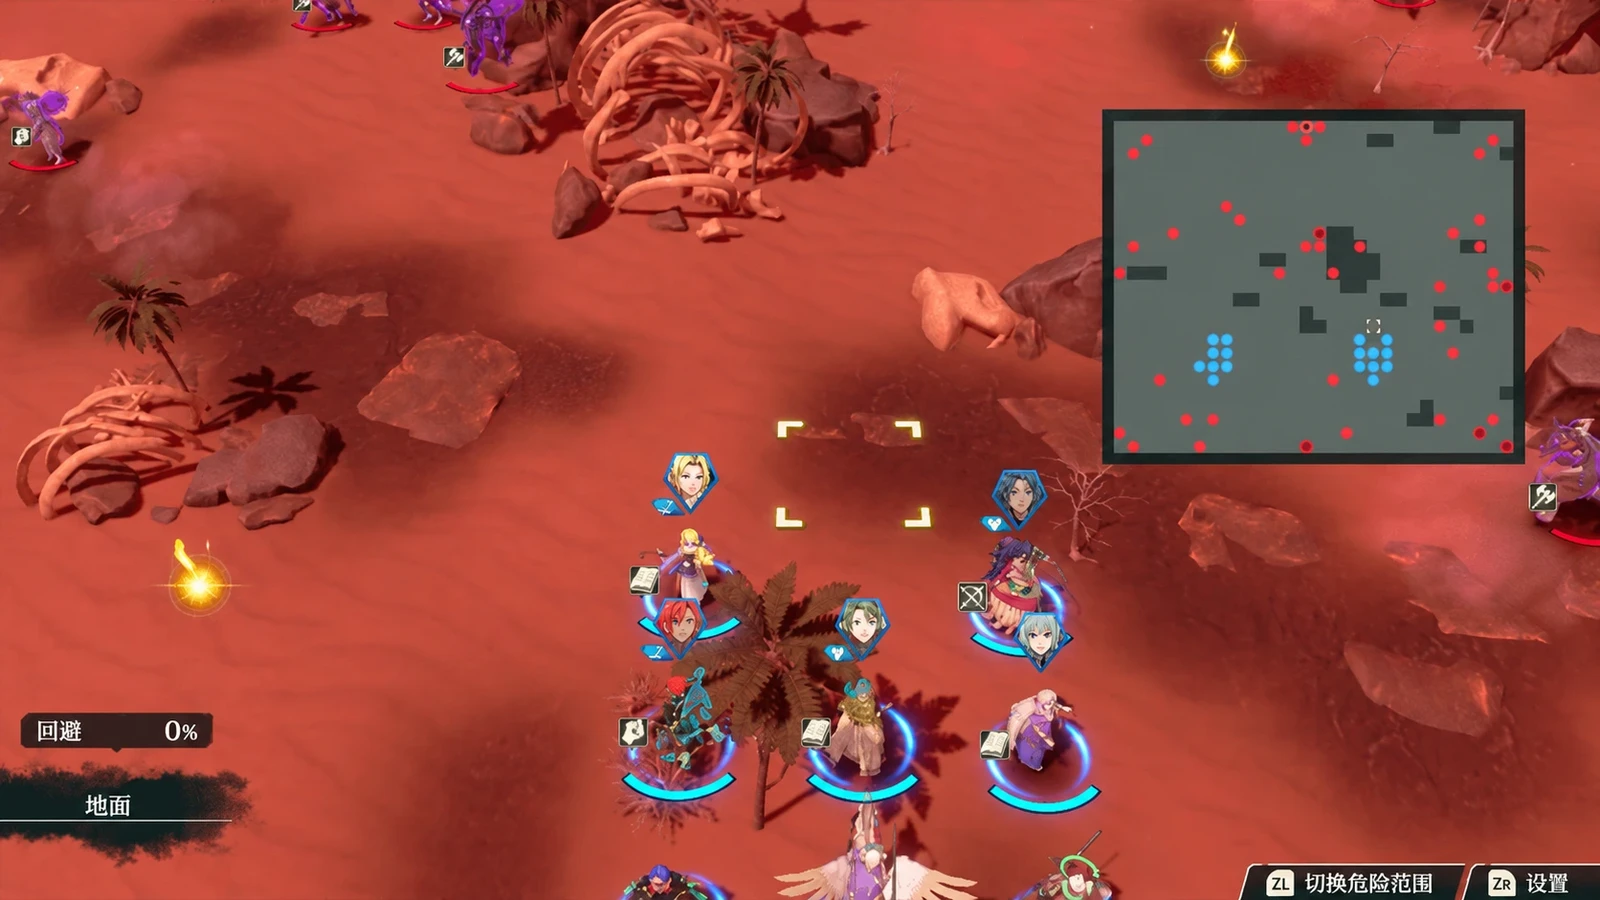
| Death Valley / Drake | Whether desert severely slows cavalry | Consider dismounting; give treasures protecting against local miasma to frontliners |
| Ruins / Mahadu | Whether  Klapka can survive through victory | Wrath Miasma boosts criticals but lowers defense; tanks cannot copy dodge builds blindly |
Fortress / Cohen and  Maria | Whether both squads are present and all victory targets are handled | Watch miasma changing by turn; killing one target is insufficient |
The three main Underworld Generals’ official Simplified Chinese names remain uncertain, and complete low-turn action sequences are unavailable for these maps.
Inference: reserve mobility and healing for allied rescues or missed finishing blows before chasing one-turn clears. Before using critical miasma, check enemy Hit and incoming damage. Even high Avoid leaves a risk of being hit. Confirm Klapka’s prerequisite before ending Section 5; only final preparations remain next.
Section 6: To the Edge of Twilight
Victory: defeat Lyrah, then complete Balor’s decisive battle and the final objective | 84 free-action turns; final battle cap 25 | Level reference: core units 65–70 in one example, you can also try at lower levels | Main threats: no town return after entering the temple, and simultaneous final-battle jobs.
Finish preparations before Lyrah
Perform needed fusions, upgrades, and repairs for your core. Check healing uses, Cleansing Blades, ranged gate-breaking tools, and refreshes. Allocate money, materials, and skill training by role to frequent combatants. Movement items can go to Eshmel, or cover preferred weaknesses. Continue upgrades, dungeon permanent-stat items, and enough functional members instead of maximizing everyone.
Lyrah differs from Part 2. Use Blaze Arts to break the beast form’s barrier, then pursue promptly when the boss relocates and summons reinforcements so Terror miasma does not keep spreading. Inference: ready pursuers and clearers before ending phase one. If everyone remains behind resupplying during transition, pursuit gets tighter. The full official Simplified Chinese name and exact relocation-trigger turns remain unclear. Plan separately for the two Lyrah fights.
After Lyrah, entering Balor’s temple prevents returning to town. Finish every last missing item before entry. An Underworld Pillar objective follows the final battle; do not quit after the main body falls.
Position gate breakers first and save attacker actions against Balor
Do not rush all twenty-five units into the boss. Breaking a gate lowers the barrier, but the opening passes quickly if attackers are still traveling. Keep one group near gates, save attacker actions near the body, and cover both groups with healing and refreshes.
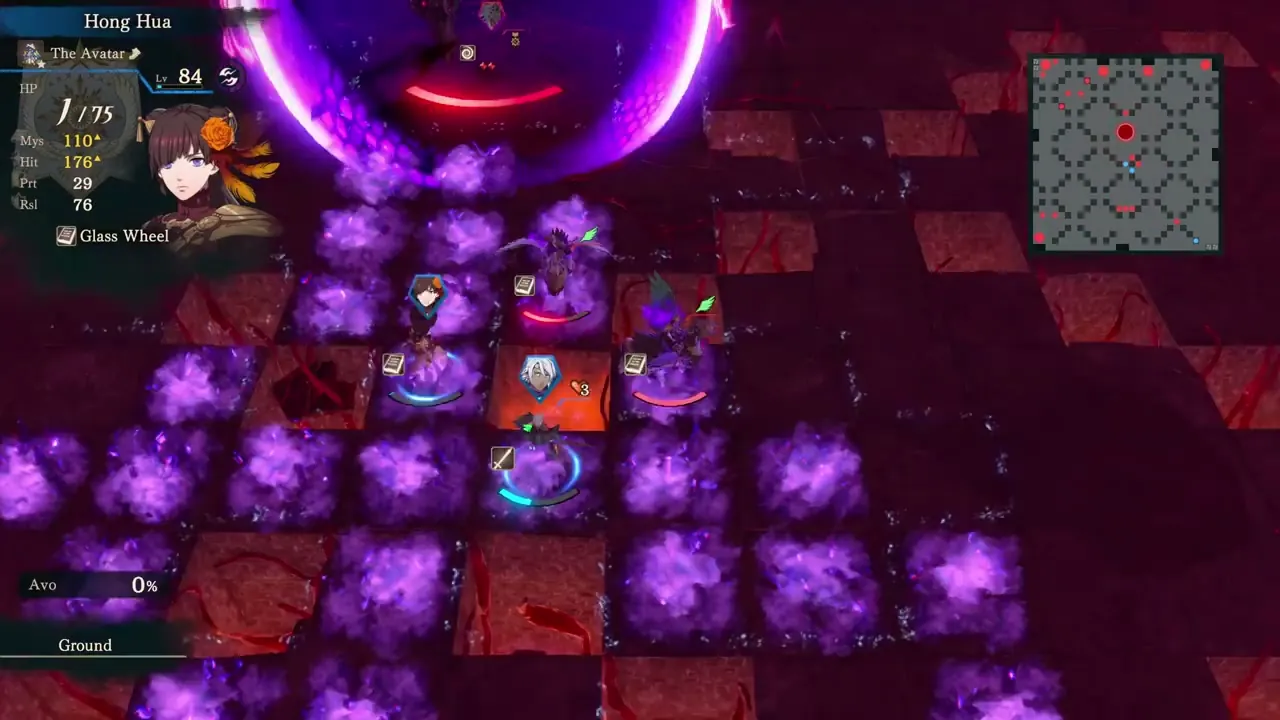
One standard-team example uses level 65–70 core units. After breaking one gate, about 4 units handle the barrier and another 2–4 main attackers remove a bar. Do not automatically break both gates together: barriers regenerate when a bar is lost. If one gate suffices this round, saving the other helps next round. Reconsider if both will soon disappear or one gate genuinely cannot open enough damage for the target segment.
Separate gate opening, attacking, and healing, using fliers and refreshes for distant gates. You can also bypass world-map gates and head straight to the final boss, but that strengthens the battle and is not required for a standard run. Saving an in-battle gate and skipping world-map gates to fight an empowered boss are different choices.
Fire-pillar warnings take priority over another hit
One observed cycle changes gates every 3 turns, while fog/fire pillars follow a 4-turn cycle: fog and ground markers at the end of turn 2, pillars at the end of turn 3; fog again at turn 6’s end and pillars at turn 7’s. Watch burning ground outlines, leave the next pillar area, and organize gate breaks and damage in the gap afterward. Current map warnings take priority; being above half HP does not prove pillar safety.
The following order is an inference.
- 1Check ground warnings and new gate positions, and confirm your attackers can survive this round.
- 2Have gate breakers clear paths and break gates.
- 3Use attackers who have not acted to hit the barrier and body.
- 4Use healing and refreshes to supply key actions.
One failed first attempt at the three-unit challenge combined blocking fliers, healing consuming actions, and depleted durability. Even level 99 lost. After adding magic swords and self-healing, Hong Hua’s Distant Thunder barely reached a gate and Eshmel finished with multihit attacks. The last round still relied on Hit and criticals, so it is not a dependable low-investment solution.
See the boss battle collection for phase details and challenge conditions. The complete build, refresh order, and prerequisites for “Hard one-turn Balor” remain unclear; a reproducible 1-turn clear sequence is not yet available.
Check records, transport, and damage reduction when stuck
- Missing allies? Speak to green icons in town and confirm Part 1 recruitment, paralogues, and War Arc completion instead of forcing levels onto a three-unit team.
- Timeout before battle? Check restored stations/temples and remaining miasma layers outside gates. Include reunion travel.
- One-shot despite defense? Inspect miasma effects on Defense, Hit, criticals, or actions, then enemy effectiveness and the current forecast.
- Still no damage after breaking a gate? Check same-round attacker actions, regenerated barriers, changed phase skills, and exhausted weapons.
- No ending after victory? Section 6 has another objective after the body; keep following the main story.
If you encounter these problems, check the corresponding conditions first. Before changing routes, see missables and New Game+ carryover to distinguish combat rewinding, restarting this section, and returning to an old route for prerequisites.