

Cai team build: Blaze terrain, Peter’s chariot cleanup, and healing lastMinor spoilers
Cai’s area Blaze attack softens enemies and creates damage-reducing ground; Peter charges through weakened targets. Move frontliners first, heal afterward, and prioritize lance users and archers.
Original video: Fortune’s Weave: Cai team build for Part 1 | English gaming channel Jay Dunna
Cai’s class masteries and equipment weight
This Part 1 team uses  Cai's area Blaze Arts to weaken enemies, then sends
 Peter's chariot through the low-HP line. Secure the front first and save healing for the end.
Start Cai in  Ornius Rider, then
 Light Cavalry. Ornius Rider develops Speed, while Light Cavalry adds Strength and HP mastery. At the advanced stage, this team prefers
 Bardinger for Defense, with
 Dragoon as an offensive alternative. If you want Dragoon mastery, finish it before switching: Hit +20 on favorable terrain helps with missed attacks in forest battles.
Use lances as the main weapon, plus a magic-damage weapon and a ranged option.  Levin Sword handles armor, while
 Short Spear reaches distant fragile targets. Change tools for each enemy. Keep developing mounts, prioritizing Movement and
 Canto benefits.
Do not equip every attractive orb. I gave Cai several, then tested and found their weight reduced Attack Speed: two attacks became one. Chance-based dodging and recovery are useful, but Cai’s build wants reliable follow-ups, so I now give those items to others.
Blaze terrain reduces damage
The ability Cai wants most prevents allies from taking damage from Underworld fire. Upgraded Blaze Arts leave fire on the ground, and allies standing in it can also take half damage. The area attack both weakens enemies and gives allies a position from which to engage. Do not push the Blaze Gauge past the Overblaze limit; repeatedly exceeding it reduces maximum HP.
Choose Combat Arts for what you lack: accuracy, a little Attack Speed, or life drain when healing is needed. Against targets whose counters you cannot survive, choose an attack that prevents counters.
Class roles for the seven-unit core
Take  Tialla through
 Diviner,
 Priest, and
 Bishop for healing and support. She is fragile on Hard. Do not expose her for a small counterattack benefit. When healing is unnecessary, buff an ally’s Strength, Defense, or Magic.
Take Peter from  Hunter into
 Charioteer. You can try
 Forest Knight, but the chariot stays useful. Cai attacks a group with Blaze first, then Peter charges through weakened enemies to finish several at once. Even when his bow damage is low,
 Shove works well.
 Esmeralda takes
 Armored Knight into
 Dreadnought for the front line.
 Alexandra stays in
 Wing Soldier to hunt mages or tries Dragoon.
 Ultand goes through Diviner and
 Shaman to
 Troubadour, using mobility to keep up.
 Guzran takes Gladiator,
 Myrmidon, and
 Shido for sword damage.

Accuracy for long shots and thrown lances
Peter gets an extra tile of bow Combat Art range. Where other archers risk return fire, he can stand farther away. Carry an accuracy art, then check the forecast before switching to higher critical chance or damage. Effective bows handle mounted units and beasts. Bring a close-range option too instead of discovering the gap when enemies reach him.
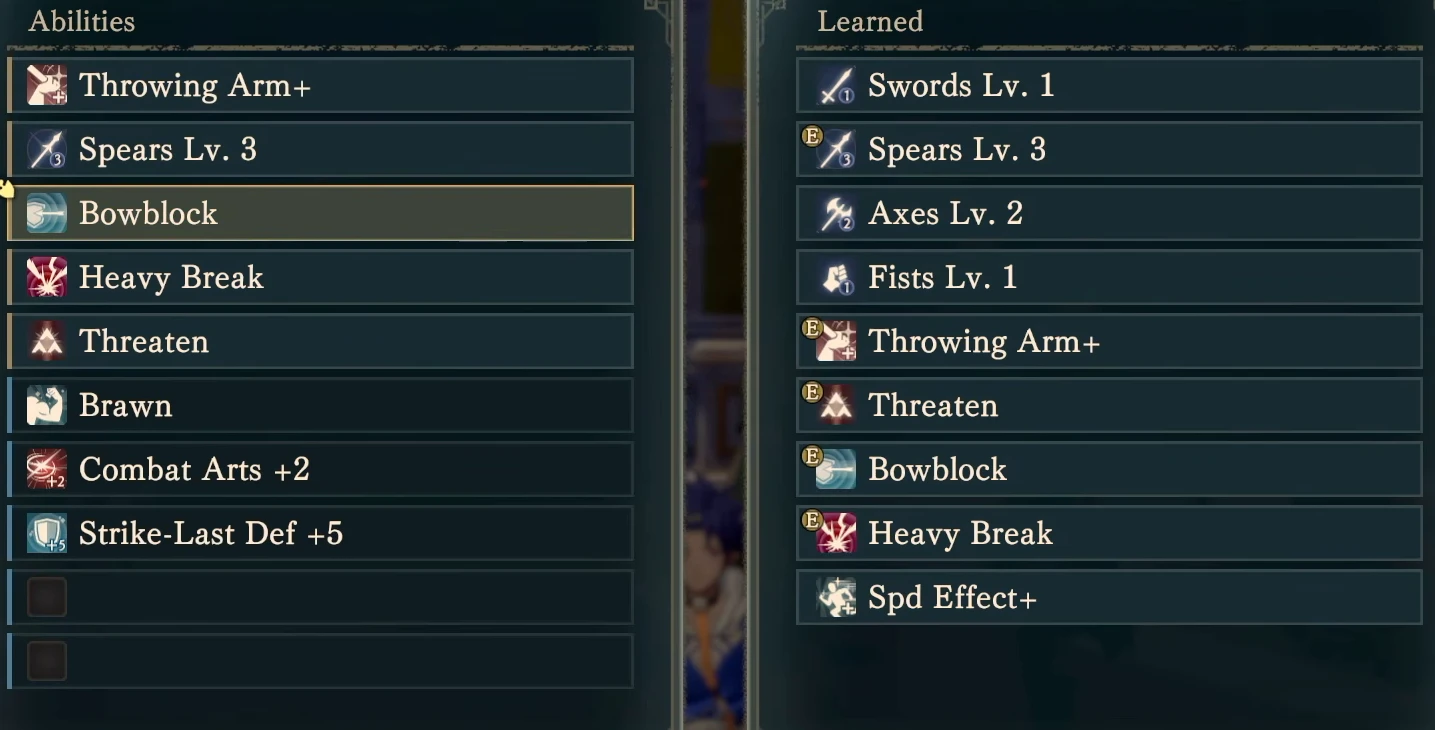
Esmeralda’s  Brawn reduces equipment weight to 80%, giving her more follow-up opportunities than ordinary armor. She also gains Hit and Attack with Pilum, and Short Spear is worth carrying. Choose accurate throws when a hit matters; for two consecutive attacks, check the reduced-accuracy forecast.
Sometimes her best action is not attacking. Hold a chokepoint, adopt a defensive stance, take damage, then heal herself. Prepare effective melee weapons too rather than relying on the highest displayed weapon stats every time.
Position supporting units to use their abilities
Alexandra uses difficult terrain, initiating Attack Speed, and Resistance to hunt mages. Magic weapons also help against armor. Keep Ultand near attackers so allies recover a little HP after combat. Giving her enough Movement to follow is more useful than leaving her alone up front.
Guzran’s Hit, Avoid, and Critical bonuses change randomly. Check this round’s bonus before choosing his attack. When rotating units, consider  Dante’s magical support or
 Ninae’s mounted and anti-mounted tools.
Weaken enemies with Blaze Arts, then finish with chariots
This team has many mounted and flying units. Deal with lance enemies and  Archer first.
When Alexandra hunts mages, check for wind magic too. High-Avoid terrain can crush accuracy. Try an accuracy Combat Art first and keep a reliable archer ready for the finishing blow.
Move frontliners first and place Esmeralda where she can draw attacks. Save healers for later. Enable all enemy ranges and find a safe tile for Tialla. Her ranged healing means she need not enter the enemy group.
Find an area where Cai can hit several enemies with Blaze, then send Peter through the weakened line to finish two or three. Use Shove either to hit several targets or return near your team. Do not charge so far that he ends alone among enemies. Heal afterward and prepare for enemy phase.