

Fifteen preparations for Cai’s route: Raise mounts early, save seeds, and start Paralogues promptlyMinor spoilers
Fifteen preparations in video order: Blaze and Magic, sewers, capture and feeding, requests and cultivation, transport and training, Paralogues, seals and leveling, upgrades, exploration, and recruitment.
Original video: “Fifteen things to do in Cai’s story: Animals, vegetables, training, and recruitment” | Japanese creator Wight’s Game Guides | Watch the original video
Clear enemies with Blaze Arts, then leave Underblaze tiles for allies to defend from. Plan mount friendship, cultivation materials, and timed paralogues ahead of time. Waiting until certification or recruitment is too late.
1. Clear enemies with Blaze Arts, then use Underblaze to reduce damage
 Cai’s Blaze Arts are useful from the opening stages, hitting several enemies for a small HP cost. Equip the skill that protects allies from Underblaze. Allies standing on Underblaze tiles also take half damage, so the area left after an attack helps hold the line. Filling the Blaze Gauge to Overblaze further improves his stats.
2. Raise Magic for Blaze damage and train Black Magic
Blaze damage uses Magic, so improve it early if you want to keep killing enemies with it later. My approach is a temporary switch to  Diviner or
 Shaman, training Black Magic along the way. That also helps with a later
 Caladrius change. Aim for at least C in Black Magic, preferably C+. Once you obtain
 Levin Sword, Magic also translates directly into weapon damage.
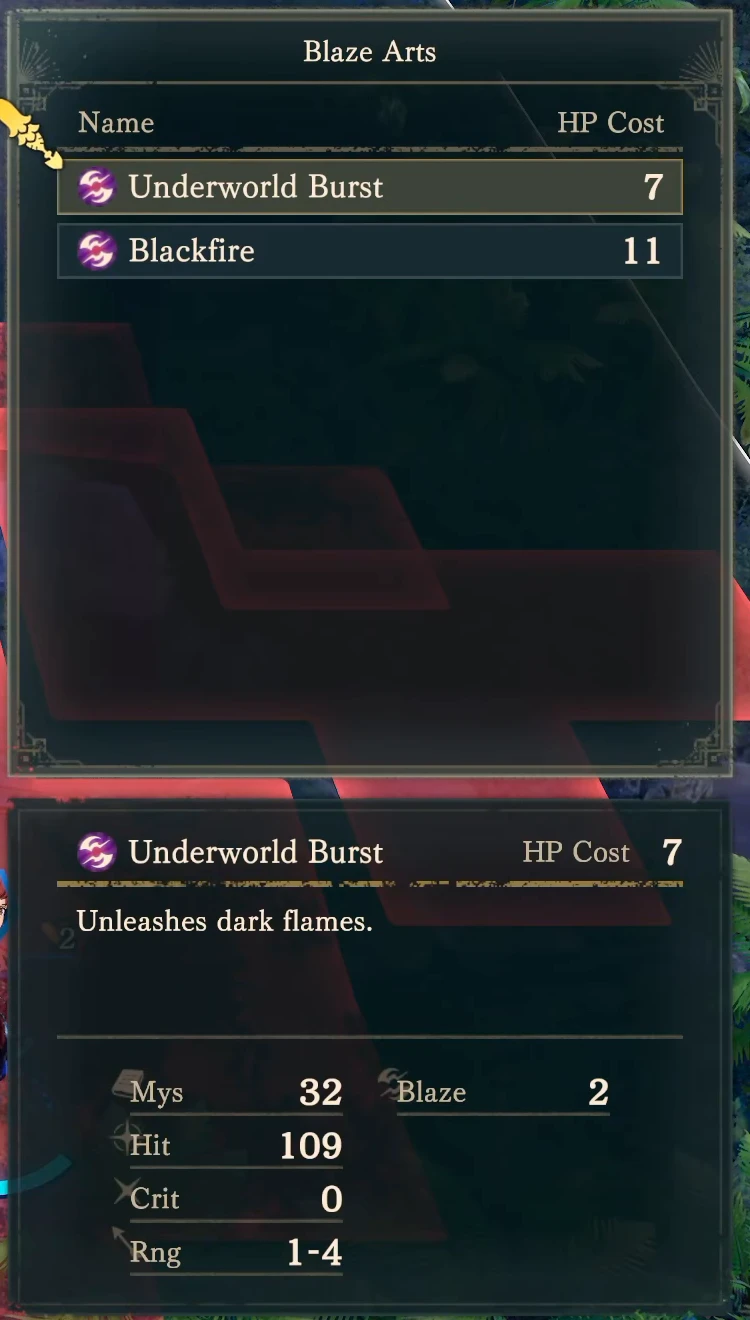
Image sources:
3. Collect sewer experience and materials every chapter
You can enter the sewers early without spending an action turn. Crates and ore provide materials, enemies give experience, and dropped  Insect Pearl can be sold. In Clashes, use Linked Attacks to make the character you want to train the MVP while also building Bond.
Defeated labyrinth enemies return only in the next chapter. Visiting each chapter to clear chests, ore, and enemies is better than leaving the sewers untouched.
4. Change the baiting turn when retrying captures
After animal capture unlocks in chapter 5, place bait on an animal tile and wait for the progress bar to fill before catching it. Use vegetables for horses and pegasi, fish for Ornius, and meat for wyverns. The wrong type makes capture harder and may trigger a battle.
Save before placing bait if you want to retry. If the wrong animal appears or capture fails, return to the title screen and reload. Repeating the same baiting action on the same turn gives the same result. Move or wait to spend a turn before placing bait to get a different set of results. If still dissatisfied, spend two turns on the next attempt. Every adjustment uses exploration turns, so do not spend the entire chapter on capture.
5. Feed mounts early to improve friendship-based growth
Assigning an animal to a mounted class improves character growth rates as well as stats and abilities. Benefits change with friendship, so start feeding animals early for characters you plan to mount later.
Each animal can be fed only once a week, resetting Sunday. Prioritize favorites, then foods matching both ingredient type and flavor. Friendship 3 unlocks an ability, and 5 improves it. Reaching high friendship from scratch takes many weeks. Starting only when you are ready to level is too late.
Choose animals by what you lack: Movement bonuses for mobility, post-combat healing for repeated fights, or the relevant growth for Speed, Dexterity, or Strength. Releasing animals yields accessories, but accessories add Weight. I prefer keeping animals first so they can immediately support someone’s growth later.
6. Complete help requests before their deadlines for Renown
Helping people is a separate task type from regular quests and awards plenty of gold and Renown. Cai’s route cannot rely on the main story alone for Renown, so schedule these requests before their deadlines.
7. Keep at least one crop as seed before handing materials over
After cultivation opens in Chapter 6, plant frequently used vegetables in empty plots along routes you often travel. Harvest mature crops as you pass without stopping on the tile. The same plot produces several rounds, and higher Renown increases how much you can cultivate.
Cultivation’s greatest benefit is multiplying a single scarce material. Vegetables for requests, animal bait, and merchant exchange materials can all be replenished this way. Keep at least one when delivering requests or exchanging equipment. Reaching zero leaves no seed to plant, forcing another search. Plant the small request reward of  Dates needed for
 Halvin first.
When searching for rare materials,  Rogue units improve the chance of a perfect result. Multiple Rogues’ effects stack.
8. Save return trips with Divine Gates and carriages
From chapter 7, use Divine Gates to shorten journeys. Completing the relevant help request also unlocks public carriages. Visit and open stops first to travel between them conveniently afterward. Carriages cost money but save many actions.
9. Train to unlock Advanced classes
Complete the class-unlock training that opens in Chapter 7. Available training expands with Renown and unlocks Caladrius,  Dragoon, and
 Troubadour. Meeting exam requirements alone will not allow certification before the unlock. Caladrius combines riding and black magic, making it a good fit for Cai. Dragoon improves Strength, while Troubadour lets white-magic users benefit from horses. Once unlocked on Cai’s route, these classes are available to later protagonists too.
10. Accept short-window Paralogues early for recruitment
From chapter 10, Paralogue windows are short. Starting September 17, watch for  Bertrand’s and
 Talimun’s Paralogues. Bertrand’s affects
 Peppe’s recruitment, while completing Talimun’s lets you recruit Talimun himself. After accepting the request, you still need to reach the battle location on the map.
 Anna’s paralogue window runs from September 24 to October 5.
 Orchel’s Chapter 11 paralogue is tighter: accept October 18–19 and finish before the 21st. Traveling from town to the battlefield also takes actions. Accept early and leave immediately to secure both the battle rewards and the opportunity to recruit
 Diego.
11. Buy Advanced Licenses whenever they restock
Buy Advanced Licenses on restock and prepare them for core units first. Promoting everyone together leaves you short of seals. Try to wait for a higher success rate before exams too.
12. Level through Linked Attacks in high-level labyrinths
When you need levels, travel east from Megaira to a high-level dungeon and clear enemies in groups with Linked Attacks. Leave and reenter when Linked Attack points run out. Reserve action turns for the trip too.
13. Upgrade strong weapons before Part 2
Before Part 2, upgrade Levin Sword and powerful weapons with effectiveness or special advantages. Upgraded ordinary iron weapons become available later, so do not spend all your ore on them. Forging is unavailable in Part 2. Do not leave upgrades for equipment you truly want to carry over until the last moment.
14. Map exploration carries over to the next route
Unlocked map areas carry over to the next protagonist. Open paths, check rare exploration listings, and collect missed chests near the end to reduce detours on the next route.
15. Recruit to fill gaps in the existing roster
 Peter’s early Strength is unremarkable, but more frequent Combat Arts in Part 2 make his Range bonus and Hit modifiers valuable.
 Tialla offers ranged healing but is fragile, so keep her outside physical enemies’ range.
 Guzran has excellent Strength, Speed, and Dexterity, making good use of sword follow-ups and effective weapons.
 Ultand heals frontliners after combat; place her behind a tank for sustained fighting.
For early recruits,  Yang Jie supplies ranged healing, while
 Noctula joins conveniently and works as an evasive physical fighter.
 Nuzzuo fills a second archer slot, useful against the growing number of fliers. For a tank, consider
 Ninae or
 Esmeralda.
 Goliath is strong too, but obtaining his three recruitment meat items costs more on Cai’s route.
 Alexandra and
 Loretta can use pegasi and Avoid for mobility and survival. Later,
 Olympia,
 Sirocco, and
 Sofia offer powerful magic or healing, but need Support preparation. Characters available earlier to other protagonists can also be saved for focused training on the next route. Finally,
 Catania suits further Speed stacking to use follow-up, Hit, and Avoid benefits together.